1. Uvod
This manual provides instructions for the safe and effective use of your NIDAGE 2-Way Articulating Borescope. This industrial endoscope is designed for detailed visual inspection in confined or hard-to-reach areas, such as engine cylinders, pipes, and machinery. Please read this manual thoroughly before operation and retain it for future reference.
Ključne značilnosti:
- Dvosmerna zglobna sonda 210°: Allows precise navigation and inspection from multiple angles without rotating the entire cable.
- 4.3-inch IPS Super HD Screen: Provides clear, vibrant, and detailed visuals of the inspection area.
- 0.24-inch (6.2mm) Tiny Endoscope Camera: Enables access to very narrow spaces.
- Nastavljive LED luči: Six integrated LED lights offer adjustable brightness for optimal illumination in dark environments.
- Vodoodporna sonda IP67: Ensures durability and functionality in wet conditions and oil applications.
- Photo and Video Function: Capture images and record videos of inspections for documentation and analysis.
- Ergonomska oblika: Udoben oprijem za dolgotrajno uporabo.
2. Vsebina paketa
Preverite, ali so v vašem paketu prisotni vsi spodaj navedeni elementi:
- NIDAGE 2-Way Articulating Borescope (Main Unit with Probe)
- USB polnilni kabel tipa C
- Uporabniški priročnik
- 32 GB pomnilniška kartica (prednameščena ali priložena posebej)
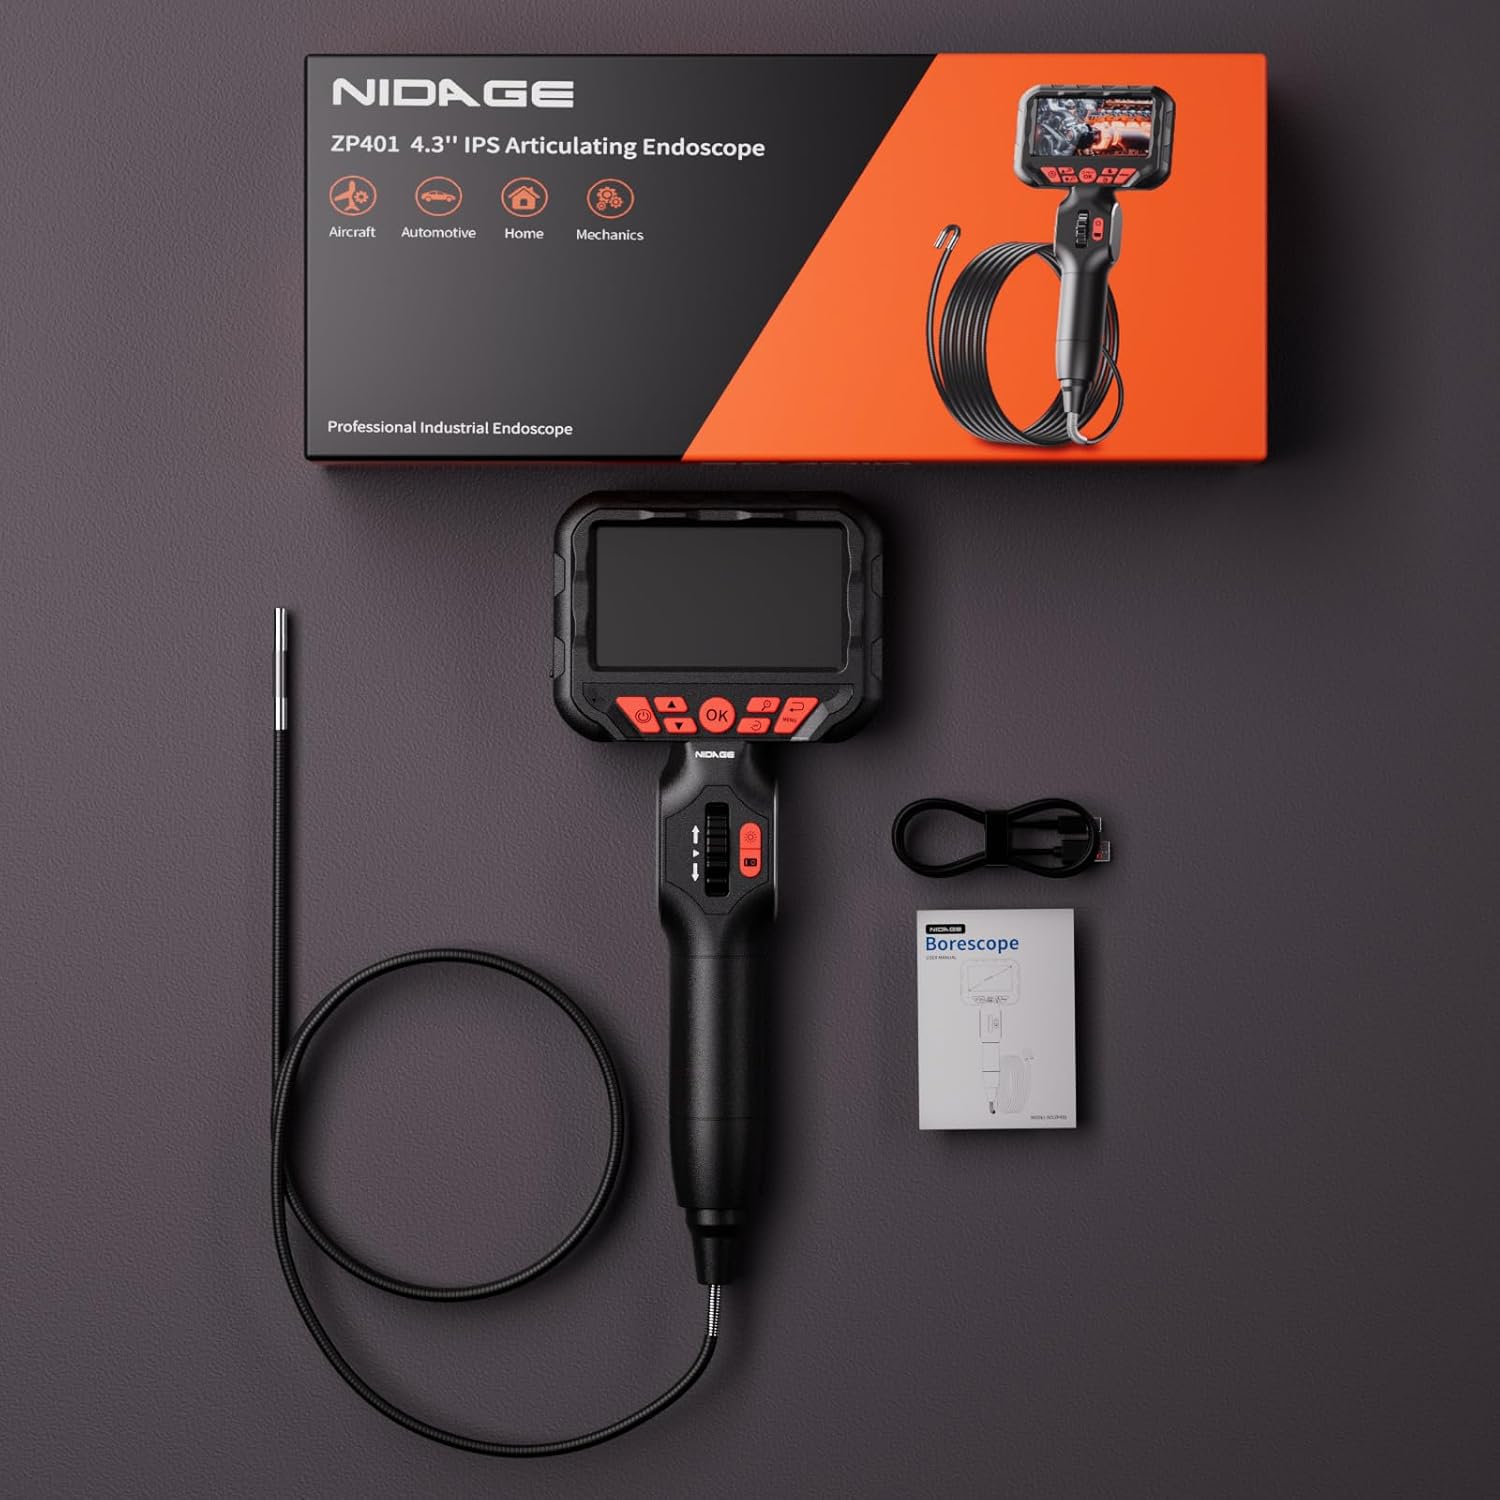
Image: Package contents of the NIDAGE borescope.
3. Izdelek je končanview
Familiarize yourself with the components and controls of your borescope.

Image: The NIDAGE 2-Way Articulating Borescope main unit.

Image: Labeled diagram of the borescope controls.
Nadzorne funkcije:
- Gumb za vklop: Pritisnite in držite za vklop/izklop naprave.
- Gumb V redu: Confirm selections or capture photos/videos.
- Gumbi gor/dol: Navigacija po menijih ali prilagajanje nastavitev.
- Krmilno kolo: Manipulate the articulation of the probe tip.
- Return/Menu Button: Dostop do glavnega menija ali pojdite nazaj.
- LEDs Adjustment Button: Cycle through LED brightness levels.
- Take Photo/Video Button: Kratek pritisk za fotografiranje, dolg pritisk za začetek/ustavitev snemanja videa.
- Gumb za povečavo: Adjust digital zoom level.
- Gumb za 180° vrtenje: Rotate the image on the screen.
4. Nastavitev
4.1 Polnjenje naprave
Before first use, fully charge the borescope. Use the provided USB Type-C cable to connect the device to a compatible USB power source (e.g., computer, wall adapter).
- Indikatorska lučka polnjenja bo med polnjenjem sveti.
- Polno polnjenje običajno traja nekaj ur.

Image: Charging the borescope via Type-C USB.
4.2 Vstavljanje pomnilniške kartice
The borescope comes with a 32GB memory card for storing images and videos. Ensure it is properly inserted before use.
- Locate the memory card slot on the device.
- Insert the memory card with the contacts facing down until it clicks into place.

Image: Inserting the 32GB memory card.
5. Navodila za uporabo
5.1 Vklop/izklop
- To power on, press and hold the Power Button until the screen illuminates.
- To power off, press and hold the Power Button until the screen turns off.
5.2 Artikulacija sonde
The borescope features a two-way articulating probe for flexible inspection.
- Uporabite Krmilno kolo on the handle to bend the probe tip left or right.
- The probe can articulate up to 210 degrees in each direction.
- Avoid forcing the probe beyond its articulation limits.

Image: Two-way articulation of the borescope probe.
5.3 Prilagajanje svetlosti LED-diode
Pritisnite LEDs Adjustment Button to cycle through different brightness levels for the probe's integrated lights. This helps optimize visibility in various lighting conditions.

Image: IP67 waterproof probe with adjustable LED lights.
5.4 Zajemanje fotografij in videoposnetkov
The borescope allows you to capture still images and record video footage of your inspections.
- Za fotografiranje: Pritisnite Take Photo/Video Button once. A camera icon or flash may appear on the screen to confirm capture.
- Za snemanje videa: Pritisnite in držite Take Photo/Video Button. A recording indicator (e.g., red dot, timer) will appear. Press and hold again to stop recording.
- Captured media is saved to the inserted 32GB memory card.

Image: Photo and video capture functions on the borescope display.
5.5 Using the 4.3-inch IPS Screen
The high-definition IPS screen provides a clear view območja inšpekcijskega pregleda.
- The screen offers wide viewkoti in natančno barvno reprodukcijo.
- Uporabite Gumb za povečavo to digitally magnify the image.
- Pritisnite 180° Rotation Button to flip the image orientation if needed.

Image: The 4.3-inch IPS screen for clear visualization.
6. Vzdrževanje
6.1 Cleaning the Probe and Unit
- After each use, especially in dirty or oily environments, gently wipe the probe with a soft, damp krpo.
- For stubborn grime, a mild detergent can be used, ensuring no liquid enters the main unit.
- Ne uporabljajte abrazivnih čistil ali topil.
- Wipe the main unit with a dry, soft cloth.
6.2 Shranjevanje
- Store the borescope in a cool, dry place, away from direct sunlight and extreme temperatures.
- Ensure the probe is coiled loosely and not sharply bent to prevent damage.
- If storing for extended periods, ensure the battery is partially charged (around 50%) to prolong battery life.
6.3 High-Temperature Protection
The borescope is equipped with high-temperature protection. If the probe's temperature exceeds 85°C, the video signal will automatically disconnect to prevent damage. Allow the probe to cool down before resuming operation.
7. Odpravljanje težav
- Naprava se ne vklopi: Prepričajte se, da je baterija popolnoma napolnjena. Če težava ne izgine, poskusite polniti z drugim USB-vhodom ali kablom.
- Ni slike na zaslonu: Check if the probe is securely connected. Ensure the device is powered on.
- Slika je zamegljena: Adjust the focus distance by moving the probe closer or further from the object. Ensure the camera lens is clean.
- Probe articulation is stiff or unresponsive: Do not force the articulation. Check for any obstructions around the probe tip.
- Fotografij/videoposnetkov ni mogoče shraniti: Ensure the memory card is properly inserted and has sufficient free space. The card may need to be formatted (refer to device settings).
- Naprava se pregreva: If the device becomes excessively hot, power it off immediately and allow it to cool down. Avoid prolonged use in high-temperature environments.
8. Specifikacije
| Funkcija | Specifikacija |
|---|---|
| Model | Two-Way Articulating Borescope (B0DHRPXGRL) |
| Premer sonde | 0.24 palcev (6.2 mm) |
| Dolžina sonde | 5.3 čevljev (1.6 metrov) |
| Kot artikulacije | 2-Way, 210° (each direction) |
| Velikost zaslona | 4.3 palcev IPS |
| Ločljivost zajema videa | 1080p |
| Območje makro ostrenja | 3–10 cm (1.18–3.94 palcev) |
| LED luči | 6 nastavljivih LED diod |
| Ocena vodotesnosti | IP67 (probe only) |
| Baterija | 1 A baterija (priložena) |
| Shranjevanje | 32GB Memory Card (included) |
| Vrata za polnjenje | USB Type-C |
9. Garancija in podpora
9.1 Informacije o garanciji
NIDAGE products are manufactured to high-quality standards. This product is covered by a limited warranty against defects in materials and workmanship from the date of purchase. Please refer to the warranty card included in your package or contact customer support for specific warranty terms and conditions.
9.2 Podpora strankam
If you encounter any issues or have questions regarding your NIDAGE 2-Way Articulating Borescope, please contact NIDAGE customer support. Contact details can typically be found on the product packaging, the official NIDAGE webspletnega mesta ali prek vaše nakupovalne platforme.
When contacting support, please provide your product model (B0DHRPXGRL) and a detailed description of the issue.


