1. Uvod
This manual provides essential information for the safe and efficient installation, operation, and maintenance of your Philips BVP167 10W LED Floodlight. Please read this manual thoroughly before installation and keep it for future reference.
The Philips BVP167 is a high-quality, energy-efficient LED floodlight designed for various indoor and outdoor applications. It features adjustable color temperature, a robust aluminum housing, and an IP65 rating for protection against dust and water.

Image 1.1: Philips BVP167 10W LED Floodlight, showing its compact design and integrated bracket.
2. Varnostne informacije
OPOZORILO: Nevarnost električnega udara. Namestitev mora opraviti usposobljen električar v skladu z vsemi lokalnimi in nacionalnimi električnimi predpisi.
- Pred namestitvijo, vzdrževanjem ali čiščenjem vedno izklopite napajanje.
- Zagotovite dovodni voltage ustreza zahtevam izdelka (220–240 V).
- Izdelka ne spreminjajte na noben način. Nepooblaščene spremembe lahko razveljavijo garancijo in povzročijo varnostna tveganja.
- Ne glejte neposredno v delujočo LED-luč.
- Zagotovite pravilno ozemljitev napeljave.
- Embalažni material hranite izven dosega otrok.
3. Vsebina paketa
Škatlo previdno vzemite iz embalaže in se prepričajte, da so vsi predmeti prisotni in nepoškodovani. Če kateri koli predmet manjka ali je poškodovan, se obrnite na prodajalca.
- Philips BVP167 10W LED Floodlight
- Montažni nosilec (vnaprej nameščen ali ločen)
- Navodila za uporabo (ta dokument)
Note: Mounting hardware (screws, anchors) may not be included and should be selected based on the mounting surface.
4. Nastavitev in namestitev
4.1. Physical Dimensions and Mounting
Refer to the diagram below for the physical dimensions of the floodlight. The integrated mounting bracket allows for versatile installation on walls, poles, or other suitable surfaces.
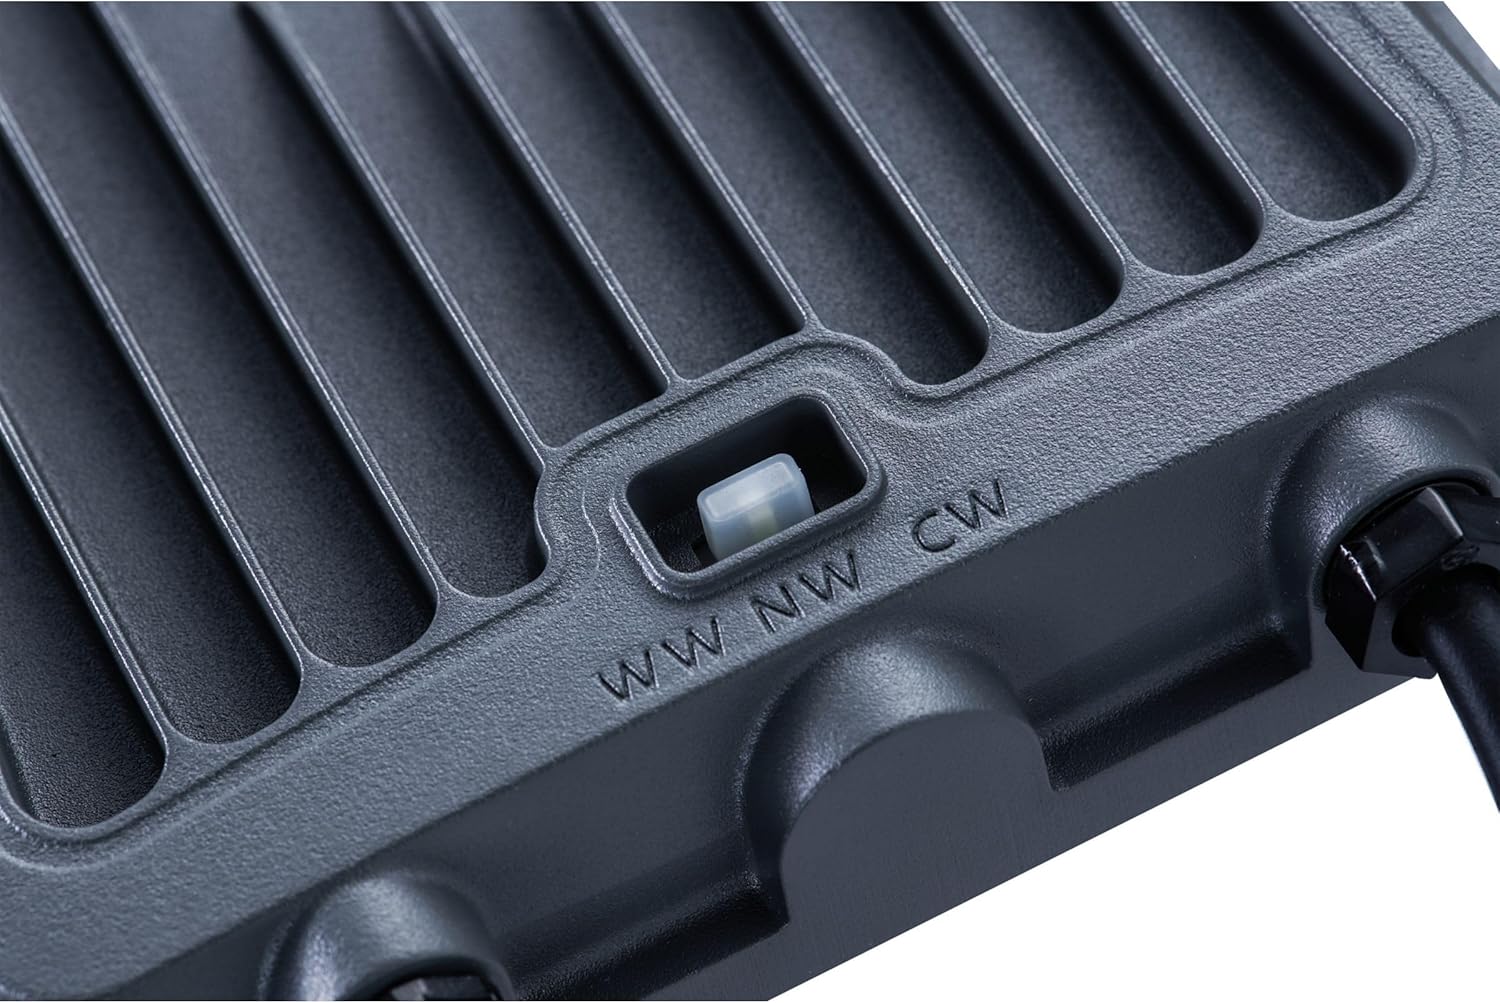
Image 4.1: Technical drawing showing the dimensions (A, B, C, D, E, a, b, c, d) of the Philips BVP167 LED Floodlight for various wattages. For the 10W model, refer to the '10W' column in the table.
Koraki montaže:
- Izberite lokacijo: Select a stable mounting surface capable of supporting the floodlight's weight. Ensure the location provides adequate clearance for light distribution and access for maintenance.
- Označite vrtalne točke: Use the mounting bracket as a template to mark the drilling points on the surface.
- Vrtanje lukenj: Drill appropriate holes for your chosen mounting hardware (not supplied).
- Varni nosilec: Attach the mounting bracket securely to the surface using suitable screws and anchors.
- Prilagodi kot: Once mounted, the floodlight's angle can be adjusted by loosening the side screws on the bracket, setting the desired angle, and then tightening the screws firmly.
4.2. Električna povezava
IMPORTANT: Ensure power is OFF at the circuit breaker before making any electrical connections.
- The floodlight comes with free cable ends for connection.
- Connect the live (brown), neutral (blue), and ground (green/yellow) wires from the floodlight to your main power supply wires according to local electrical codes.
- Use an appropriate IP-rated junction box or connector for outdoor installations to ensure water resistance.
- Preverite, ali so vse povezave varne in pravilno izolirane.
4.3. Color Temperature Selection
The Philips BVP167 floodlight allows you to select between three color temperatures: 3000K (Warm White), 4000K (Neutral White), and 6500K (Cool White). This selection is made via a switch located on the back of the fixture.

Slika 4.2: Bližnji posnetek view of the color temperature selection switch (WW, NW, CW) on the back of the floodlight.
Za spremembo barvne temperature:
- Ensure the floodlight is powered off.
- Locate the switch on the back of the floodlight.
- Slide the switch to your desired setting:
- WW: Topla bela (3000K)
- SZ: Nevtralno bela (4000K)
- CW: Hladno bela (6500K)
- Restore power to the floodlight. The light will illuminate with the selected color temperature.
5. Navodila za uporabo
Once properly installed and connected, the Philips BVP167 LED Floodlight operates simply by applying power. There are no complex controls for daily use.
- Vklop/izklop: The floodlight will turn on when power is supplied to its circuit and turn off when power is removed. This is typically controlled by a wall switch or an external timer/sensor (not included).
- Prilagoditev svetlosti: The product description mentions brightness adjustment via a switch. However, the provided images and common features for this type of floodlight primarily indicate color temperature selection. If your specific model includes a separate switch for brightness (e.g., a dip switch inside a sealed compartment), consult the specific documentation provided with your unit for instructions on accessing and adjusting it. For most standard installations, the brightness is fixed at 1200 lumens.
6. Vzdrževanje
OPOZORILO: Pred kakršnim koli vzdrževanjem vedno izklopite napajanje.
- Čiščenje: Periodically clean the exterior of the floodlight with a soft, damp cloth. Do not use abrasive cleaners, solvents, or harsh chemicals, as these can damage the finish or optical components.
- Pregled: Regularly inspect the floodlight for any signs of damage, such as cracked housing, frayed cables, or loose mounting. If any damage is found, disconnect power immediately and have the unit inspected by a qualified technician.
- Brez delov, ki bi jih lahko servisiral uporabnik: The Philips BVP167 LED Floodlight contains no user-serviceable parts. Do not attempt to open the housing or repair the internal components.
7. Odpravljanje težav
Če imate težave z reflektorjem, si oglejte naslednje pogoste težave in rešitve:
| Težava | Možen vzrok | rešitev |
|---|---|---|
| Luč se ne vklopi. | Brez napajanja. Ohlapna žična povezava. Faulty switch/circuit breaker. | Check power supply to the circuit. Preverite, ali so vse električne povezave varne (ko je napajanje izklopljeno). Preverite stikalo ali odklopnik. |
| Svetloba utripa ali zatemni. | Nestabilno napajanje. Ohlapna napeljava. | Zagotovite stabilno napajanje. Preverite ožičenje (ko je napajanje izklopljeno). |
| Nepravilna barvna temperatura. | Stikalo za barvno temperaturo je napačno nastavljeno. | Turn off power, adjust the color temperature switch to the desired setting (WW, NW, or CW), then restore power. |
| Water ingress/condensation inside fixture. | Nepravilna namestitev ali poškodovano tesnilo. | Disconnect power immediately. Inspect for damage or improper sealing. Contact a qualified electrician or Philips support. |
Če težava po poskusu teh rešitev ne izgine, se obrnite na Philipsovo podporo strankam ali usposobljenega električarja.
8. Specifikacije
| Model | BVP167 (8720169736016) |
| Poraba energije | 10 vatov |
| Svetlobni tok | 1200 lumnov |
| Lumen per Watt | 120 lm/W |
| Barvna temperatura | Selectable: 3000K (Warm White), 4000K (Neutral White), 6500K (Cool White) |
| Indeks barvnega upodabljanja (CRI) | 80-89 |
| Vhodna voltage | 220-240V |
| Faktor moči | 0.95 |
| Kot snopa | 110 degrees (Symmetric) |
| Ocena IP | IP65 (zaščita pred prahom in vodnimi curki) |
| Ocena IK | IK07 (Protection against mechanical impacts) |
| Delovna temperatura | -25°C do +40°C |
| Material ohišja | Aluminij |
| Material leč | Steklo |
| Lifespan (L80B50) | 50,000 uri |
| Dimenzije (D x Š x V) | Approx. 130mm x 85mm x 31mm (for 10W model, refer to diagram for exact measurements) |
| Teža | 1 kg |
9. Garancija in podpora
9.1. Informacije o garanciji
This Philips BVP167 LED Floodlight comes with a 3-letna garancija od datuma nakupa. Ta garancija krije napake v materialu in izdelavi pri normalni uporabi. Ne krije škode, ki nastane zaradi nepravilne namestitve, zlorabe, zlorabe, nesreč ali nepooblaščenih popravil.
Za garancijske zahtevke shranite dokazilo o nakupu.
9.2. Podpora strankam
For technical assistance, warranty claims, or further information, please contact Philips customer support through their official webspletnega mesta ali kontaktnih podatkov, navedenih v dokumentaciji o nakupu.
Lahko obiščete uradni Philips webspletno mesto za podporne vire: www.philips.com/support


