1. Uvod
The KETOTEK KT99pro is a versatile dual digital temperature controller designed for precise temperature management. It features two independent 10A relay outputs, allowing simultaneous control of both heating and cooling devices. This thermostat is ideal for a wide range of applications including home brewing, reptile habitats, fermentation, incubation, and more, ensuring your environment maintains an ideal temperature.
Key features include a wide temperature control range, high accuracy, switchable Celsius/Fahrenheit display, adjustable high and low temperature alarms, temperature calibration, cooling delay start, and memory storage function.

Slika 1: Konecview of KETOTEK KT99pro features.

Slika 2: Npramples of applications for the temperature controller.
2. Navodila za nastavitev
Follow these steps to set up your KETOTEK KT99pro temperature controller:
- Razpakirajte napravo: Carefully remove the temperature controller and its components from the packaging. Ensure all parts are present: the main unit, two waterproof NTC temperature sensors, and two suction cups.
- Napajalni priključek: Plug the temperature controller into a standard 220V AC 50/60Hz power outlet. The LED displays will illuminate.
- Priključite naprave: Plug your heating device into the TC1 outlet and your cooling device into the TC2 outlet. Ensure the appliances are compatible with 10A relay outputs.
- Namestitev senzorja: Position the two waterproof NTC temperature sensors in the environment where temperature monitoring and control are required. The sensors can be secured using the provided suction cups. Ensure the sensors are not directly exposed to heating or cooling elements to get accurate readings.
- Montaža (izbirno): The controller features double hanging holes on the back for wall mounting, or it can be placed on a flat surface.

Figure 3: Included components and physical features.

Figure 4: Mounting the controller and sensor placement examples.
3. Navodila za uporabo
The KT99pro features a dual LED display and simple buttons for easy operation.
3.1 Osnovna nastavitev temperature
- Nastavitev začetne temperature: Pritisnite ▲ button for 3 seconds to enter the start temperature setting mode. Use the ▲ or ▼ buttons to adjust the desired start temperature.
- Nastavitev temperature zaustavitve: Pritisnite ▼ button for 3 seconds to enter the stop temperature setting mode. Use the ▲ or ▼ buttons to adjust the desired stop temperature.
3.2 Advanced Settings (P0-P7 Modes)
Za dostop do naprednih nastavitev pritisnite TC1 ▲ in TC2 ▲ buttons simultaneously for 3 seconds. Use the ▲ or ▼ buttons to navigate through the P0-P7 modes and adjust their values.
- P0: Heating/Cooling Mode Selection: Set to 'H' for heating or 'C' for cooling.
- P1: Hysteresis Setting: Adjust the temperature difference between the turn-on and turn-off points.
- P2: High Temperature Alarm: Set the upper limit for the temperature alarm.
- P3: Low Temperature Alarm: Set the lower limit for the temperature alarm.
- P4: Temperature Calibration: Adjust the temperature reading for accuracy.
- P5: Cooling Delay Start: Set a delay (0-5 minutes) before the cooling output activates.
- P6: Celsius/Fahrenheit Switch: Toggle between °C and °F display.
- P7: Button Sound On/Off: Enable or disable button press sounds.
3.3 Umerjanje temperature
To calibrate the temperature, press the TC1 ▲ in TC2 ▼ buttons simultaneously for 5 seconds. Adjust the calibration value using the ▲ or ▼ gumbi.
3.4 Funkcija ponastavitve
To reset the controller to factory settings, press the TC1 ▼ in TC2 ▼ gumba hkrati za 5 sekunde.

Figure 5: Visual guide for basic and advanced settings.

Figure 6: Temperature control range and precision details.
4. Vzdrževanje
Proper maintenance ensures the longevity and accurate performance of your temperature controller.
- Čiščenje: Disconnect the device from power before cleaning. Use a soft, dry cloth to wipe the main unit. For the waterproof sensors, they can be gently cleaned with a damp po potrebi obrišite s krpo. Izogibajte se uporabi abrazivnih čistil ali topil.
- Skrb za senzor: Regularly inspect the sensor cables for any signs of damage or wear. Ensure the sensors are kept clean for accurate readings.
- Shranjevanje: Ko krmilnika dlje časa ne uporabljate, ga shranite na hladnem in suhem mestu, stran od neposredne sončne svetlobe in ekstremnih temperatur.
5. Odpravljanje težav
Ta razdelek obravnava pogoste težave in njihove rešitve.
- Alarm Indicators (HHH/LLL):
If the temperature exceeds the high temperature alarm value, the display will show "HHH" and an audible alarm will sound. If the temperature falls below the low temperature alarm value, the display will show "LLL" and an audible alarm will sound. Check the environment and connected devices to address the temperature deviation. - Netočne odčitke temperature:
Ensure the sensors are clean and properly placed. Perform a temperature calibration (refer to section 3.3) if you suspect the readings are consistently off. - Naprava se ne odziva:
Check if the device is properly plugged into a working power outlet. If the issue persists, try performing a factory reset (refer to section 3.4). - Outputs Not Activating:
Verify that the heating/cooling mode (P0) is correctly set. Check the start and stop temperature settings. Ensure the connected appliances are functional and properly plugged into the controller's outlets.
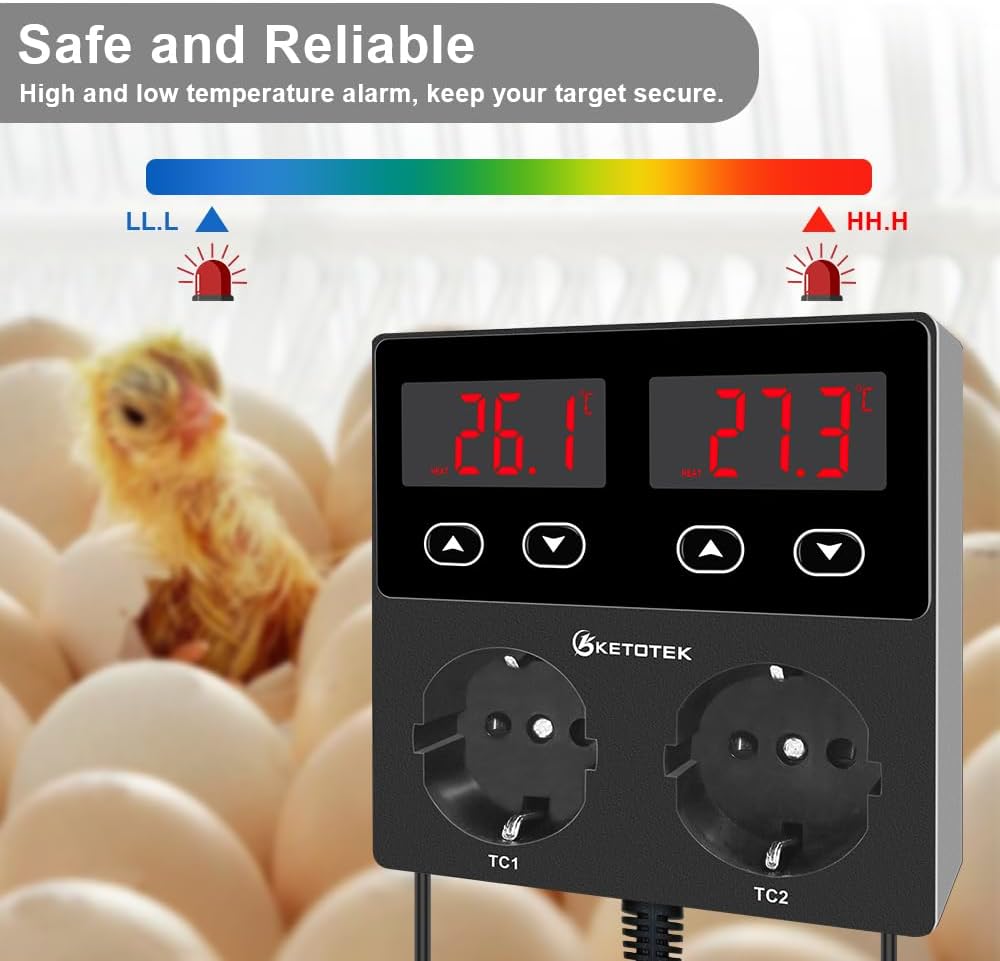
Figure 7: High and low temperature alarm indicators.
6. Specifikacije
| Znamka | KETOTEK |
| Številka modela | KT99PRO EU version |
| voltage | 220 volta |
| Izhodni releji | 2 x 10A |
| Območje nadzora temperature | -50 °C do 100 °C (-58 °F do 212 °F) |
| Natančnost temperature | ± 1 ° C / ± 2 ° F |
| Vrsta zaslona | LED |
| Mere izdelka (D x Š x V) | 11 x 3.5 x 11 cm (4.33 x 1.38 x 4.33 palca) |
| Teža predmeta | 488 gramov (1.07 lbs) |
| Dolžina napajalnega kabla | 1.40 m (4.6 čevljev) |
| Dolžina kabla senzorja | 1.9 m (6.23 čevljev) |
| Material | Lahek material |
| barva | Črna |

Slika 8: Dimenzije izdelka in dolžine kablov.
7. Informacije o garanciji
This KETOTEK product is covered by a standard manufacturer's warranty. For specific details regarding warranty duration and terms, please refer to the product packaging or contact KETOTEK customer support. The warranty typically covers defects in materials and workmanship under normal use.
8. Podpora strankam
If you encounter any issues or have questions not covered in this manual, please contact KETOTEK customer support for assistance. You can typically find contact information on the product packaging or the official KETOTEK webmesto.
KETOTEK aims to provide reliable electronic materials and functional modules to make life easier and smarter.


