1. Uvod
This manual provides essential information for the proper setup, operation, and maintenance of your ELECROW 5-Inch Mini Touchscreen Monitor. Please read these instructions carefully before using the product to ensure optimal performance and longevity.

Figure 1: ELECROW 5-Inch Mini Touchscreen Monitor
The ELECROW 5-Inch Mini Touchscreen Monitor is a versatile display solution featuring an 800x480 resolution TN capacitive 5-point touch screen. It is designed for broad compatibility with devices such as Raspberry Pi (including models 5, 4, 4B, 3B+, 3B, B+), PCs, and laptops, offering a driver-free, plug-and-play experience.
2. Kaj je v škatli
Preverite, ali so v vašem paketu priloženi vsi spodaj navedeni elementi:
- 1 x 5 Inch Display
- 1 x HD kabel
- 1 x kabel USB-A na Type-C
- 1 x HD to Mini HD Adapter
- 1 x uporabniški priročnik

Slika 2: Vsebina paketa
3. Lastnosti
- 5-Inch HD Capacitive Touchscreen: Features an 800×480 resolution LCD panel with a 60Hz refresh rate, ensuring sharp visuals, smooth performance, and responsive touch.
- Driver-Free, Plug-and-Play: The LCD display comes with an HD cable for display and a USB cable for power. Simply connect HDMI for display and USB for power—no drivers needed.
- Široka združljivost: The touch screen supports the entire Raspberry Pi lineup (including Raspberry Pi 5/4/4B/3B+/3B/B+), Banana Pi, Jetson Nano, and standard HDMI devices. It can also function as a secondary screen for a TV box, a Switch gaming display, or an extra Windows monitor.
- Audio Support & Easy Controls: Equipped with a 3.5mm headphone jack and a 4P speaker interface for external audio. A dedicated power button helps save energy, and four mounting holes allow secure attachment of Raspberry Pi or other devices.
- Multi-System Support & Precise Touch: The IPS touchscreen supports five-point touch on Windows 11/10/8/7. When paired with Raspberry Pi running Raspbian or Ubuntu, it supports single-point touch, making it versatile for various applications.
4. Nastavitev
4.1. Connecting to Raspberry Pi
To connect the monitor to a Raspberry Pi, follow these steps:
- Connect the provided HD cable to the HDMI port on your Raspberry Pi and the HD input on the monitor.
- Connect the provided USB-A to Type-C cable to a USB port on your Raspberry Pi and the Type-C power/touch port on the monitor. This provides power to the monitor and enables touch functionality.
- If your Raspberry Pi uses a Mini HD port, use the included HD to Mini HD adapter.

Figure 3: Connection Diagram for Raspberry Pi, NVIDIA Jetson, and BeagleBone
Video Guide: Connecting to Raspberry Pi
Video 1: Demonstrates connecting the 5-inch touchscreen display to a Raspberry Pi, showing the display output and touch functionality.
4.2. Connecting to PC/Laptop
For PC or laptop connection, the process is similar:
- Connect the HD cable from your PC/laptop's HDMI output to the monitor's HD input.
- Connect the USB-A to Type-C cable from a USB port on your PC/laptop to the monitor's Type-C port for power and touch input.
Video Guide: Connecting to PC/Laptop
Video 2: Illustrates the monitor being used with both a Raspberry Pi and a computer, demonstrating its versatility as a secondary display.
5. Navodila za uporabo
5.1. Funkcionalnost na dotik
The monitor supports 5-point capacitive touch for intuitive interaction. On Windows systems (11/10/8/7), it supports full 5-point touch. For Raspberry Pi running Raspbian or Ubuntu, it supports single-point touch.

Figure 4: 5-Point Capacitive Touchscreen Gestures
5.2. Multi-System Compatibility
The monitor is compatible with various operating systems and devices, including Raspbian, Ubuntu, Windows, Android, Mac OS, and Chrome OS. This allows for flexible use across different platforms.
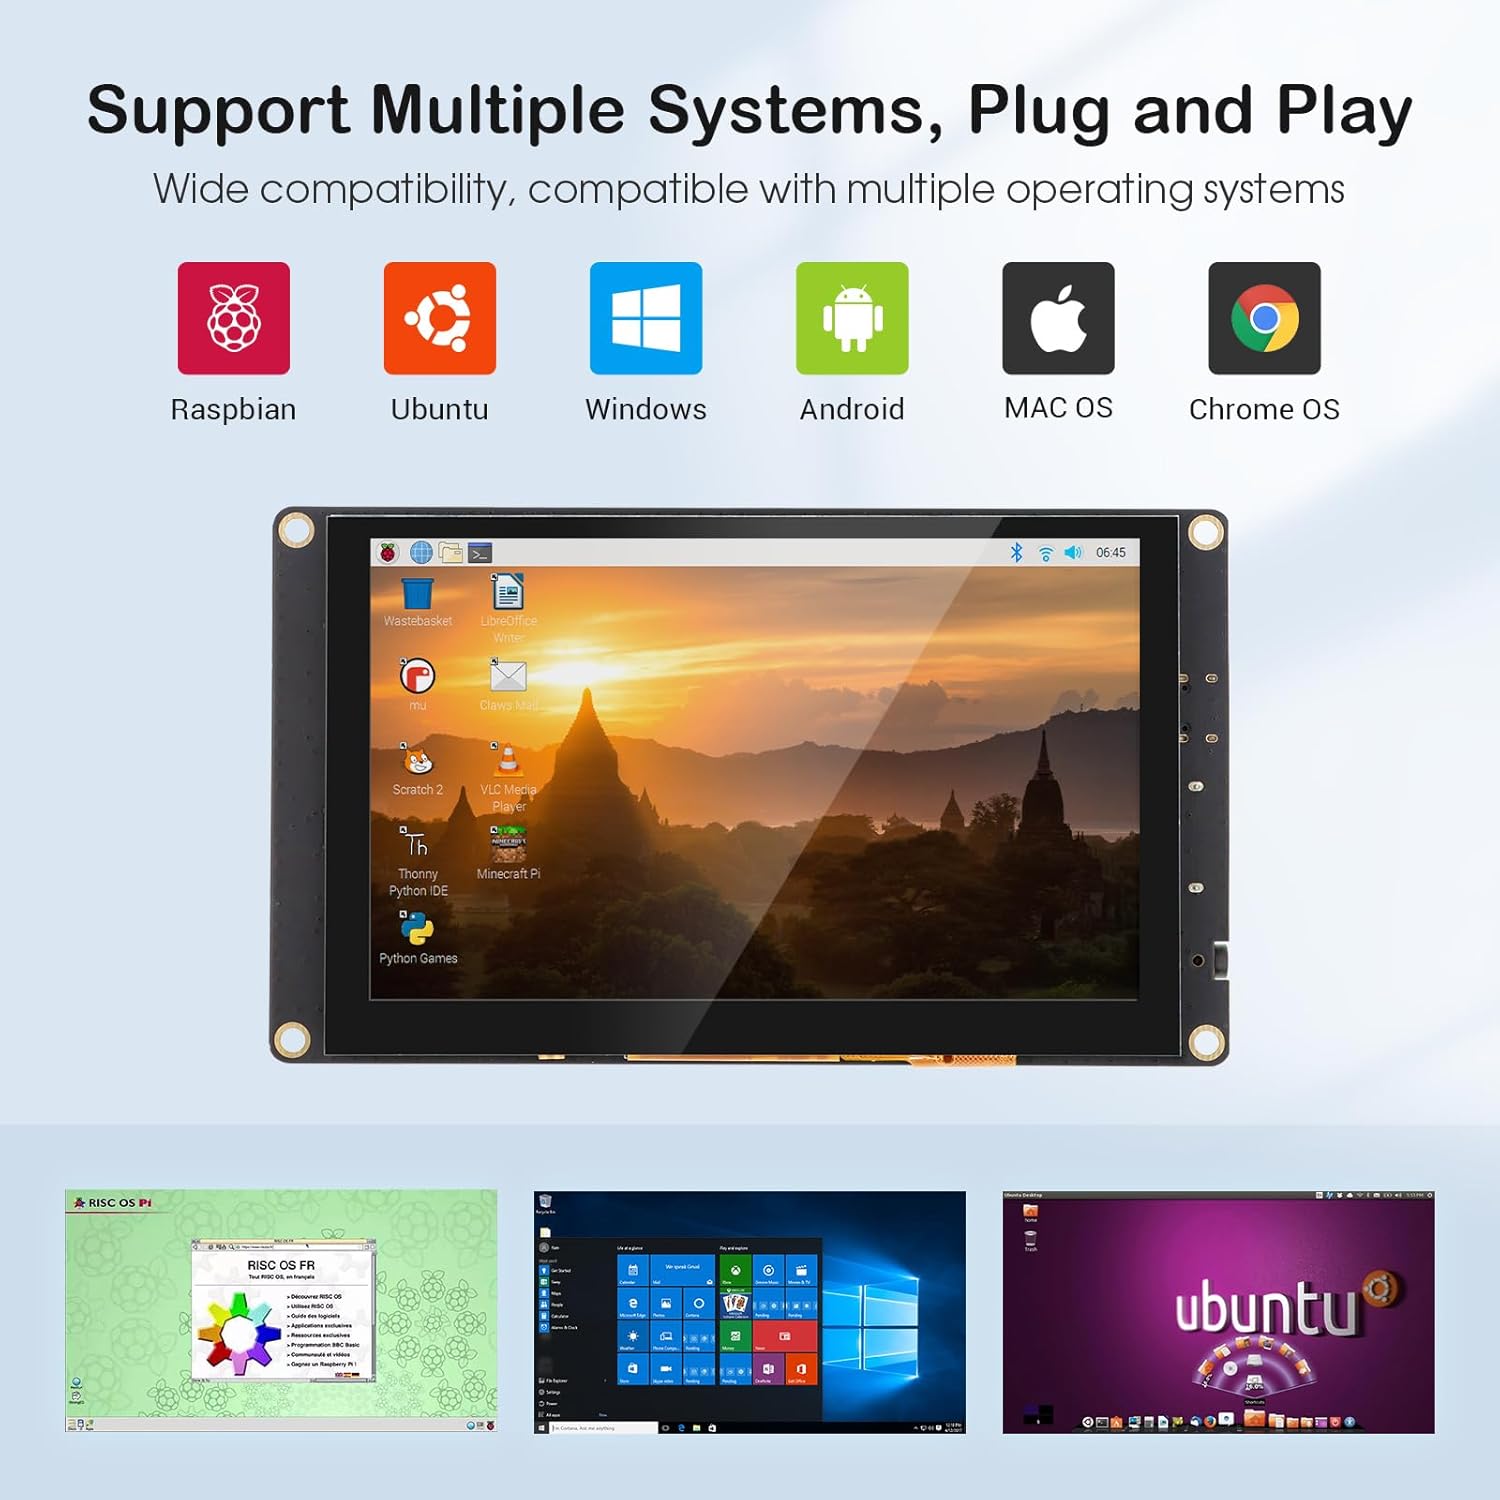
Slika 5: Združljivost več sistemov
5.3. Zvočni izhod
The monitor includes a 3.5mm headphone jack and a 4P speaker interface for connecting external audio devices. Ensure your source device is configured to output audio via HDMI for sound to be routed through the monitor's audio outputs.
5.4. Gumb za vklop
A dedicated power button is located on the monitor to conserve energy when the display is not in use. Press the button to turn the screen on or off.
6. Vzdrževanje
To ensure the longevity and optimal performance of your ELECROW 5-Inch Mini Touchscreen Monitor, follow these maintenance guidelines:
- Čiščenje: Uporabite mehko krpo, ki ne pušča vlaken, dampened with water or a screen-cleaning solution to clean the display surface. Avoid harsh chemicals, abrasive materials, or excessive moisture.
- Ravnanje: Handle the monitor by its edges. Avoid applying excessive pressure to the screen, especially the touch surface.
- Okolje: Operate the monitor in a clean, dry environment, away from direct sunlight, extreme temperatures, and high humidity.
- Shranjevanje: When not in use for extended periods, store the monitor in its original packaging or a protective case to prevent dust accumulation and physical damage.
7. Odpravljanje težav
Če imate težave z monitorjem, si oglejte naslednje pogoste korake za odpravljanje težav:
- Brez prikaza/črni zaslon:
- Ensure both the HDMI (or HD) cable and the USB power cable are securely connected.
- Verify that the power button on the monitor is in the 'On' position.
- Check the video output settings on your source device (Raspberry Pi, PC, etc.) to ensure it is configured to output to the correct display.
- Try a different HDMI cable or USB cable to rule out cable defects.
- Touch Functionality Not Working:
- Ensure the USB cable is connected from the source device to the monitor's Type-C port, as this provides the touch data connection.
- For Windows, you may need to calibrate the touchscreen. Go to Control Panel > Hardware and Sound > Tablet PC Settings > Calibrate the screen for pen or touch input.
- For Raspberry Pi, ensure the correct drivers or configuration settings are applied for touch input. Refer to Raspberry Pi documentation for specific setup instructions for external touchscreens.
- Screen Tearing or Visual Artifacts (Raspberry Pi):
- Some users have reported screen tearing issues with Raspberry Pi. This can often be resolved by adjusting settings in the
/boot/config.txtfile. Common settings to check or add include:hdmi_force_hotplug=1(forces HDMI output)hdmi_drive=2(enables HDMI audio)dtoverlay=ads7846,cs=1,penirq=25,penirq_pull=2,speed=50000,keep_vref_on=0,swapxy=0,pmax=255,xohms=150,xmin=200,xmax=3900,ymin=200,ymax=3900(for touch overlay) - Ensure overscan is disabled in Raspberry Pi OS settings (
raspi-config) to prevent black borders.
- Some users have reported screen tearing issues with Raspberry Pi. This can often be resolved by adjusting settings in the
- Poor Image Quality/Viewzorni koti:
- This monitor uses a TN panel, which typically has narrower viewing angles compared to IPS panels. Adjust the viewing angle for optimal clarity.
- Ensure both protective films are removed from the screen. There may be a less obvious second film beneath the first.
8. Specifikacije
| Funkcija | Specifikacija |
|---|---|
| Znamka | ELECTROW |
| Številka modela | DIS05490T |
| Velikost zaslona | 5 palcev |
| Resolucija | 800 x 480 slikovnih pik |
| Razmerje stranic | 1.66:1 |
| Opis površine zaslona | Sijajni |
| Svetlost slike | 300 lm |
| Dimenzije izdelka | 0.5 x 5.4 x 3.1 palcev |
| Teža predmeta | 5 unč |
9. Garancija in podpora
For warranty information and technical support, please refer to the official ELECROW website or contact their customer service directly. Details are typically provided on the product packaging or within the included user manual booklet.


