1. Uvod
This manual provides detailed instructions for the installation, configuration, and operation of your Hikvision DS-7104HGHI-K1 4-Channel Digital Video Recorder (DVR). Please read this manual thoroughly before using the product to ensure correct and safe operation. Keep this manual for future reference.
2. Izdelek je končanview in funkcije
The Hikvision DS-7104HGHI-K1 is a 4-channel 1080p Lite DVR designed for reliable surveillance recording. It supports various camera types and features advanced video compression technology.

Slika 2.1: Vrh view of the Hikvision DS-7104HGHI-K1 DVR, showing its compact design and branding.
Ključne značilnosti:
- 4-Channel Video Input: Supports up to 4 analog cameras.
- 1080p Lite Recording: Provides high-definition recording at 1080p Lite resolution.
- H.265+ kompresija: Advanced video compression technology for efficient storage and reduced bandwidth usage.
- Multi-format Input: Compatible with HDTVI, AHD, CVI, CVBS, and up to 5 IP camera inputs (up to 2MP).
- Izhod HDMI/VGA: For local monitoring.
- Oddaljeni dostop: Podpira daljinsko upravljanje viewing via Hik-Connect app.

Slika 2.2: Spredaj in zadaj views of the Hikvision DVR, highlighting various ports and connectivity options, along with icons representing H.265 Pro, Mobile access, 5-in-1 compatibility, and IP/Analog XVR capabilities.
H.265+ Compression Benefits:
H.265+ compression significantly reduces the required storage space and bandwidth compared to older compression standards like H.264, without compromising video quality.

Slika 2.3: A bar graph illustrating the reduction in 24-hour recording file size (GB) when using H.265+ compression compared to H.264 and H.265, showing up to an 83% gap in storage requirements.
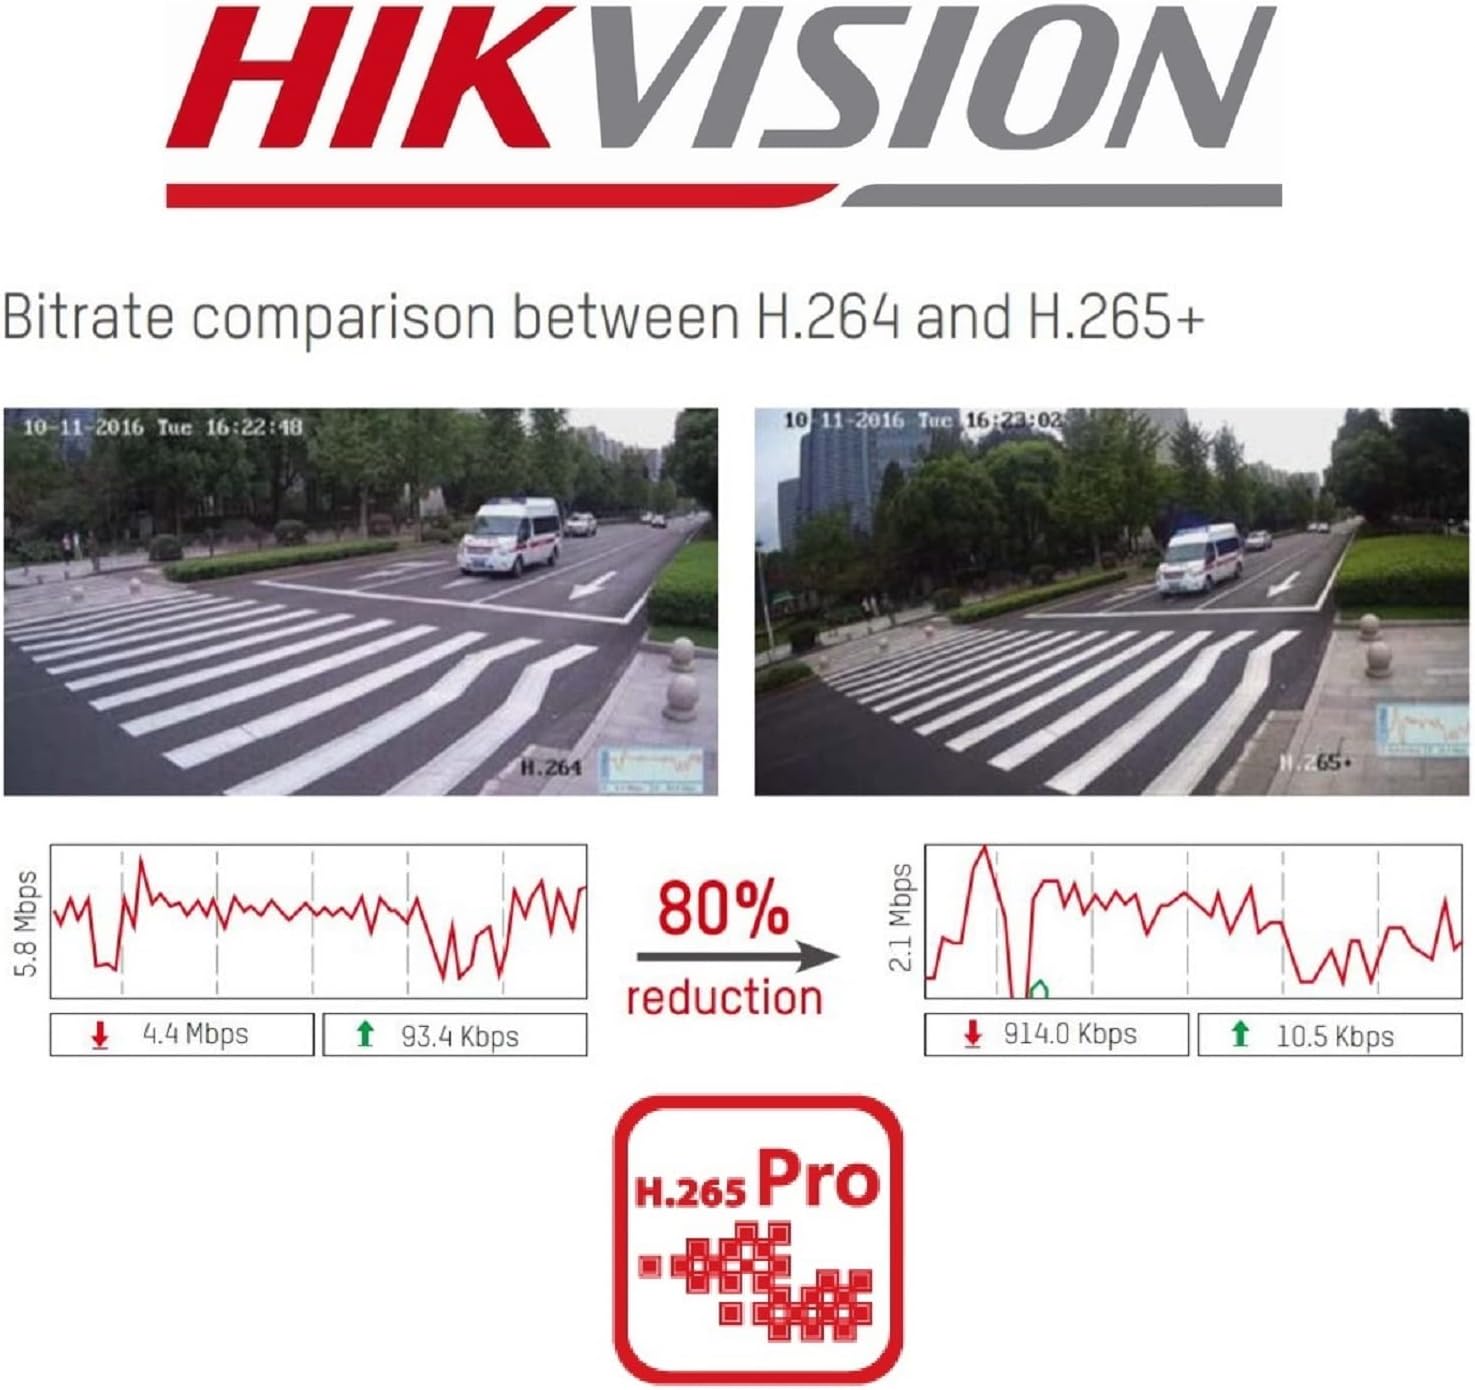
Slika 2.4: A visual comparison of bitrate usage between H.264 and H.265+ compression, demonstrating an 80% reduction in bitrate with H.265+ while maintaining similar video quality in sample surveillance footage.
3. Vsebina paketa
Preverite, ali so v paketu vsi elementi:
- Hikvision DS-7104HGHI-K1 DVR Unit
- Napajalni adapter
- Miška USB
- SATA kabli (za povezavo trdega diska)
- Vodnik za hiter začetek
- Note: Hard drive is not included and must be purchased separately.
4. Varnostne informacije
- Ensure the power supply matches the DVR's requirements.
- Do not expose the DVR to water or moisture.
- Izogibajte se postavljanju DVR-ja na neposredno sončno svetlobo ali v bližino virov toplote.
- Poskrbite za ustrezno prezračevanje, da preprečite pregrevanje.
- Uporabljajte samo dodatke, ki jih je določil proizvajalec.
5. Nastavitev
5.1 Namestitev strojne opreme
- Hard Drive Installation (HDD not included):
- Odvijte in odstranite zgornji pokrov DVR-ja.
- Connect the SATA power and data cables from the DVR to the hard drive.
- Secure the hard drive inside the DVR using the provided screws.
- Namestite zgornji pokrov in ga pritrdite z vijaki.
- Povežite kamere: Connect your analog cameras to the BNC video input ports on the rear panel of the DVR.
- Povežite monitor: Priključite monitor na izhodna vrata HDMI ali VGA.
- Poveži omrežje: Priključite ethernetni kabel iz LAN vhoda DVR-ja na usmerjevalnik ali omrežno stikalo.
- Priključite miško USB: Priključite miško USB v vrata USB na DVR-ju.
- Vklop: Priključite napajalnik na DVR in nato v električno vtičnico. DVR se bo samodejno vklopil.
5.2 Začetna konfiguracija
- First-Time Startup: Upon first boot, the DVR will guide you through a setup wizard.
- Nastavi geslo: Create a strong password for the admin user. This is crucial for security.
- Nastavitve omrežja: Konfigurirajte omrežne nastavitve (DHCP je običajno zadosten za večino domačih omrežij).
- Inicializacija trdega diska: The DVR will prompt you to initialize the newly installed hard drive. This step is necessary for recording.
- Datum in čas: Nastavite pravilen datum in čas.
6. Delovanje
6.1 V živo View
Po začetni nastavitvi bo DVR prikazal sliko v živo view from connected cameras on the monitor. You can switch between single-camera view in mreža z več kamerami view z uporabo zaslonskih kontrol ali miške.
6.2 Snemanje
The DVR is typically configured to record continuously by default once the HDD is initialized. You can customize recording schedules, motion detection recording, and alarm recording settings through the DVR's menu:
- Pojdi na Menu > Record > Schedule to adjust recording times.
- Pojdi na Menu > Alarm > Motion Detection to configure motion-triggered recording.
6.3 Predvajanje
Za view posnet footage:
- Pojdi na Menu > Playback.
- Izberite kamero(-e) in datumsko/časovno obdobje, ki ga želite ponovno posneti.view.
- Za navigacijo po posnetku uporabite krmilne elemente predvajanja (predvajanje, premor, hitro previjanje naprej, previjanje nazaj).tage.
6.4 Oddaljeni dostop (Hik-Connect)
The Hik-Connect app allows you to view v živo footage, play back recordings, and receive alerts on your smartphone or tablet from anywhere with an internet connection.

Slika 6.1: The Hik-Connect application icon alongside a smartphone displaying a multi-camera live view, illustrating the remote monitoring capabilities of the DVR system.
- Download the Hik-Connect app from your device's app store.
- Create a Hik-Connect account.
- Add your DVR to the app by scanning the QR code on the DVR or manually entering its serial number.
- Ensure your DVR is connected to the internet and Hik-Connect service is enabled in the DVR's network settings.
7. Vzdrževanje
- Redno čiščenje: Keep the DVR free from dust. Use a soft, dry cloth for cleaning.
- Posodobitve vdelane programske opreme: Občasno preverite uradne strani Hikvisiona. webspletno mesto za posodobitve vdelane programske opreme za zagotovitev optimalne zmogljivosti in varnosti.
- Varnostno kopiranje podatkov: Redno varnostno kopirajte pomembne posnetke na zunanji pomnilnik.
- Varnost gesla: Change your DVR password periodically to enhance security.
8. Odpravljanje težav
- Brez video izhoda:
- Preverite povezave kabla HDMI/VGA.
- Prepričajte se, da je monitor vklopljen in nastavljen na pravilen vhod.
- Brez snemanja:
- Verify that a hard drive is installed and initialized.
- Check recording schedules and ensure they are active.
- Prepričajte se, da so kamere pravilno priključene in delujejo.
- Dostop na daljavo ni mogoč:
- Prepričajte se, da je DVR povezan z internetom.
- Check network settings and Hik-Connect status on the DVR.
- Verify your Hik-Connect account and device binding in the app.
- DVR Unresponsive:
- Restart the DVR by disconnecting and reconnecting the power.
- If issues persist, consider a factory reset (note: this will erase configurations).
9. Specifikacije
| Funkcija | Podrobnost |
|---|---|
| Številka modela | DS-7104HGHI-K1 |
| Video vhod | 4-channel BNC (HDTVI/AHD/CVI/CVBS) + up to 5 IP channels (up to 2MP) |
| Stiskanje videa | H.265 Pro+/H.265+/H.265/H.264+/H.264 |
| Ločljivost kodiranja | 1080p Lite @ 25/30 fps |
| Video izhod | 1 HDMI, 1 VGA (simultaneous output) |
| Avdio vhod | 1-kanalni RCA |
| Avdio izhod | 1-kanalni RCA |
| Podpora za trdi disk | 1 vmesnik SATA, zmogljivost do 4 TB |
| Omrežni vmesnik | 1 RJ45 10M/100M samoprilagodljiv Ethernet vmesnik |
| USB vmesnik | 2 vmesnika USB 2.0 |
| Dimenzije (D x Š x V) | 20 x 20 x 4.5 cm |
| Teža | 1.01 kg (brez HDD) |
10. Garancija in podpora
For warranty information and technical support, please refer to the official Hikvision website or contact your authorized Hikvision dealer. Keep your purchase receipt as proof of purchase.


