1. Uvod
This manual provides detailed instructions for the installation, operation, and maintenance of your Edge Audio Xtreme Series EDX5000.1FD-E0 Monoblock Amplifier. The EDX5000.1FD-E0 is a high-performance Class D full-bridge amplifier designed for powerful audio output. Please read this manual thoroughly before attempting installation or operation to ensure proper use and to prevent damage.
1.1 Varnostni ukrepi
- Pred kakršnimi koli električnimi priključki vedno odklopite negativni pol akumulatorja vozila.
- Prepričajte se, da so vse napeljave pravilno napeljane in zavarovane, da preprečite poškodbe ali kratke stike.
- Za napajalne in ozemljitvene priključke uporabite ožičenje ustreznega premera, kot je navedeno v tem priročniku.
- Izogibajte se namestitvi amplifier in locations exposed to moisture or excessive heat.
- Če ste glede katerega koli dela postopka namestitve negotovi, se posvetujte s profesionalnim monterjem.
2. Vsebina paketa
Preden nadaljujete z namestitvijo, preverite, ali so v paketu prisotni vsi elementi.
- Edge Audio EDX5000.1FD-E0 Monoblock Amplifier
- Remote Bass Control Unit
- Wiring for Remote Bass Control
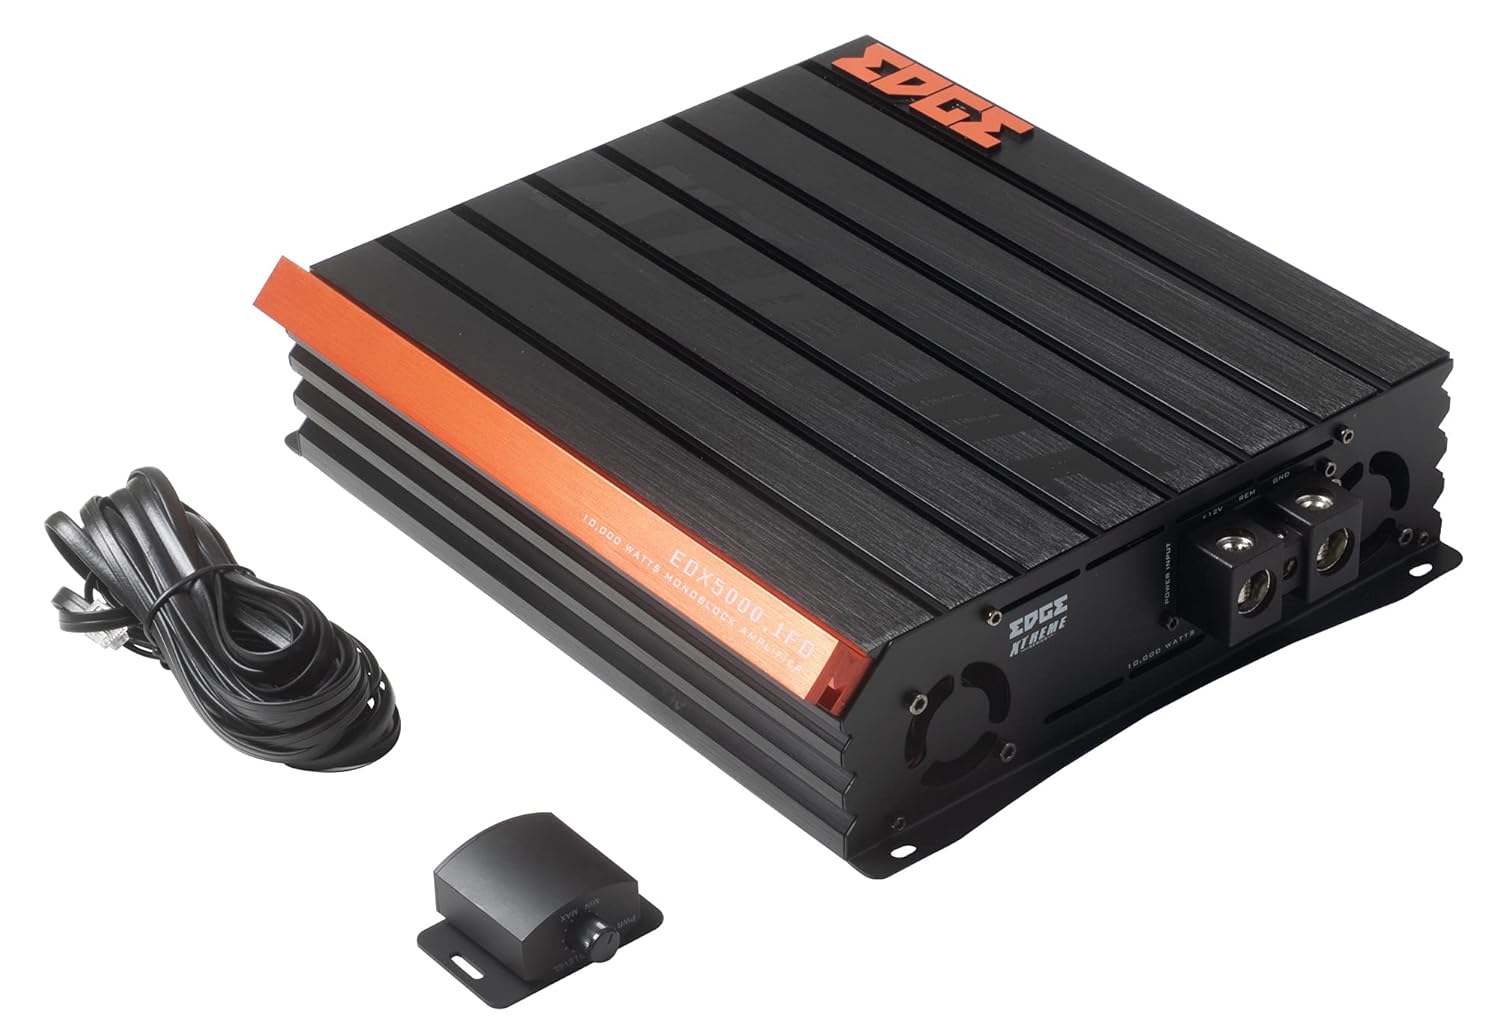
Image 2.1: Contents of the EDX5000.1FD-E0 package, including the amplifier, remote bass control, and connecting cable.

Image 2.2: The retail packaging for the Edge Audio EDX5000.1FD-E0 Monoblock Amplifier.
3. Lastnosti
The Edge Audio Xtreme Series EDX5000.1FD-E0 amplifier incorporates advanced features for optimal audio performance:
- Monoblock power amplifier design for dedicated subwoofer applications.
- Max Power: 10,000 watts.
- Built-in active crossovers (High-Pass Filter and Low-Pass Filter) for precise sound shaping.
- Adjustable Bass Boost circuit for enhanced low-frequency response.
- Ultra-efficient Class D topology for high power output with minimal heat generation.
- Wideband frequency response up to 20kHz.
- Full bridge technology for efficient power delivery.
- Compact footprint for versatile installation options.
- Dimensions (H x W x D): 2.5 x 10.4 x 9.1 inches (64 x 264 x 230mm).

Slika 3.1: Zgoraj view of the EDX5000.1FD-E0 ampoživitelj, razstavaasing its compact design and heatsink fins.
4. Nastavitev in namestitev
Pravilna namestitev je ključnega pomena za delovanje in dolgo življenjsko dobo vašega amplifier. Follow these guidelines carefully.
4.1 Mesto pritrditve
Namestite amplifier in a dry, well-ventilated area, away from direct sunlight or heat sources. Ensure sufficient airflow around the amplifier's heatsink. The amplifier is designed for surface mounting.
4.2 Žične povezave
All wiring should be securely connected and insulated to prevent short circuits. Use high-quality, appropriate gauge wiring.
4.2.1 Napajalni priključki
Povežite amplifier to the vehicle's electrical system as follows:
- +12V (napajanje): Connect a heavy-gauge power cable (e.g., 4 AWG or larger for 10,000W max power) directly from the positive terminal of the vehicle's battery to the +12V terminal on the amplifier. Install an appropriate fuse (not supplied) within 18 inches of the battery.
- GND (ozemljitev): Priključite debel ozemljitveni kabel enake velikosti kot napajalni kabel iz priključka GND na amplifier to a clean, unpainted metal surface of the vehicle chassis. Ensure a solid electrical connection.
- REM (daljinski vklop): Priključite žico manjšega premera (npr. 18 AWG) iz priključka REM na amplifier to the remote turn-on output of your head unit. This wire turns the ampvklop in izklop sistema za dvigovanje plamena skupaj z avdio sistemom.

Image 4.1: Power input terminals (+12V, REM, GND) on the EDX5000.1FD-E0 amplifier.
4.2.2 Priključki avdio vhoda
Connect your head unit's RCA outputs to the 'LOW INPUT' RCA jacks on the amplifier.
4.2.3 Priključki izhodov zvočnikov
Priključite nizkotonski zvočnik(e) na izhodne priključke za zvočnike na amplifier. Ensure correct polarity (+ to + and - to -) for optimal performance. Refer to your subwoofer's specifications for impedance matching.

Image 4.2: Rear panel of the EDX5000.1FD-E0 amplifier, showing low-level inputs, crossover controls, gain, bass boost, and speaker output terminals.
5. Navodila za uporabo
Ko je nameščen, prilagodite ampnastavitve lifierja za optimalno kakovost zvoka.
5.1 Konec nadzorne ploščeview
Refer to Image 4.2 for the location of the following controls:
- HPF (visokoprepustni filter): Adjusts the high-pass crossover frequency. For subwoofer applications, this should typically be set to its minimum or off, as a low-pass filter is usually preferred.
- LPF (nizkopasovni filter): Adjusts the low-pass crossover frequency (15Hz - 200Hz). This filters out frequencies above the set point, sending only low frequencies to the subwoofer. Set this according to your subwoofer and system requirements, typically between 60Hz and 100Hz.
- DOBITE: Se ujema z amplifier's input sensitivity to the output level of your head unit. Start with the gain at minimum, then slowly increase it until you hear distortion, then back off slightly. Do not use the gain control as a volume knob.
- BASS BOOST: Adjusts the level of bass enhancement (0dB - 12dB). Use sparingly to avoid distortion.
- FREQ (Bass Boost Frequency): Selects the center frequency for the bass boost (35Hz - 70Hz).
- DALJINSKO: Port for connecting the wired remote bass control unit.
5.2 Daljinski upravljalnik nizkih tonov
The included remote bass control allows for convenient adjustment of the subwoofer output level from the driver's seat. Connect it to the 'REMOTE' port on the amplifier.
6. Vzdrževanje
Redno vzdrževanje pomaga zagotoviti dolgo življenjsko dobo in delovanje vašega amplifier.
- Čiščenje: Občasno očistite amplifier's exterior with a soft, dry cloth. Do not use harsh chemicals or abrasive cleaners. Ensure ventilation fins are free of dust and debris.
- Preverjanje povezave: Annually inspect all power, ground, remote, and speaker connections for tightness and corrosion. Loose connections can cause performance issues or damage.
- Okolje: Zagotovite amplifier remains in a dry, stable environment, protected from extreme temperatures.
7. Odpravljanje težav
Če imate težave z vašim ampČe se obrnete na podporo, si oglejte naslednje pogoste težave in rešitve.
- Brez napajanja:
- Check the in-line fuse near the battery.
- Verify +12V, GND, and REM connections are secure and receiving power.
- Ensure the remote turn-on wire is connected to a switched 12V source.
- Ni zvoka:
- Check all RCA input and speaker output connections.
- Verify head unit is powered on and outputting audio.
- Adjust the GAIN control.
- Popačen zvok:
- Reduce the GAIN setting.
- Check speaker wiring for shorts or incorrect polarity.
- Zagotovite ujemanje impedance zvočnikov amplifier specifikacije.
- Reduce BASS BOOST if active.
- AmpPregrevanje gorilnika:
- Poskrbite za ustrezno prezračevanje okolice amplifier.
- Check speaker impedance; running too low an impedance can cause overheating.
- Verify power and ground wire gauge is sufficient.
8. Specifikacije
Technical specifications for the Edge Audio Xtreme Series EDX5000.1FD-E0 Monoblock Ampdvigalo:
| Funkcija | Specifikacija |
|---|---|
| Številka modela | EDX5000.1FD-E0 |
| Znamka | ROB |
| Ampvrsta dvigala | Monoblock, Class D, Full Bridge |
| Največja moč | 10,000 vatov |
| Frekvenčni odziv | Do 20kHz |
| Built-in Crossovers | Active (HPF, LPF) |
| Ojačanje nizkih tonov | Adjustable (0-12dB) |
| Frekvenca ojačanja nizkih tonov | Adjustable (35Hz-70Hz) |
| voltage | 230 voltov (delovna napetosttage Range typically 12-14.4V DC for car audio) |
| Vrsta namestitve | Površinska montaža |
| Mere izdelka (V x Š x G) | 2.5 x 10.4 x 9.1 palcev (64 x 264 x 230 mm) |
| Teža izdelka | 6.61 funta |
9. Garancija in podpora
For warranty information or technical support, please refer to the documentation provided at the time of purchase or contact your authorized Edge Audio dealer. Keep your proof of purchase for warranty claims.


