1. Uvod
Welcome to the TMEZON Wireless Security Camera System user manual. This guide provides detailed instructions for the setup, operation, and maintenance of your MZ-WF8430W system. Please read this manual thoroughly before installation and use to ensure proper functionality and safety. This system features 3-megapixel cameras, an 8-channel Network Video Recorder (NVR), and IP66 waterproof cameras suitable for both indoor and outdoor surveillance.
2. Vsebina paketa
Prosimo, preverite paket za naslednje artikle:
- 1 x 8-Channel Wireless NVR
- 4 x 3MP Wireless IP Cameras
- 1 x napajalnik za snemalnik
- 4 x napajalniki za kamero
- 1 x USB miška
- 1 x omrežni kabel
- 1 x uporabniški priročnik
- Kompleti pritrdilnih vijakov

Slika: Konecview of the TMEZON Wireless Security Camera System components, including the NVR and four cameras.
3. Navodila za namestitev
3.1 Initial NVR Connection
Follow these steps to set up your NVR:
- Priključite NVR na monitor s kablom HDMI ali VGA.
- Priključite miško USB na vrata USB na snemalniku (NVR).
- Connect the NVR to your router using the provided network cable for internet access and remote viewing.
- Connect the NVR power adapter and plug it into an electrical outlet. The NVR will power on automatically.

Image: Diagram illustrating the connections for the NVR, including power, monitor, and network cable to a router.
3.2 Namestitev kamere
The cameras are IP66 waterproof, making them suitable for both indoor and outdoor use. Ensure cameras are within the NVR's wireless range.
- Choose suitable locations for your cameras, considering coverage area and power outlet proximity.
- Mount the cameras securely using the provided screw kits.
- Vsako kamero priključite na ustrezen napajalnik in ga vključite v električno vtičnico.
- The cameras will automatically pair with the NVR. If not, refer to the troubleshooting section for manual pairing.
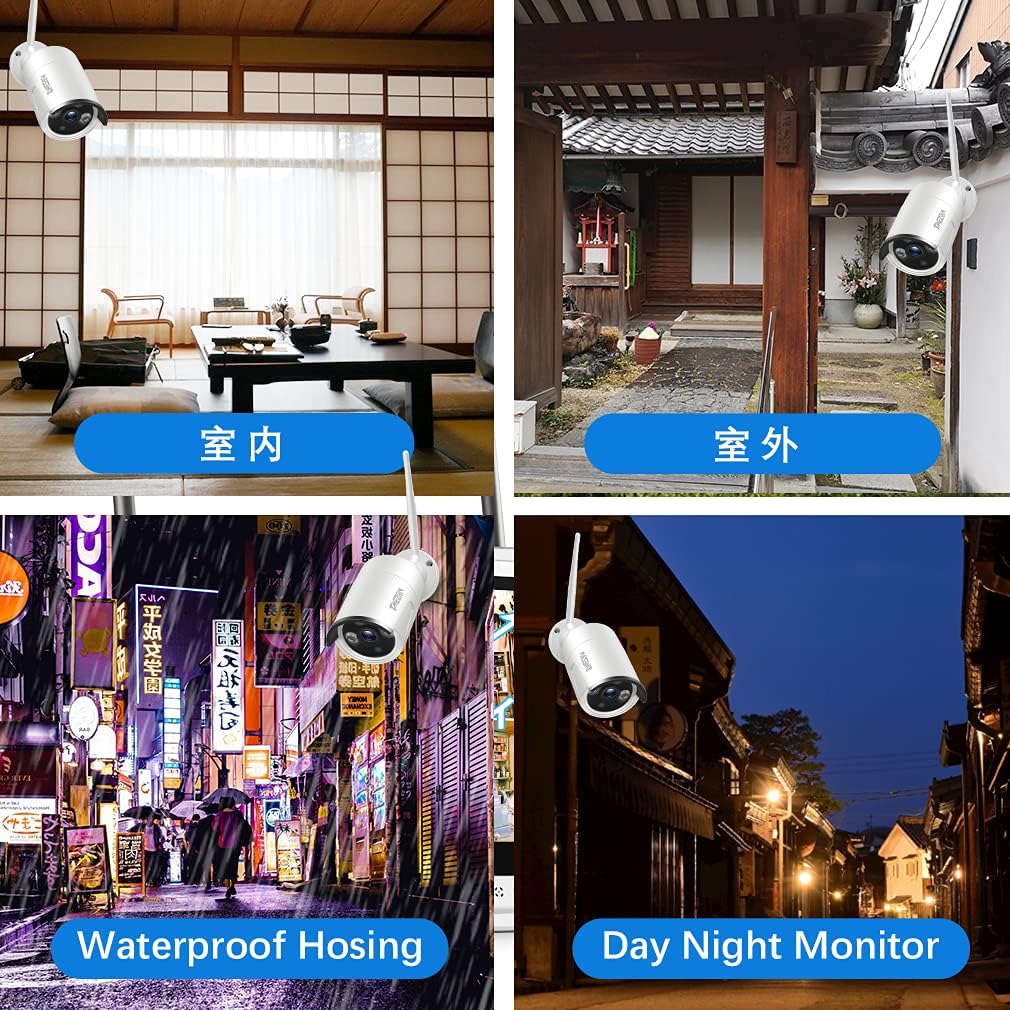
Slika: npramples of camera placement for both indoor and outdoor environments.
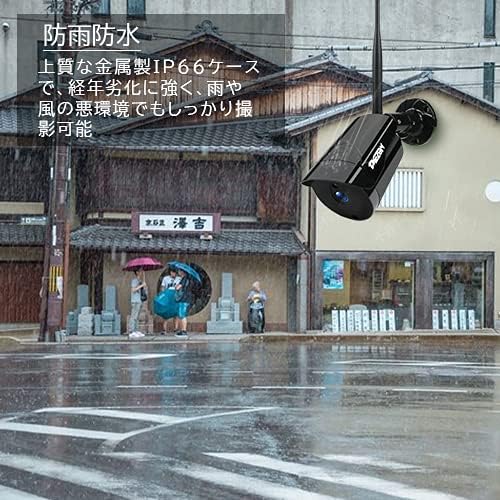
Image: A camera mounted outdoors, demonstrating its IP66 waterproof capability in a rainy setting.
3.3 Remote Access Setup (Mobile App)
Za view your cameras remotely on a smartphone or PC, follow these steps:
- Download the 'IP PRO' app from the App Store (iOS) or Google Play Store (Android).
- Registrirajte nov račun v aplikaciji.
- Scan the QR code on your NVR or manually enter the device ID to add your system to the app.
- Ko ga dodate, lahko view live feeds, playback recordings, and manage settings from your mobile device.

Image: Demonstrates remote access to the camera system from various devices including tablets, laptops, and smartphones.

Image: A visual guide showing the steps for easy remote access setup via the mobile application.
Video: Splošno konecview of the system's features and setup process.
4. Navodila za uporabo
4.1 V živo View in Snemanje
After initial setup, the NVR will display live feeds from all connected cameras. You can navigate the interface using the USB mouse. The system is configured for continuous recording by default. You can adjust recording schedules and modes (e.g., motion-triggered) in the NVR settings.
4.2 Predvajanje
Za ponovnoview posnet footage:
- Right-click on the NVR interface to access the main menu.
- Izberite »Predvajanje«.
- Choose the desired camera, date, and time to view posnetki.
4.3 Zaznavanje gibanja
The system supports motion detection, which can trigger recording and alerts. To configure:
- Access the NVR's main menu and go to 'Alarm' or 'Motion Detect' settings.
- Enable motion detection for specific cameras.
- Adjust sensitivity and define detection areas as needed.

Image: Highlights key features such as WiFi wireless connectivity, motion detection, night vision mode, IP66 waterproof rating, remote monitoring, and email alerts.
4.4 Nočni vid
The cameras are equipped with infrared (IR) LEDs for automatic night vision, providing clear black and white video footage in low-light or no-light conditions.
4.5 Opozorila po e-pošti
You can configure the system to send email notifications when motion is detected:
- In the NVR settings, navigate to 'Network' then 'Email'.
- Enter your email server details and recipient email addresses.
- Enable email alerts for motion detection events.

Image: A smartphone screen displaying an instant email notification triggered by an alarm event, showing a person attempting to break in.
Video: Demonstrates various operational aspects of the security camera system.
5. Vzdrževanje
Redno vzdrževanje zagotavlja optimalno delovanje in dolgo življenjsko dobo vašega varnostnega sistema:
- Čiste kamere: Leče fotoaparata občasno obrišite z mehko krpoamp krpo za odstranjevanje prahu in umazanije, kar zagotavlja jasno kakovost slike.
- Preverite povezave: Prepričajte se, da so vsi napajalni in omrežni kabli varno priključeni, da preprečite izgubo signala.
- Posodobitve vdelane programske opreme: Check the TMEZON official website for any available firmware updates for your NVR and cameras to enhance features and security.
- Zdravje trdega diska: If your NVR has a hard drive, regularly check its status in the system settings to prevent recording failures.
6. Odpravljanje težav
Tukaj so rešitve za pogoste težave, na katere lahko naletite:
6.1 Ni video prikaza na monitorju
- Preverite moč: Ensure the NVR and monitor are powered on and connected correctly.
- Povezava kabla: Verify the HDMI/VGA cable is securely connected between the NVR and monitor.
- Vir vhoda: Confirm the monitor's input source is set to the correct HDMI/VGA port.
6.2 Cameras Not Showing on NVR
- Moč kamere: Ensure all cameras are powered on.
- Brezžični doseg: Check if cameras are within the NVR's wireless range. Obstacles like thick walls can reduce signal strength.
- Ročno seznanjanje: If cameras do not automatically connect, you may need to manually pair them. Access the NVR's 'IPC Channel Config' or 'Wireless Add' menu and follow the on-screen instructions to add cameras.
6.3 Oddaljeni dostop ne deluje
- NVR Internet Connection: Ensure the NVR is connected to your router and has internet access. Check the network status in NVR settings.
- Prijava v aplikacijo: Verify you are logged into the correct account on the mobile app.
- Dodana naprava: Confirm the NVR device has been successfully added to your app account.
- Nastavitve usmerjevalnika: Ensure your router is not blocking the NVR's internet access.
6.4 Slaba kakovost slike
- Čista leča: Clean the camera lens as described in the maintenance section.
- Nastavitve ločljivosti: Check the camera's resolution settings in the NVR. Ensure it's set to 3MP (2048*1536P) for optimal clarity.
- Osvetlitev: Ensure adequate lighting for color images during the day. Night vision will be black and white.
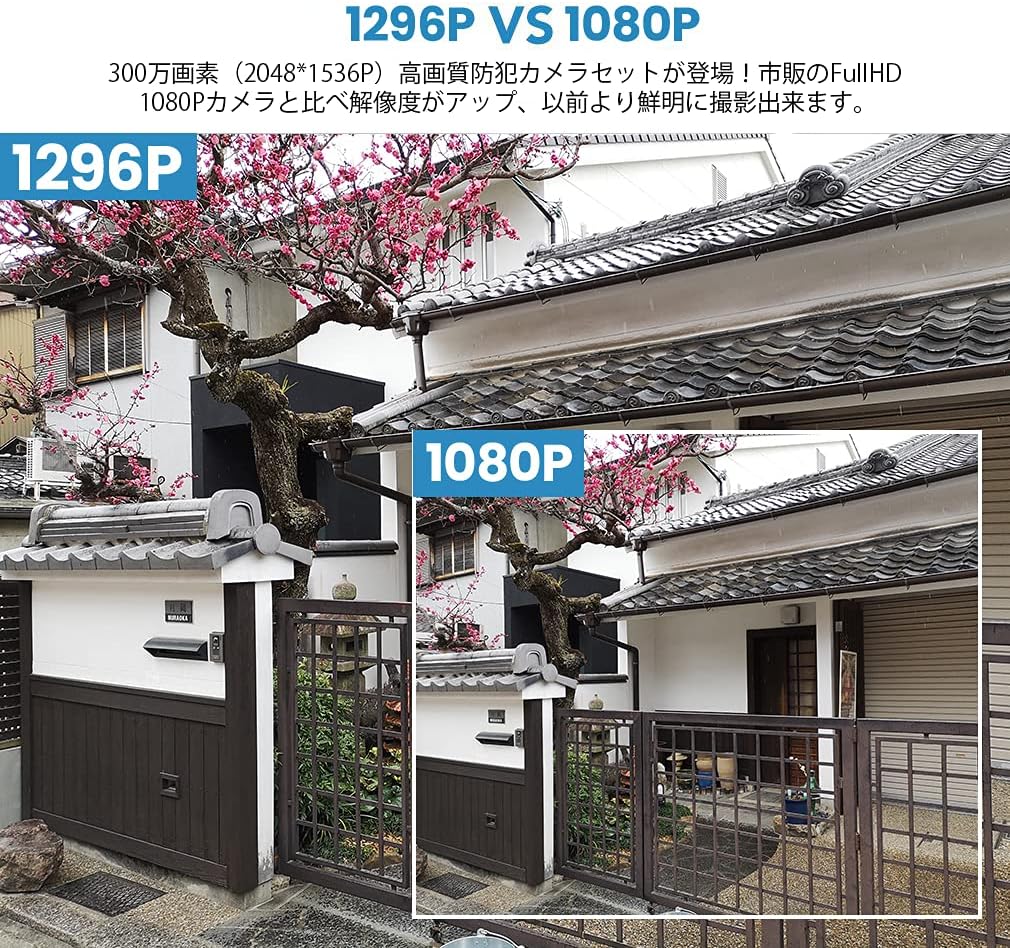
Image: A visual comparison demonstrating the improved clarity and detail of 1296P resolution compared to 1080P.

Image: A comparison showing the difference in image quality between 1080P and 720P resolutions, highlighting the superior detail of 1080P.
7. Specifikacije
| Funkcija | Specifikacija |
|---|---|
| Znamka | TMEZON |
| Številka modela | MZ-WF8430W |
| Tehnologija povezljivosti | Brezžično |
| Ločljivost zajema videa | 1944p (3 milijonov slikovnih pik) |
| Posebne lastnosti | Vodoodporen (IP66) |
| Število kanalov | 8 |
| Dimenzije paketa | 32 x 31.1 x 18.3 cm |
| Teža paketa | 3.64 kilogramov |
| Potrebne baterije | št |
8. Garancija in podpora
TMEZON provides customer support for its products. For warranty information, technical assistance, or any questions not covered in this manual, please contact TMEZON customer service through their official website or the contact information provided with your purchase. Please have your model number (MZ-WF8430W) and purchase details ready when contacting support.


