1. Uvod
This manual provides essential information for the installation, configuration, operation, and maintenance of the MOXA AWK-1137C-US-T 802.11n Wireless AP Client. This device is designed for industrial wireless applications, offering reliable 802.11n connectivity in challenging environments with a wide operating temperature range.
2. Varnostne informacije
- Always disconnect power before cleaning or servicing the device.
- Poskrbite za pravilno ozemljitev, da preprečite nevarnosti električnega toka.
- Napravo uporabljajte znotraj določenih temperaturnih in vlažnostnih območij.
- Naprave ne izpostavljajte vlagi ali ekstremnim temperaturam.
- Namestitev in vzdrževanje naj izvaja samo usposobljeno osebje.
3. Vsebina paketa
Preverite, ali vaš paket vsebuje naslednje elemente:
- MOXA AWK-1137C-US-T Wireless AP Client unit
- Navodila za hitro namestitev
- Documentation CD (or link to online resources)
- Mounting kit (if applicable)
- Power adapter or terminal block (if applicable)
Če kateri koli predmet manjka ali je poškodovan, se nemudoma obrnite na prodajalca.
4. Strojna oprema je končanaview
The AWK-1137C-US-T features robust industrial design. Key components typically include:
- Ethernet vrata: Za žične omrežne povezave.
- Antenski priključki: For external antennas to optimize wireless signal.
- Vhodna moč: Terminal block for DC power input.
- LED indikatorji: Provide status information for power, WLAN, and Ethernet activity.
- Gumb za ponastavitev: For restoring factory default settings.
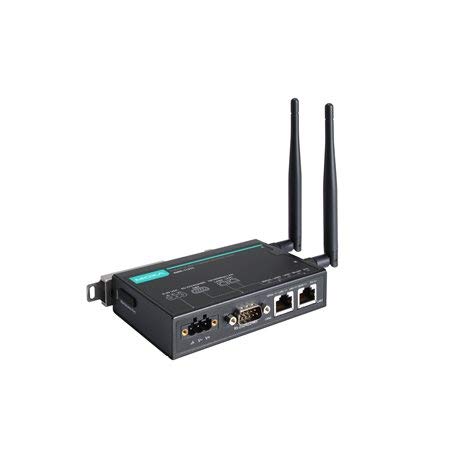
Figure 1: MOXA AWK-1137C-US-T Wireless AP Client. This image shows the compact industrial design of the device, typically featuring antenna ports, Ethernet connections, and power input.
5. Nastavitev
5.1 Montaža
The AWK-1137C-US-T supports DIN-rail mounting. Attach the DIN-rail kit to the device and snap it onto a standard DIN-rail. Ensure the device is securely fastened to prevent vibration or accidental dislodgement.
5.2 Napajalni priključek
- Connect a suitable DC power source (e.g., 12-48 VDC) to the device's power input terminal block.
- Ensure correct polarity (+ and -) as indicated on the device.
- Tighten the screws on the terminal block to secure the power wires.
5.3 Omrežna povezava
- Connect an Ethernet cable from your network switch or router to the Ethernet port on the AWK-1137C-US-T.
- Attach appropriate antennas to the antenna connectors. Ensure they are securely tightened.
5.4 Začetna konfiguracija
To access the device's web-upravljalni vmesnik:
- Connect a computer directly to the device's Ethernet port or ensure it is on the same network segment.
- Configure your computer's IP address to be in the same subnet as the device's default IP address (refer to the Quick Installation Guide for the default IP).
- Odpri a web browser and enter the device's default IP address.
- Log in using the default username and password (refer to the Quick Installation Guide).
- Change the default password immediately for security.
6. Delovanje
6.1 Načini delovanja
The AWK-1137C-US-T can operate in various modes, including Access Point (AP) and Client mode. Select the appropriate mode based on your network requirements.
- Način dostopne točke (AP): The device acts as a central hub for wireless clients to connect.
- Način odjemalca: The device connects to an existing Access Point, extending wired network connectivity wirelessly.
6.2 Brezžične nastavitve
Configure the following wireless parameters via the web vmesnik:
- SSID: The name of your wireless network.
- Kanal: Select an appropriate wireless channel to avoid interference.
- Band: Configure for 2.4 GHz or 5 GHz operation, depending on the model and environment.
- Oddajna moč: Adjust the output power for optimal coverage and compliance.
6.3 Varnostne nastavitve
Implement strong wireless security to protect your network:
- Šifriranje: Use WPA2/WPA3-PSK or Enterprise for robust security.
- Password/Passphrase: Choose a strong, unique password.
- Filtriranje naslovov MAC: Optionally restrict access to specific devices.
7. Vzdrževanje
7.1 Posodobitve vdelane programske opreme
Regularly check the MOXA website for the latest firmware updates. Firmware updates can provide new features, performance improvements, and security patches. Follow the instructions provided with the firmware package for a safe update process.
7.2 Čiščenje
Clean the device periodically with a soft, dry cloth. Do not use liquid or aerosol cleaners. Ensure the device is powered off before cleaning.
7.3 Okoljski vidiki
Ensure the operating environment remains within the specified temperature and humidity limits (-40 to 75°C). Avoid placing the device near heat sources or in direct sunlight.
8. Odpravljanje težav
8.1 Brez napajanja
- Check the power cable connection and ensure the power source is active.
- Preverite napajalno voltage is within the device's specified range.
- Inspect the power input terminal block for loose connections.
8.2 Ni omrežne povezave
- Check Ethernet cable connections and ensure they are properly seated.
- Verify that the network switch or router is functioning correctly.
- For wireless connections, ensure the SSID, security settings, and channel match the connected AP/client.
- Check the LED indicators for network activity.
8.3 Počasna brezžična hitrost
- Ensure antennas are properly connected and positioned for optimal signal.
- Check for sources of interference (e.g., other wireless devices, microwave ovens).
- Adjust the wireless channel to a less congested one.
- Verify that the device is operating in 802.11n mode and not a slower standard.
8.4 Ponastavitev na tovarniške nastavitve
If configuration issues persist, you may need to reset the device to its factory default settings. Locate the reset button (often recessed) and press and hold it for approximately 5-10 seconds while the device is powered on. The device will reboot with default settings.
9. Specifikacije
| Funkcija | Specifikacija |
|---|---|
| Številka modela | AWK-1137C-ZDA-T |
| Brezžični standard | 802.11n |
| Operacijski pas | US Band |
| Delovna temperatura | -40 do 75°C |
| Dimenzije paketa | 7.87 x 6.57 x 1.97 palcev |
| Teža predmeta | 1.15 funtov |
| Proizvajalec | MOXA |
| Prvič na voljo | 30. april 2018 |
10. Garancija in podpora
10.1 Informacije o garanciji
MOXA products typically come with a standard warranty. For detailed warranty terms and conditions, please refer to the official MOXA webspletno mesto ali garancijski list, ki je priložen izdelku. Dokazilo o nakupu shranite za uveljavljanje garancije.
10.2 Tehnična podpora
For technical assistance, product documentation, or driver downloads, please visit the official MOXA support website. You can also contact MOXA's customer support team directly through the contact information provided on their webmesto.


