Uvod
This manual provides detailed instructions for the safe installation, operation, and maintenance of your Project Source 11-Inch Flush Mount Light fixture. Please read this manual thoroughly before beginning installation and retain it for future reference. This product is designed for indoor use only.
Varnostne informacije
WARNING: Risk of Electric Shock. Disconnect power at the fuse or circuit breaker before installing or servicing.
- Vse električne povezave morajo biti v skladu z lokalnimi predpisi, odloki ali Nacionalnim električnim kodeksom (NEC).
- Če niste prepričani o postopku namestitve, se posvetujte s kvalificiranim električarjem.
- Te svetilke ne nameščajte v mokro aliamp lokacije.
- Ensure all wires are properly connected and secured to prevent short circuits.
- Ne prekoračite največje wattage, določeno za to vpenjalo.
- S steklenimi komponentami ravnajte previdno, da preprečite lomljenje.
Vsebina paketa
Pred začetkom namestitve preverite, ali so prisotne vse komponente:
- Project Source 11-Inch Flush Mount Light Fixture (2 units)
- Mounting Hardware Kit (screws, wire nuts)
- Navodila za uporabo (ta dokument)
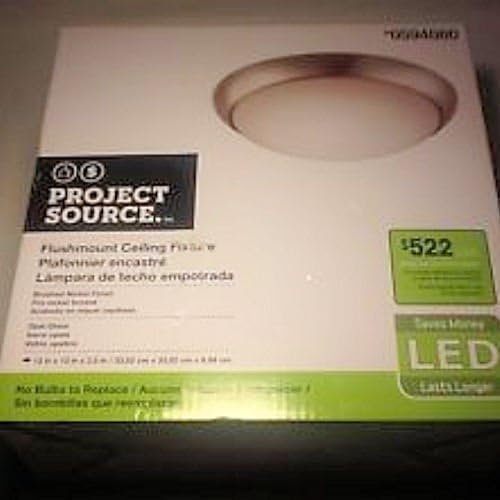
Image: The retail packaging box for the Project Source 11-Inch Flush Mount Light. The box is white with green accents, featuring an image of the light fixture and "PROJECT SOURCE" branding.
Nastavitev in namestitev
Potrebna orodja (niso priložena):
- Phillips izvijač za glavo
- Odstranjevalci žice
- Električni trak (neobvezno)
- Zaščitna očala
Koraki namestitve:
- Izklopite napajanje: Locate the circuit breaker or fuse box that controls the power to the light fixture location. Turn off the power completely before proceeding.
- Odstranite staro napravo (če je primerno): Previdno odstranite vse obstoječe svetilke in si oglejte ožičenje.
- Priprava ožičenja: If necessary, strip approximately 1/2 inch of insulation from the ends of the house supply wires.
- Povežite žice:
- Povežite črna žico od svetilke do črna (hot) wire from the ceiling box using a wire nut.
- Povežite bela žico od svetilke do bela (neutral) wire from the ceiling box using a wire nut.
- Povežite zeleni ali goli baker ground wire from the fixture to the zeleni ali goli baker ground wire from the ceiling box using a wire nut.
Ensure all wire nuts are securely tightened. Wrap electrical tape around wire nuts for added security if desired.
- Pritrdilni element: Carefully tuck all wires into the junction box. Align the fixture's mounting holes with the screws on the junction box or mounting bracket. Secure the fixture to the ceiling using the provided screws.
- Namestitev steklenega difuzorja: Gently place the glass diffuser into the fixture and secure it according to the fixture's design (e.g., twist-lock, spring clips, or decorative nuts).
- Obnovi moč: Turn the power back on at the circuit breaker or fuse box. Test the light fixture to ensure it functions correctly.

Image: A pair of Project Source 11-Inch Flush Mount Light fixtures. Each fixture features a brushed nickel base and a domed, frosted white glass diffuser, designed to provide soft, diffused light.
Navodila za uporabo
The Project Source 11-Inch Flush Mount Light is designed for simple operation. Once properly installed and wired, the light fixture is controlled by a standard wall switch connected to the circuit. Flip the wall switch to the "ON" position to illuminate the fixture, and to the "OFF" position to turn it off.
Note: This fixture uses integrated LED technology and does not require bulb replacement.
Vzdrževanje
To ensure the longevity and appearance of your light fixture, follow these simple maintenance guidelines:
- Čiščenje: Pred čiščenjem se prepričajte, da je napajanje svetilke izklopljeno z odklopnikom. Uporabite mehko, suho ali rahlo mehko krpo.amp cloth to wipe down the exterior surfaces. Do not use abrasive cleaners, solvents, or polishes as they may damage the finish or glass.
- Nega stekla: The frosted glass diffuser can be carefully removed for cleaning if necessary. Wash with mild soap and water, rinse thoroughly, and dry completely before reattaching.
- Brez zamenjave žarnice: This fixture features integrated LED components. There are no bulbs to replace. If the light stops working, refer to the Troubleshooting section.
Odpravljanje težav
If your light fixture is not functioning as expected, consult the following common issues and solutions:
| Težava | Možen vzrok | rešitev |
|---|---|---|
| Luč se ne vklopi. |
|
|
| Svetloba utripa ali zatemni. |
|
|
| Glass diffuser is loose. |
|
|
If the problem persists after trying these solutions, contact a qualified electrician or customer support.
Specifikacije
| Funkcija | Podrobnost |
|---|---|
| Znamka | Vir projekta |
| Model | 11-Inch Flush Mount Light (2-Pack) |
| Dimenzije izdelka | 11 x 11 x 3 palcev |
| Teža predmeta | 4.1 funtov |
| Material | Steklo |
| Največji kompatibilni Wattage | 120 vatov |
| Vrsta žarnice | Integrirana LED |
| Slog | Klasična |
Garancija in podpora
This product is a refurbished item. Please refer to the seller's specific return and warranty policy at the point of purchase for details regarding coverage and support for refurbished products. General support for Project Source products may be available through their official channels.
For technical assistance or further inquiries, please contact the retailer or manufacturer directly.


