Uvod
This manual provides detailed instructions for the safe and proper installation, operation, and maintenance of your Progress Lighting Inspire Collection 9-Light Off-White Linen Shade Traditional Chandelier in Brushed Nickel. Please read all instructions carefully before beginning installation and retain this manual for future reference.
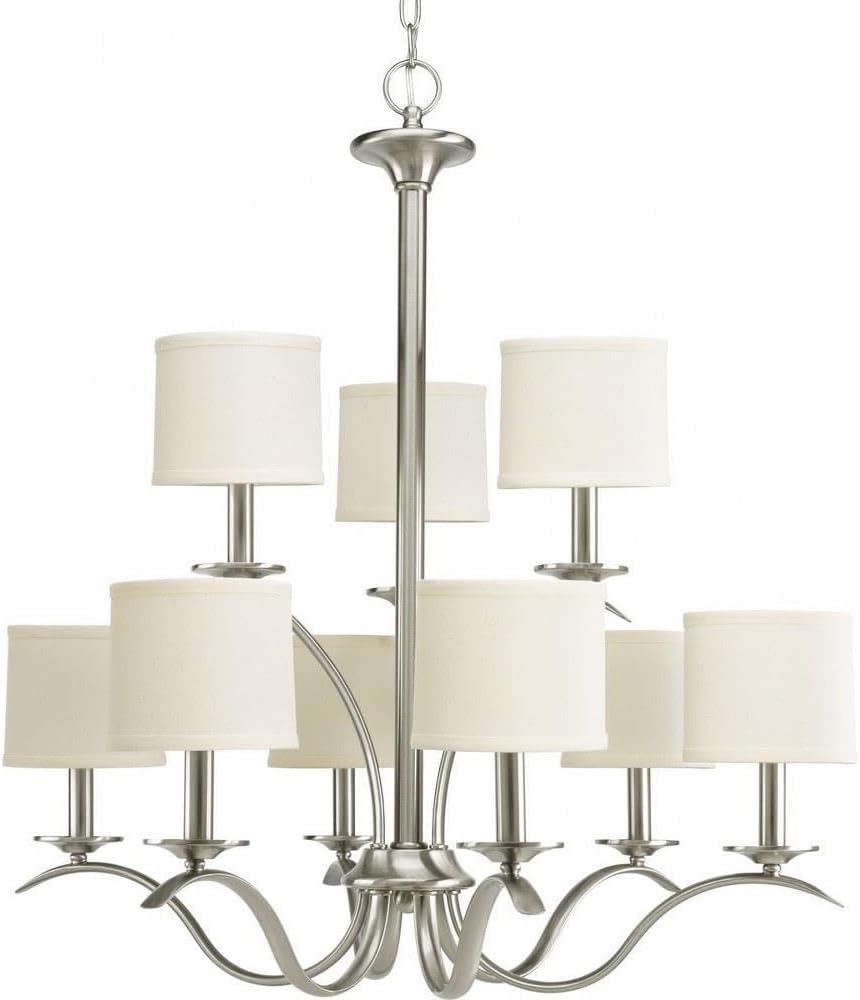
Image: The Inspire Collection 9-Light Chandelier featuring a brushed nickel finish and off-white linen shades.
Varnostne informacije
OPOZORILO: To reduce the risk of fire, electric shock, or personal injury, always turn off the main power supply at the circuit breaker before installation, removal, or servicing. This product requires professional installation. Always consult a qualified electrician if you are unsure about the installation process.
Predlog 65 Opozorilo: Ta izdelek lahko vsebuje kemikalije, za katere zvezna država Kalifornija ve, da povzročajo raka in prirojene okvare ali druge reproduktivne poškodbe. Po rokovanju si umijte roke.
- Ensure all electrical connections are in accordance with local codes and ordinances.
- Uporabljajte le navedeno vrsto žarnice in močtage, da preprečite pregrevanje.
- Do not hang anything from the fixture.
Vsebina paketa
Pred začetkom namestitve preverite, ali so prisotne vse komponente:
- Chandelier fixture assembly
- 9 Off-white linen shades
- Ceiling chain (6 feet of 9 gauge chain supplied)
- Električna napeljava
- Mounting hardware (may require additional screws not included)
- Namestitveni list
Nastavitev in namestitev
Professional installation is recommended for this chandelier. Follow these general steps, referring to the included installation sheet for specific details.
1. Pripravite se na namestitev
- Izklopite napajanje na odklopniku.
- Previdno razpakirajte napravo in njene komponente.
- Determine the desired hanging height. For an 8-foot ceiling, the bottom of the chandelier should be 30-36 inches above a dining table. For higher ceilings, divide the vertical space into thirds and position the chandelier two-thirds of the distance from the floor, ensuring at least 7 feet of clearance from the floor in areas where people walk underneath.
2. Namestite vpenjalo
- Attach the mounting bracket to the junction box in the ceiling.
- Adjust the chain length as needed. The supplied chain is 6 feet long.
- Napeljite električne žice skozi verigo in streho.
3. Električne povezave
- Connect the fixture's ground wire to the ground wire from the junction box.
- Connect the fixture's 'white or identified' wire (often with ridges) to the white (neutral) wire from the junction box.
- Connect the fixture's 'plain or black' wire to the black (hot) wire from the junction box.
- Zavarujte vse povezave z žičnimi maticami in električnim trakom.
4. Končna montaža
- Pritrdite nadstrešek na strop.
- Install 9 candelabra-shaped bulbs (E26 base, maximum 60 watts each). Note: Only candelabra-shaped bulbs can be used with the shades.
- Attach the off-white linen shades to each light socket.
- Obnovite napajanje na odklopniku.
Vizualni vodnik za namestitev
Video: Celovit pregledview of chandelier installation by Progress Lighting, demonstrating key steps and considerations for proper setup.
Dimenzije izdelka

Image: Dimensional drawing of the chandelier, indicating a width of 29.38 inches and a height of 31 inches.
Navodila za uporabo
Once properly installed, your chandelier can be operated using a standard wall switch. If your electrical setup includes a dimmer switch, ensure it is compatible with incandescent bulbs for optimal performance.
The fixture's switch type is listed as 'Pull Chain' in some specifications, however, the primary control is typically via a wall switch for chandeliers of this design. Please refer to your specific home wiring and switch setup.
Vzdrževanje
Čiščenje
- Pred čiščenjem vedno izklopite napajanje.
- Napravo obrišite z mehko, suho krpo.
- Ne uporabljajte abrazivnih čistil ali topil, saj lahko poškodujejo premaz.
- The linen shades can be gently dusted or spot cleaned with a damp krpo, če je potrebno.
Zamenjava žarnice
- Ensure power is off and bulbs have cooled before replacing.
- Unscrew old bulbs and screw in new E26 candelabra-shaped bulbs.
- Ne prekoračite največje wattage 60 vatov na žarnico.
Odpravljanje težav
Če vaš lestenec ne deluje pravilno, glejte naslednje pogoste težave:
- Brez svetlobe: Check the circuit breaker, ensure bulbs are securely screwed in, and verify all electrical connections are tight.
- Utripajoče luči: Ensure bulbs are fully tightened. If using a dimmer, confirm it is compatible with the bulb type and that the bulbs are dimmable.
- Ohlapna pritrditev: Re-check mounting hardware and ensure it is securely fastened to the ceiling junction box.
Če težave vztrajajo, se posvetujte z usposobljenim električarjem.
Specifikacije
| Znamka | Razsvetljava Progress |
| Ime modela | Navdihniti |
| Številka dela | P4638-09 |
| barva | Brušen nikelj |
| Material | Legirano jeklo |
| Material senčila | perilo |
| Slog | Prehodni |
| Oblika svetilke | Lestenec |
| Dimenzije izdelka | 29.38 cm D x 29.38 cm Š x 31 cm V |
| Teža predmeta | 15 funta |
| Število svetlobnih virov | 9 |
| Podnožje žarnice | E26 |
| Wattage | 60 vatov (na žarnico) |
| voltage | 120 volta |
| Notranja/zunanja uporaba | Notranja |
| Posebna funkcija | Na seznamu UL |
Informacije o garanciji
Ta izdelek Progress Lighting je zajet v 1-letna omejena garancija. This warranty guarantees your complete satisfaction with your purchase and includes professional after-sales customer service support. Please retain your proof of purchase for warranty claims.
Podpora uporabnikom
For further assistance, technical support, or warranty inquiries, please visit the official Progress Lighting website or contact their customer service department. Refer to the packaging or the Progress Lighting webspletno mesto za trenutne kontaktne podatke.


