1. Uvod
This manual provides detailed instructions for the installation, setup, operation, and maintenance of the Intermatic EI600LAC 7-Day Astronomic Single-Pole/3-Way Time Switch. This digital timer is designed to control indoor lighting and other loads, offering programmable ON/OFF events based on time and astronomic settings (sunrise/sunset).
Ključne značilnosti:
- 7-Day Astronomic Timing: Automatically adjusts events based on sunrise and sunset.
- Up to 40 ON/OFF operations per week.
- Single-Pole and 3-Way switch applications.
- No Neutral Wire required for installation.
- Memory guard protects against power failure.
- Factory-supplied CR2 lithium battery provides up to three years of time keeping without AC power.
- CFL compatible.
2. Varnostne informacije
WARNING: Risk of Electric Shock. May cause serious injury or death. Turn power OFF at circuit breaker before installing unit.
- Installation should be performed by a qualified electrician or a person with knowledge of electrical wiring.
- Zagotovite, da upoštevate vse lokalne in nacionalne električne predpise.
- Do not exceed the maximum load ratings of the switch.
- Pred začetkom kakršnih koli električnih del vedno izklopite napajanje na odklopniku ali v omarici z varovalkami.
3. Vsebina paketa
Preverite, ali vaš paket vsebuje naslednje elemente:
- Intermatic EI600LAC Time Switch (Light Almond)
- CR2 Lithium Battery (pre-installed)
- Navodila za uporabo
4. Namestitev
The EI600LAC can be installed in both single-pole and 3-way wiring configurations. It does not require a neutral wire.
4.1 Sheme ožičenja
Refer to the included wiring diagrams for specific connections. Ensure all connections are secure and insulated.
4.2 Montaža
- After wiring, carefully push the time switch into the wall box.
- Secure the switch to the wall box using the provided screws.
- Attach the decorative wall plate (not included) over the switch.

Figure 1: Intermatic EI600LAC Time Switch with a standard wall plate.
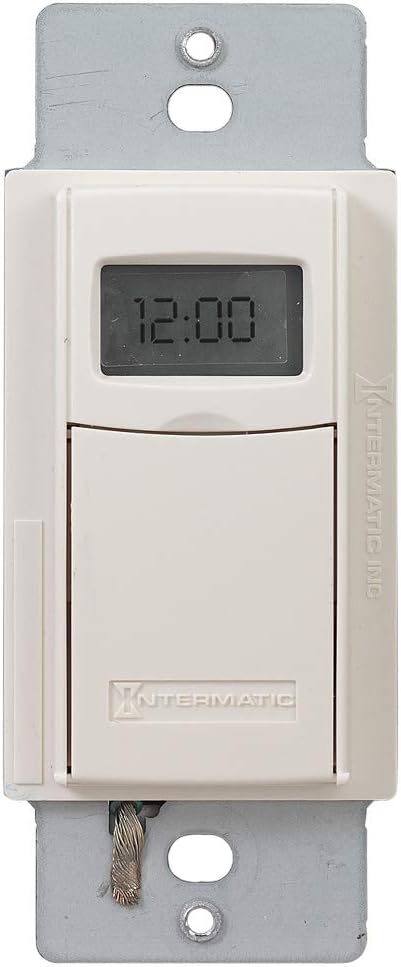
Slika 2: Spredaj view of the time switch, showing the digital display and the lower flap.
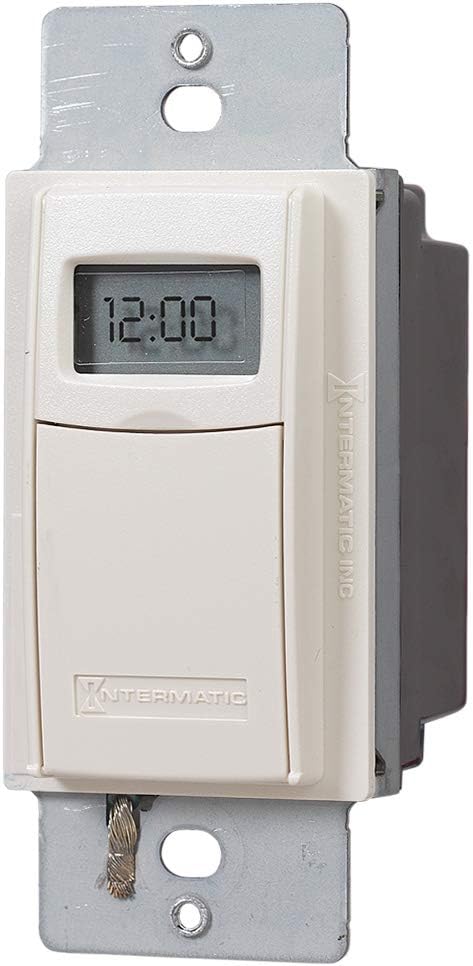
Slika 3: Pod kotom view of the time switch, highlighting its compact design.
5. Nastavitev
After installation and restoring power, the time switch will require initial setup.
5.1 Začetna nastavitev časa in datuma
Follow the on-screen prompts to set the current time and date. The device automatically adjusts for Daylight Savings Time.
5.2 Location Setting (Astronomic Feature)
The astronomic feature requires setting your general location. This allows the timer to calculate local sunrise and sunset times for automatic adjustments.
6. Operating the Time Switch
The time switch features a digital display and hidden programming buttons located behind a lower flap.

Figure 4: The time switch with its lower flap open, showing the 'mode', 'on/off', '+' and '-' buttons for programming.
6.1 Manual ON/OFF Control
Press the visible ON/OFF button on the lower part of the switch to manually turn the connected load on or off. This acts as a temporary override to programmed settings.
6.2 Programiranje dogodkov VKLOP/IZKLOP
To access programming buttons, gently pull down the lower flap of the switch. You will find buttons for 'mode', 'on/off', '+' and '-'.
- Press the 'mode' button to enter programming mode.
- Use the '+' and '-' buttons to navigate through program numbers (up to 40 available).
- Each ON event and each OFF event is a separate program. For example, Program 01 can be an ON time, and Program 02 can be an OFF time. They are independent.
- Select a program number, then use the 'on/off' button to designate it as an ON or OFF event.
- Set the desired time and days for each event using the '+' and '-' buttons.
- Repeat for all desired ON and OFF events.
- To exit programming mode, press the 'mode' button until the normal time display returns.
7. Vzdrževanje
7.1 Zamenjava baterije
The time switch uses a CR2 lithium battery for timekeeping during power outages. The battery is designed to last approximately three years. When the battery is low, a low battery indicator may appear on the display. To replace the battery:
- Turn off power to the switch at the circuit breaker.
- Remove the wall plate and carefully pull the switch out of the wall box.
- Locate the battery compartment, typically on the side or back of the unit.
- Replace the old CR2 battery with a new one, observing polarity.
- Reinstall the switch and wall plate, then restore power.
8. Odpravljanje težav
- Display is blank or not responding: Check power at the circuit breaker. Ensure the CR2 battery is installed correctly and has sufficient charge.
- Load does not turn ON/OFF as programmed:
- Verify that the ON and OFF events are programmed correctly and assigned to separate program numbers.
- Check that the current time and date are set accurately.
- Ensure the astronomic settings (location) are correct if using sunrise/sunset functions.
- Confirm the manual override is not active.
- Difficulty fitting into wall box: The unit may be thicker than standard switches. Ensure sufficient space in the electrical box.
- Switch feels loose or wobbly: Ensure mounting screws are tightened securely.
9. Specifikacije
| Specifikacija | Vrednost |
|---|---|
| Številka modela | EI600LAC |
| Znamka | Intermatic |
| Trenutna ocena | 20 Amps |
| Delovna zvezatage | 120 voltov (izmenični tok) / 277 voltov (izmenični tok) |
| Wattage | 5540 vatov |
| Vrsta vezja | 3-smerni |
| Vrsta stika | Običajno odprto |
| Vrsta priključka | Vijačne sponke |
| Mere predmeta (D x Š x V) | 1.81 x 1.75 x 4.13 palcev |
| Teža predmeta | 7.4 unč |
| Vrsta baterije | 1 litijeva baterija CR2 (priložena) |
| Ocena mednarodne zaščite | IP54 |
| barva | Svetli mandelj |

Slika 5: stran view of the time switch, displaying maximum load ratings and certifications.

Figure 6: Dimensional drawing of the time switch, indicating its length, width, and depth.
10. Garancija in podpora
10.1 Informacije o garanciji
The Intermatic EI600LAC Time Switch comes with a 1-year warranty. This warranty covers replacement of the unit but does not include labor costs for removal or reinstallation.
10.2 Podpora strankam
For technical assistance or warranty claims, please contact Intermatic customer support. Refer to the official Intermatic webZa trenutne kontaktne podatke glejte spletno mesto ali embalažo izdelka.


