
Uvod
This manual provides detailed instructions for the assembly, operation, and maintenance of your THINK 30 Model 617 Large Outdoor Cat Enclosure. Please read all instructions carefully before assembly and use to ensure proper function and safety for your pets.
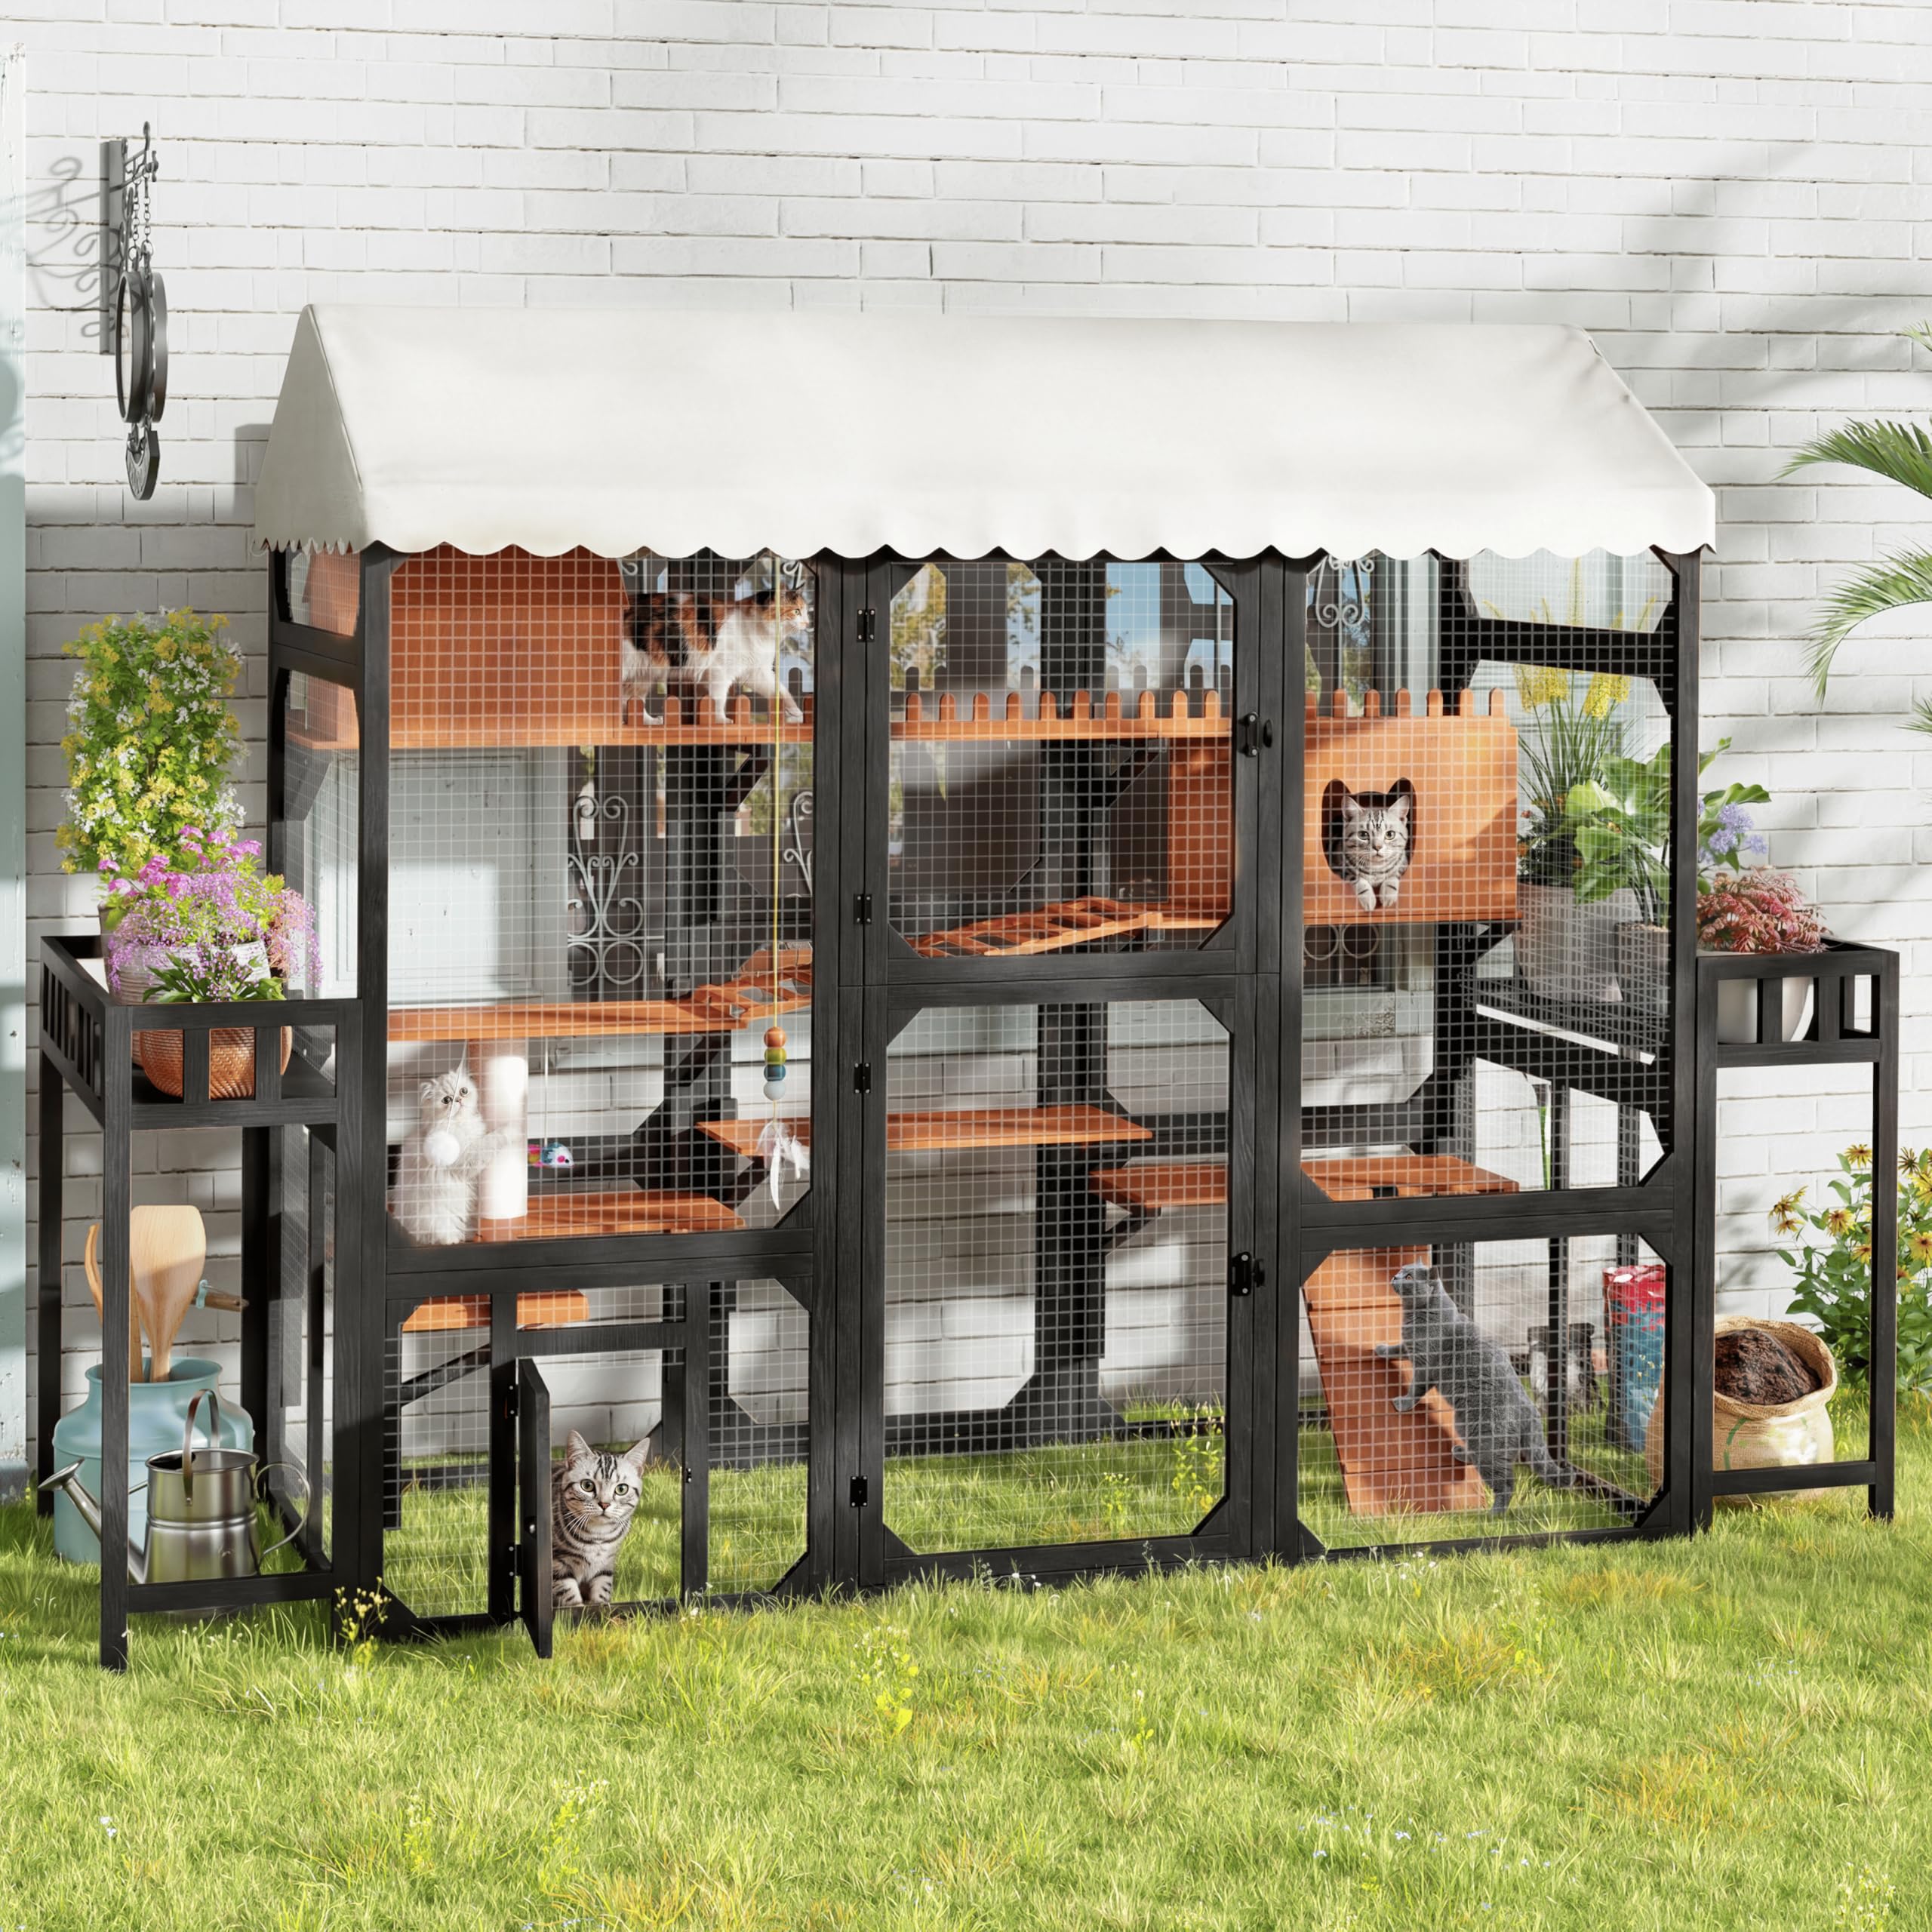
Image: The THINK 30 Model 617 Large Outdoor Cat Enclosure, featuring a multi-level design, weather-resistant roof, and integrated plant stands on either side.
Varnostne informacije
- Always ensure all components are securely fastened before allowing pets into the enclosure.
- Redno pregledujte ohišje glede morebitnih znakov obrabe, poškodb ali ohlapnih delov.
- Majhne otroke držite stran od območja montaže.
- This enclosure is designed for outdoor use. Ensure it is placed on a level, stable surface.
- Do not modify the structure of the enclosure, as this may compromise its integrity and safety.
Seznam delov
Before beginning assembly, verify that all parts are present and undamaged. Refer to the included hardware pack and component diagrams for identification.
- Leseni okvirni paneli (različne velikosti)
- Kovinske žične mreže
- Roof Structure and Weather-Resistant Awning
- Plezanje Rampin platforme
- Resting Box(es)
- Plant Stand Components
- Lockable Access Doors
- Assembly Hardware (screws, bolts, nuts, hinges, latches)
- Tools (Allen wrench, screwdriver - typically included or required)
Postavitev in montaža
Assembly typically takes approximately 2 hours with two people. Ensure you have adequate space and all tools ready.
Step 1: Prepare the Base Structure
Unpack all components and lay them out. Identify the base frame pieces. Connect the bottom wooden frame panels using the provided hardware to form the rectangular base of the enclosure. Ensure the structure is square and stable.

Image: Product dimensions diagram, illustrating the overall size of the cat enclosure (107.87"L x 35.04"W x 73.62"H).
Step 2: Install Side and Back Panels
Attach the vertical wooden frame panels and wire mesh panels to the base. Work systematically around the enclosure, securing each panel firmly. Pay attention to the orientation of panels with door openings.
Step 3: Assemble Internal Platforms and Ramps
Install the multi-level platforms, climbing ramps, and resting boxes according to the diagram. These components provide enrichment and climbing opportunities for your cats. Ensure they are level and securely attached to the frame.
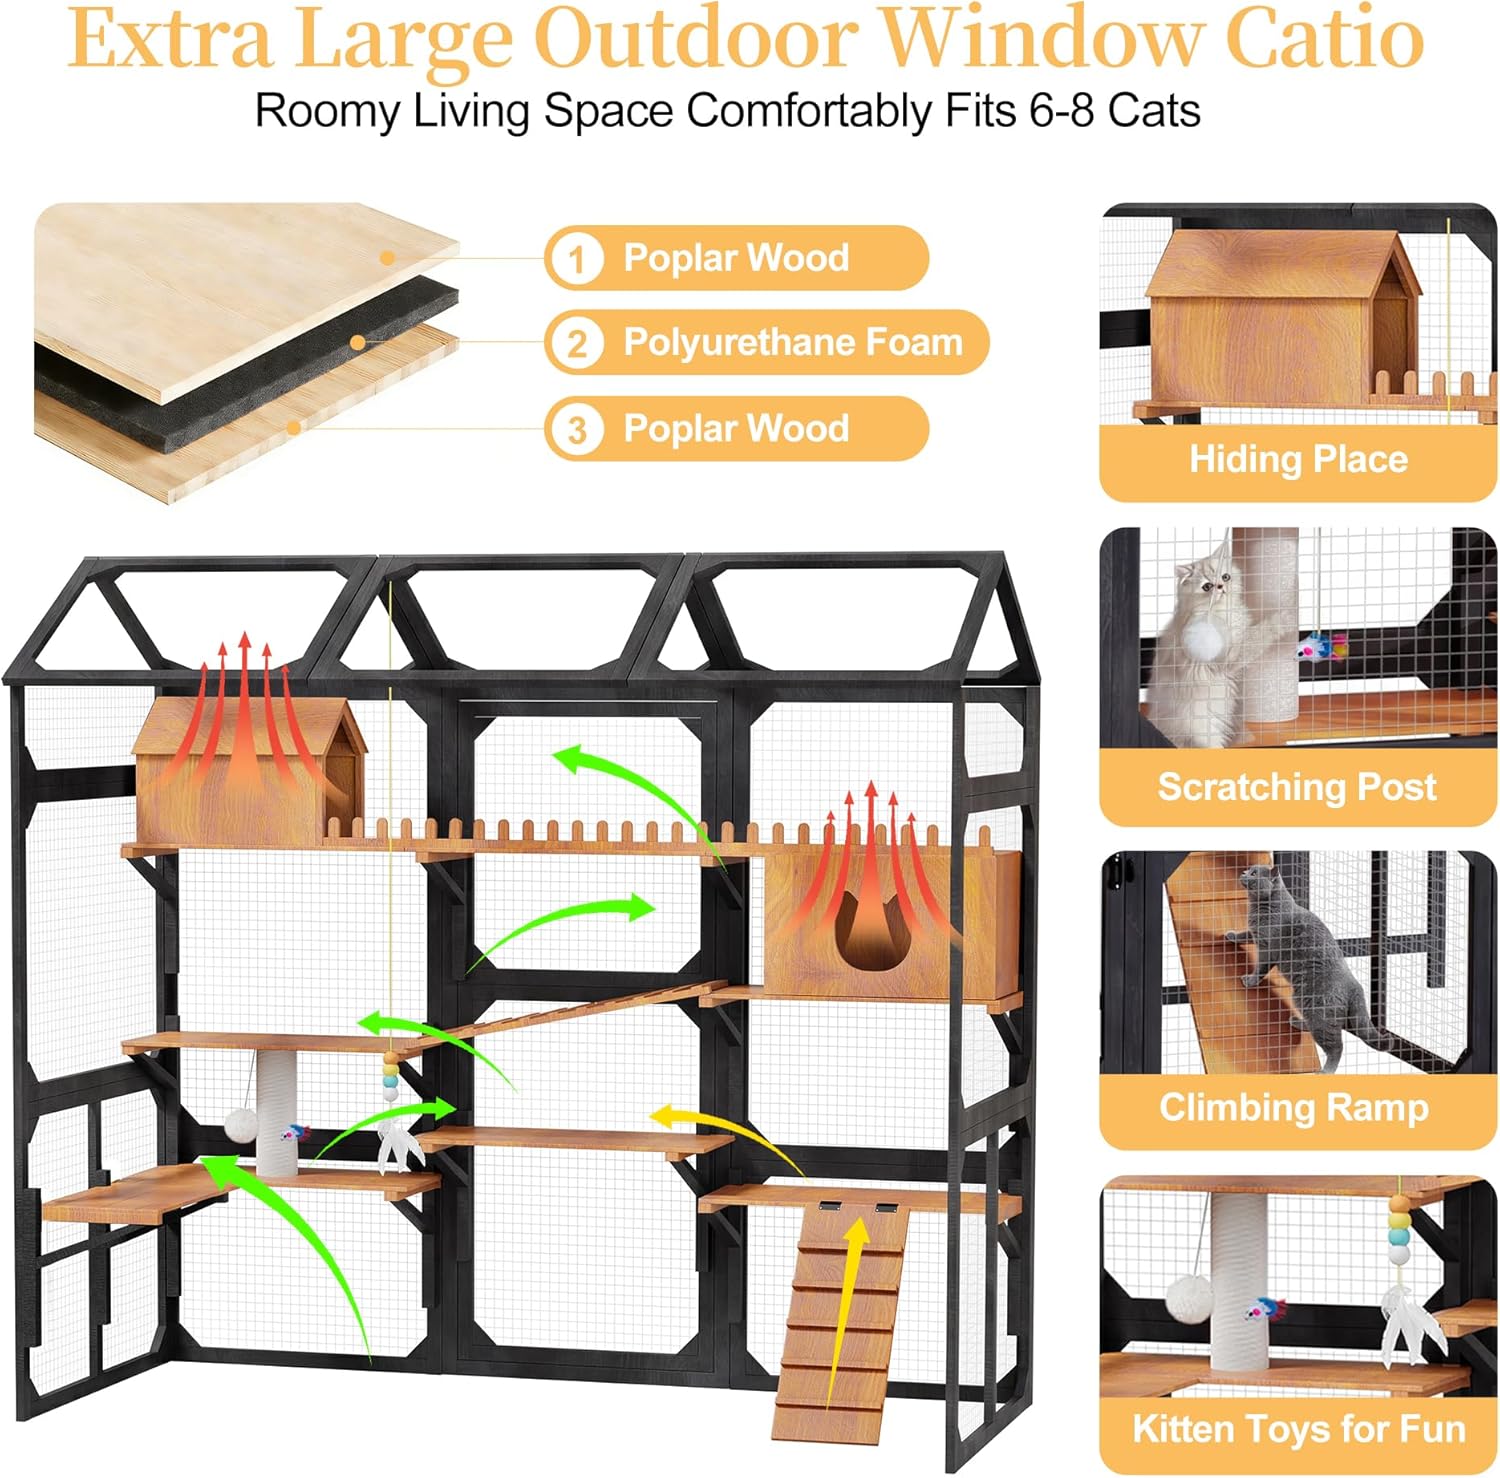
Image: Internal structure of the cat enclosure, highlighting platforms, ramps, and resting areas, designed for cat activity and comfort.
Step 4: Attach Plant Stands
Assemble and attach the multi-tiered plant stands to the sides of the main enclosure. These stands are designed for potted plants or storage.

Image: Details of the integrated plant stands, showing their reinforced wooden frame and open shelf design for versatility.
Step 5: Install the Roof and Awning
Construct the roof frame and attach it to the top of the enclosure. Then, secure the weather-resistant canvas sunshade awning over the roof structure. Ensure the awning is taut and properly secured to provide protection from sun and light rain.

Image: The waterproof cover, demonstrating its weather-resistant properties and construction from selected pine wood.
Step 6: Attach Doors and Final Checks
Install the lockable front access doors. Test all hinges and latches to ensure they operate smoothly and securely. Perform a final check of all screws and connections to confirm tightness and stability.
Navodila za uporabo
Accessing the Enclosure
The enclosure features large, lockable front access doors. Use the latches to open and close the doors. Always ensure the doors are securely latched when pets are inside to prevent escapes.
Connecting to a Cat Tunnel (Optional)
A small door is provided which can be connected to a compatible cat tunnel (sold separately) to expand your cat's play area and provide direct access from your home.
Utilizing Plant Stands
The integrated plant stands can be used to display potted plants, grow catnip, or store gardening tools and pet supplies. Ensure any plants placed on the stands are non-toxic to cats.
Vzdrževanje
Čiščenje
- Regularly clean the wooden surfaces and wire mesh with a damp cloth and mild, pet-safe cleaner. Avoid harsh chemicals.
- The weather-resistant awning can be wiped clean with a damp cloth. For deeper cleaning, it may be removed and hand-washed with mild soap and water. Ensure it is completely dry before reattaching.
- Periodically sweep or vacuum the interior to remove pet hair and debris.
Inšpekcija
- Inspect all wooden components for cracks, splinters, or signs of rot, especially after prolonged exposure to weather.
- Check the wire mesh for any damage, bends, or sharp edges that could injure your pets.
- Ensure all screws, bolts, and latches remain tight. Tighten any loose hardware as needed.
- Examine the awning for tears or significant wear. Replace if necessary to maintain weather protection.
Odpravljanje težav
| Težava | Možen vzrok | rešitev |
|---|---|---|
| Enclosure feels wobbly or unstable. | Ohlapna strojna oprema; neravna tla. | Tighten all screws and bolts. Ensure the enclosure is placed on a flat, level surface. |
| Vrata se ne zapirajo ali ne zapahnejo pravilno. | Nepravilno poravnani tečaji; upognjen zapah. | Check hinge alignment and adjust if possible. Inspect the latch for damage and replace if necessary. |
| Water pooling inside the enclosure. | Awning not properly installed or damaged; heavy rain. | Ensure the awning is taut and correctly secured. Inspect for tears and repair or replace if damaged. Consider additional weather protection in extreme conditions. |
| Cats not using platforms/ramps. | Unfamiliarity; preference for ground level. | Encourage use with treats or toys placed on higher levels. Allow time for cats to explore and adapt. |
Specifikacije
- Model: 617
- Znamka: THINK 30
- Mere izdelka (D x Š x V): 107.87 cm x 35.04 cm x 73.62 cm
- Teža: 128.31 lbs
- Weight Capacity (Platform): 66 lbs
- Material: Pine Wood + Metal Wire
- Čas sestavljanja: Approximately 2 hours (with two people)
- Notranja/zunanja uporaba: Na prostem
- Vključene komponente: Roof, Resting Box, Climbing Ramps
Garancija in podpora
For warranty information or customer support, please refer to the documentation included with your purchase or contact THINK 30 customer service directly. Contact details are typically available on the manufacturer's webspletno mesto ali originalna embalaža.