
1. Uvod
Thank you for choosing the INFIYA K1 2K Window Camera. This manual provides detailed instructions for setting up, operating, and maintaining your camera to ensure optimal performance and home security. Please read this manual thoroughly before use and retain it for future reference.
2. Kaj je v škatli
Preverite, ali so v paketu prisotne vse komponente:
- 1 x INFIYA K1 Camera
- 1 x napajalnik
- 1 x napajalni kabel Type-C
- Magnetic Stickers
- Sponke za kable
- 1 x vodnik za hiter začetek

Image: Contents of the INFIYA K1 camera box.
3. Izdelek je končanview
Familiarize yourself with the main components of your INFIYA K1 camera:

Image: Labeled diagram of the INFIYA K1 camera components.
- Indikatorska lučka: Prikazuje stanje kamere.
- Objektiv: Snema videoposnetke v ločljivosti 2K.
- Magnetic Part: For easy window mounting.
- Gumb za ponastavitev: Uporablja se za ponastavitev na tovarniške nastavitve ali seznanjanje.
- Reža za TF kartice: For local storage (supports up to 128GB, card not included).
- govornik: Za dvosmerno zvočno komunikacijo.
- Type-C Power Cable: Poveže kamero z napajalnikom.
4. Navodila za namestitev
4.1 Physical Installation (Drill-Free)
The INFIYA K1 camera features a magnetic design for easy, drill-free installation on any interior window.
- Clean the Window: Ensure the glass surface is clean and dry to prevent condensation issues.
- Apply Magnetic Sticker: Peel off the protective film from the magnetic sticker and firmly attach it to the desired location on your window.
- Priložite kamero: Align the camera with the magnetic sticker and attach it. The magnetic connection will hold it securely.
- Vklop: Connect the Type-C power cable to the camera and plug the power adapter into an electrical outlet.

Image: Step-by-step physical installation of the camera.
4.2 App Connection and Wi-Fi Configuration
To access your camera's features, you need to connect it to the Wansview Aplikacija v oblaku.
- Prenesite aplikacijo: Prenesite Wansview Cloud App from your smartphone's app store (available for Android and iOS).
- Registriraj račun: Odprite aplikacijo in registrirajte nov račun ali se prijavite, če ga že imate.
- Dodaj napravo: Follow the in-app instructions to add a new device. Select the INFIYA K1 model.
- Povežite se z Wi-Fi: Ensure your camera is powered on and near your Wi-Fi router (within 3 feet for initial setup). The K1 camera supports dual-band Wi-Fi (2.4Ghz & 5Ghz). Follow the app prompts to connect the camera to your home Wi-Fi network.

Image: App connection and Wi-Fi configuration steps.
5. Delovanje
5.1 V živo View and 2K Resolution
Once connected, access the live feed through the Wansview Cloud App. The INFIYA K1 provides sharp 2K resolution video, capturing clear details of your outdoor environment through the window, optimized to reduce glare and reflection.
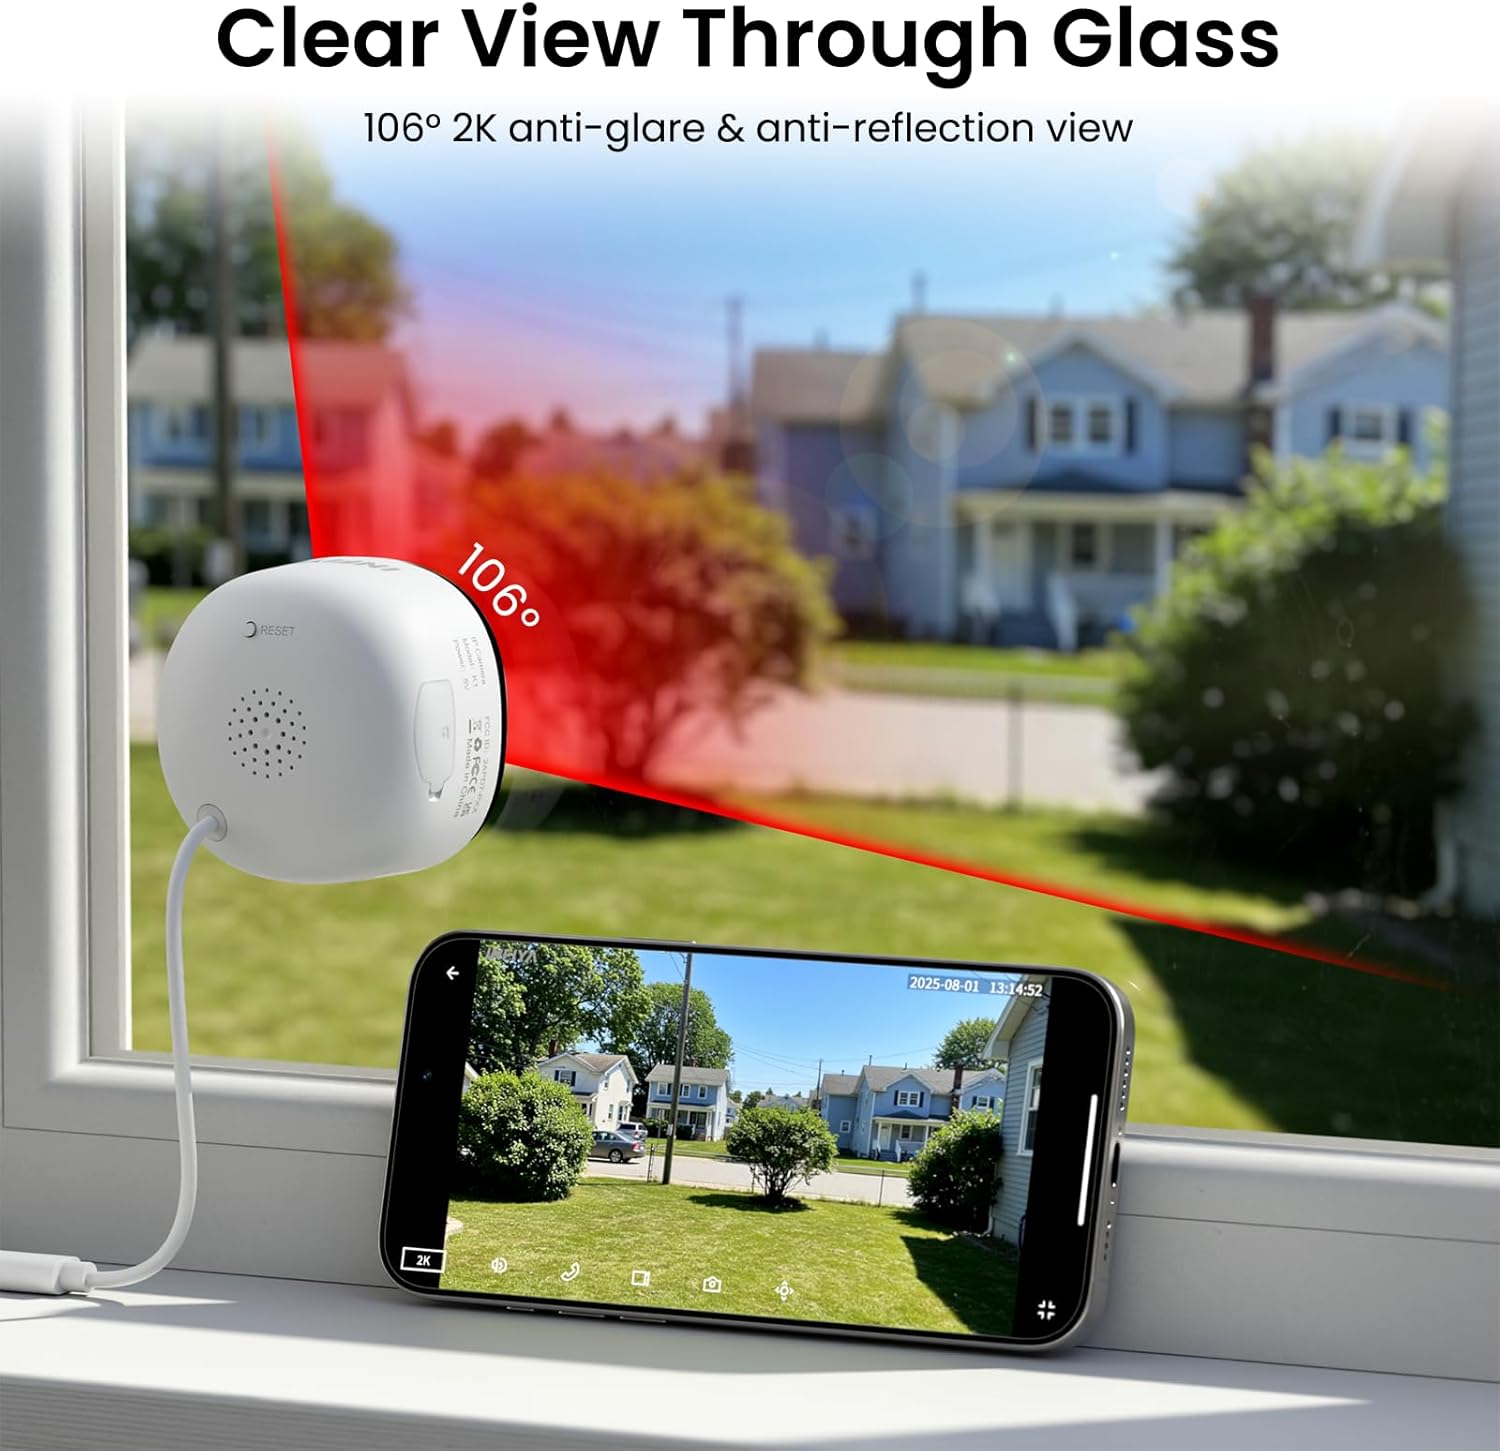
Image: Clear 2K view through glass from the camera.
5.2 Full-Color Night Vision
The camera features advanced Black Light Color Technology, enabling vivid full-color footage even in low-light conditions (e.g., starlight/moonlight). This allows for better identification of details at night compared to traditional infrared black and white night vision.

Image: Comparison of night vision capabilities.
5.3 Motion & Human Detection with Alerts
The INFIYA K1 camera utilizes AI-powered human detection to minimize false alarms. When human activity is detected, the camera activates a three-layer alert system:
- Immediate app notifications to your phone.
- An optional siren (can be configured in the app).
- Automatic video clip recording of the event.
You can customize detection zones and sensitivity levels within the app.
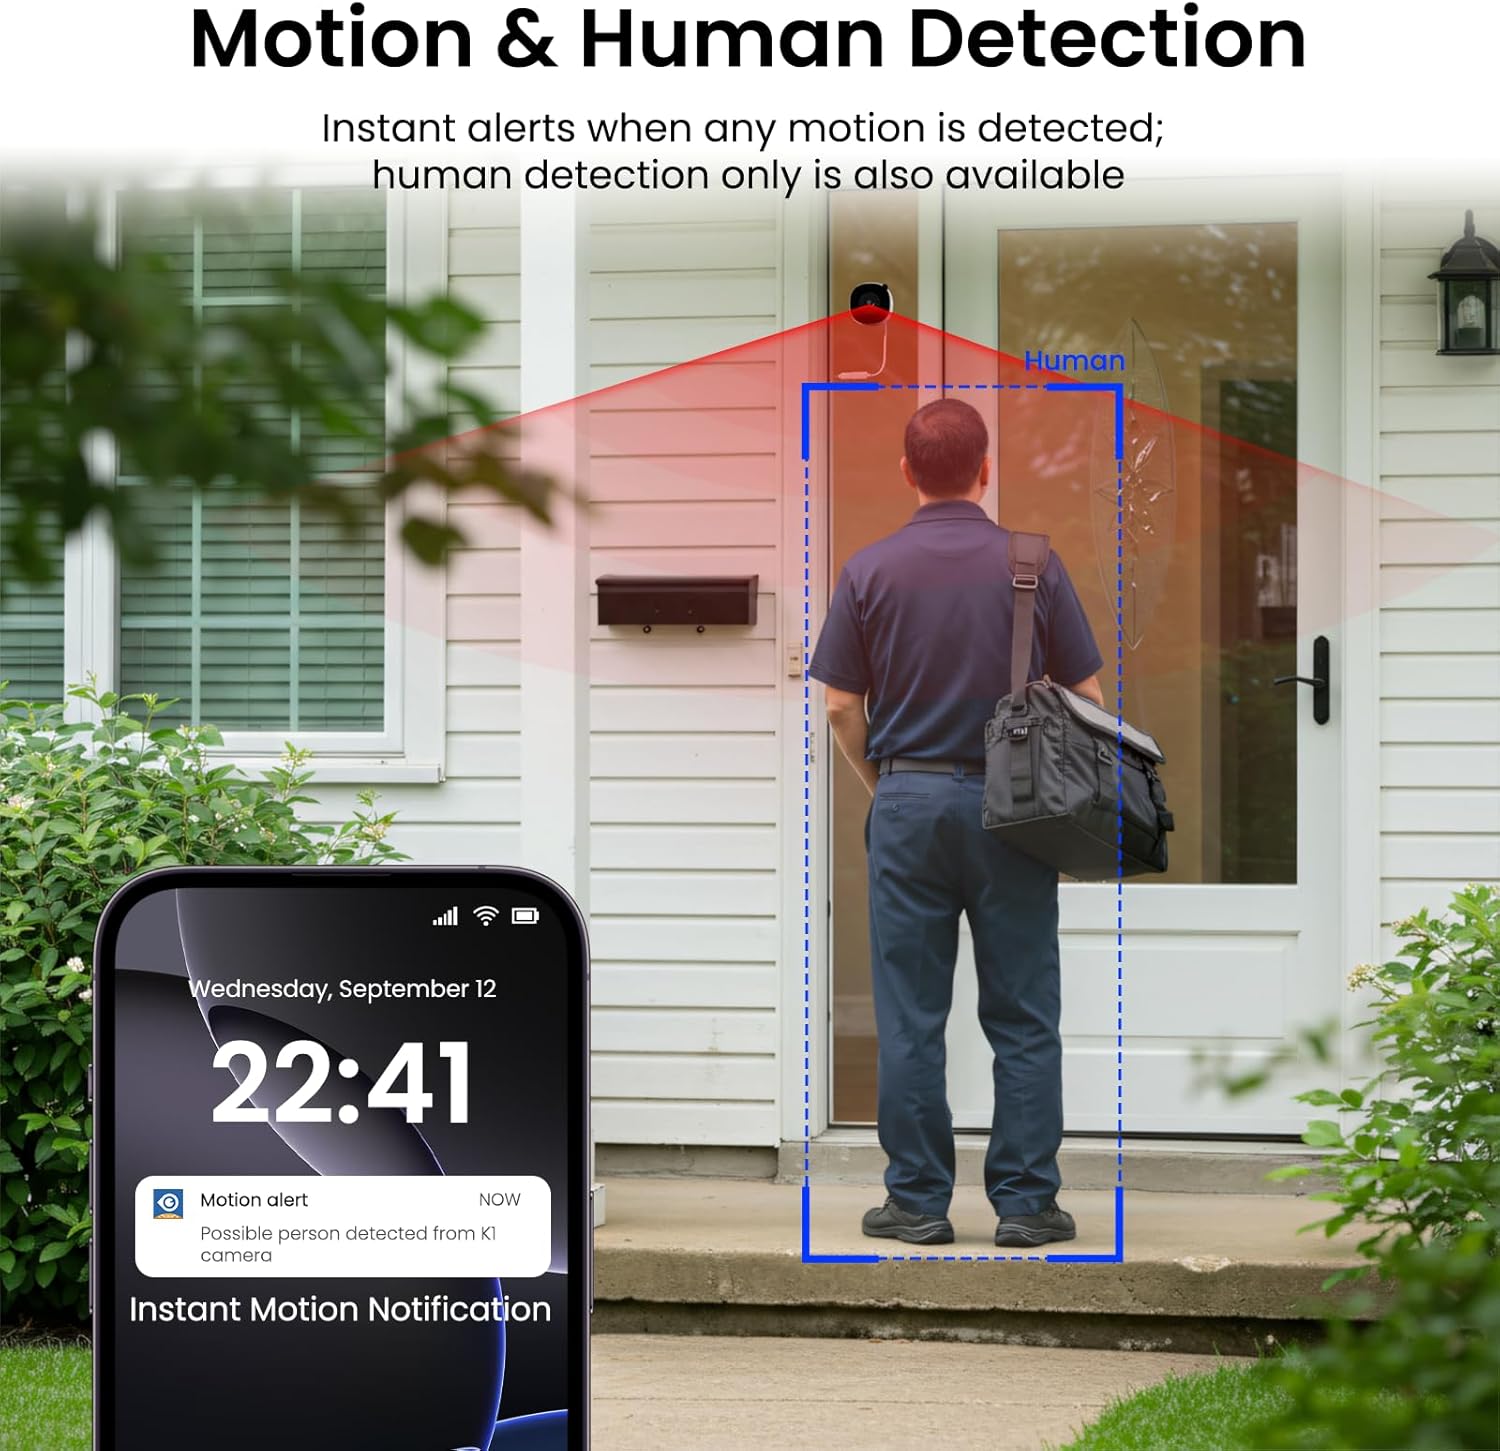
Image: Motion and human detection in action.
5.4 Dvosmerni zvok
The integrated speaker and microphone allow for two-way communication. You can speak through the camera to visitors or deter intruders directly from your smartphone app.
5.5 Multi-User Sharing & Multi-Device Support
Share camera access with family members through the app. The camera also supports integration with multiple devices and smart home platforms like Alexa and Google Assistant for convenient voice control and viewing.

Image: Multi-user sharing feature.

Image: Multi-device support with smart assistants.
6. Možnosti shranjevanja
The INFIYA K1 camera offers flexible recording and storage solutions:
6.1 Local Storage (TF Card)
Insert a TF (microSD) card (up to 128GB, not included) into the camera's slot for continuous 24/7 recording. The camera features a smart overwrite function that automatically manages storage space by cycling old footage.
6.2 Shranjevanje v oblaku (neobvezno)
For enhanced security and accessibility, you can opt for cloud storage. All videos uploaded to the cloud are encrypted. Cloud plans offer various features and storage durations, as detailed in the app.

Image: Local and cloud storage options.
6.3 Recording Modes Comparison

Image: Comparison table of recording modes.
7. Specifikacije
Detailed technical specifications for the INFIYA K1 camera:
| Funkcija | Podrobnost |
|---|---|
| Ime modela | K1 |
| Znamka | INFIYA |
| Tehnologija povezljivosti | Brezžično (Wi-Fi) |
| Frekvenca Wi-Fi | 5 GHz in 2.4 Ghz |
| Ločljivost zajema videa | 3 milijone slikovnih pik (2K) |
| Viewkota | 105 stopinj |
| Nočni vid | Color Night Vision (Black Light Color Technology) |
| Območje nočnega vida | 29.5 čevljev |
| Funkcije zaznavanja | Zaznavanje gibanja in človeka |
| Vrsta opozorila | Motion Only (Configurable) |
| Avdio | Dvosmerni pogovor |
| Možnosti shranjevanja | TF Card (up to 128GB), Cloud Storage (Optional) |
| Vir napajanja | Corded Electric (5V, 5 Watt-hours) |
| Vrsta pritrditve | Window Mount (Magnetic) |
| Združljive naprave | Alexa / Google Assistant |
| Mere predmeta | 2.41 x 1.57 x 2.41 palcev |
| Notranja uporaba na prostem | Indoor (for window monitoring) |
8. Odpravljanje težav
If you encounter issues with your INFIYA K1 camera, refer to the following common problems and solutions:
- Kamera se ne povezuje z Wi-Fi:
- Prepričajte se, da je kamera v dosegu vašega usmerjevalnika.
- Preverite, ali je vaše geslo za Wi-Fi pravilno.
- Check if your router supports 2.4Ghz or 5Ghz, and ensure the camera is attempting to connect to a compatible band.
- Try resetting the camera using the reset button and re-attempting the setup process.
- Slaba kakovost videa:
- Prepričajte se, da je leča kamere čista.
- Check your internet connection speed; a stable connection is crucial for 2K streaming.
- Verify the camera is positioned correctly on the window to minimize glare or reflections.
- Opozorila o gibanju ne delujejo:
- Confirm motion detection is enabled in the app settings.
- Adjust the detection sensitivity and detection zones.
- Prepričajte se, da so obvestila aplikacij omogočena na vašem pametnem telefonu.
- No Recording to TF Card:
- Prepričajte se, da je TF kartica pravilno vstavljena v režo.
- Check if the TF card is formatted correctly (usually FAT32). Format it via the app if necessary.
- Verify that continuous recording or event recording to TF card is enabled in the app settings.
For further assistance, please refer to the in-app help section or contact INFIYA customer support.
9. Varnostne informacije
Please observe the following safety guidelines to ensure safe operation and prevent damage to your device:
- Uporabljajte samo priloženi napajalnik in kabel.
- Fotoaparata ne izpostavljajte ekstremnim temperaturam, vlagi ali neposredni vodi.
- Izogibajte se postavljanju kamere v bližino močnih magnetnih polj.
- Fotoaparat hranite izven dosega otrok in hišnih ljubljenčkov.
- Do not attempt to disassemble or repair the camera yourself. Contact qualified personnel for service.
- Prepričajte se, da je kamera varno nameščena, da preprečite njen padec.
10. Garancija in podpora
Your INFIYA K1 camera comes with a standard manufacturer's warranty. Please refer to the warranty card included in your package or visit the official INFIYA webza podrobne garancijske pogoje.
For technical support, product inquiries, or warranty claims, please contact INFIYA customer service through the contact information provided in the app or on the official webmesto.