
1. Uvod
This manual provides detailed instructions for the installation, operation, and maintenance of your GIGABYTE X870E AORUS ELITE X3D Motherboard. Designed for high-performance computing, this motherboard supports AMD Ryzen 9000 series processors and features advanced power delivery, high-speed memory support, and extensive connectivity options. Please read this manual thoroughly before proceeding with installation to ensure proper setup and optimal performance.
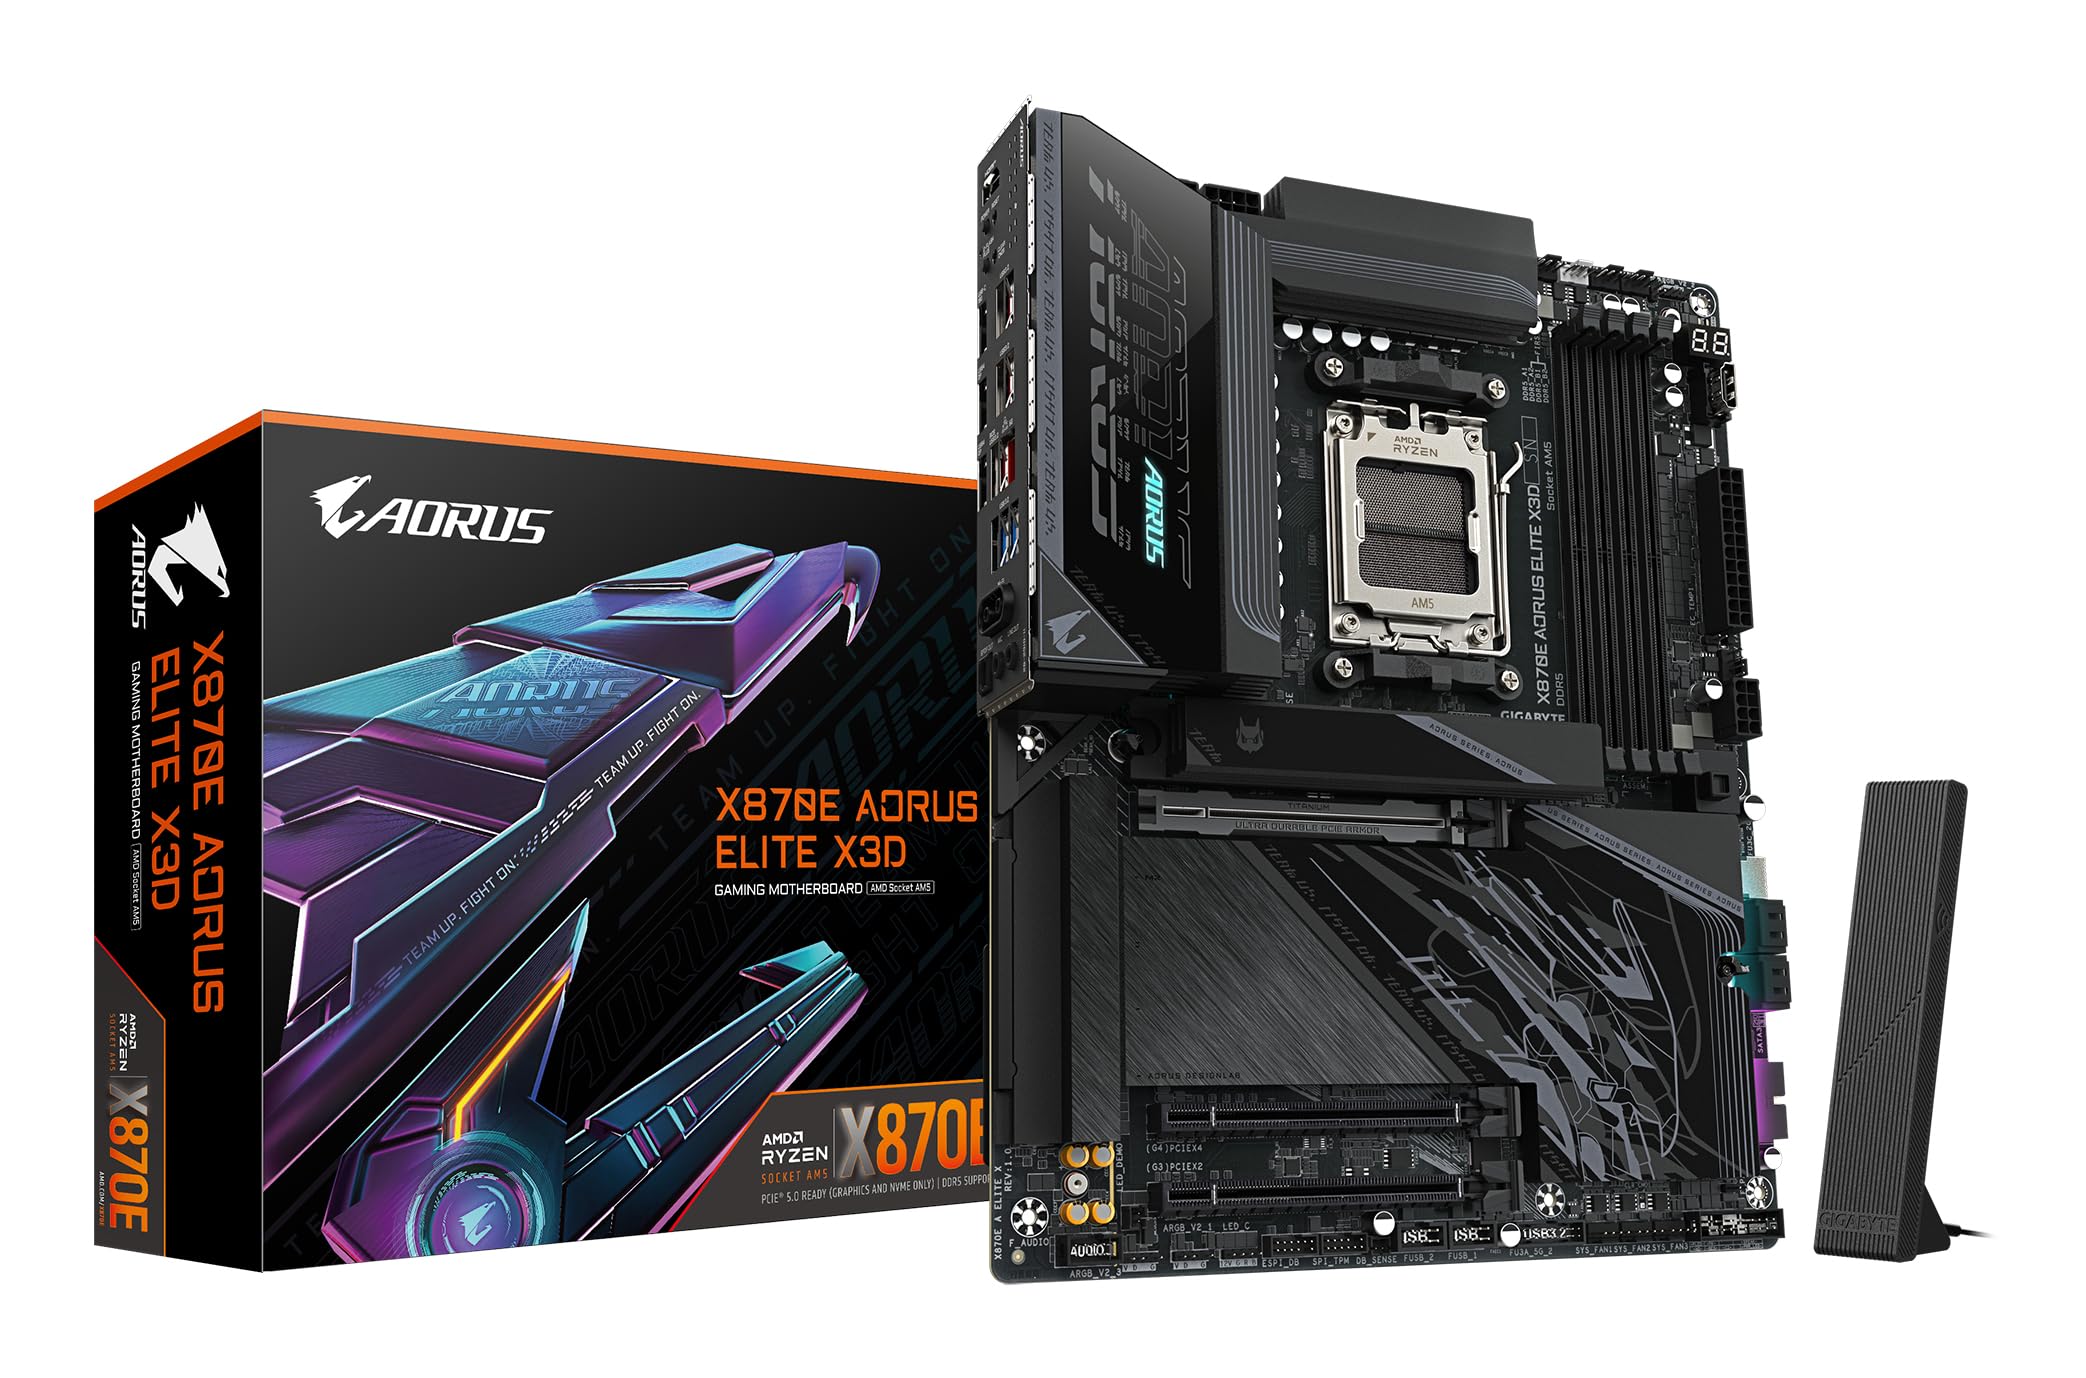
Figure 1: GIGABYTE X870E AORUS ELITE X3D Motherboard - Top View
2. Nastavitev in namestitev
Pred začetkom namestitve se prepričajte, da je vaš sistem izklopljen in odklopljen iz vira napajanja. Matično ploščo prijemajte za robove, da preprečite statično razelektritev.
2.1 Namestitev procesorja (podnožje AM5)
- Na matični plošči poiščite vtičnico za procesor AM5.
- Odprite ročico za zadrževanje procesorja.
- Carefully align the CPU with the socket, ensuring the triangular markers match. Do not force the CPU into the socket.
- Gently lower the CPU into place.
- Zaprite zadrževalno ročico, da pritrdite procesor.

Figure 2: AMD Ryzen 3D Processor for Socket AM5
2.2 Namestitev RAM-a (DDR5)
- Odprite sponke na obeh koncih rež za pomnilnik DDR5.
- Poravnajte pomnilniški modul z režo in se prepričajte, da se zareza na modulu ujema s ključem v reži.
- Trdno pritisnite na oba konca pomnilniškega modula, da se sponke zaskočijo.
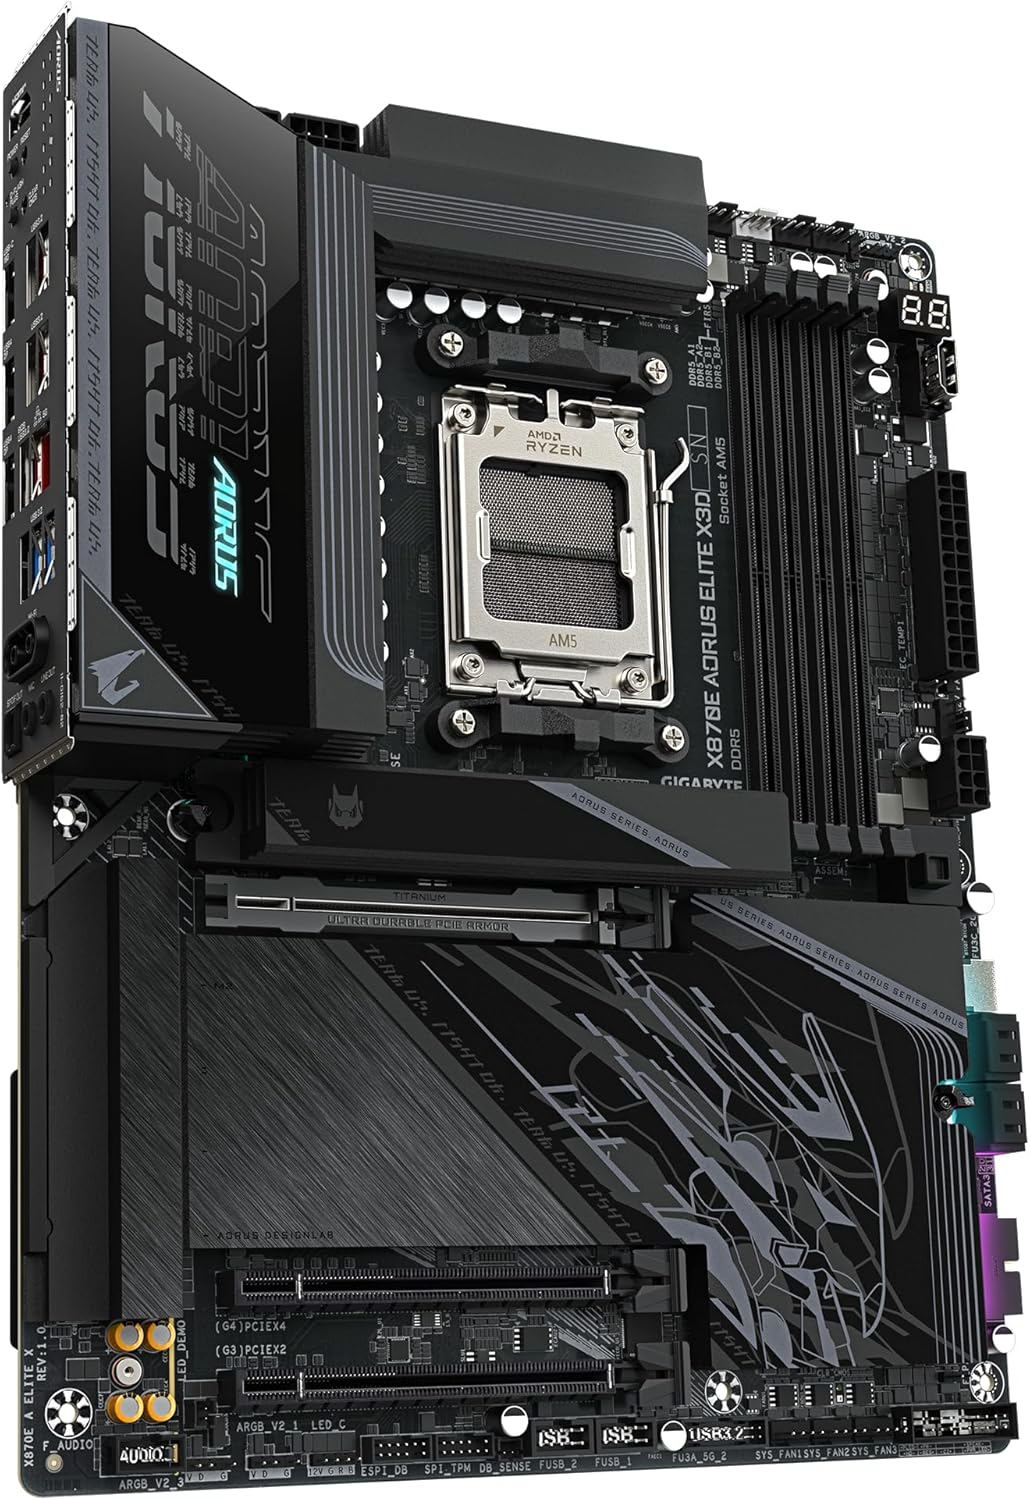
Slika 3: Reže za pomnilnik DDR5
2.3 M.2 SSD Installation (EZ-Latch Click & Plus)
The motherboard features M.2 EZ-Latch Click & Plus for tool-less installation of M.2 SSDs and their heatsinks.
- Locate an M.2 slot and remove the protective film from the thermal pad on the M.2 heatsink.
- Vstavite pogon M.2 SSD v režo pod kotom.
- Gently push down the M.2 SSD and secure it using the EZ-Latch mechanism.
- Place the M.2 heatsink over the SSD and secure it using the EZ-Latch Plus mechanism.

Figure 4: EZ DIY Features for M.2 and PCIe Installation
2.4 Namestitev kartice PCIe
Insert your graphics card or other PCIe expansion cards into the appropriate PCIe 5.0 or PCIe 4.0 slots. Ensure the card is fully seated and secured with the case's retention mechanism.
2.5 Wi-Fi Antenna Installation (EZ-Plug)
Attach the included Wi-Fi antenna to the designated connectors on the rear I/O panel. The EZ-Plug design ensures a quick and easy connection.
2.6 Napajalni priključki
Priključite 24-pinski glavni napajalni priključek ATX in 8-pinski (ali 4+4-pinski) napajalni priključek CPU iz napajalnika na matično ploščo.
2.7 Zadnja V/I ploščaview

Figure 5: Rear I/O Panel Connectivity
The rear I/O panel provides a range of connectivity options including HDMI, Dual USB4 Type-C with DP-Alt, multiple USB 3.2 ports, 5GbE LAN, and Wi-Fi 7 antenna connectors.
3. Navodila za uporabo
3.1 Initial Boot and BIOS/UEFI Access
Upon first power-on, the system will perform a Power-On Self-Test (POST). To access the BIOS/UEFI setup, press the DEL key repeatedly during the POST process. The BIOS allows you to configure system settings, boot order, and advanced features.
3.2 X3D Turbo Mode 2.0
The GIGABYTE X870E AORUS ELITE X3D motherboard features X3D Turbo Mode 2.0, an AI-driven technology designed to optimize performance for AMD Ryzen X3D processors. This mode intelligently adjusts CPU parameters to maximize gaming and application performance. This feature can typically be enabled or configured within the BIOS/UEFI settings under the 'Tweaker' or 'Performance' sections.

Figure 6: AI-Driven Performance Optimization
3.3 Memory Overclocking (AMD EXPO)
This motherboard supports AMD EXPO for easy DDR5 memory overclocking up to 9000MT/s. To enable EXPO profiles, navigate to the BIOS/UEFI settings, usually under the 'Tweaker' or 'Memory' section, and select the desired EXPO profile for your memory modules.
3.4 Namestitev gonilnika
After installing your operating system, install the necessary drivers for the motherboard components. These typically include chipset drivers, LAN drivers, Wi-Fi drivers, and audio drivers. Drivers can be found on the GIGABYTE official website for your specific motherboard model. It is recommended to download the latest drivers for optimal compatibility and performance.
4. Vzdrževanje
Redno vzdrževanje pomaga zagotoviti dolgo življenjsko dobo in stabilno delovanje vaše matične plošče in računalniškega sistema.
- Odstranjevanje prahu: Občasno očistite prah iz notranjosti ohišja računalnika, zlasti s hladilnikov in ventilatorjev, s stisnjenim zrakom. Pred čiščenjem se prepričajte, da je sistem izklopljen in izklopljen iz električnega omrežja.
- Preverjanje povezave: Occasionally check all power and data cable connections to ensure they are secure.
- Posodobitve BIOS-a/UEFI-ja: Keep your BIOS/UEFI firmware updated to benefit from performance improvements, bug fixes, and support for new hardware. Refer to the GIGABYTE webspletno mesto za postopke posodabljanja in files.
- Posodobitve programske opreme: Prepričajte se, da sta vaš operacijski sistem in gonilniki posodobljena.

Figure 7: Motherboard Thermal Design
5. Odpravljanje težav
Če naletite na težave, si oglejte naslednje pogoste korake za odpravljanje težav:
- Ni napajanja/Ni POST-a:
- Verify all power cables (24-pin ATX, CPU power) are securely connected.
- Prepričajte se, da so moduli RAM-a pravilno nameščeni v svojih režah. Poskusite jih ponovno namestiti ali preizkusiti z enim modulom naenkrat.
- Check CPU installation and ensure the CPU cooler is properly installed.
- Clear CMOS by removing the CMOS battery for a few minutes or using the Clear CMOS jumper/button (refer to motherboard diagram).
- Brez zaslona:
- Ensure your monitor is connected to the correct graphics output (either dedicated GPU or motherboard's integrated graphics port).
- Reseat your graphics card.
- Če je mogoče, preizkusite z drugim kablom za prikaz ali monitorjem.
- Težave z omrežno povezljivostjo (LAN/Wi-Fi):
- Ensure LAN cable is properly connected or Wi-Fi antennas are securely attached.
- Verify that the correct LAN and Wi-Fi drivers are installed. If not, download them from the GIGABYTE website using another device and transfer them via USB.
- Preverite omrežne nastavitve v vašem operacijskem sistemu.
- Pogon M.2 SSD ni bil zaznan:
- Ensure the M.2 SSD is fully inserted into its slot and secured.
- Check BIOS/UEFI settings to ensure the M.2 slot is enabled and configured correctly.
- Some M.2 slots may share bandwidth with SATA ports; ensure no conflicts exist (refer to the full motherboard manual for details).
6. Specifikacije
| Funkcija | Podrobnost |
|---|---|
| Znamka | Gigabajt |
| Ime modela | X870E A ELITE X |
| CPU vtičnica | Vtičnica AM5 |
| Združljivi procesorji | AMD Ryzen 9000 / 8000 / 7000 Series |
| Vrsta čipseta | AMD X870E |
| Tehnologija RAM-a | DDR5 |
| Hitrost pomnilnika | Do 9000 MHz (pretaktiranje) |
| Pomnilniške reže | 4 (Dvokanalni) |
| Max RAM Size | 256 GB |
| Zasnova VRM-ja | 16+2+2 Phase Digital |
| PCIe reže | 2 x PCIe 5.0, 2 x PCIe 4.0 (Total 3 physical slots) |
| M.2 reže | 4 (including PCIe 5.0 x4 support) |
| SATA vrata | 4 |
| LAN | 5 GbE LAN |
| Brezžična povezljivost | Wi-Fi 7 |
| Vrata USB | 11 (including Dual USB4 Type-C with DP-Alt, QC-USB 65W front) |
| Vrata HDMI | 1 |
| Glavni napajalni konektor | 24 zatič |
| Dimenzije (DxŠxV) | 30.5D x 24.4Š x 3.5V cm |
| Teža | 2980 gramov |
7. Garancija in podpora
7.1 Garancija izdelka
The GIGABYTE X870E AORUS ELITE X3D Motherboard comes with a 3-letna garancija proizvajalca. Please retain your proof of purchase for warranty claims. The warranty covers defects in materials and workmanship under normal use. It does not cover damage caused by improper installation, accidents, misuse, abuse, natural disasters, or unauthorized modifications.
7.2 Tehnična podpora
For technical assistance, driver downloads, BIOS updates, or further information, please visit the official GIGABYTE webspletno mesto. Tam lahko najdete vire za podporo, pogosta vprašanja in kontaktne podatke za podporo strankam.
Uradno podjetje GIGABYTE Webspletno mesto: www.gigabyte.com


