
Uvod
Thank you for choosing the HOMVILLA Digital Alarm Clock, Model 8813. This alarm clock features a large, colorful LED display, adjustable volume and brightness, dual alarms, and a convenient USB charging port. This manual provides detailed instructions for setup, operation, maintenance, and troubleshooting to ensure optimal performance and a seamless user experience.

konecview of the HOMVILLA Digital Alarm Clock's key features, including adjustable dimmer, volume, snooze, dual alarms, 12/24-hour format, 8 alarm melodies, memory function, USB charging, DST, and a large display.
Nastavitev
1. Razpakiranje in začetna priprava
- Carefully remove the alarm clock from its packaging.
- Peel off any protective film from the LED display.
2. Napajalni priključek
The HOMVILLA Digital Alarm Clock is powered by a corded electric connection. A USB cable and power adapter are included for your convenience.
- Connect the USB cable to the DC Port on the back of the alarm clock.
- Plug the USB cable into the provided power adapter.
- Insert the power adapter into a standard electrical outlet. The display will illuminate.
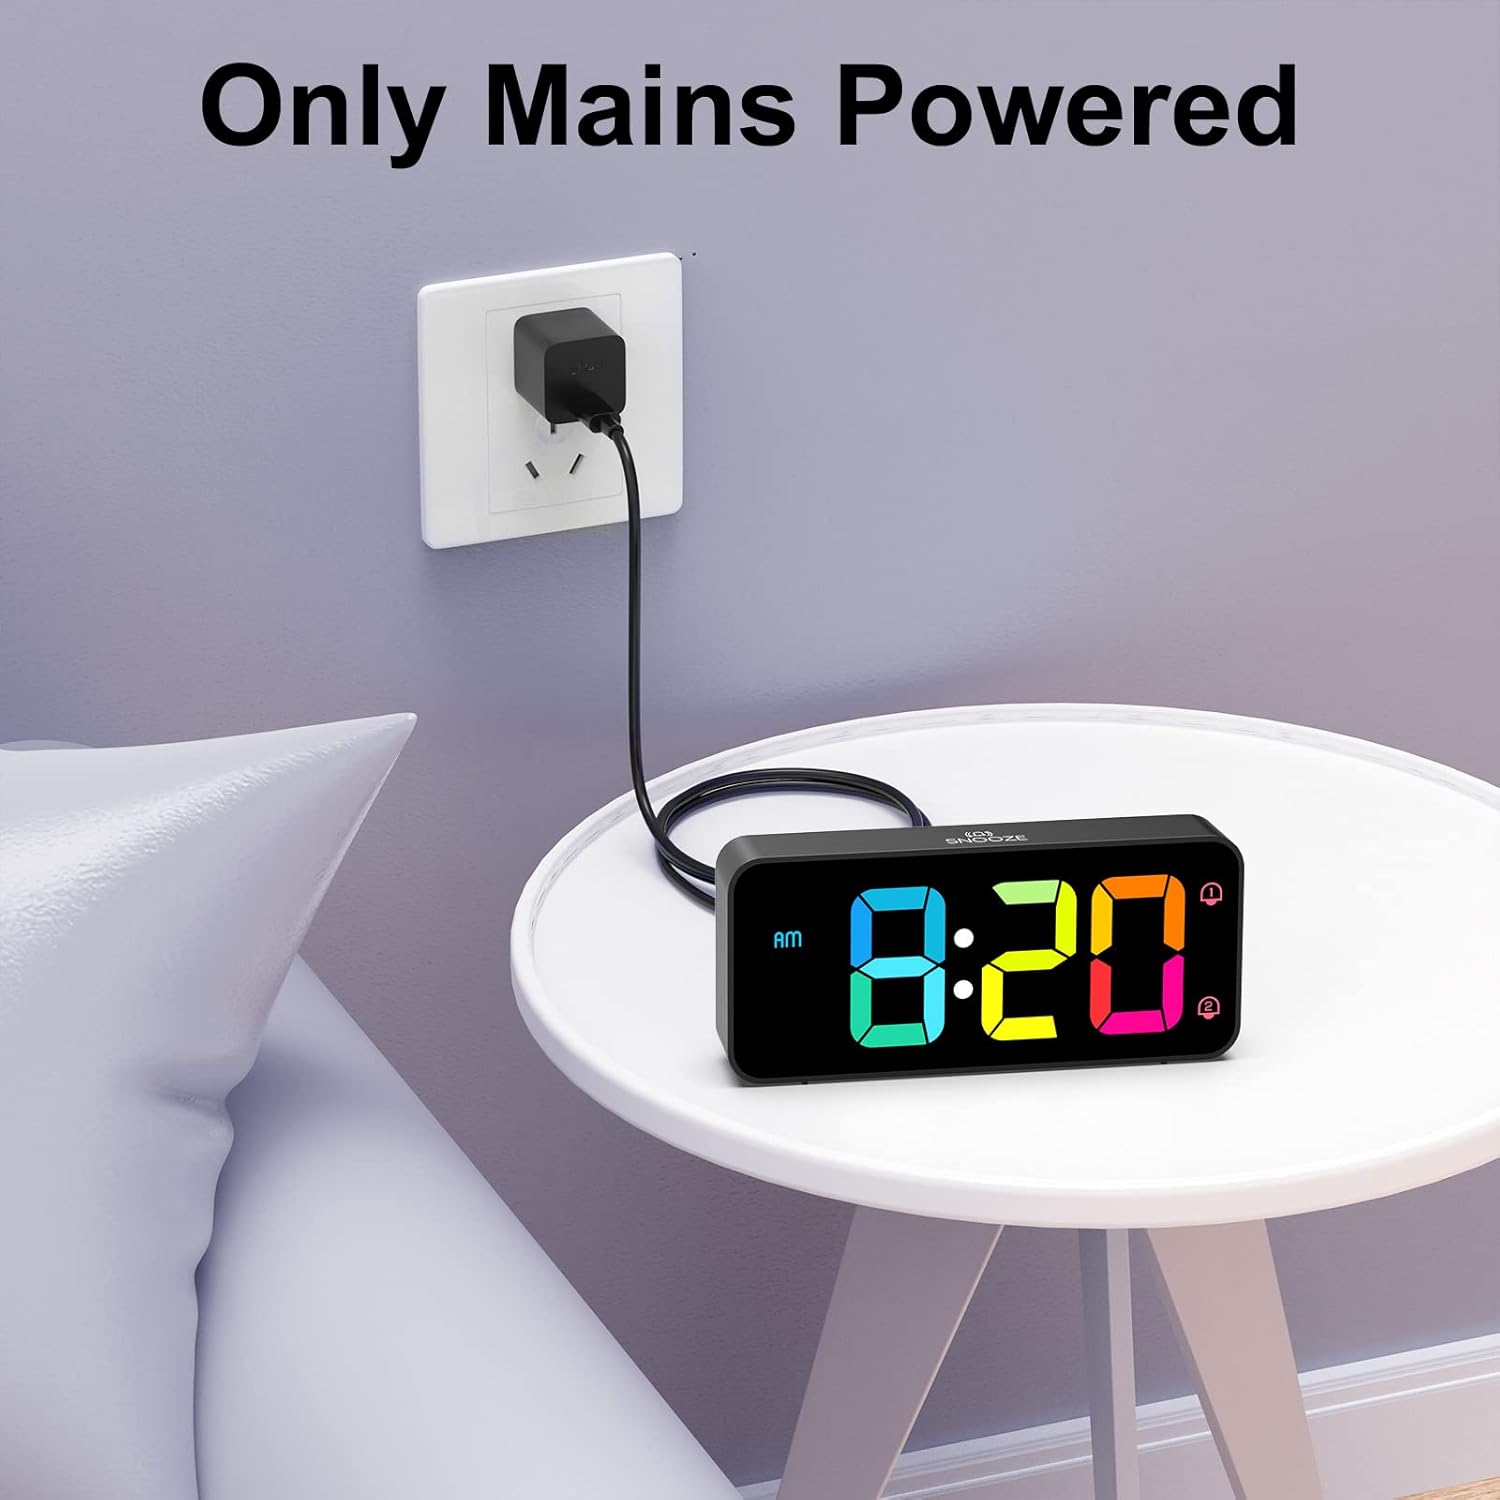
The alarm clock requires continuous mains power for operation. Connect the USB cable to the clock and the adapter to a wall outlet.
3. Battery Backup (Memory Function)
While the clock requires mains power to operate, you can install backup batteries to retain time and alarm settings during a power outage.
- Poiščite predal za baterije na spodnji strani budilke.
- Vstavite 2 bateriji AAA (nista priloženi) in pazite na pravilno polarnost (+/-).
- Zaprite predal za baterije.
Opomba: The backup batteries only support the memory function; the display will not be active without mains power.

Installing 2 AAA batteries enables the memory function, preserving your time and alarm settings during power interruptions.
Delovanje
Familiarize yourself with the control buttons and wheels located on the back and top of the alarm clock.

Podrobno view of the alarm clock's controls, including the volume wheel, dimmer wheel, time setting buttons, alarm setting buttons, and the snooze button.
1. Nastavitev časa
- Pritisnite in držite ČAS NAST button on the back of the clock. The hour digits will begin to flash.
- Uporabite UP in DOL buttons to adjust the hour. Pay attention to the AM/PM indicator if using 12-hour format.
- Pritisnite ČAS NAST again to move to minute adjustment. Use UP in DOL nastavite zapisnik.
- Pritisnite ČAS NAST tretjič za potrditev in izhod iz načina nastavitve časa.
- To switch between 12-hour and 24-hour format, briefly press the UP gumb med običajnim prikazom časa.
2. Setting Dual Alarms
Ura podpira dva neodvisna alarma (Alarm 1 in Alarm 2).
- Pritisnite in držite ALARM NASTAVLJEN button. The Alarm 1 icon and hour digits will flash.
- Uporabite UP in DOL buttons to set the desired hour for Alarm 1.
- Pritisnite ALARM NASTAVLJEN again to set the minutes for Alarm 1. Use UP in DOL.
- Pritisnite ALARM NASTAVLJEN a third time to set Alarm 2. Repeat the hour and minute setting process.
- Pritisnite ALARM NASTAVLJEN a fourth time to confirm and exit alarm setting mode.
- To activate/deactivate an alarm, briefly press the VKLOP/IZKLOP button. The corresponding alarm icon (1 or 2) will appear/disappear on the display.

The clock supports dual alarms for different schedules and features a convenient snooze function.
3. Prilagajanje glasnosti alarma
The alarm volume can be adjusted from 90 dB to 120 dB using the volume scroll wheel.
- Poiščite GLASNOST scroll wheel on the left side of the back panel.
- Gently slide the wheel up or down to increase or decrease the alarm volume to your preferred level.
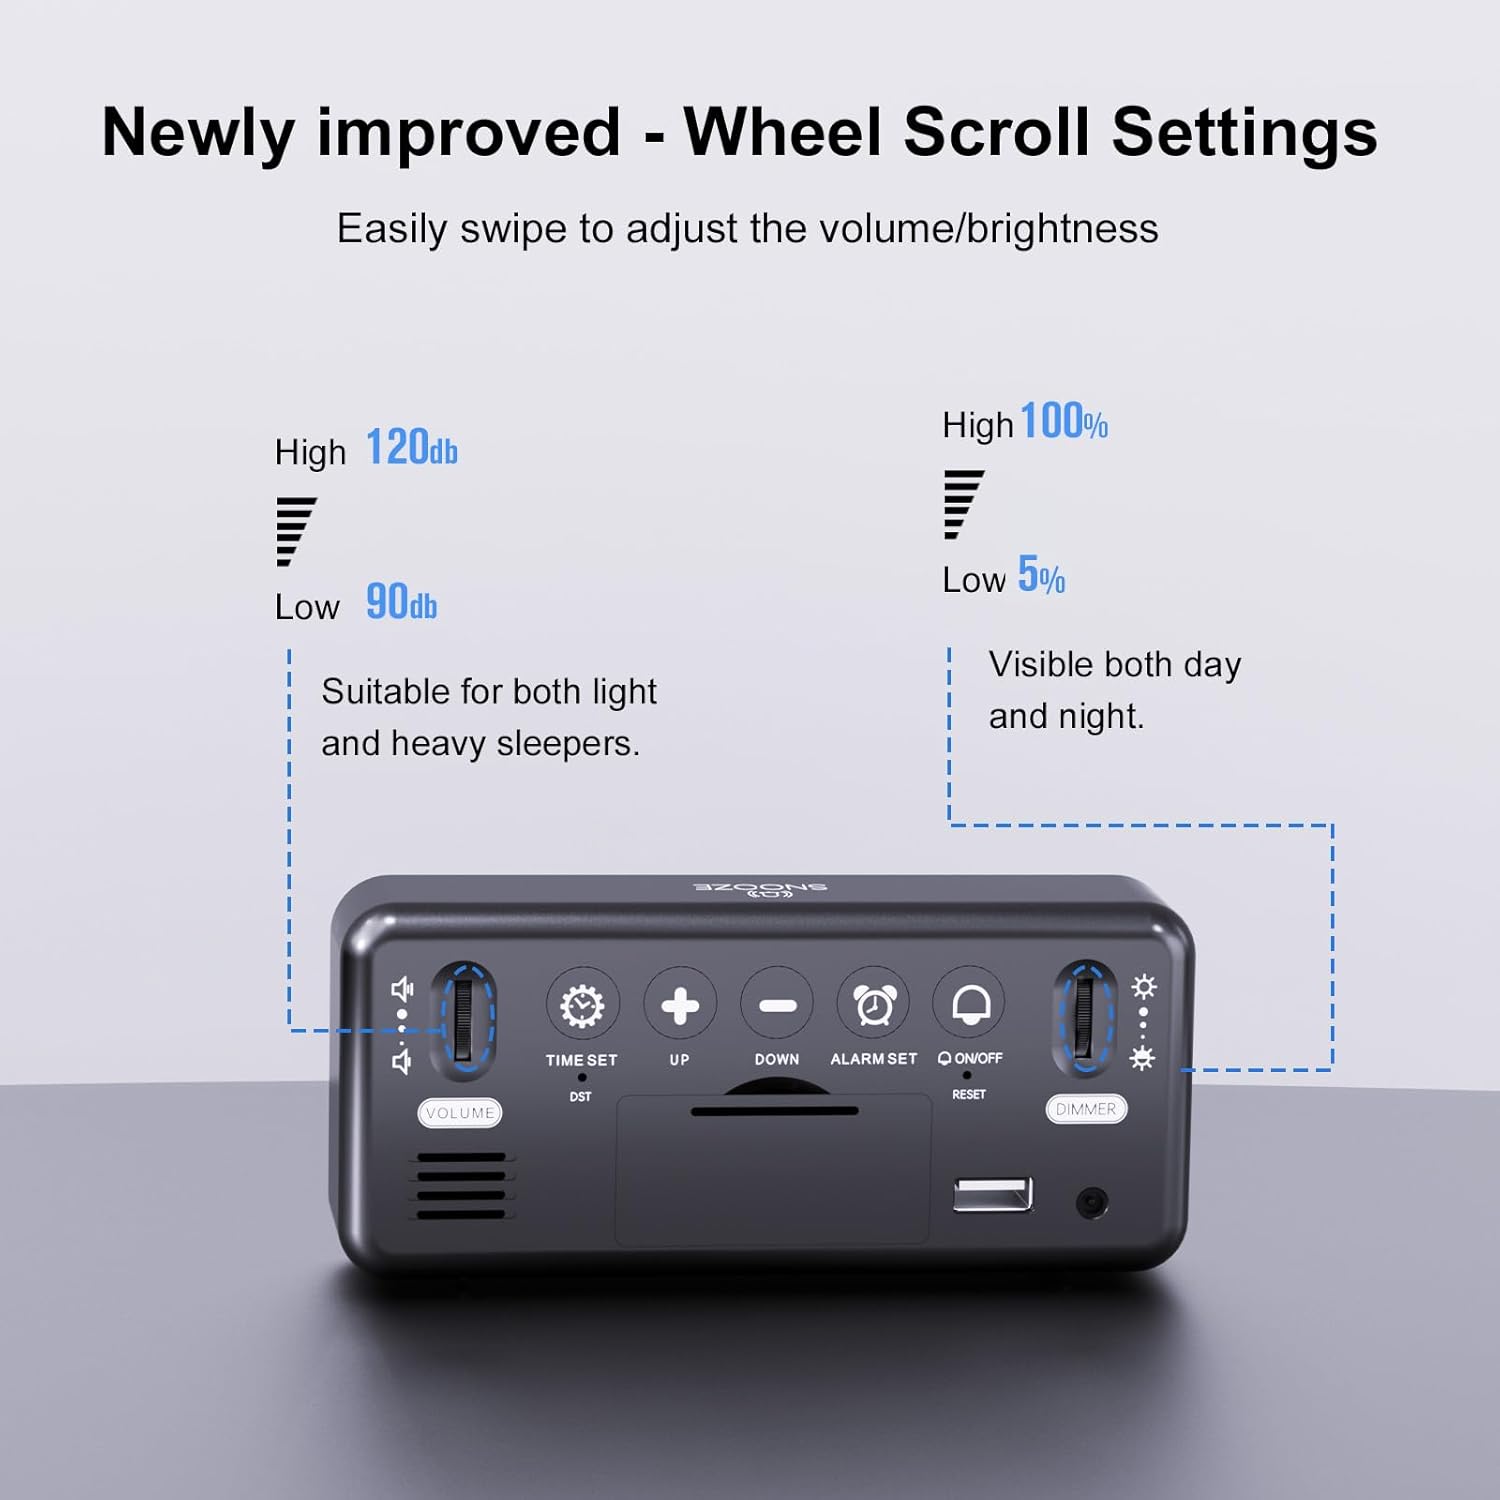
Adjust the alarm volume from 90dB to 120dB using the dedicated scroll wheel on the back.
4. Selecting Alarm Melodies
The alarm clock offers eight different melodies.
- While in alarm setting mode (after setting the time for an alarm), press the UP or DOL button to cycle through the available melodies.
- Pritisnite ALARM NASTAVLJEN da potrdite svojo izbiro.

Choose from 8 distinct alarm sounds, including classic ringtones, nature sounds, and musical options.
5. Funkcija dremeža
Ko se oglasi alarm, pritisnite veliko DREMEŽ button on the top of the clock to temporarily silence the alarm for 5 minutes.
6. Izklop alarma
To turn off a sounding alarm for the day, press any of the five buttons on the back panel (TIME SET, UP, DOWN, ALARM SET, ON/OFF). The alarm will reset for the next day.
7. Prilagajanje svetlosti zaslona
The display brightness is continuously adjustable from 5% to 100%.
- Poiščite DIMMER scroll wheel on the right side of the back panel.
- Gently slide the wheel up or down to increase or decrease the display brightness to your desired level.
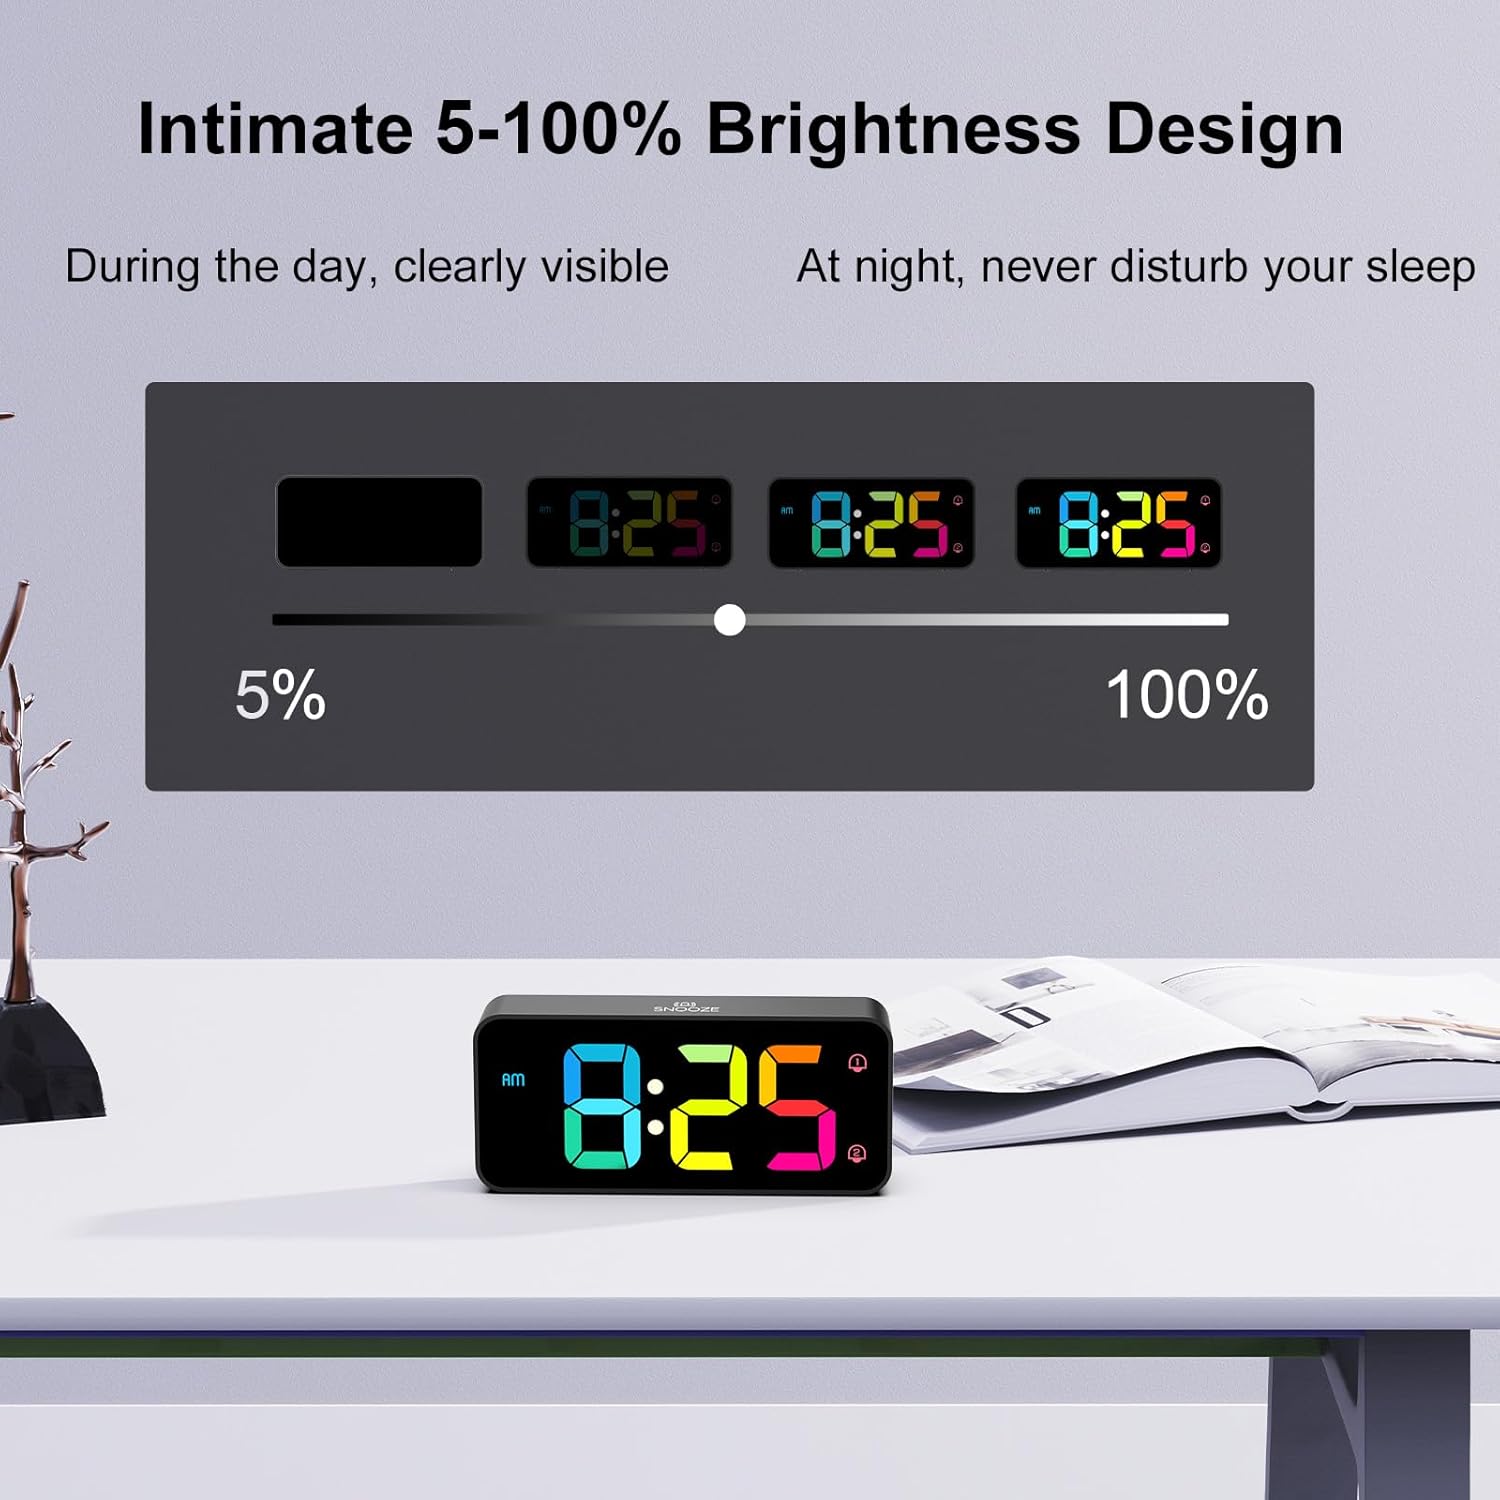
The display brightness can be adjusted from 5% to 100% for comfortable viewv vseh svetlobnih pogojih.
8. Poletni čas (DST)
To activate or deactivate Daylight Saving Time, briefly press the poletni čas button on the back panel. The time will adjust by one hour, and the DST indicator will appear/disappear.
9. Vrata za polnjenje USB
A USB port is located on the back panel for convenient charging of mobile phones or other small electronic devices.
- Priključite polnilni kabel USB vaše naprave v Vrata USB on the back of the alarm clock.
- Ensure the alarm clock is connected to mains power for the charging function to work.
Vzdrževanje
To ensure the longevity and proper functioning of your HOMVILLA Digital Alarm Clock, follow these simple maintenance guidelines:
- Čiščenje: Gently wipe the display and exterior surfaces with a soft, dry, or slightly damp cloth. Avoid using abrasive cleaners, solvents, or chemical sprays, as these can damage the finish.
- Umestitev: Budilko postavite na stabilno, ravno površino, stran od neposredne sončne svetlobe, prekomerne vročine, vlage ali močnih magnetnih polj.
- moč: Always ensure the clock is connected to a stable power source. If storing for an extended period, disconnect from power and remove backup batteries.
Odpravljanje težav
Če imate kakršne koli težave z budilko, si oglejte naslednje pogoste težave in rešitve:
| Težava | Možen vzrok | rešitev |
|---|---|---|
| Display is off or flickering. | No mains power; loose connection; power adapter issue. | Ensure USB cable and adapter are securely connected and plugged into a working outlet. Check if the outlet has power. |
| Alarm se ne oglasi. | Alarm not activated; volume too low; incorrect alarm time set. | Verify the alarm icon (1 or 2) is displayed. Adjust the volume wheel. Recheck alarm time settings. |
| Ponastavitev časa/nastavitev po izpadu napajanjatage. | No backup batteries installed or batteries are depleted. | Install 2 new AAA batteries for the memory function. |
| Vrata za polnjenje USB ne delujejo. | Clock not connected to mains power. | Ensure the alarm clock is powered by the included USB cable and adapter from a wall outlet. |
| Gumbi se ne odzivajo. | Začasna programska napaka. | Unplug the power adapter, remove backup batteries (if installed), wait 30 seconds, then reconnect power. This performs a soft reset. |
Specifikacije
| Funkcija | Podrobnost |
|---|---|
| Številka modela | 8813 |
| Mere izdelka (D x Š x V) | 14.4 x 3.81 x 6.3 cm (5.7 x 1.5 x 2.5 palca) |
| Teža predmeta | 200 gramov |
| Znamka | HOMVILLA |
| barva | Black - Colorful Display |
| Vrsta zaslona | Digitalna LED |
| Posebne lastnosti | LED Display, Dual Alarms, Adjustable Brightness (5-100%), Adjustable Volume (90-120dB), Snooze, DST, USB Charging Port |
| Vir napajanja | Corded Electric (USB cable and adapter included) |
| Rezervna baterija | 2 x AAA (not included, for memory function only) |
| Material | Plastika |
| Vrsta namestitve | Namizna |
| Tehnologija povezljivosti | USB |
Informacije o garanciji
HOMVILLA offers a doživljenjska garancija for this product. For details regarding warranty claims or service, please refer to the contact information provided in the support section.
Podpora
For further assistance, technical support, or warranty inquiries, please contact HOMVILLA customer service through the retailer's platform or the official HOMVILLA website. Please have your product model number (8813) and purchase details ready when contacting support.