
Uvod
Welcome to the ULTRICS Digital Multimeter D2 user manual. This device is designed for precise and reliable electrical measurements, suitable for professionals and DIY enthusiasts. It accurately measures AC/DC voltage, DC current, resistance, continuity, and diodes. This manual provides essential information for safe and effective operation, helping you to maximize the utility of your new multimeter.
Varnostne informacije
OPOZORILO: Always exercise extreme caution when working with electrical circuits. Improper use of this multimeter can result in electric shock, personal injury, or damage to the device.
- Ne prekoračite največjih vhodnih vrednosti za nobeno območje.
- Do not use the multimeter if it or the test leads appear damaged. Inspect them before each use.
- Ensure the function switch is in the correct position before making measurements. Changing ranges while connected to a live circuit can cause damage.
- Disconnect power to the circuit before measuring resistance, continuity, or diodes.
- Bodite previdni pri delu z voltagnad 30 V AC RMS, 42 V vrhom ali 60 V DC. Te vol.tagpredstavljajo znatno nevarnost električnega udara.
- Always connect the common (COM) test lead first, then the live lead. Disconnect the live lead first, then the common lead.
- Replace the battery when the low battery indicator appears to ensure accurate readings and proper device function.
This multimeter is rated CAT II 600V, indicating its suitability for measurements on circuits directly connected to the low-voltage namestitev.
Vsebina paketa
Preverite, ali so v paketu prisotni vsi elementi:
- 1 x ULTRICS Digital Multimeter D2
- 2 x merilna kabla (rdeča in črna)
- 1 x 9V baterija
- 1 x Uporabniški priročnik (ta dokument)
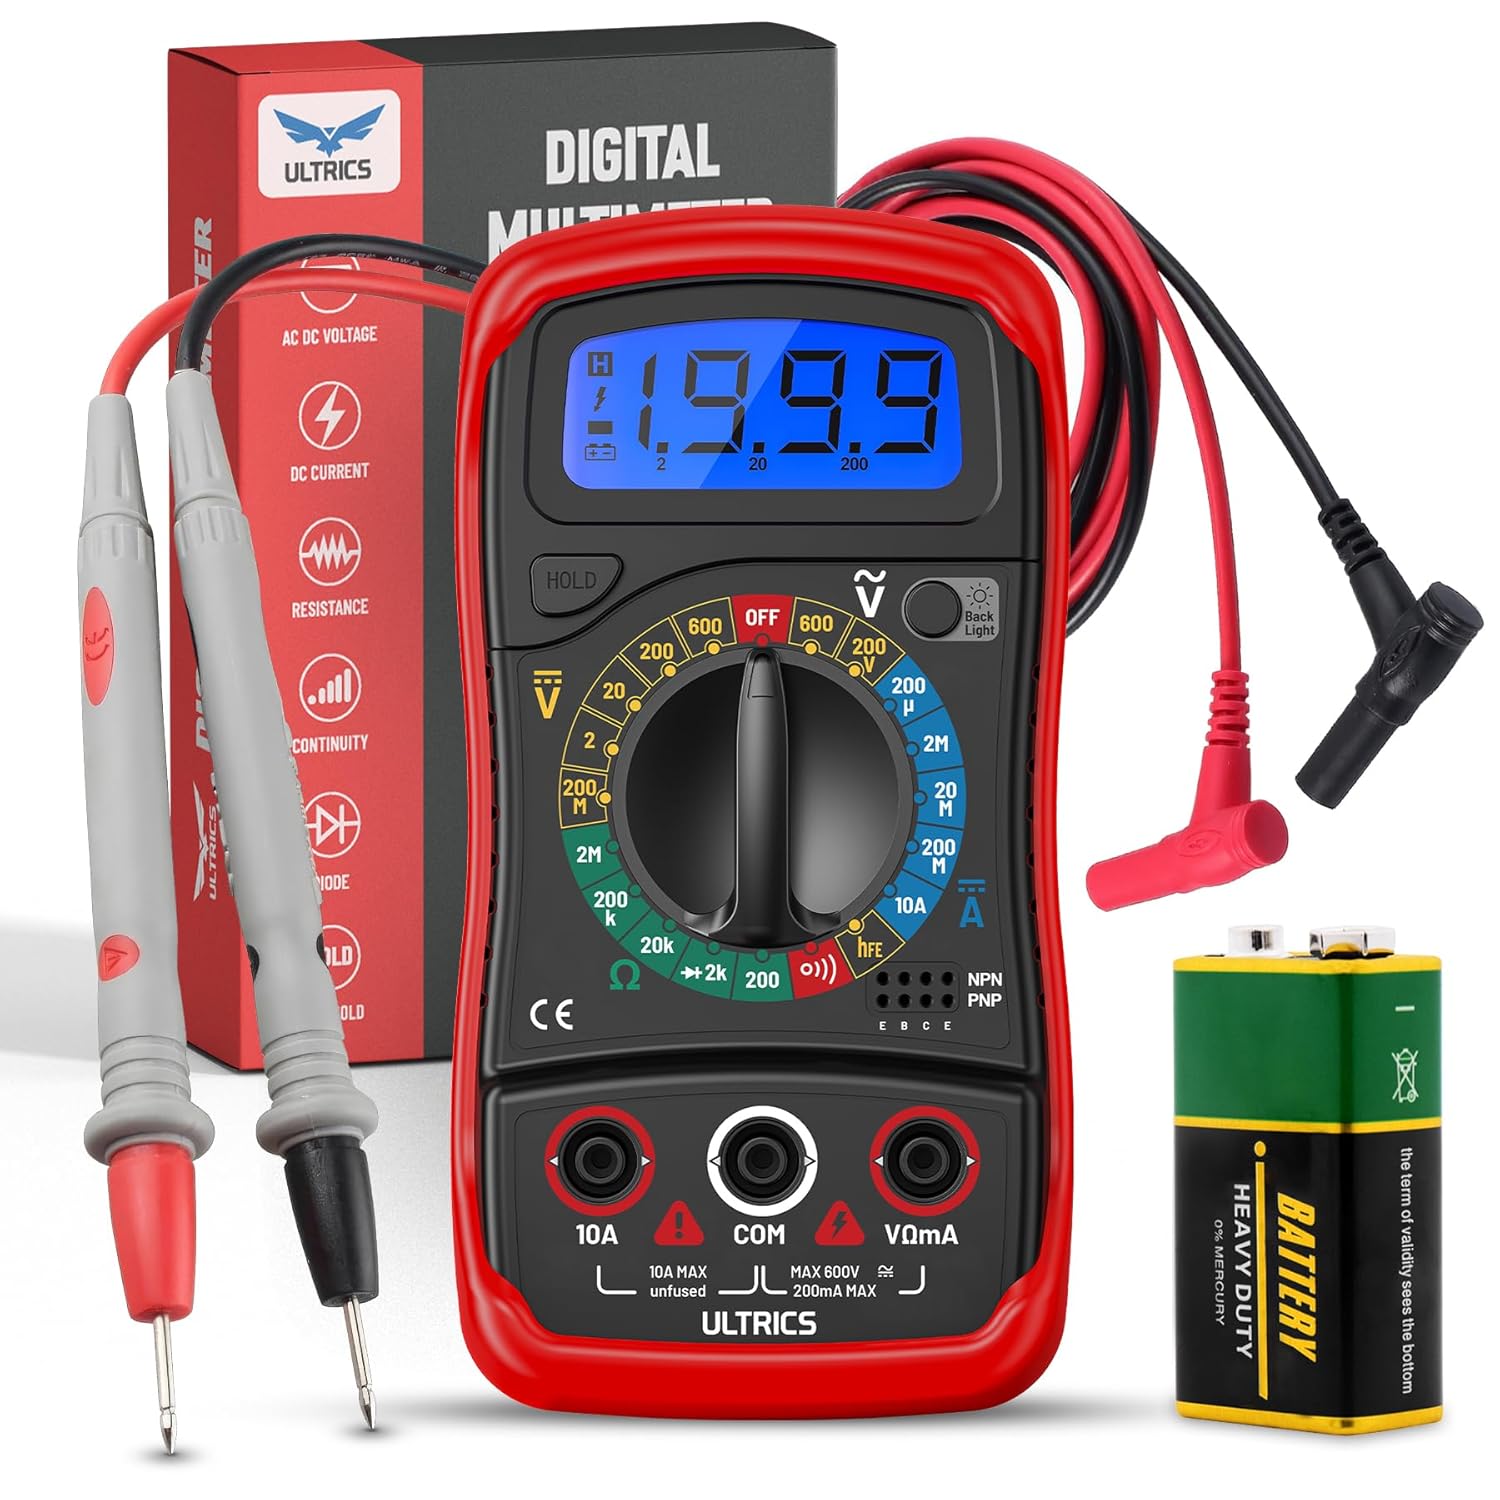
Image: Contents of the ULTRICS Digital Multimeter D2 package, including the multimeter, red and black test leads, and a 9V battery.
Konec izdelkaview
Familiarize yourself with the components of your ULTRICS Digital Multimeter D2.

Image: Detailed diagram of the ULTRICS Digital Multimeter D2, highlighting its key components such as the LCD display, data hold button, backlight button, function switch, test lead jacks, and protective rubber shell.
- LCD zaslon: Shows measurement readings, units, and polarity. Features a bright backlight for low-light conditions.
- Gumb za zadrževanje podatkov: Freezes the current reading on the display for easier recording.
- Gumb za osvetlitev ozadja: Vklopi ali izklopi osvetlitev ozadja zaslona.
- Function Switch (Rotary Dial): Izbere želeno merilno funkcijo in območje.
- 10A Input Jack: Used for measuring DC current up to 10 Amperes.
- COM (Common) Input Jack: The negative (-) input for all measurements. Always connect the black test lead here.
- VΩmA Input Jack: The positive (+) input for voltage, upor in miliampere current measurements. Connect the red test lead here.
- Transistor Test Jacks (hFE): Used for testing NPN and PNP transistors.
- Protective Rubber Shell: Provides durability and protection against minor impacts and splashes.
- Zložljivo stojalo: Allows for hands-free operation and easy viewvhodni kot.
Nastavitev
Namestitev baterije
The ULTRICS Digital Multimeter D2 requires one 9V battery (included).
- Poiščite predal za baterije na zadnji strani multimetra.
- Z izvijačem odstranite vijak, s katerim je pritrjen pokrov baterije.
- Nežno odstranite pokrov baterije.
- Priključite 9V baterijo na sponke za baterijo in pazite na pravilno polarnost (+ na + in - na -).
- Baterijo vstavite v predal.
- Ponovno namestite pokrov baterije in ga pritrdite z vijakom.
Priključitev testnih potencialnih strank
Pred meritvami vedno preverite, ali so merilne povezave varno priključene.
- Insert the black test lead's banana plug into the COM (Skupni) vhodni priključek.
- Za večino meritev (volumtage, resistance, continuity, diode, small current), insert the red test lead's banana plug into the VΩmA vhodni priključek.
- For high current measurements (up to 10A DC), insert the red test lead's banana plug into the 10A vhodni priključek.
Navodila za uporabo
This section details how to perform various measurements using your multimeter.
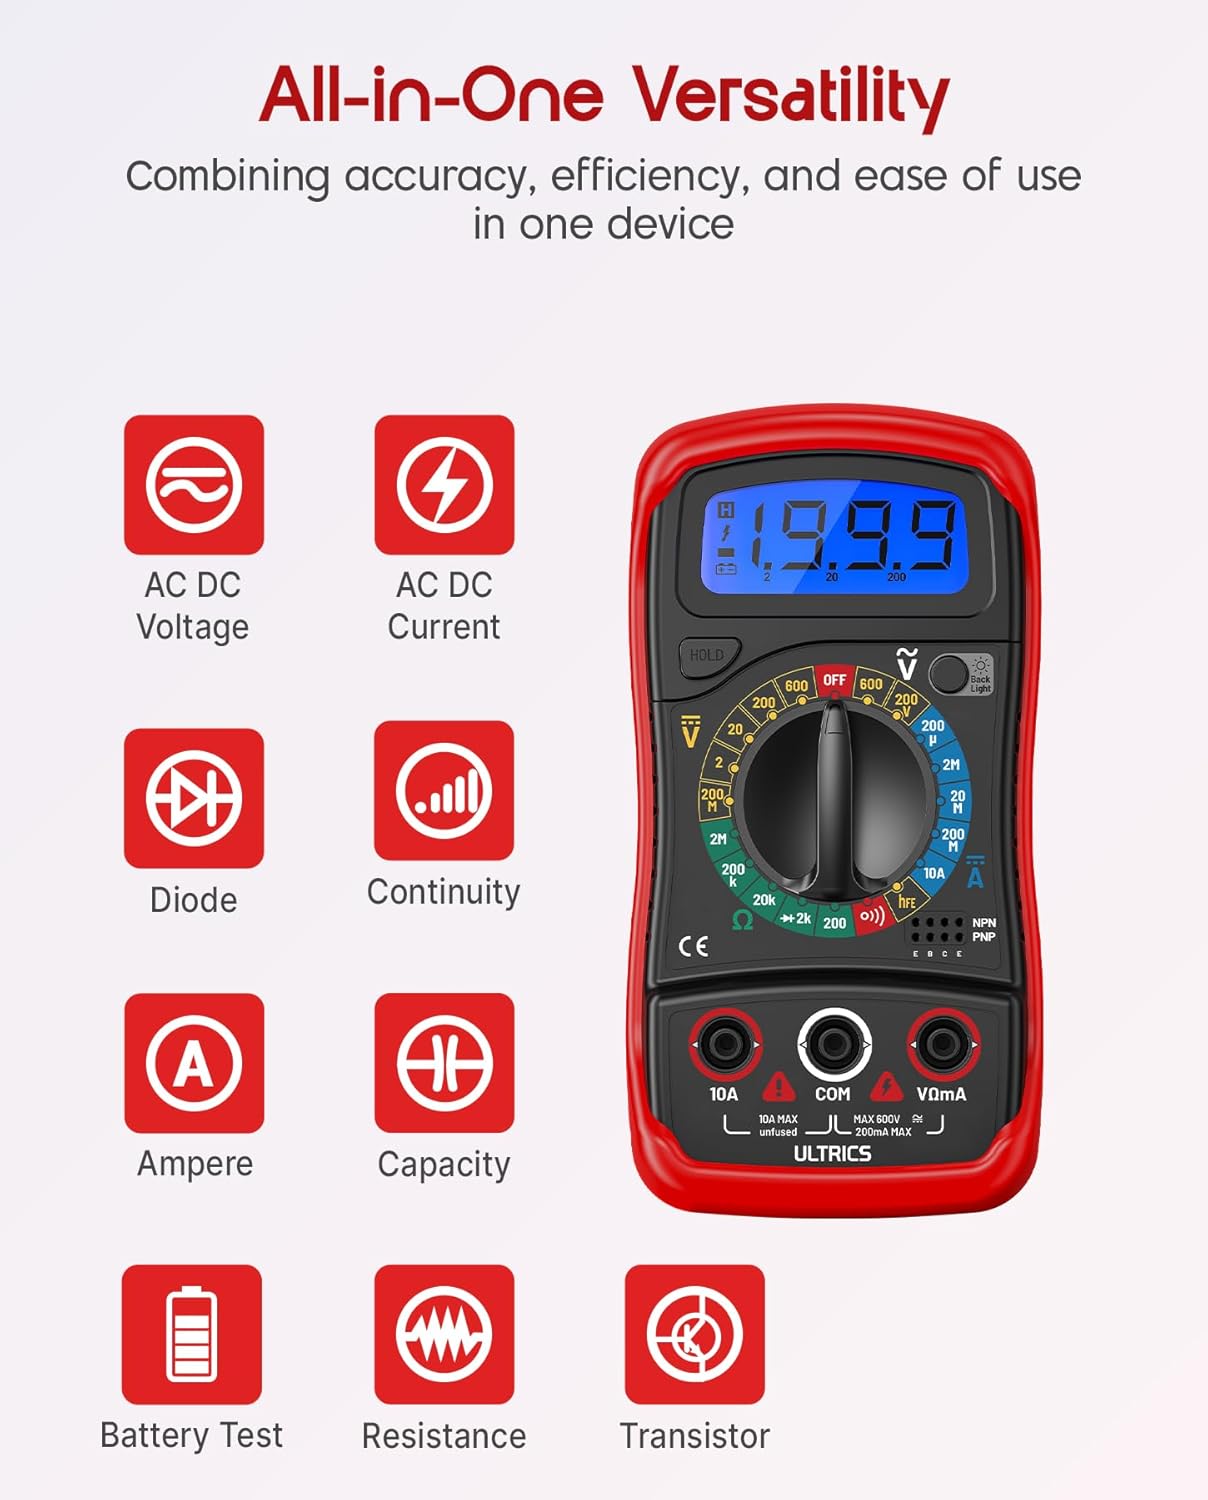
Image: Visual representation of the multimeter's versatile functions, including AC/DC Voltage, AC/DC Current, Diode, Continuity, Ampere, Capacity, Battery Test, Resistance, and Transistor measurements.
Merjenje DC Voltage (VDC)
- Priključite črni preskusni kabel na COM vtičnico in rdeči merilni kabel na VΩmA jack.
- Turn the function switch to the desired VDC range (e.g., 200mV, 2V, 20V, 200V, 600V). If unsure, start with the highest range and decrease as needed.
- Merilne kable priključite vzporedno na komponento ali vezje, ki ga želite izmeriti.
- Preberite zvtage vrednost na LCD zaslonu.
Merjenje AC Voltage (VAC)
- Priključite črni preskusni kabel na COM vtičnico in rdeči merilni kabel na VΩmA jack.
- Turn the function switch to the desired VAC range (e.g., 200V, 600V).
- Merilne kable priključite vzporedno na izmenični tok.tage vir.
- Preberite zvtage vrednost na LCD zaslonu.
Measuring DC Current (ADC)
POZOR: Never connect the multimeter in parallel when measuring current. Always connect it in series with the circuit. Improper connection can damage the multimeter or the circuit.
- Izklopite napajanje vezja.
- For currents up to 200mA, connect the black test lead to the COM vtičnico in rdeči merilni kabel na VΩmA jack.
- For currents up to 10A, connect the black test lead to the COM vtičnico in rdeči merilni kabel na 10A jack.
- Turn the function switch to the desired ADC range (e.g., 200µA, 2mA, 20mA, 200mA, 10A).
- Prekinite vezje in multimeter priključite zaporedno na vezje.
- Vklopite napajanje vezja.
- Odčitajte trenutno vrednost na LCD zaslonu.
- Turn off power to the circuit before disconnecting the multimeter.
Merjenje upornosti (Ω)
POZOR: Ensure the circuit is completely de-energized before measuring resistance. Measuring resistance on a live circuit can damage the multimeter.
- Priključite črni preskusni kabel na COM vtičnico in rdeči merilni kabel na VΩmA jack.
- Turn the function switch to the desired Ω range (e.g., 200Ω, 2kΩ, 20kΩ, 200kΩ, 2MΩ, 20MΩ).
- Merilne kable priključite na komponento, katere upornost želite izmeriti.
- Odčitajte vrednost upora na LCD-zaslonu.
Test kontinuitete
The continuity test checks for a complete circuit path. An audible buzzer will sound if continuity is detected.
- Priključite črni preskusni kabel na COM vtičnico in rdeči merilni kabel na VΩmA jack.
- Obrnite funkcijsko stikalo na Kontinuiteta (buzzer) position.
- Priključite merilne kable na vezje ali komponento.
- Če je upornost manjša od približno 50 Ω, se bo oglasil zvočni signal, ki označuje neprekinjenost žice.
Diodni test
Preizkus diode meri naprej voltagpadec diode.
- Priključite črni preskusni kabel na COM vtičnico in rdeči merilni kabel na VΩmA jack.
- Obrnite funkcijsko stikalo na Dioda položaj.
- Connect the red test lead to the anode (+) and the black test lead to the cathode (-) of the diode.
- Preberite naprej voltage drop on the LCD display. Reverse the leads; the display should show "OL" (Overload) for a good diode.
Test tranzistorja hFE
This function tests the DC current gain (hFE) of NPN and PNP transistors.
- Obrnite funkcijsko stikalo na hFE položaj.
- Identify the Emitter (E), Base (B), and Collector (C) leads of the transistor.
- Insert the transistor leads into the corresponding holes in the hFE socket on the multimeter, ensuring correct NPN or PNP type.
- Vrednost hFE odčitajte na LCD-zaslonu.
Funkcija zadrževanja podatkov
Pritisnite PRIDRŽI button to freeze the current reading on the display. Press it again to release the hold and resume live readings.
Funkcija osvetlitve ozadja
Pritisnite Osvetlitev ozadja button to turn the LCD backlight on or off, improving visibility in dim environments.

Slika: Bližnji posnetek view of the multimeter's LCD display, demonstrating its bright backlight feature for enhanced readability in various lighting conditions.
Vzdrževanje
Čiščenje
Za čiščenje multimetra obrišite ohišje zamp cloth and a mild detergent. Do not use abrasives or solvents, as these may damage the casing ali zaslon.
Zamenjava baterije
When the low battery indicator appears on the display, replace the 9V battery as described in the "Installing the Battery" section to ensure continued accurate readings.
Zamenjava varovalke
If the current measurement function stops working, the fuse may need replacement. This multimeter is equipped with internal fuses for protection.
- Ensure the multimeter is OFF and all test leads are disconnected.
- Odstranite pokrov baterije in baterijo.
- Carefully open the main casing (this may require removing additional screws, typically located under the rubber shell).
- Locate the fuse(s) on the circuit board. This model typically uses a 200mA/250V fuse for the mA range and a 10A/250V fuse for the 10A range.
- Replace the blown fuse with a fuse of the same type and rating. Never use a fuse with a different rating.
- Reassemble the multimeter, ensuring all screws are tightened and the casing is properly sealed.
Shranjevanje
If the multimeter is not used for a long period, remove the battery to prevent leakage and store the device in a cool, dry place, away from direct sunlight and extreme temperatures.
Odpravljanje težav
| Težava | Možen vzrok | rešitev |
|---|---|---|
| Brez zaslona ali zatemnjen zaslon | Prazen ali prazen akumulator | Zamenjajte 9V baterijo. |
| Prikazano je "OL" (preobremenitev) | Input value exceeds selected range; open circuit (for resistance/continuity) | Select a higher range; check for breaks in the circuit or component. |
| Nepravilni odčitki | Izbrana napačna funkcija/območje; slaba povezava merilnega kabla; prazna baterija | Verify function switch position and range; ensure leads are firmly connected; replace battery. |
| Merjenje toka ne deluje | Pregorela varovalka | Replace the appropriate fuse (refer to Maintenance section). |
| No continuity buzzer | Open circuit; resistance too high | Ensure circuit is closed; check resistance value (buzzer typically activates below 50Ω). |
Specifikacije
| Funkcija | Podrobnost |
|---|---|
| Model | Digital Multimeter D2 |
| Zaslon | 3 ½ digit LCD, 1999 counts, with backlight |
| DC Voltage | 200 mV / 2 V / 20 V / 200 V / 600 V |
| AC Voltage | 200V / 600V |
| enosmerni tok | 200µA / 2mA / 20mA / 200mA / 10A |
| Odpornost | 200Ω / 2kΩ / 20kΩ / 200kΩ / 2MΩ / 20MΩ |
| Diodni test | ja |
| Neprekinjenost Buzzer | ja |
| Test tranzistorja hFE | ja |
| Zadrževanje podatkov | ja |
| Vir napajanja | 9V baterija |
| Ocena varnosti | IEC CAT II 600V, CE, RoHS compliant |
| Dimenzije (D x Š x V) | 14.6 x 10 x 5 cm (5.75 x 3.94 x 1.97 palca) |
| Teža | 240 gramov (0.53 lbs) |
Garancija in podpora
ULTRICS provides a 12-month warranty for this product, covering manufacturing defects from the date of purchase. Please retain your proof of purchase for warranty claims.
For technical support, warranty claims, or any questions regarding your ULTRICS Digital Multimeter D2, please contact ULTRICS customer service through the retailer's platform or the official ULTRICS webspletno mesto. Ko se obrnete na podporo, imejte pripravljene podatke o nakupu in številko modela.
Proizvajalec: ULTRICS
Številka modela: Digital Multimeter D2
ASIN: B0DYP62MW7