1. Uvod
This manual provides detailed instructions for the safe and proper installation, operation, and maintenance of your FORGING MOUNT Rotating TV Wall Mount HY9107-B. Please read all instructions carefully before beginning installation to ensure correct setup and to prevent damage or injury.
2. Varnostne informacije
WARNING: Failure to read and follow these instructions may result in serious personal injury, property damage, or voiding of your warranty.
- Ensure the mounting surface can safely support the combined weight of the mount and your TV.
- Ne prekoračite največje dovoljene nosilnosti 55 kg (25 lbs).
- This mount is designed for installation on wood studs, solid concrete walls, or brick walls. Ne vgrajujte samo v suhomontažne plošče.
- Za natančno lociranje lesenih stebrov vedno uporabite iskalnik stebrov.
- If you are unsure about the installation process, consult a qualified professional installer.
- Med namestitvijo hranite otroke in hišne ljubljenčke proč.
3. Vsebina paketa
Verify that all components are present and undamaged before installation. If any parts are missing or defective, contact FORGING MOUNT customer service.

Slika: Konecview of all included components for the TV wall mount.
Montažne komponente:
- Sestavljanje stenske plošče
- TV Bracket Arms (4 pieces)
Komplet strojne opreme:
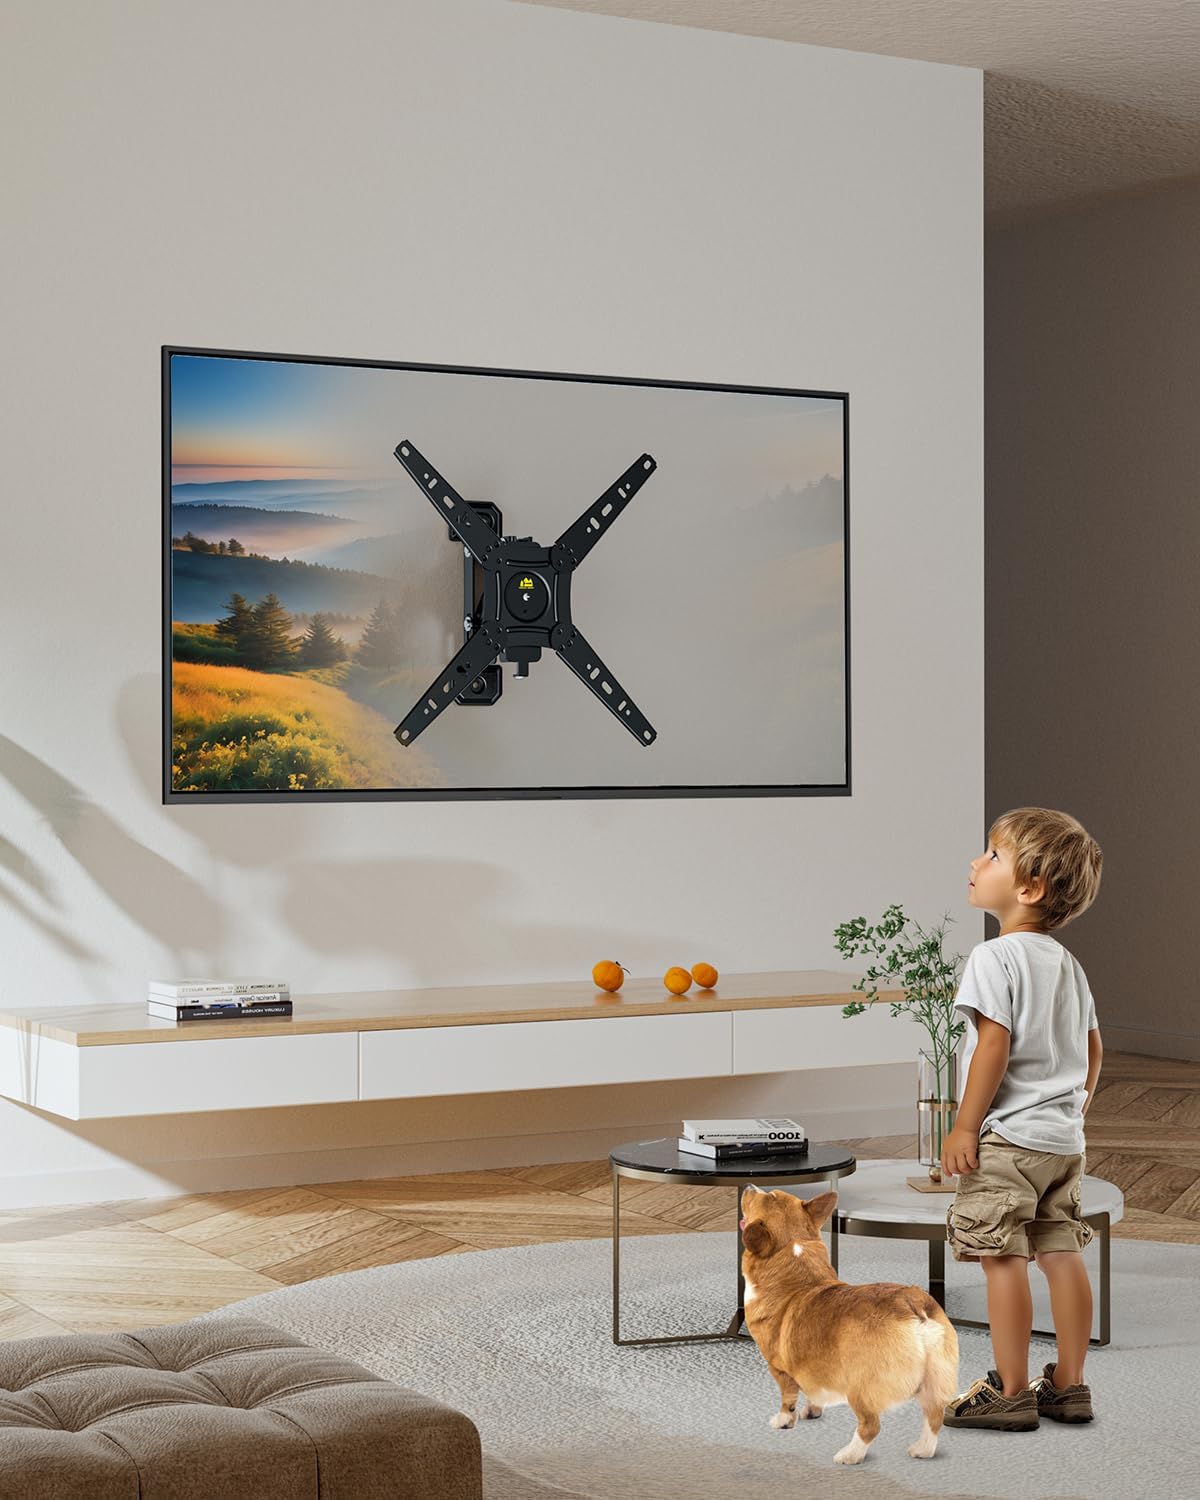
Image: Various screws, washers, and spacers provided for different TV models and wall types.
- Različni vijaki za televizorje (M4, M6, M8)
- Podložke in distančniki
- Lag Bolts (for wall mounting)
- Concrete Anchors (for concrete/brick walls)
4 Potrebno orodje (ni vključeno)
- Phillips izvijač
- Električni vrtalnik
- Nivo mehurčkov
- Svinčnik
- Iskalnik stebrov (nujno potreben za namestitev lesenih stebrov)
5. Specifikacije
| Funkcija | Specifikacija |
|---|---|
| Združljivost velikosti televizorja | 13-49 palcev |
| Zmogljivost teže | Do 55 lbs (25 kg) |
| Združljivost VESA | 75x75mm to 300x300mm (e.g., 75x75, 100x100, 100x200, 200x200, 200x300, 300x300) |
| Vrsta gibanja | Rotate (Landscape to Portrait), Swivel, Tilt, Extend/Retract |
| Razdalja od stene (uvlečena) | 2.36 palcev |
| Razdalja od stene (podaljšana) | Do 5.3 palcev |
| Material | Legirano jeklo |

Image: Common VESA patterns supported by the mount, showing horizontal and vertical measurements.
6. Nastavitev in namestitev
Follow these steps for a secure installation. It is recommended to have two people for TV mounting.
1. korak: Pripravite steno
- Poiščite položaj montaže: Determine the desired height and center of your TV. Use a stud finder to locate the center of a wood stud for wood stud installation. For concrete or brick walls, ensure the chosen location is solid.
- Označite vrtalne točke: Hold the wall plate assembly against the wall at the desired height and use a pencil to mark the drilling points. Use a bubble level to ensure the marks are perfectly horizontal.
- Vrtanje pilotnih lukenj:
- For Wood Studs: Drill pilot holes using a 3/16" (4.5mm) drill bit to a depth of 2.2" (55mm).
- For Concrete/Brick Walls: Drill pilot holes using a 3/8" (10mm) drill bit to a depth of 2.4" (60mm). Insert concrete anchors into the drilled holes.

Image: Illustration of compatible wall types for installation: solid concrete, single wood stud, and brick wall. Note: Do not install in drywall alone.
Step 2: Install the Wall Plate Assembly
- Align the wall plate assembly with the drilled holes. Attach it to the wall using the appropriate lag bolts and washers for your wall type. Tighten securely with a wrench.
Video: This video demonstrates the installation process of a full motion TV wall mount, including wall preparation, attaching the wall plate, and securing the TV. It highlights the mount's ability to rotate between portrait and landscape orientations.
3. korak: pritrdite TV nosilce na TV
- Televizor položite z zaslonom navzdol na mehko, čisto površino, da preprečite praske.
- Attach the TV bracket arms to the back of your TV using the appropriate screws, washers, and spacers from the hardware kit. Ensure they are securely fastened.
Step 4: Hang TV on Mount
- Carefully lift the TV and hook the attached TV brackets onto the wall plate assembly. Ensure the TV is securely seated on the mount.
- Privijte vse varnostne vijake ali zaklepne mehanizme na nosilcih televizorja, da preprečite nenamerno premikanje.

Image: The FORGING MOUNT TV Wall Mount with a television securely attached, demonstrating its full motion capabilities.
7. Navodila za uporabo
Rotation (Landscape to Portrait)
This mount allows for easy 90-degree rotation to switch your TV between landscape and portrait orientations. Gently rotate the TV to your desired orientation.

Image: A user demonstrating the 90-degree rotation feature of the TV mount, switching the display from horizontal to vertical.
Podaljšanje in umik
The mount can extend up to 5.3 inches from the wall and retract to a minimum of 2.36 inches. Gently pull or push the TV to adjust the distance from the wall.
Image: An illustration detailing the mount's ability to retract to 2.36 inches and extend up to 5.3 inches from the wall, optimizing space and viewing kotov.
Swivel and Tilt
The mount offers swivel and tilt capabilities for optimal viewing angles. Adjust the TV horizontally (swivel) or vertically (tilt) as needed. The mount allows for easy cable access even when retracted.

Image: A visual comparison highlighting the FORGING MOUNT's design for easy cable access behind the TV, contrasting with other mounts that make cable management difficult.
8. Vzdrževanje
- Občasno preverite vse vijake in matico, da se prepričate, da so trdno priviti. Po potrebi jih ponovno privijte.
- Nosilec očistite z mehko, suho krpo. Izogibajte se abrazivnim čistilom ali topilom.
- Ensure smooth movement of the articulating arms. If movement becomes stiff, apply a small amount of silicone-based lubricant to the joints.
9. Odpravljanje težav
Issue: TV does not stop at desired position during rotation.
rešitev: Adjust the two side screws on the rotation mechanism alternately using the provided tools until the desired tension is achieved. Refer to the detailed graphical installation guide for visual assistance.
10. Garancija in podpora
For warranty information or technical support, please refer to the product packaging or contact FORGING MOUNT customer service directly. Keep your purchase receipt for warranty claims.