
1. Uvod
Thank you for choosing the MOUNTUP Dual Monitor Arm MU8012-W-07. This instruction manual provides essential information for the safe and correct installation, operation, and maintenance of your new monitor arm. Please read this manual thoroughly before installation and keep it for future reference.
Varnostni ukrepi
- Pred sestavljanjem se prepričajte, da so vse komponente prisotne in nepoškodovane. Ne uporabljajte, če kateri koli del manjka ali je okvarjen.
- Verify that your desk surface is strong enough to support the combined weight of the monitor arm and your monitors.
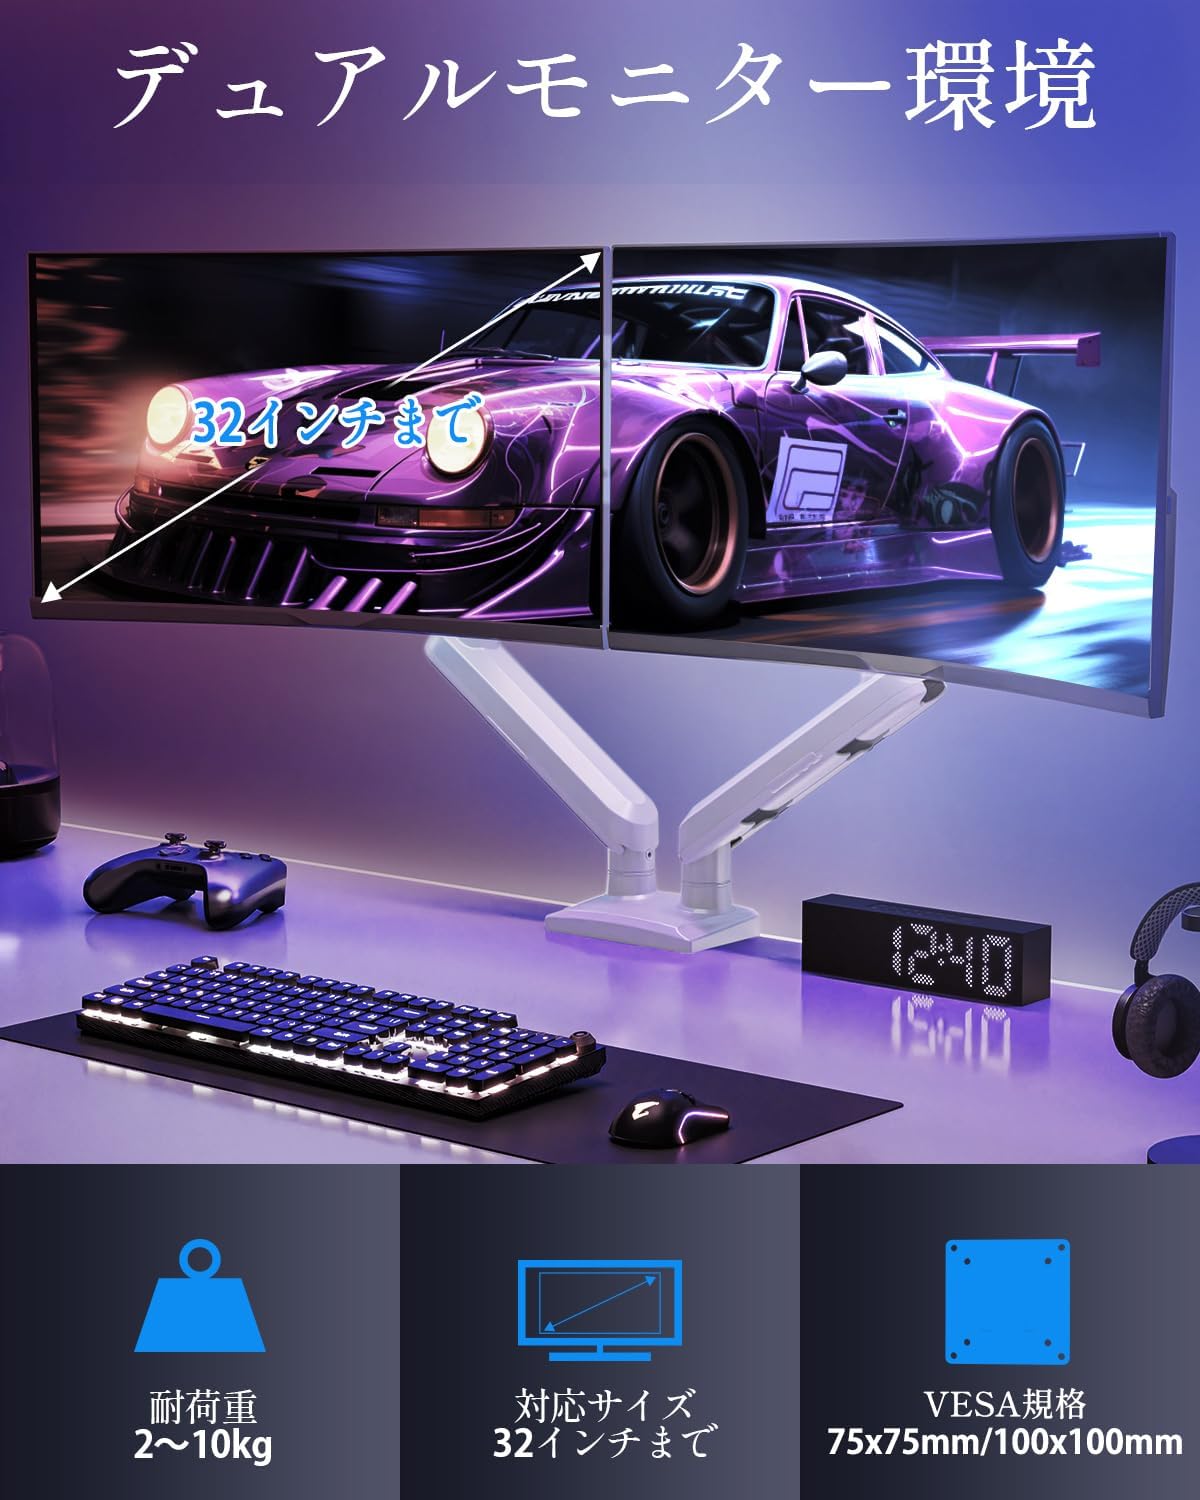
- Do not exceed the maximum weight capacity of 10kg (22 lbs) per arm.
- Always follow the installation steps carefully. Improper installation may result in product damage or personal injury.
- Keep children away from the product during assembly. Small parts may be a choking hazard.
2. Vsebina paketa
Prosimo, preverite, ali so v vašem paketu priložene vse naslednje komponente:
- Monitor Arm Assembly (x1)
- VESA plošča (x2)
- Pisalna miza Clamp Osnova (x1)
- Grommet Base (x1)
- Mounting Hardware Kit (screws, washers, spacers)
- Hex Wrenches (various sizes)
- Navodila za uporabo (x1)
3. Specifikacije
| Funkcija | Specifikacija |
|---|---|
| Model | MU8012-W-07 |
| Material | Legirano jeklo |
| barva | Bela |
| Združljivost velikosti zaslona | 13 - 32 palcev |
| Nosilnost (na roko) | 2–10 kg (4.4–22 lbs) |
| Združljivost VESA | 75x75 mm, 100x100 mm |
| Možnosti namestitve | Clamp, Grommet |
| Razpon nagiba | +85° do -45° |
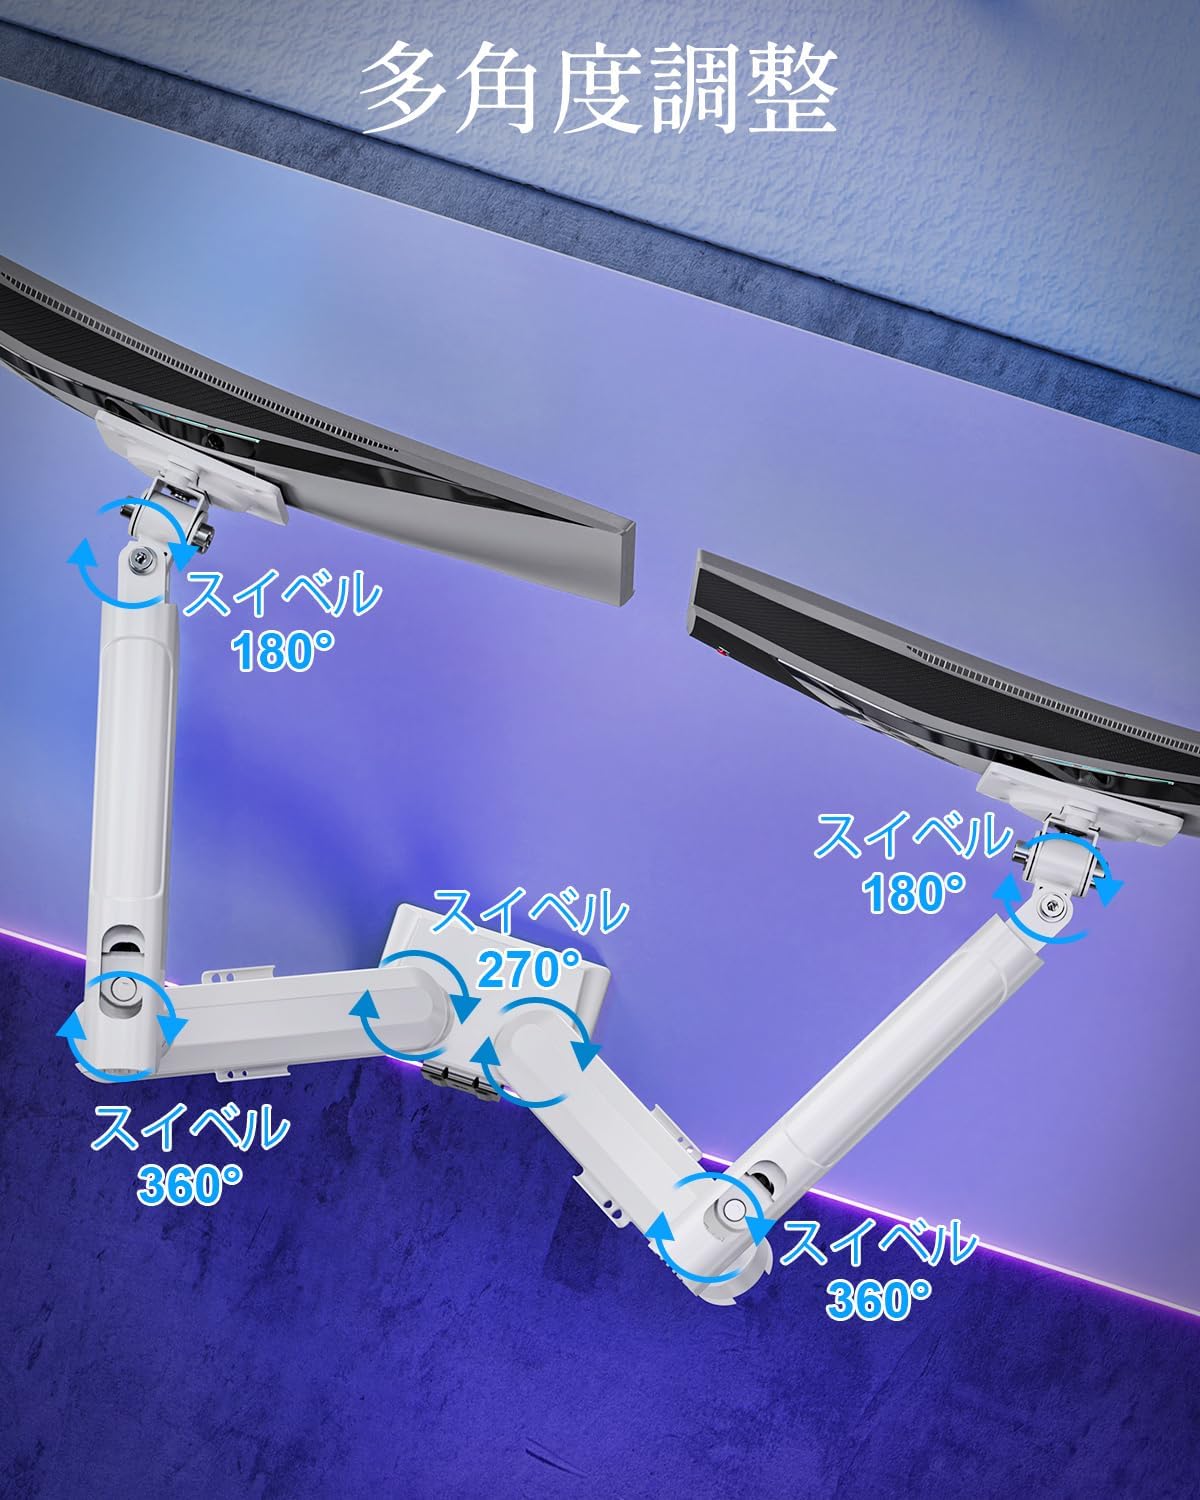
| Vrtljiv domet | 180° (monitor plate), 270° (middle joint), 360° (base) |
| Rotation (Pivot) | 360° |
| Max Height Adjustment | 44 cm (17.3 palcev) |
| Max Arm Extension | 50 cm (19.7 palcev) |
| Teža izdelka | 3.1 kg (6.8 lbs) |

4. Nastavitev in namestitev
1. korak: Izberite način montaže
The MOUNTUP Dual Monitor Arm supports two installation methods: Clamp Mount and Grommet Mount. Choose the method that best suits your desk.

Clamp Namestitev pritrditve
- Priložite clamp base to the main pole of the monitor arm.
- Postavite clamp onto the edge of your desk. Ensure the desk thickness is between 10-70mm (0.4-2.7 inches).
- Zategnite clamp Privijajte vijak, dokler roka ni varno pritrjena na mizo. Prepričajte se, da je stabilna in se ne maje.

Montaža vtičnice
- If your desk has a grommet hole, ensure its diameter is between 10-60mm (0.4-2.4 inches) and the desk thickness is between 10-70mm (0.4-2.7 inches).
- Attach the grommet base to the main pole.
- Insert the grommet bolt through the desk hole and secure it from underneath with the provided plate and nut.
- Tighten the nut until the arm is firmly attached to the desk.
2. korak: pritrdite plošče VESA na monitorje
- Carefully lay your monitor face down on a soft, clean surface.
- Ploščo VESA poravnajte z montažnimi luknjami na zadnji strani monitorja.
- Use the appropriate screws (M4 or M5) and washers from the hardware kit to secure the VESA plate to the monitor. Do not overtighten.
3. korak: Namestitev monitorjev na nosilce
- Slide the monitor (with the attached VESA plate) onto the VESA head of the monitor arm.
- Ensure the monitor clicks into place or is securely fastened by the quick-release mechanism.
- Ponovite za drugi monitor.

4. korak: upravljanje kablov
Route your monitor cables through the integrated cable management clips on the underside of the arms. This helps maintain a tidy workspace.

5. Upravljanje in nastavitve
The MOUNTUP Dual Monitor Arm offers flexible adjustments to optimize your viewizkušnje.

Adjusting Arm Tension (Gas Spring)
The gas spring mechanism allows for smooth height adjustments. If your monitor sags or is difficult to move, you may need to adjust the tension.

- To increase tension (if monitor sags): Use the provided hex wrench to turn the adjustment screw clockwise.
- To decrease tension (if arm is too stiff): Turn the adjustment screw counter-clockwise.
- Always adjust tension with the arm held horizontally. Test the movement after each small adjustment until the monitor holds its position freely.
Prilagoditve monitorja
- Nastavitev višine: Gently push or pull the monitor up or down to your desired height. The gas spring will assist in holding the position. Max height is 44cm (17.3 inches).
- Nastavitev nagiba: Tilt the monitor screen up to +85° or down to -45° to reduce glare and optimize viewing angles. Loosen the tilt bolt, adjust, then re-tighten.
- Nastavitev vrtenja: The arm allows for 180° swivel at the monitor plate, 270° at the middle joint, and 360° at the base, providing wide range of motion.
- Rotation (Pivot): Za preklapljanje med ležečo in pokončno orientacijo monitor zavrtite za 360°.

6. Vzdrževanje
- Čiščenje: Obrišite roko monitorja z mehko krpoamp krpo. Izogibajte se abrazivnim čistilom ali topilom, ki bi lahko poškodovala površino.
- Periodični pregledi: Občasno preverite vse vijake in povezave, da se prepričate, da so trdno priviti. Po potrebi jih ponovno privijte.
- Gas Spring Longevity: The high-quality gas spring is tested for over 20,000 cycles. Proper tension adjustment will help maintain its performance over time.

7. Odpravljanje težav
- Monitor Sags or Won't Stay Up: The gas spring tension is too low. Refer to the "Adjusting Arm Tension" section and turn the adjustment screw clockwise to increase tension.
- Arm is Too Stiff or Difficult to Move: The gas spring tension is too high. Refer to the "Adjusting Arm Tension" section and turn the adjustment screw counter-clockwise to decrease tension.
- Monitor Wobbles: Ensure all mounting screws (VESA plate to monitor, arm to desk) are securely tightened. Check that the desk clamp or grommet mount is firm.
- Monitor Tilt Angle Won't Hold: The tilt bolt may be loose. Tighten the tilt bolt on the VESA head.
8. Garancija in podpora
MOUNTUP provides a 2-letna garancija kakovosti od datuma nakupa tega izdelka. Ta garancija krije proizvodne napake in težave, ki nastanejo zaradi normalne uporabe.
If you encounter any problems with your MOUNTUP Dual Monitor Arm, or if you have questions regarding installation or operation, please contact our customer support. You can typically find seller contact information through your purchase history on the platform where you bought the product (e.g., Amazon order details).
Please have your model number (MU8012-W-07) and purchase date ready when contacting support to ensure a swift resolution.