
1. Uvod
This manual provides essential information for the safe and efficient operation, setup, and maintenance of your VEVOR CO2 Laser Engraver 40W, Model KH-3020. Please read this manual thoroughly before using the machine to ensure proper function and to prevent injury or damage.

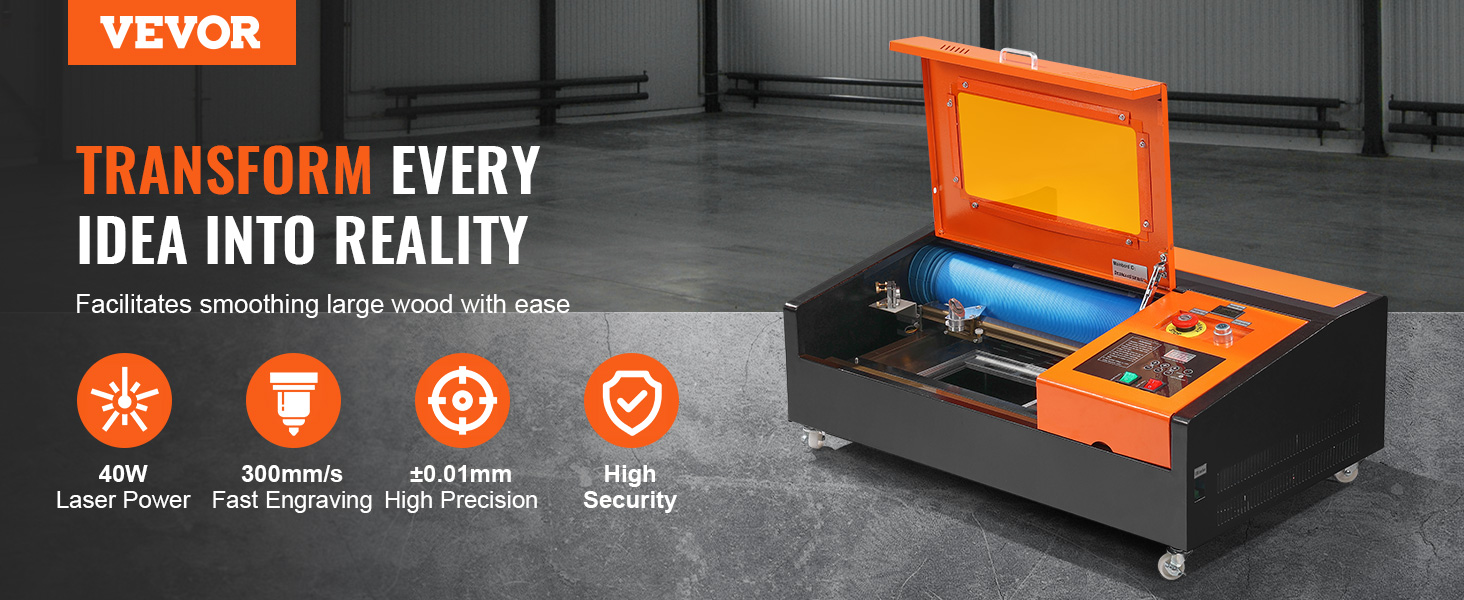
Image 1.1: The VEVOR 40W CO2 Laser Engraver, Model KH-3020, featuring a desktop design and compatibility with various graphic formats.
2. Varnostna navodila
OPOZORILO: Lasersko sevanje lahko povzroči hude poškodbe. Vedno upoštevajte varnostne ukrepe.
- Med upravljanjem stroja vedno nosite ustrezna laserska zaščitna očala.
- Ensure proper ventilation. The laser engraver produces smoke and fumes that must be exhausted outdoors.
- Stroja med delovanjem nikoli ne puščajte brez nadzora.
- Only engrave or cut materials compatible with CO2 lasers. Avoid materials that produce toxic fumes or catch fire easily.
- V bližini imejte gasilni aparat.
- Ensure the water cooling system is properly connected and functioning before activating the laser tube.
- Do not open the laser compartment during operation.
- Ensure the machine is properly grounded to prevent electrical hazards.
3. Kaj je v škatli?
Carefully unpack all components and verify that all items listed below are present. If any items are missing or damaged, contact VEVOR customer support immediately.
- 1 x Enota za lasersko graviranje
- 1 x Workbench
- 1 x podatkovni kabel (USB)
- 1 x USB ključek (s programsko opremo in gonilniki)
- 1 x vodna črpalka
- 1 x napajalni kabel
- 1 x Installation Accessories (Screws/Double-sided Tape)
- 1 x varnostni ključek
- 1 x izpušna cev
Slika 3.1: Konecview of the components included with the VEVOR CO2 Laser Engraver.
4. Nastavitev
4.1 Razpakiranje in namestitev
- Carefully remove the laser engraver from its packaging.
- Napravo postavite na stabilno, ravno površino v dobro prezračevanem prostoru, stran od vnetljivih materialov.
4.2 Namestitev izpušnega sistema
- Connect the provided exhaust pipe to the smoke outlet on the rear of the machine.
- Route the exhaust pipe to an outdoor vent or a suitable air filtration system to safely remove fumes.

Image 4.1: The integrated exhaust fan, designed to vent smoke and odors during operation.
4.3 Nastavitev sistema vodnega hlajenja
- Fill a clean bucket or reservoir with distilled water.
- Place the water pump into the water reservoir.
- Connect the water inlet and outlet hoses from the laser engraver to the water pump, ensuring a secure, leak-free connection.
- Ensure water circulates freely through the laser tube before powering on the laser.
4.4 Electrical and Computer Connections
- Connect the power cable to the machine and a grounded electrical outlet.
- Connect the USB data cable from the laser engraver to your computer.
- Insert the provided USB flash drive into your computer to install the necessary software and drivers (e.g., CorelDRAW plugin).
- Enter the verification code found on the machine's control board into the software when prompted.
Video 4.1: Demonstrates connecting the laser engraver to a computer and entering the software verification code.
5. Navodila za uporabo
5.1 Konec nadzorne ploščeview
The intuitive digital control panel allows for precise laser power control and operational adjustments.
Slika 5.1: Podrobno view of the control panel, showing the LCD display, laser switch, power switch, and lighting switch.
- Zaslon LCD: Shows current laser power and other settings.
- Lasersko stikalo: Activates/deactivates the laser.
- Stikalo za vklop: Vklopi/izklopi stroj.
- Stikalo za osvetlitev: Controls internal workspace illumination.
- Laser Power Adjustment Buttons: Use '+' and '-' to fine-tune laser power.
- Laser Test Switch: For brief laser firing to check alignment (use with extreme caution).
5.2 Priprava na graviranje/rezanje
- Power on the machine using the Power Switch.
- Ensure the water pump is running and water is circulating.
- Place your material securely on the workbench.
- Adjust the focus of the laser head according to your material thickness.

Image 5.2: Close-up of the laser head performing high-speed engraving on a wooden surface.
5.3 Delovanje programske opreme
- Open your design software (e.g., CorelDRAW) and prepare your design.
- Use the installed plugin to send your design to the laser engraver.
- Set appropriate laser power and speed settings based on your material and desired outcome. Refer to material testing guidelines for optimal results.

Slika 5.3: Primeramples of designs engraved on various non-metal surfaces such as acrylic, glass, cardboard, leather, wood, and stone.
5.4 Starting the Engraving/Cutting Process
- Once settings are confirmed in the software, initiate the job.
- The laser will begin its operation. Monitor the process closely.
- V nujnih primerih takoj pritisnite gumb za zaustavitev v sili.
6. Vzdrževanje
Redno vzdrževanje zagotavlja optimalno delovanje in podaljšuje življenjsko dobo vašega laserskega graverja.
6.1 Cleaning the Laser Lens and Mirrors
- Periodically inspect the laser lens and mirrors for dust or debris.
- Use a specialized lens cleaning solution and cotton swabs or lens paper to gently clean optical components. Avoid touching with bare hands.
6.2 Water Cooling System Maintenance
- Regularly check the water level in the reservoir and refill with distilled water as needed.
- Change the water in the cooling system every 1-2 weeks, or more frequently with heavy use, to prevent algae growth and maintain cooling efficiency.
- Clean the water pump filter periodically.
6.3 Exhaust System Cleaning
- Inspect the exhaust pipe and fan for buildup of residue.
- Clean the exhaust fan and ducting as necessary to maintain efficient smoke extraction.
6.4 Laser Tube

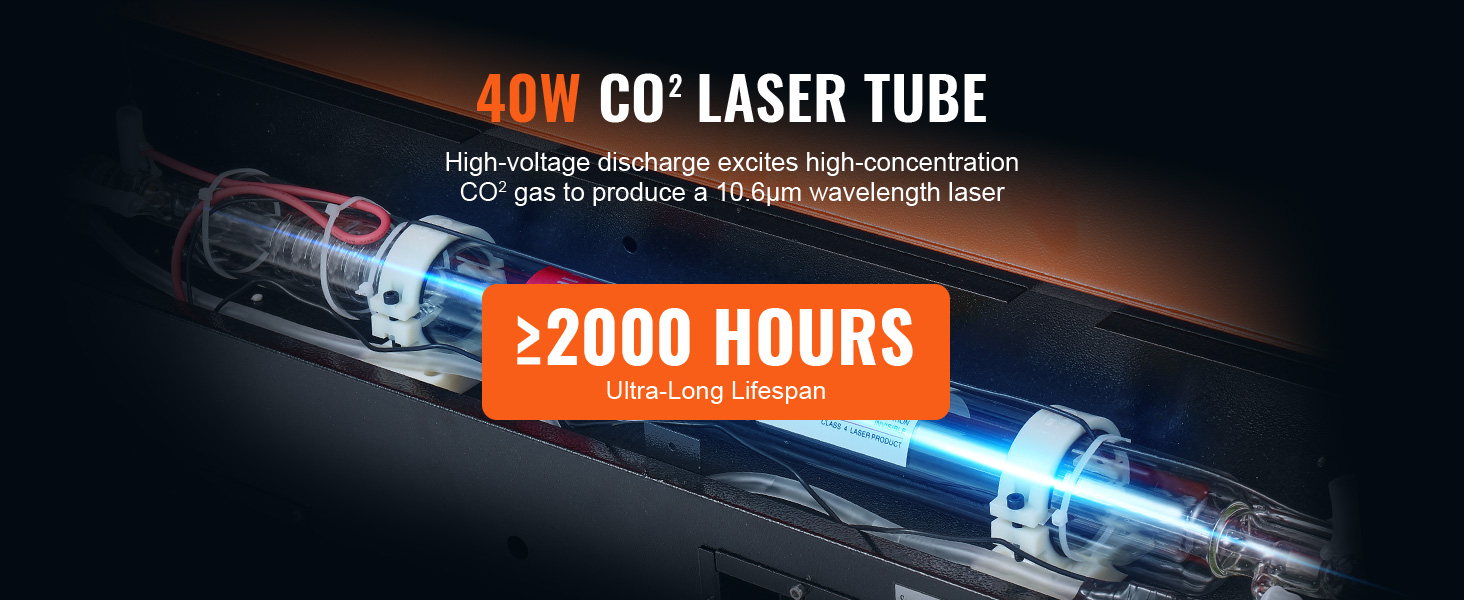
Image 6.1: The 40W CO2 laser tube, designed for an ultra-long lifespan of over 2000 hours.
7. Odpravljanje težav
Ta razdelek obravnava pogoste težave, na katere lahko naletite. Za težave, ki niso navedene tukaj, se obrnite na podporo strankam.
| Težava | Možen vzrok | rešitev |
|---|---|---|
| Laser ne deluje ali je izhodna moč slaba | Water cooling issue, misaligned mirrors, low laser power setting, faulty laser tube. | Check water flow and temperature. Inspect and clean mirrors/lens. Increase laser power. Contact support if tube is suspected faulty. |
| Slaba kakovost graviranja/rezanja | Incorrect focus, wrong power/speed settings, dirty lens/mirrors, material incompatibility. | Adjust focus. Optimize power/speed settings for the material. Clean optical components. Ensure material is suitable for CO2 laser. |
| Exhaust system ineffective | Blocked exhaust pipe, fan malfunction, improper sealing. | Check exhaust pipe for obstructions. Ensure fan is operating. Verify all connections are sealed. |
| Težave s povezavo programske opreme | Incorrect drivers, USB cable problem, software not installed correctly, security dongle not recognized. | Reinstall drivers and software from the provided USB drive. Try a different USB port or cable. Ensure security dongle is properly inserted. |
8. Specifikacije
Key technical specifications for the VEVOR CO2 Laser Engraver 40W, Model KH-3020.
| Funkcija | Specifikacija |
|---|---|
| Številka modela artikla | KH-3020 |
| Največja moč laserja | 40 W |
| Učinkovito delovno območje | 12 x 8 palca (30 x 20 cm) |
| Hitrost graviranja | 11.8 ips / 0–300 mm/s |
| Hitrost rezanja | 3.9 ips / 1–100 mm/s |
| Maximum Cutting Thickness (Acrylic) | ≤ 0.2 inches / 4 mm |
| Nadzorna plošča | M2 |
| Dimenzije izdelka | 31.5 x 21.7 x 12 palca (800 x 550 x 305 mm) |
| Teža predmeta | 60.2 funtov (27.3 kg) |

Slika 8.1: Dimenzionalno nadview and key specifications of the VEVOR CO2 Laser Engraver.
9. Garancija in podpora
Za informacije o garanciji, tehnično podporo ali servisne poizvedbe glejte garancijski list, ki je priložen izdelku, ali obiščite uradno spletno stran VEVOR. website. You can also contact VEVOR customer support directly for assistance.
Podpora strankam VEVOR: Visit VEVOR Support Page


