
1. Uvod
The TIMBOOTECH Wireless HDMI Transmitter and Receiver system provides a solution for wireless video and audio transmission. This system features built-in screens and control buttons for real-time monitoring of pairing status, connected receivers, and channel selection, ensuring optimal signal quality. It supports up to four receivers simultaneously and offers an extended transmission range of up to 1000 feet (300 meters). Additional features include an HDMI loop-out port and an integrated cooling fan for enhanced performance and reliability.
This device is suitable for various applications, including home entertainment, business presentations, indoor and outdoor filming, live broadcasts, concerts, and gaming setups. It operates on dual-band 2.4GHz and 5.8GHz frequencies, providing stable, interference-free performance with an ultra-low latency of 0.06 seconds.
2. Vsebina paketa
Prosimo, preverite, ali so v vašem paketu priloženi vsi spodaj navedeni artikli:
- 1 x brezžični HDMI oddajnik (TX)
- 2 x brezžični HDMI sprejemnik (RX)
- 2 x HDMI kabel
- 2 x USB-C napajalni kabel
- 1 x mini HDMI adapter
- 1 x adapter za mikro HDMI
- 2 x nastavek za hladni čevelj
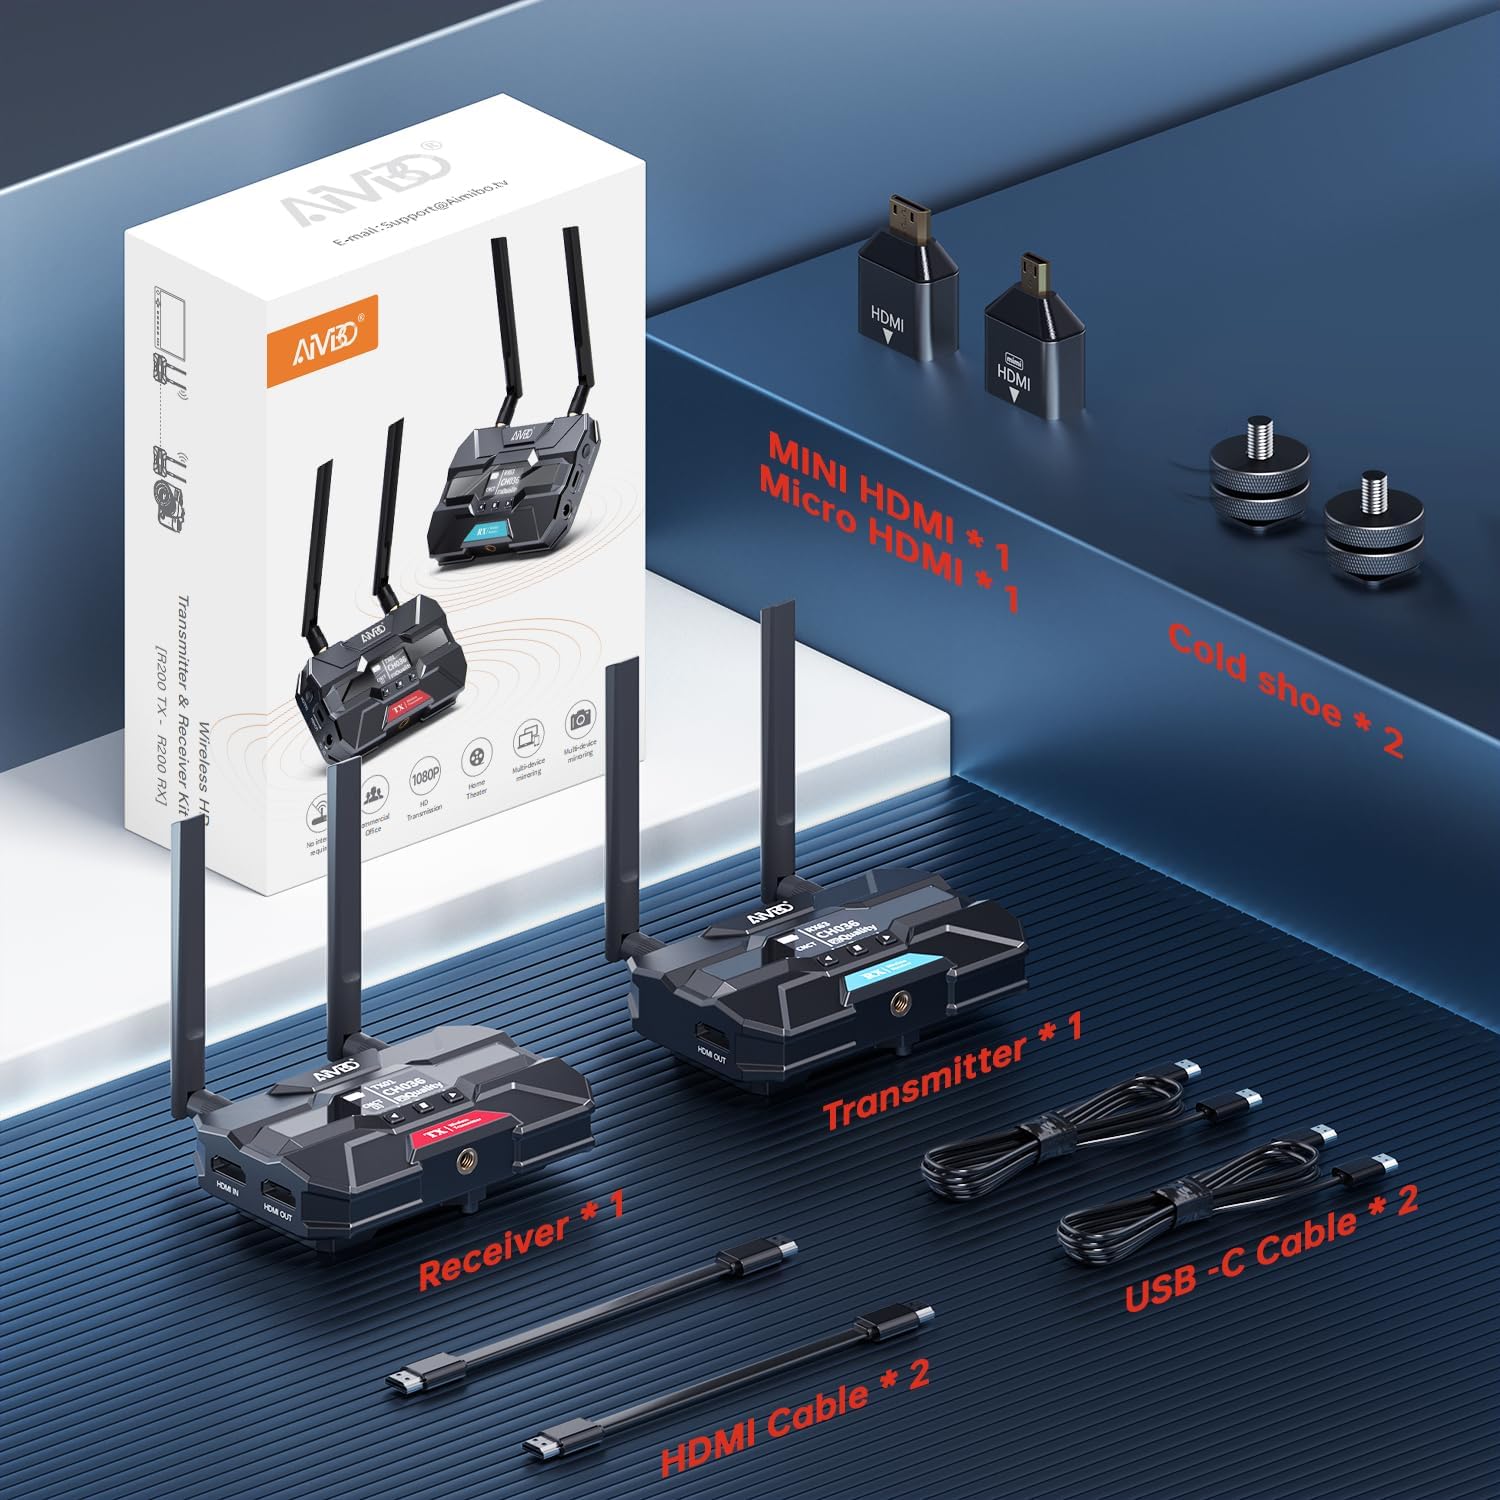
Image: Contents of the TIMBOOTECH Wireless HDMI system package, showing the transmitter, receiver, various cables (HDMI, USB-C), and adapters (Mini HDMI, Micro HDMI), along with cold shoe mounts.
3. Izdelek je končanview
The TIMBOOTECH Wireless HDMI system consists of a Transmitter (TX) and Receiver (RX) units, each equipped with essential features for reliable operation.
Transmitter (TX) Unit
- OLED zaslon: Shows current status, channel, and signal quality.
- Gumbi za upravljanje: For navigation and settings adjustment.
- Vrata HDMI IN: Connects to your video source (e.g., camera, laptop).
- HDMI OUT (Loop-Out) Port: Connects to a local monitor for simultaneous viewing.
- Vhodna moč DC 12V: Primary power connection.
- Napajalni vhod USB-C: Alternative power connection.
- Hladilni ventilator: Preprečuje pregrevanje med daljšo uporabo.
- Antene: Za brezžični prenos signala.
Receiver (RX) Unit
- OLED zaslon: Shows current status, channel, and signal quality.
- Gumbi za upravljanje: For navigation and settings adjustment.
- Vhod HDMI OUT: Connects to your display device (e.g., TV, projector).
- Vhodna moč DC 12V: Primary power connection.
- Napajalni vhod USB-C: Alternative power connection.
- Hladilni ventilator: Preprečuje pregrevanje med daljšo uporabo.
- Antene: Za sprejem brezžičnega signala.

Slika: Bližnji posnetek view of the TIMBOOTECH Wireless HDMI Transmitter (red label) and Receiver (blue label) units, highlighting their OLED screens, control buttons, and antennas.

Image: A collage illustrating key features of the TIMBOOTECH Wireless HDMI system, including its triple power options, integrated OLED screen, 5.8G chip, cooling fan, and camera mount compatibility.
4. Navodila za nastavitev
Follow these steps to set up your TIMBOOTECH Wireless HDMI system:
- Priključite oddajnik (TX):
- Connect your HDMI video source (e.g., camera, laptop, Blu-ray player) to the Vhod HDMI port on the Transmitter using an HDMI cable.
- (izbirno) Če želite view the source on a local display, connect an HDMI cable from the HDMI OUT (Loop-Out) port on the Transmitter to your local TV or monitor.
- Priključite sprejemnik (RX):
- Priključite kabel HDMI iz HDMI IZHOD port on each Receiver to your desired display device (e.g., TV, monitor, projector).
- Power On the Devices:
- Connect the provided DC 12V power adapters to the DC 12V input ports on both the Transmitter and all Receiver units, then plug them into a power outlet. Alternatively, you can use the USB-C power cables for power. (Note: For optimal performance, especially over long distances, using the DC 12V power adapter is recommended.)
- Press the power button on each unit to turn them on.
- Preverite povezavo:
- Once powered on, the OLED screens on both the Transmitter and Receiver(s) will display their status. They should automatically pair. Look for indicators like "CNCT" (Connected) and matching channel numbers (e.g., TX CH036, RX CH036).
- If pairing does not occur automatically, refer to the "Operating Instructions" section for manual channel selection.

Image: A visual representation of the wireless HDMI setup, demonstrating how the Transmitter (TX) connects to a primary TV and TV Stick via loop-out, while a Receiver (RX) transmits the signal to a second TV in another room.
5. Navodila za uporabo
5.1 Vklop/izklop
- Za vklop pritisnite MOČ button on each unit.
- Za izklop pritisnite in držite tipko MOČ gumb, dokler se enota ne izklopi.
5.2 Monitoring Status via OLED Screen
The built-in OLED screen provides real-time information:
- Indikator TX/RX: Identifies the unit as Transmitter or Receiver.
- Channel Number (CH): Displays the current operating channel. Ensure TX and RX units are on the same channel for connection.
- Connection Status (CNCT): Indicates if the unit is connected to its counterpart.
- Kakovost signala: Shows the strength and quality of the wireless signal.
5.3 Izbira kanala
If you experience interference or connection issues, you can manually change the operating channel:
- On both the Transmitter and Receiver units, use the control buttons (usually up/down or menu buttons) to navigate to the channel selection option.
- Select a new channel. Ensure both the TX and all RX units are set to the same channel for proper communication.
- The system will attempt to re-establish connection on the new channel.
5.4 Using HDMI Loop-Out
The Transmitter's HDMI OUT (Loop-Out) port allows you to connect a local display while simultaneously transmitting the signal wirelessly to one or more Receivers. This is useful for monitoring the source content directly at the transmission point.
5.5 Multi-Receiver Setup
The system supports connecting a single Transmitter to up to four Receivers simultaneously. To add more Receivers:
- Ensure the additional Receiver(s) are powered on.
- Verify that the channel displayed on the new Receiver matches the channel of the active Transmitter. If not, adjust the channel on the Receiver.
- The new Receiver should automatically connect to the Transmitter.

Image: A stadium setting with multiple screens, illustrating the capability of the TIMBOOTECH system to transmit to up to four receivers over a range of 1000 feet, ideal for large-scale events.
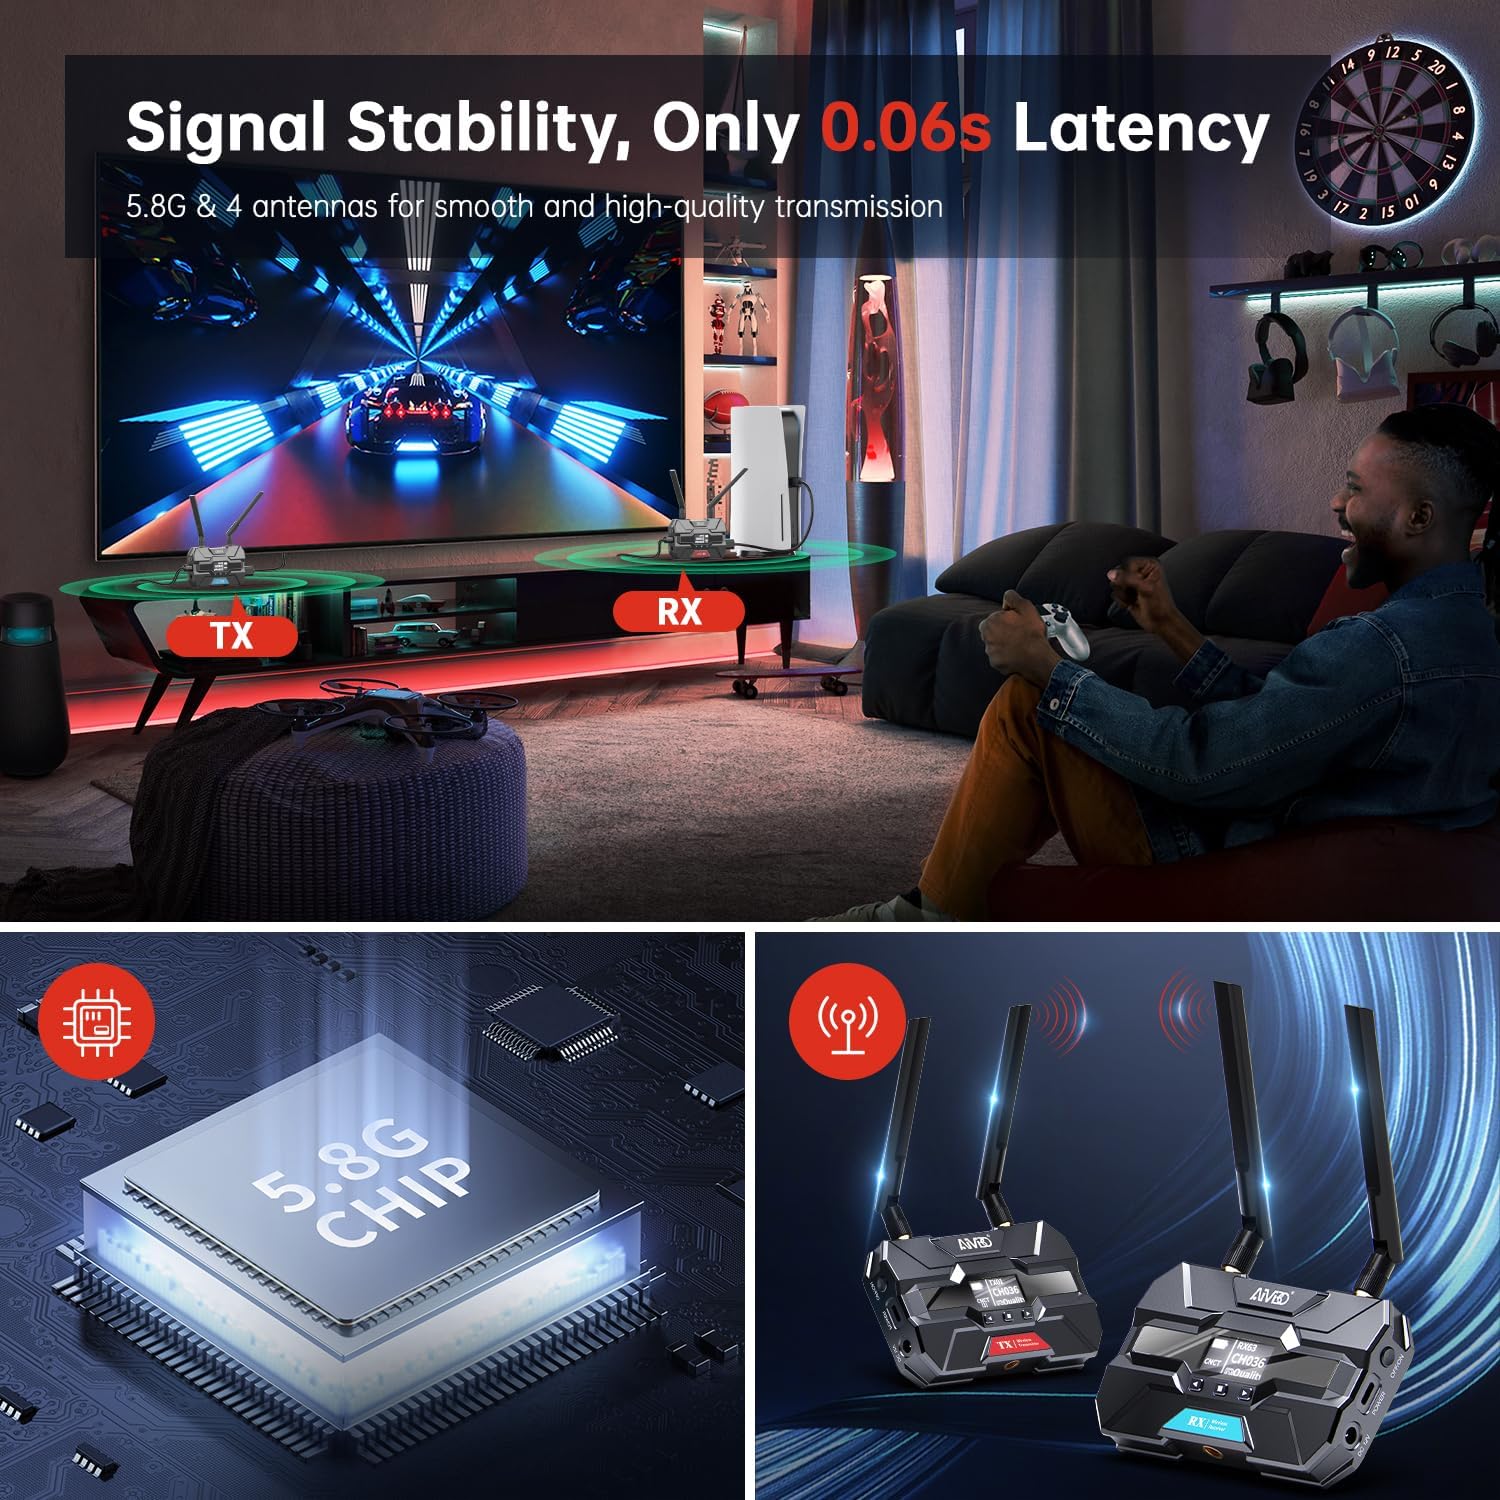
Image: A gaming environment demonstrating the TIMBOOTECH Wireless HDMI system's stable signal and ultra-low latency (0.06s), crucial for responsive gaming experiences.
6. Vzdrževanje
- Čiščenje: Za čiščenje zunanjosti enot uporabite mehko, suho krpo. Ne uporabljajte tekočih čistil ali topil.
- Hladilni ventilator: The built-in cooling fan helps maintain optimal operating temperature. Ensure the fan vents are not obstructed to allow proper airflow.
- Shranjevanje: Ko naprave dlje časa ne uporabljate, jih shranite na hladnem in suhem mestu, stran od neposredne sončne svetlobe in ekstremnih temperatur.
7. Odpravljanje težav
If you encounter issues with your TIMBOOTECH Wireless HDMI system, please refer to the following troubleshooting tips:
| Težava | Možen vzrok | rešitev |
|---|---|---|
| Na zaslonu ni signala |
|
|
| Poor signal quality, flickering, or dropped connection |
|
|
| Enote se ne združujejo |
|
|
| Pregrevanje |
|
|
8. Specifikacije
- Številka modela: c6e2f051-b1a5-4eb1-920e-7e082da52f8c
- Obseg prenosa: Do 1000 m (300 čevljev)
- Zakasnitev: 0.06 sekund
- Brezžična frekvenca: Dual-band 2.4GHz and 5.8GHz
- Maximum Receivers: 4 (one Transmitter to four Receivers)
- Tehnologija povezljivosti: HDMI
- Vrsta priključka: HDMI
- Posebna lastnost: Built-in Cooling Fan, OLED Display, HDMI Loop-Out
- Združljive naprave: Televisions, Monitors, Projectors, Cameras, Laptops, Blu-ray players, Set-top boxes, PCs, DSLRs, Satellites, DVDs
- Vhodna moč: DC 12V (recommended), USB-C
- Proizvajalec: TIMBOOTECH
9. Garancija in podpora
For warranty information and technical support, please refer to the documentation provided with your purchase or contact TIMBOOTECH customer service through their official channels. Keep your purchase receipt for warranty claims.


