1. Uvod
This manual provides detailed instructions for the installation, operation, and maintenance of your SIXTOP 3 Channel Dash Cam. This device is designed to record video from the front, interior, and rear of your vehicle, enhancing driving safety and providing evidence in various situations.
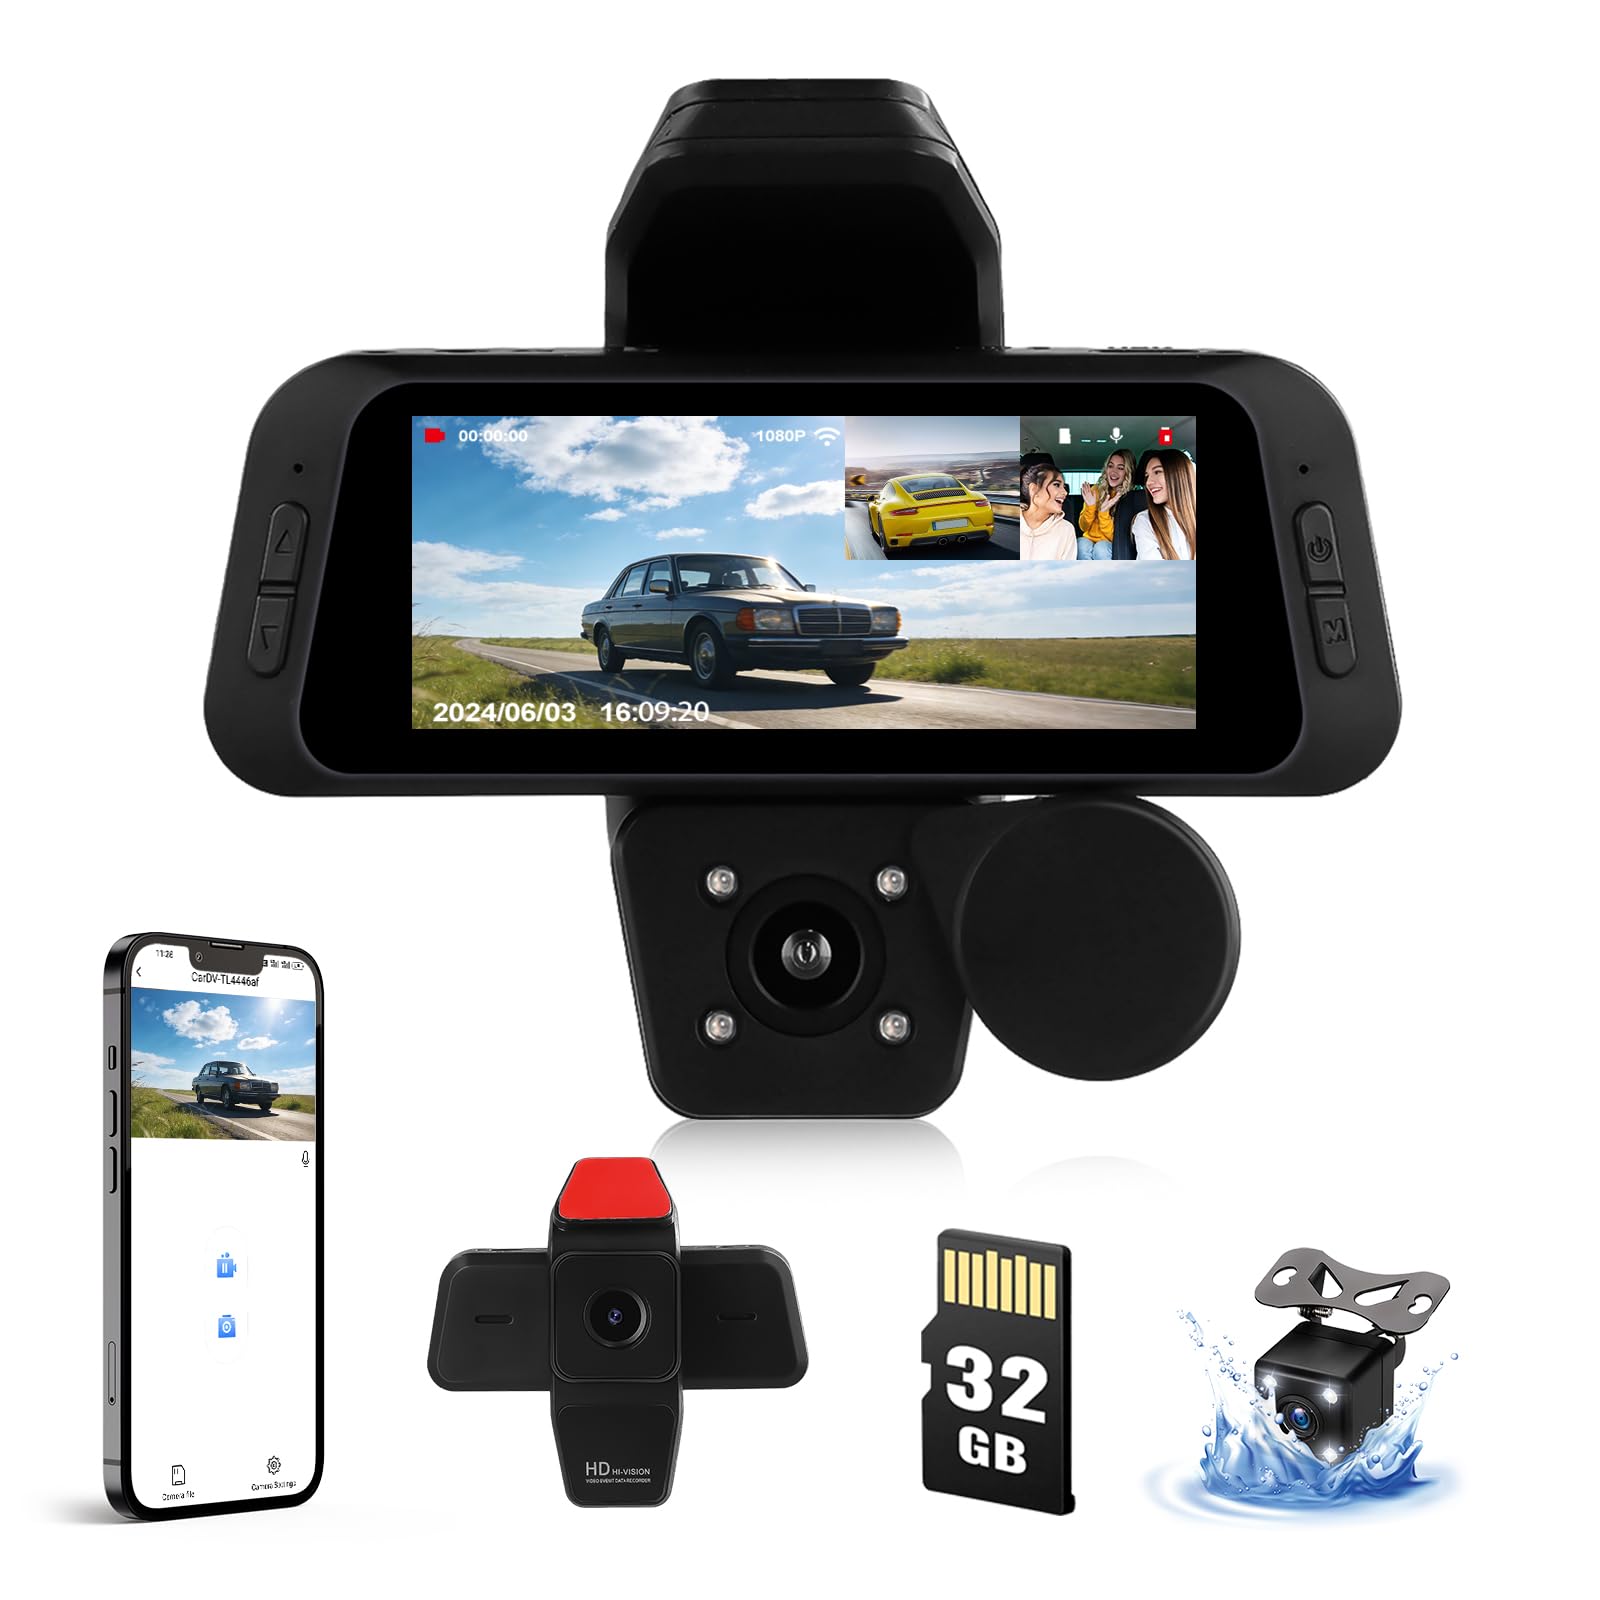
Image: SIXTOP 3 Channel Dash Cam main unit.
2. Vsebina paketa
Preverite, ali so v vašem paketu priloženi vsi spodaj navedeni elementi:
- SIXTOP 3 Channel Dash Cam (Main Unit)
- Napajalni kabel
- Zadaj View Kamera
- Extended Line (for rear camera)
- Uporabniški priročnik
- Accessories (e.g., mounting screws, adhesive pads)
- 32GB TF Card (microSD)

Image: Package contents and main unit dimensions.
3. Diagram izdelka
Familiarize yourself with the components and controls of your dash cam:
Slika: Spredaj in zadaj views of the dash cam with labeled buttons and ports.
- Tipka gor: Navigation/Selection.
- Tipka dol: Navigation/Selection.
- Stikalo za vklop: Vklopi/izklopi napravo.
- M Menu Key: Dostopi do nastavitev menija.
- AN: (Function not specified, typically for mode switching or indicator).
- Ponastaviti: Ponastavi napravo na tovarniške nastavitve.
- MIC: Mikrofon za snemanje zvoka.
- USB: Power input and data transfer.
- TF: Reža za kartico MicroSD.
- Vgrajena kamera: Interior camera.
- Sprednja kamera: Records the forward view.
4. Nastavitev in namestitev
4.1. Vstavljanje kartice TF
Insert the provided 32GB TF card into the TF card slot (9) on the dash cam. Ensure the card is inserted correctly until it clicks into place. To remove, gently press the card until it pops out.
4.2. Dash Cam Installation Procedure
Follow these steps for proper installation of the dash cam in your vehicle:
- Step 1: Clean the Installation Area. Use a clean rag to wipe the glass surface on your windshield where the dash cam will be mounted. Ensure the area is free of dust and grease for optimal adhesion.
- Step 2: Prepare the Mount. If using an adhesive mount, tear off the protective film from the adhesive pad. If using a suction cup mount, ensure the suction cup is clean.
- Step 3: Mount the Dash Cam. Press the dash cam mount firmly onto the cleaned glass surface. For suction cup mounts, engage the locking mechanism.
- Step 4: Connect the Rear Camera (Optional). If using the rear camera, connect its cable to the main dash cam unit. Route the cable neatly along the vehicle's interior trim to the rear of the car. The red line on the rear camera extension cable is the reversing trigger line; connect this to your vehicle's reversing light power supply for automatic reverse view switching. This connection is optional; the rear camera image can still be manually selected without it.
- Step 5: Connect Power Supply. Connect the power cord to the dash cam's USB port (8) and plug the other end into your vehicle's 12V power outlet (cigarette lighter socket).
- 6. korak: Prilagodite kot. Adjust the angle of the front camera to ensure it captures the road ahead clearly. Adjust the interior camera and rear camera (if installed) for desired coverage.

Image: Step-by-step installation guide for the dash cam.
5. Navodila za uporabo
5.1. Vklop/izklop
- Automatic Power: Kamera na armaturni plošči se bo samodejno vklopila in začela snemati, ko vklopite kontakt vašega vozila.
- Manual Power: Press and hold the Power Switch (3) to manually turn the device on or off.
5.2. Recording Modes and Views
This dash cam supports three camera views: Front, Interior, and Rear. You can switch between display modes to view different combinations on the 3-inch IPS screen.

Image: Various display configurations for the three-channel camera system.
- Spredaj View Kamera: Records the road ahead (150° wide-angle).
- Internal Camera: Records the driver and vehicle interior. The round cover can be moved to open or block this camera for privacy.
- Zadaj View Kamera: Zagotavlja a view of the area behind the vehicle (120° wide-angle). Useful for reversing assistance.
5.3. Automatic Loop Recording
The dash cam continuously records video in segments. When the TF card is full, the oldest unlocked filese samodejno prepišejo z novimi posnetki. To zagotavlja neprekinjeno snemanje brez ročnega posredovanja.

Image: Illustration of automatic loop recording and app connection process.
5.4. G-senzor (zaznavanje trčenja)
The built-in G-Sensor detects sudden impacts or collisions. When triggered, it automatically locks the current video segment, preventing it from being overwritten by loop recording. This ensures critical event footage je ohranjen.

Image: G-Sensor parking detection feature, showing how it records collisions and other events.
5.5. Nadzor parkiranja
When the vehicle is parked, the dash cam can continue to monitor for impacts. If a collision is detected while parked, the dash cam will automatically power on and record, providing evidence for incidents like bumps or vandalism.
Note: This function may require a hardwire kit (sold separately) for continuous power.

Image: Parking monitoring feature in action, showing a parked car and remote viewing via app.
5.6. WiFi and App Connectivity
The dash cam features built-in WiFi for seamless connection to your smartphone via a dedicated app. This allows you to view v živo footage, playback recorded videos, and download fileneposredno na vaš telefon.
- Download the "Viidure" app from your smartphone's app store.
- Open the app and follow the on-screen prompts to connect wirelessly.
- Connect to the dash cam's WiFi network (SSID and password usually displayed on the dash cam screen, default password often "12345678").
- Return to the app to manage your recordings.
For app download, you can also scan the QR code found in the user manual or on the product packaging, or visit the official app download page: https://www.6zhentan.com/app/d0001/index.html
5.7. Screen Saver Function
To minimize distraction while driving, you can enable the screen saver function in the settings. The screen will turn off after a set period, but the dash cam will continue recording normally in the background.

Image: Screen saver function, showing the dash cam continuing to record with the screen off.
5.8. Kompenzacija osvetlitve
The dash cam automatically adjusts video brightness based on ambient light conditions. This feature ensures that recordings are clear and visible, even in challenging lighting, such as very bright or very dark environments.

Image: Exposure compensation feature, showing how the dash cam adjusts for optimal video clarity in varying light conditions.
6. Vzdrževanje
- Čiščenje: Za čiščenje leče in zaslona armaturne kamere uporabite mehko, suho krpo. Izogibajte se uporabi abrazivnih čistil ali topil.
- Kartica TF: Regularly format the TF card (monthly is recommended) to ensure optimal performance and prevent data corruption. Back up any important files pred formatiranjem.
- Posodobitve vdelane programske opreme: Preverite pri proizvajalcu webna spletnem mestu ali v aplikaciji poiščite morebitne posodobitve vdelane programske opreme za izboljšanje delovanja in dodajanje novih funkcij.
7. Odpravljanje težav
| Težava | Možen vzrok | rešitev |
|---|---|---|
| Kamera na armaturni plošči se ne vklopi. | No power supply; faulty power cable; loose connection. | Check power connection to vehicle's 12V outlet. Ensure the power cable is securely connected to the dash cam. Test with another power source if possible. |
| "Card Full" error or recording stops. | TF card is full of locked files; TF card error; low-quality TF card. | Format the TF card (back up important files first). Reduce G-Sensor sensitivity if too many files are being locked. Use a high-speed (Class 10 or U3) TF card. |
| Težave s povezavo aplikacije. | Incorrect WiFi password; phone not connected to dash cam's WiFi; app malfunction. | Ensure correct WiFi password ("12345678" is common default). Confirm your phone is connected to the dash cam's WiFi network. Restart the app and dash cam. |
| Slaba kakovost videa. | Umazana leča; zaščitna folija je še vedno na leči; napačna nastavitev ločljivosti. | Clean the camera lenses. Ensure any protective film is removed. Check video resolution settings in the menu. |
| Kamera na armaturni plošči se zamrzne ali sesuje. | Software issue; TF card error. | Press the Reset button (6). Format the TF card. Update firmware if available. |
8. Specifikacije
| Funkcija | Podrobnost |
|---|---|
| Znamka | SIXTOP |
| Ime modela | ONBOARD_CAMERA |
| Dimenzije izdelka | 4.1 x 10.5 x 9.7 cm |
| Teža | 340 g |
| Tehnologija povezljivosti | Wi-Fi |
| Ločljivost zajema videa | 1080p |
| Polje od View | 150 stopinj (spredaj), 120 stopinj (zadaj) |
| Velikost zaslona | 3 palcev |
| Vrsta zaslona | LCD |
| Vrsta bliskovnega pomnilnika | TF, microSD |
| Velikost priložene pomnilniške kartice | 32 GB |
| Max Supported Flash Memory | 128 GB |
| Posebne lastnosti | Built-In WiFi, G-Sensor, Loop Recording, Night Vision, Reverse Assist |
| Nadzorna metoda | Pritisni gumb |
| Podprti standardi | AVI, JPG |
| Hitrost sličic | 30 sličic na sekundo |
9. Informacije o garanciji
This SIXTOP Dash Cam comes with a 1-letna garancija from the date of purchase. This warranty covers manufacturing defects and ensures replacement for eligible issues. Please retain your proof of purchase for warranty claims.
10. Podpora strankam
For technical assistance, troubleshooting, or warranty inquiries, please contact SIXTOP customer support:
- E-pošta: SIXTOP123@163.com
- Spletna podpora: Refer to the official SIXTOP store on Amazon or the manufacturer's webstran za dodatne vire.

Image: SIXTOP customer support contact information.
SIXTOP is committed to providing 24/7 quick response, 1-year replacement, and lifetime technical support.