
HOCO QS2
Hoco QS2 Portable Smart Air Pump & Emergency Start-Up Power Bank User Manual
Model: QS2
1. Uvod
Thank you for choosing the Hoco QS2 Portable Smart Air Pump & Emergency Start-Up Power Bank. This device is a multi-functional tool designed to provide reliable assistance in various situations, including jump-starting vehicles, inflating tires, and charging electronic devices. Please read this manual thoroughly before use to ensure proper operation and to maximize the lifespan of your device.
2. Varnostni ukrepi
Always observe the following safety guidelines to prevent injury or damage to the device and property.
- Naprave ne izpostavljajte ekstremnim temperaturam, neposredni sončni svetlobi ali ognju.
- Hraniti izven dosega otrok.
- Naprave ne razstavljajte, spreminjajte ali poskušajte popraviti sami. Obrnite se na usposobljeno servisno osebje.
- Ensure proper ventilation during operation, especially when using the air pump or jump start function.
- Izogibajte se kratkemu stiku na izhodnih sponkah.
- Ne uporabljajte zaganjalnika, če je akumulator prazen.amps ali so kabli poškodovani.
- When jump-starting, ensure the vehicle's ignition is off and all accessories are unplugged.
- Do not over-inflate tires. Always refer to the recommended tire pressure for your vehicle.
- If the device becomes excessively hot during use, discontinue operation immediately.
3. Vsebina paketa
Označite polje za naslednje elemente:
- 1 x Hoco QS2 8000 mAh Portable Smart Air Pump Emergency Start-Up Power Bank
- 1 x Jump Start Cables (Red and Black Clamps)
- 1 x Air Hose with Valve Connector
- Various Nozzle Adapters (e.g., for bicycles, balls)
- 1 x polnilni kabel USB Type-C

Figure 1: Hoco QS2 and its complete set of accessories.
4. Sestavni deli izdelka
Familiarize yourself with the different parts of your Hoco QS2 device.
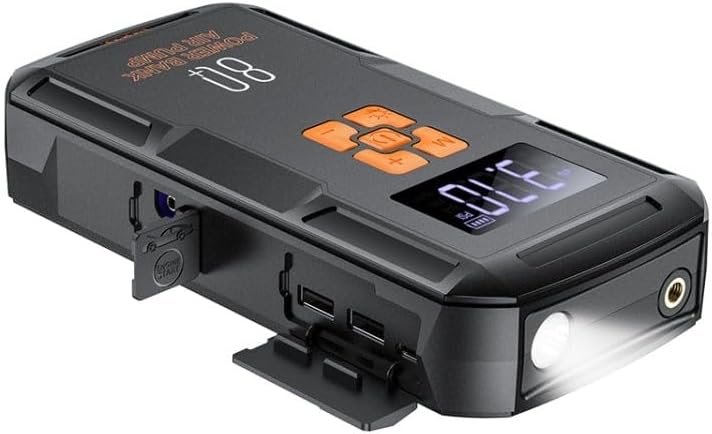
Slika 2: Konecview of the Hoco QS2 device.
- Digitalni zaslon: Shows current pressure, battery level, and selected mode.
- Gumbi za upravljanje: Moč, izbira načina, povečanje/zmanjšanje tlaka.
- Priključek za zračno cev: Connects the inflation hose.
- Vrata za zagon: Connects the jump start cables.
- Izhodna vrata USB (2x): For charging external devices (5V/2.4A).
- Vhodna vrata tipa C: For charging the Hoco QS2 itself (5V/2.4A).
- Svetilka LED: Zagotavlja osvetlitev.
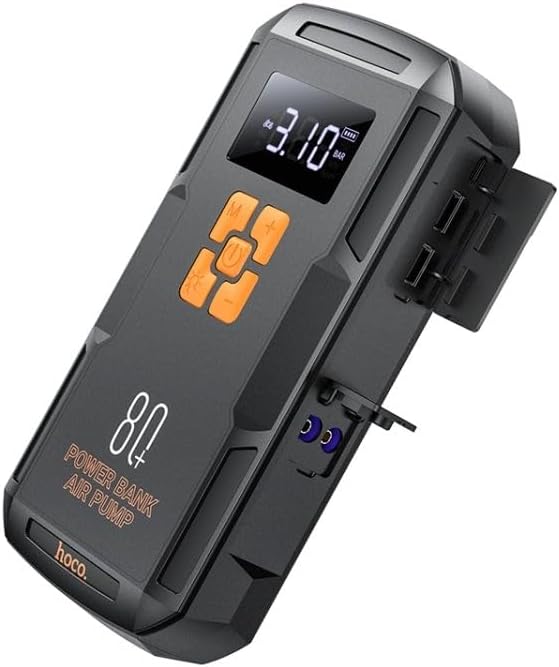
Slika 3: stran view of the Hoco QS2 with ports visible.
5. Nastavitev in polnjenje
5.1 Charging the Hoco QS2
Before first use, fully charge the Hoco QS2. It is recommended to keep the device charged above 50% for optimal performance, especially for jump-starting.
- Connect the provided USB Type-C charging cable to the Type-C input port on the Hoco QS2.
- Connect the other end of the USB cable to a 5V/2.4A USB wall adapter (not included) or a compatible USB port.
- The digital display will indicate the charging status and battery level.
- Čas polnjenja se lahko razlikuje glede na vir napajanja.
6. Navodila za uporabo
6.1 Jump Start Function
The Hoco QS2 can jump-start vehicles with up to 4.0L gasoline or 2.0L diesel engines.
- Ensure the Hoco QS2 is sufficiently charged (at least 75% battery recommended).
- Izklopite kontakt vozila in vso električno opremo.
- Priključite rdeči (+) clamp kabla za zagon na pozitivni (+) pol akumulatorja vozila.
- Povežite črni (-) klamp to the negative (-) terminal of the vehicle's battery or a solid, unpainted metal part of the engine block (ground point).
- Insert the blue connector of the jump start cable into the jump start port on the Hoco QS2.
- Once connected, the Hoco QS2 will automatically enter jump start mode.
- Zaženite motor vozila. Če se ne zažene takoj, počakajte 30 sekund, preden poskusite znova. Ne zaganjajte motorja več kot 3 sekunde na poskus.
- Once the vehicle starts, immediately disconnect the jump start cable from the Hoco QS2, then remove the black (-) clamp, ki mu sledi rdeči (+) clamp iz akumulatorja vozila.
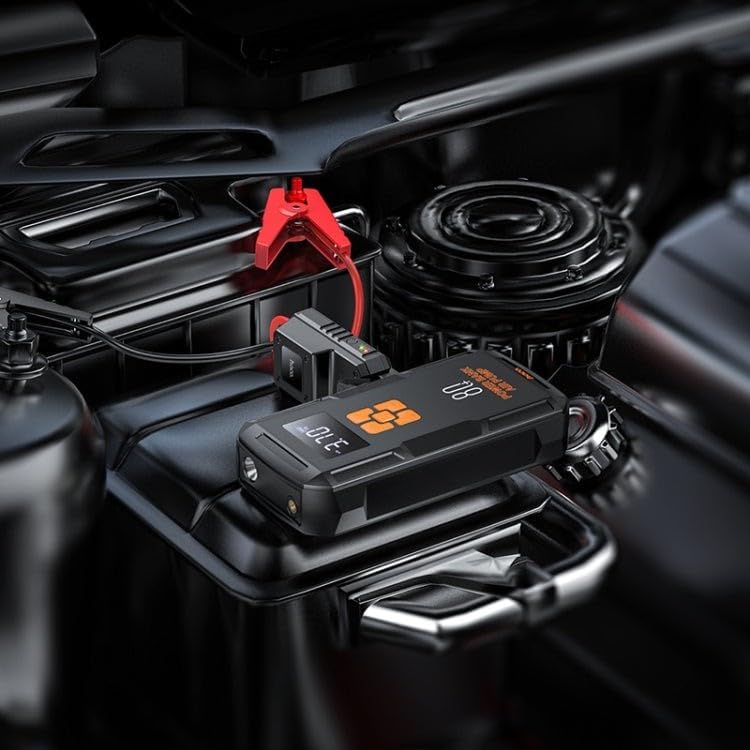
Figure 4: Using the Hoco QS2 for jump-starting a vehicle.
6.2 Tire Inflation Function (Air Pump)
The Hoco QS2 can inflate tires up to 10.3 bar (150 PSI) and features multiple inflation modes.
- Connect the air hose to the air hose port on the Hoco QS2.
- Attach the other end of the air hose to the tire valve. Ensure a secure connection to prevent air leakage. Use appropriate nozzle adapters for other inflatables (e.g., bicycle tires, sports balls).
- Press the Power button to turn on the device. The display will show the current tire pressure.
- Press the 'M' (Mode) button to cycle through the inflation modes: Car, Motorcycle, Bicycle, Basketball. Each mode has a default pressure setting, which can be adjusted.
- Z gumboma '+' in '-' nastavite želeni ciljni tlak.
- Press the Power button again to start inflation. The pump will automatically stop once the target pressure is reached.
- Odklopite zračno cev z ventila pnevmatike in naprave.

Figure 5: Inflating a car tire with the Hoco QS2.
6.3 Funkcija prenosne baterije
The Hoco QS2 can charge your electronic devices via its dual USB output ports.
- Connect your device's USB charging cable to one of the USB output ports on the Hoco QS2.
- Drugi konec kabla priključite na svojo elektronsko napravo (npr. pametni telefon, tablični računalnik).
- The Hoco QS2 will automatically begin charging your device.
- The digital display will show the remaining battery level of the power bank.
6.4 Funkcija LED svetilke
The integrated LED flashlight provides illumination for various situations.
- To turn on the flashlight, press and hold the 'Light' button (usually indicated by a light bulb icon).
- Press the 'Light' button again to cycle through different light modes (e.g., steady on, SOS signal, strobe).
- Press and hold the 'Light' button again to turn off the flashlight.
7. Vzdrževanje in shranjevanje
- Napravo očistite z mehko, suho krpo. Ne uporabljajte agresivnih kemikalij ali abrazivnih čistil.
- Store the Hoco QS2 in a cool, dry place, away from direct sunlight and moisture.
- For long-term storage, charge the device every 3-6 months to maintain battery health.
- Ensure all ports are covered when not in use to prevent dust and debris from entering.
8. Odpravljanje težav
| Težava | Možen vzrok | rešitev |
|---|---|---|
| Naprava se ne vklopi. | Nizka baterija. | Napravo popolnoma napolnite. |
| Vozilo se ne zažene s pomočjo kablov. | Incorrect cable connection; Device battery too low; Vehicle battery severely discharged. | Ensure correct polarity (+ to +, - to -). Charge the Hoco QS2. Allow more time for the vehicle battery to receive a charge, or seek professional assistance if the battery is completely dead. |
| Air pump not inflating or inflating slowly. | Air hose not securely connected; Nozzle adapter not suitable; Device battery low. | Check all connections for leaks. Use the correct adapter. Charge the device. |
| Polnjenje prek USB-ja ne deluje. | Device battery low; Cable faulty; Device not compatible. | Charge the Hoco QS2. Try a different USB cable. Ensure your device is compatible with 5V/2.4A charging. |
9. Tehnične specifikacije
| Funkcija | Specifikacija |
|---|---|
| Številka modela | QS2 |
| Kapaciteta baterije | 8000 mAh (29.6 Wh) |
| Vhod tipa C | 5V / 2.4A |
| USB Output 1/2 | 5V / 2.4A |
| Skupni izhod USB | 5V / 2.4A |
| Izhod iz začetnega skoka | 12V (for vehicle emergency start) |
| Največji zračni tlak | 10.3 bara / 150 PSI |
| Dimenzije | Približno 12 x 10 x 8 cm |
| Teža | Pribl. 800 gramov |
| Delovna temperatura | Refer to product packaging for specific range. |
10. Garancija in podpora
HOCO products are designed and manufactured to the highest quality standards. For warranty information and customer support, please refer to the warranty card included with your purchase or visit the official HOCO webspletnega mesta. Račun shranite kot dokazilo o nakupu za morebitne garancijske zahtevke.
Ask a question about this manual
Ask about setup, troubleshooting, compatibility, parts, safety, or missing instructions. Manuals+ will review the question and use this page’s manual context to help answer it.