
1. Uvod
Thank you for choosing the Moongiantgo 5L Dough Maker with Ferment Function. This appliance is designed to simplify the dough preparation process, offering both kneading and fermentation capabilities in one unit. Please read this manual thoroughly before use to ensure safe and efficient operation.
2. Pomembna varnostna navodila
- Pred uporabo aparata preberite vsa navodila.
- Glavne enote ne potapljajte v vodo ali druge tekočine.
- Med delovanjem držite roke in pripomočke stran od premikajočih se delov.
- Ensure the lid is securely locked before starting the machine.
- Izvlecite vtič iz vtičnice, ko ga ne uporabljate, preden namestite ali odstranite dele in pred čiščenjem.
- Ta naprava je samo za uporabo v gospodinjstvu.
3. Izdelek je končanview
Familiarize yourself with the components of your Moongiantgo Dough Maker.
Slika: Razstavljeno view showing the PP Small Conical Lid, ABS Mixing Bowl Lid, 304 Stainless Steel Bowl, Die-casting Aluminum Kneading Blade, Face-up Touch Panel, and Suction Foot.
- Glavna enota: V njem sta nameščena motor in krmilna plošča.
- Posoda iz nerjavečega jekla 304: 5L capacity for mixing and fermenting dough.
- Gnetenje: Detachable blade for dough mixing.
- Prozoren pokrov: Allows observation of the kneading process and has a central opening for adding ingredients.
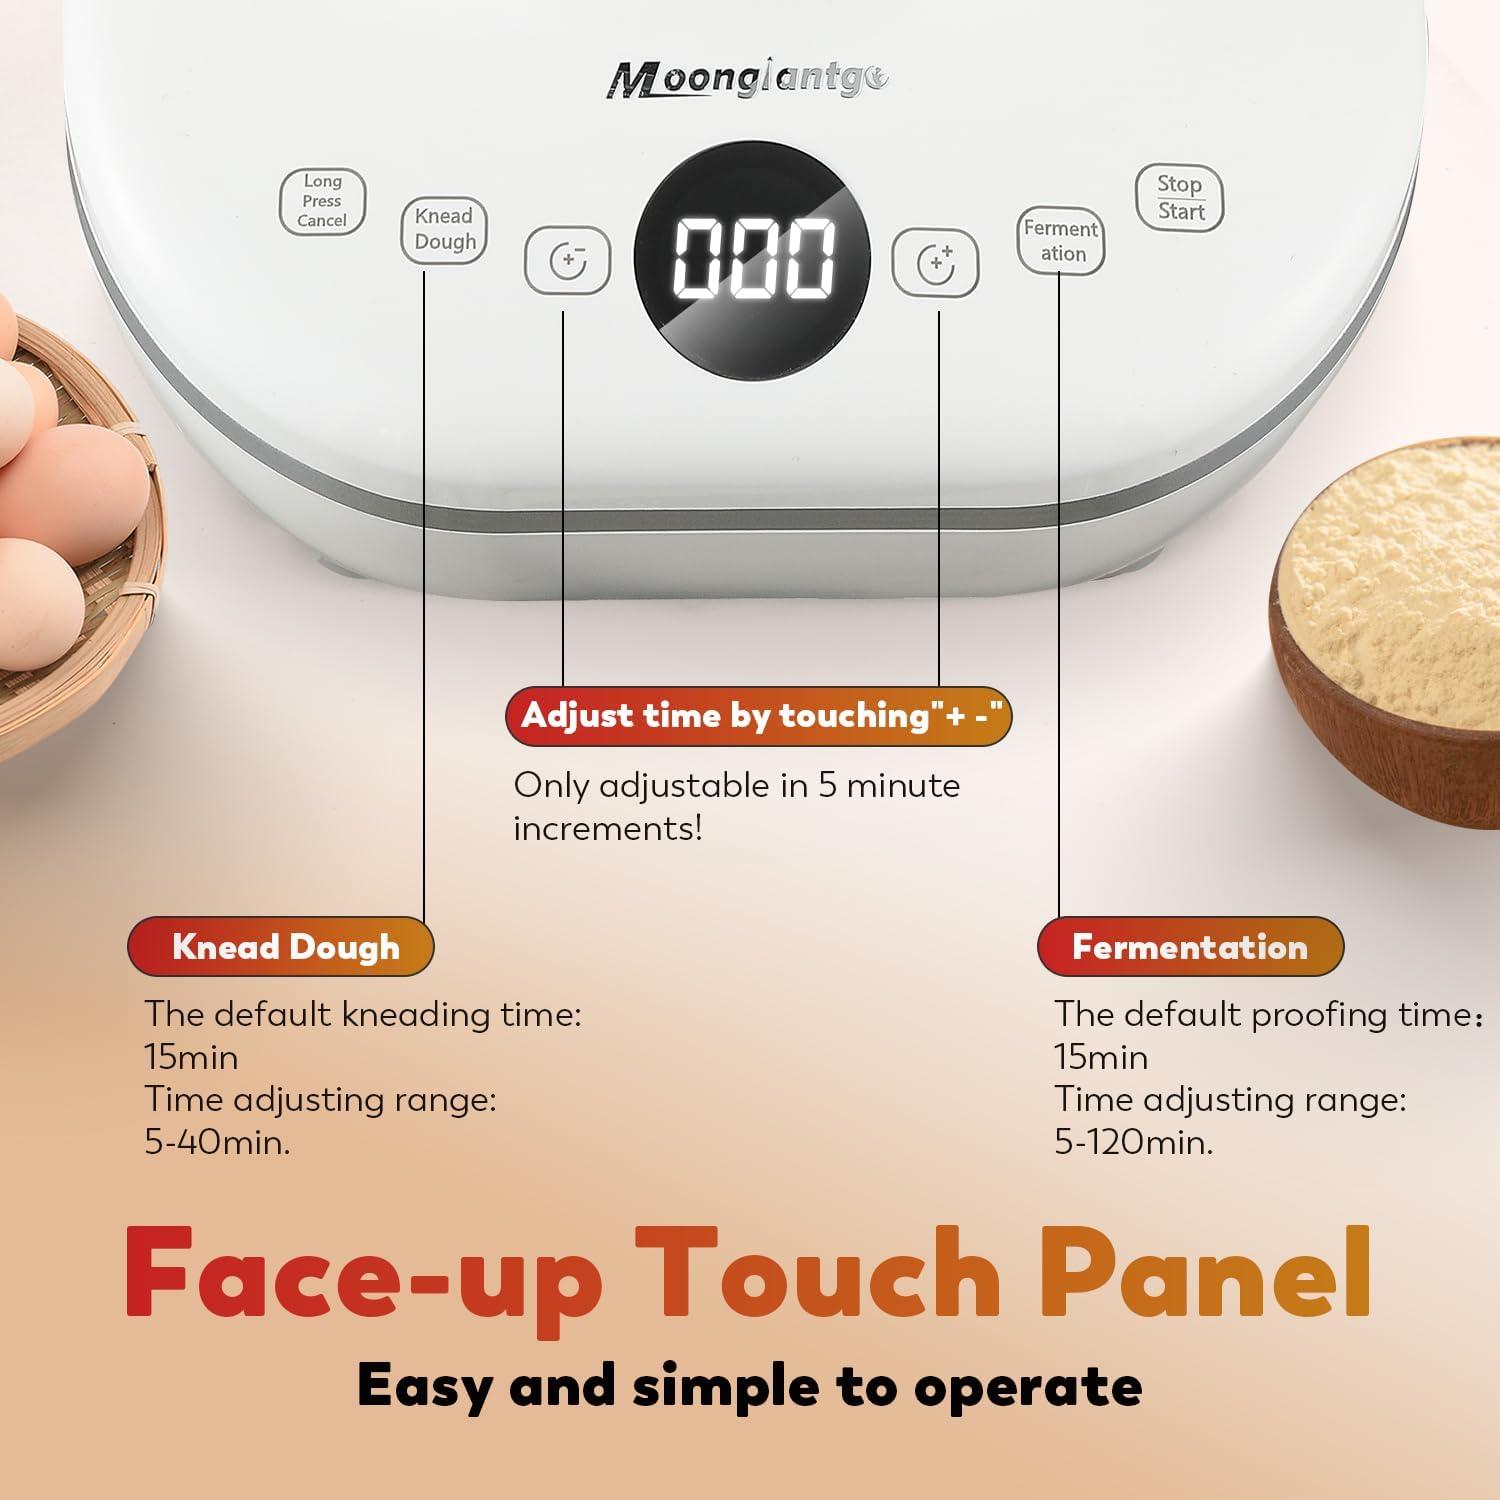
- Plošča na dotik: For setting kneading and fermentation times.
- Suction Feet: Za stabilnost med delovanjem.
4. Nastavitev in montaža
Before first use, ensure all packaging materials are removed and clean the bowl and kneading blade. Place the dough maker on a stable, flat, and dry surface.
- Insert the Kneading Blade: Place the kneading blade onto the shaft at the bottom of the stainless steel bowl. Ensure it is securely seated.
- Place the Bowl: Position the 304 stainless steel bowl onto the main unit, ensuring it is properly aligned.
- Zavarujte pokrov: Place the transparent lid onto the bowl and rotate it clockwise until it locks securely into place.
- Priključite napajanje: Plug the power cord into a suitable electrical outlet. The display will light up, indicating standby mode.
Video: Demonstrates how to insert and remove the detachable kneading blade.

Image: Illustrates the process of closing the bowl lid by rotating it clockwise until it locks.
5. Navodila za uporabo
5.1 Kneading Dough
- Dodajte sestavine: Pour the desired flour and water into the stainless steel bowl. The suggested flour-water ratio is 100:45-100:50. Recommended flour-yeast ratio is 100:1-100:2.
- Set Kneading Time: Touch the "Knead Dough" key. The default kneading time is 15 minutes. You can adjust the time from 5 to 40 minutes using the "+-" keys (adjustable in 5-minute increments).
- Start Kneading: After setting the time, touch the "Start/Stop" key to begin the kneading process. The machine operates intermittently, simulating hand kneading.
- Premor/Prekliči: You can touch the "Start/Stop" key again to pause at any time. To cancel the process, long press the "Long Press Cancel" key.

Image: Shows flour and water being added to the dough maker's bowl.
Slika: Podrobna view of the touch panel, highlighting the 'Knead Dough' button and time adjustment controls.

Image: The dough maker actively mixing ingredients to form dough.
5.2 Fermenting Dough
- Prepare for Fermentation: After kneading, or if you are only fermenting, ensure the dough is in the bowl and the lid is securely closed.
- Set Fermentation Time: Touch the "Fermentation" key. The default fermentation time is 90 minutes. You can adjust the time from 5 to 120 minutes using the "+-" keys (adjustable in 5-minute increments).
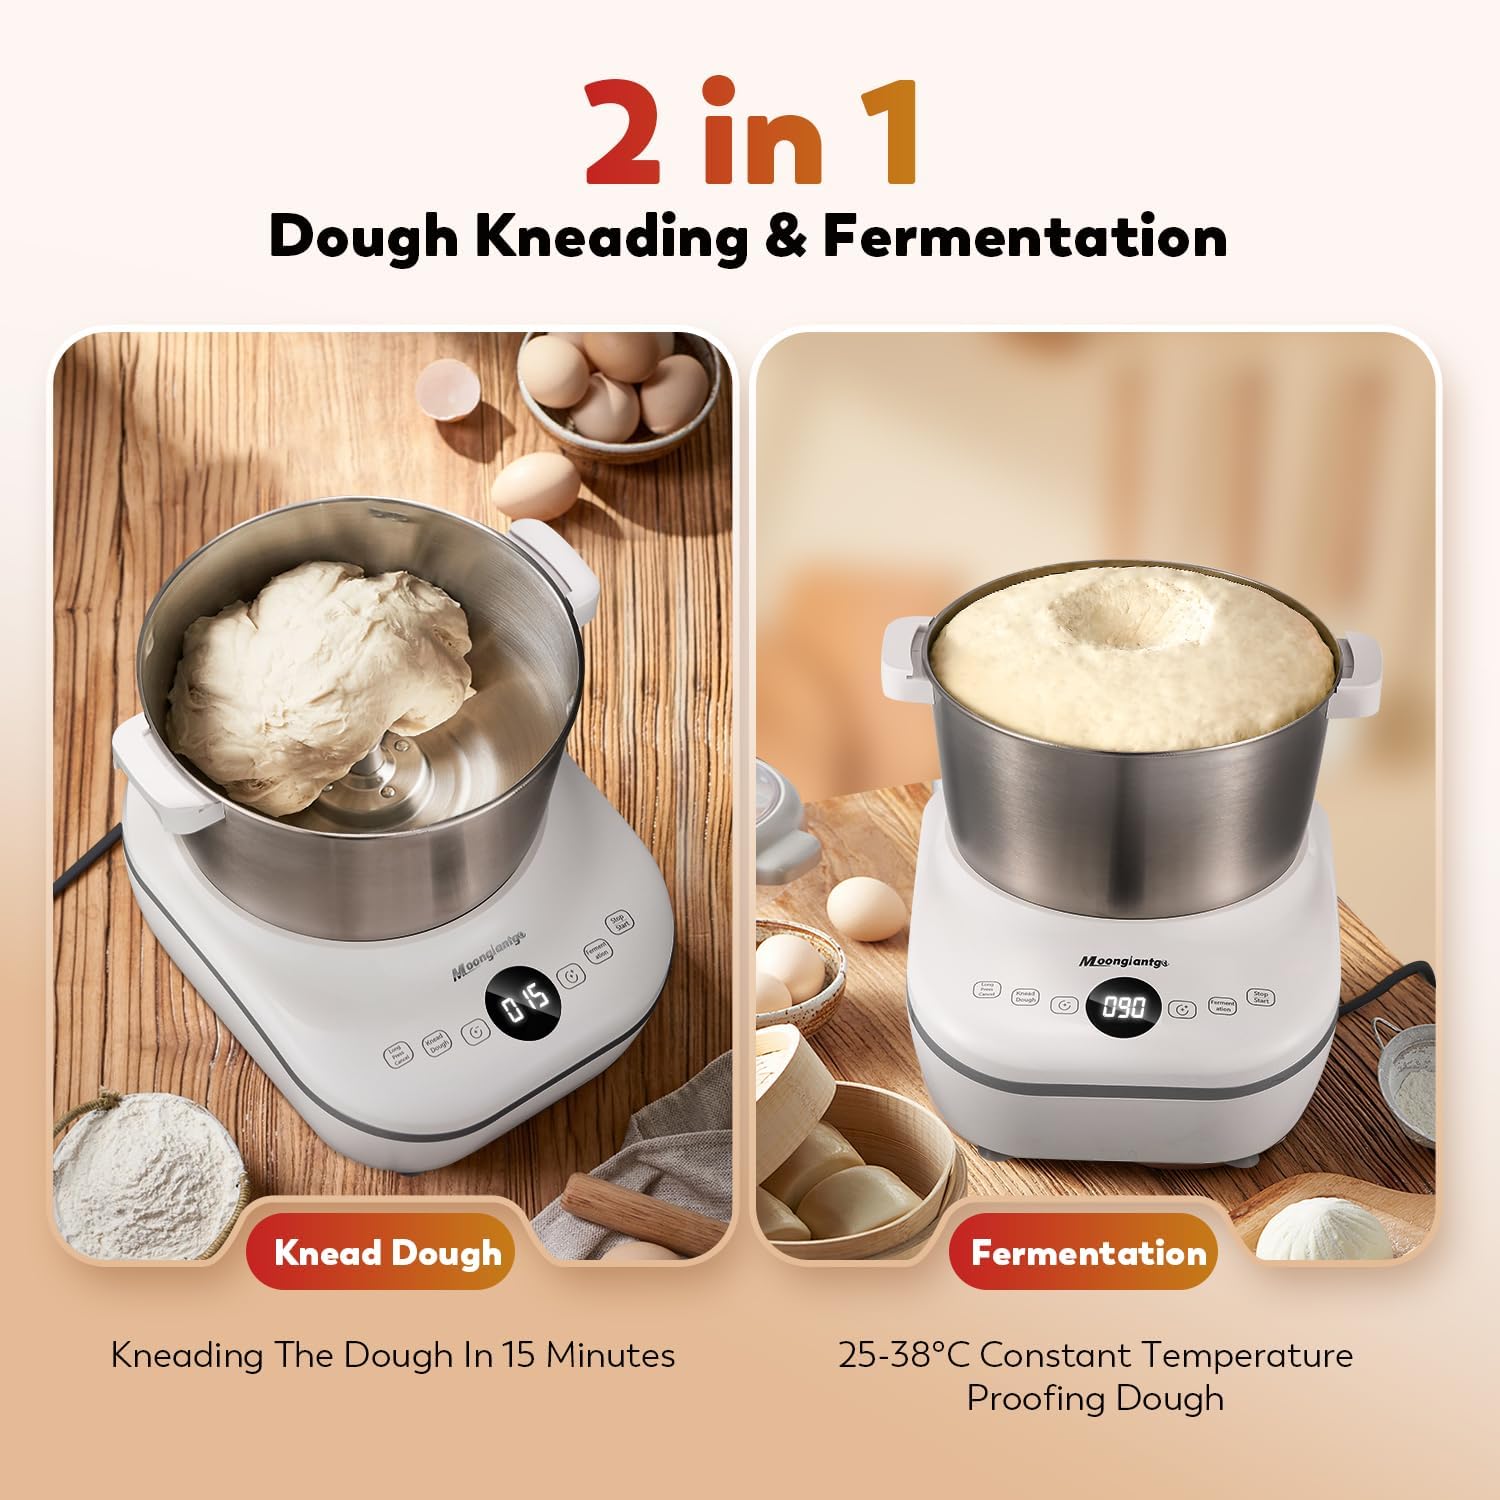
- Začetek fermentacije: Touch the "Start/Stop" key to begin. The machine will maintain a constant temperature between 25~38°C for optimal proofing.
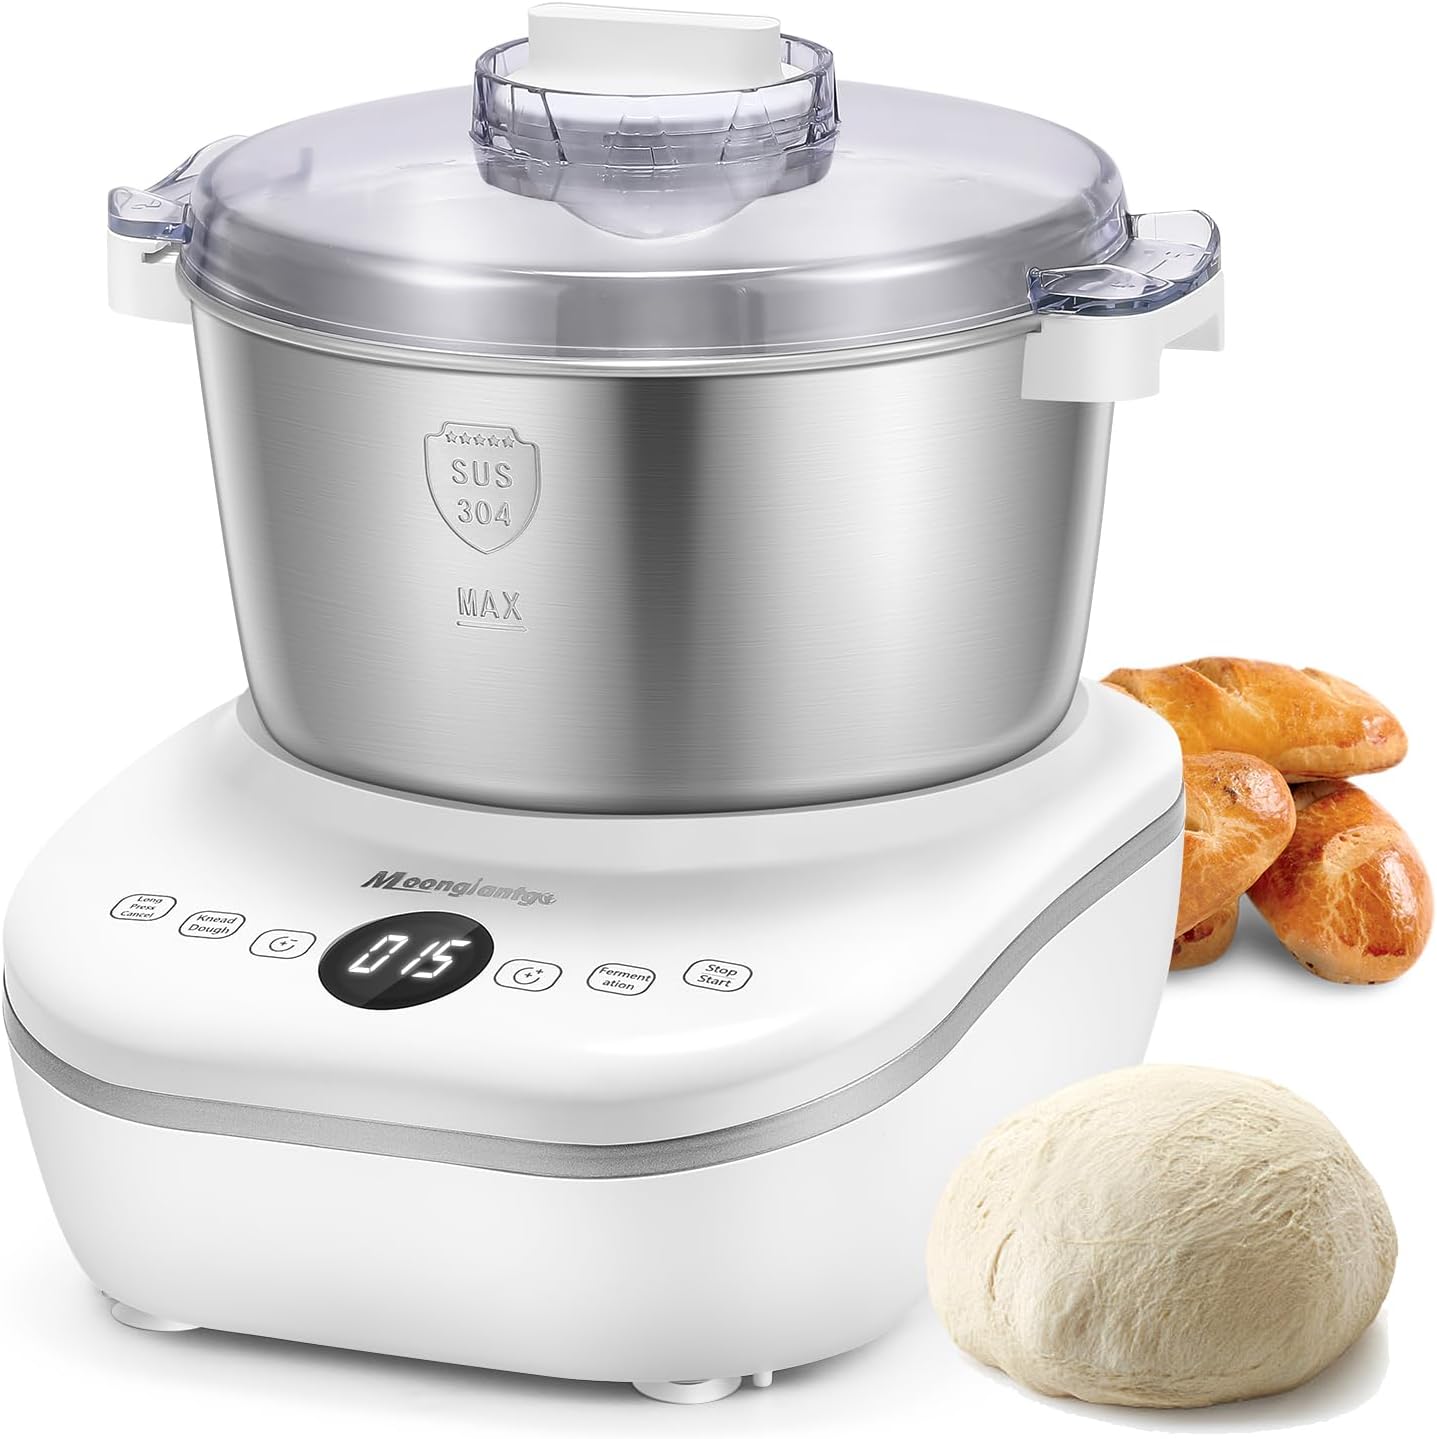
Image: The dough maker displaying both the kneading process and the fermentation process with rising dough.
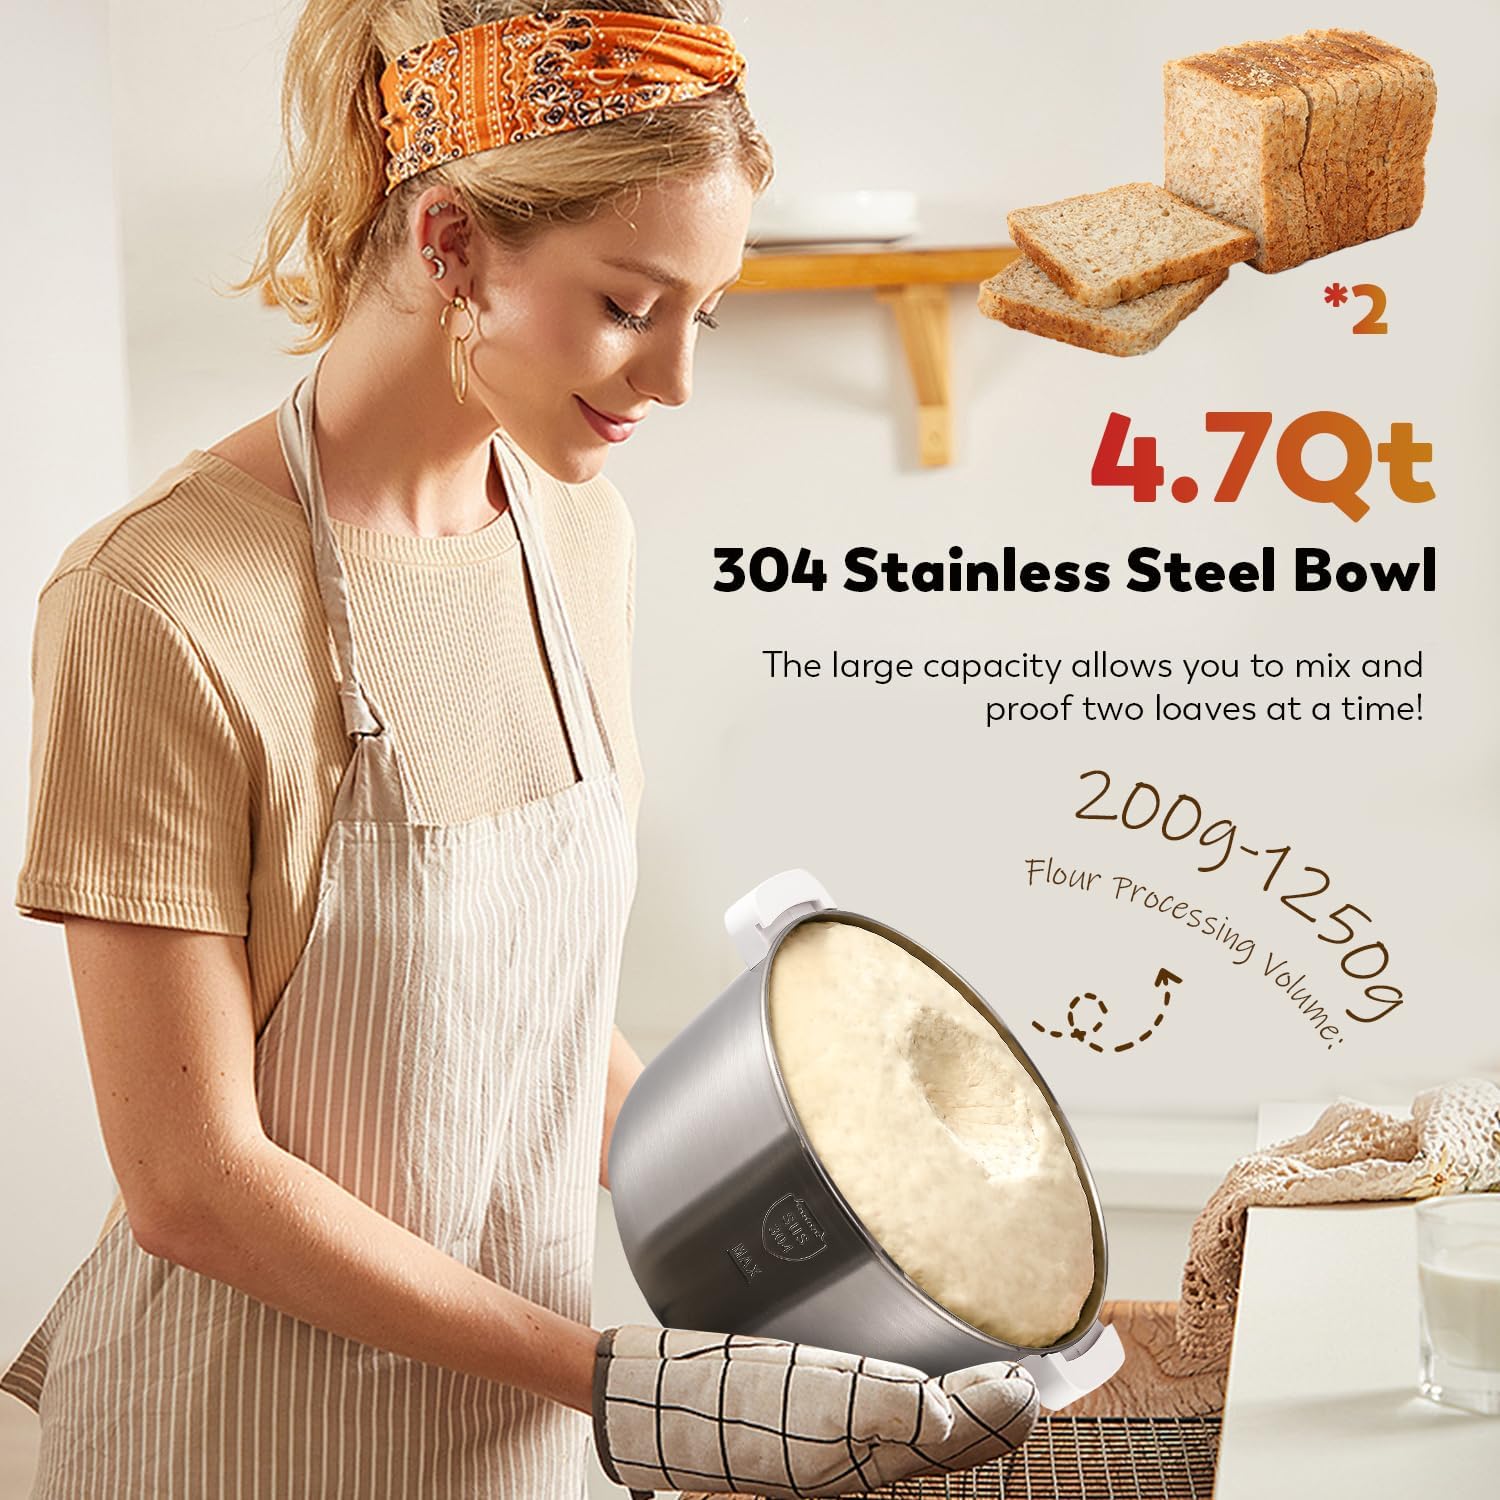
Image: Close-up of dough actively fermenting and rising within the stainless steel bowl.
5.3 Adding Ingredients During Operation
The transparent lid features a small central opening with a removable lid. This allows you to add water or other ingredients while the dough maker is operating without interrupting the process.

Image: A hand pouring water through the small central opening of the transparent lid while the machine is in use.
5.4 Use Tips
- If room temperature is below 20°C, use warm water for better fermentation results.
- Adding a small amount of cooking oil during mixing can reduce dough sticking to the bowl.
- The machine runs intermittently, simulating hand kneading, which is normal.
Video: Demonstrates the dough maker in action, including adding ingredients, kneading, fermentation, and preparing various dough-based foods.
6. Vzdrževanje in čiščenje
Proper maintenance ensures the longevity and hygiene of your dough maker.
- Demontaža: Unplug the appliance. Remove the lid, then detach the stainless steel bowl from the main unit. Remove the kneading blade from the bowl.
- Cleaning the Bowl and Blade: Both the 304 stainless steel bowl and the kneading blade are detachable and can be rinsed directly with water. They are also dishwasher safe.
- Pomembna opomba: If you leave dough in the bowl for an extended period after use, it may harden and make removing the blade difficult. Remove the blade from the bowl as soon as possible after use.
- Čiščenje glavne enote: Obrišite glavno enoto z oglasomamp krpo. Ne potapljajte ga v vodo.
- Sušenje in shranjevanje: Preden napravo ponovno sestavite ali shranite, se prepričajte, da so vsi deli popolnoma suhi.

Image: Shows the detachable stainless steel bowl and kneading blade, emphasizing ease of cleaning.
7. Odpravljanje težav
Če naletite na kakršne koli težave, si oglejte naslednje pogoste težave in rešitve:
| Težava | Možen vzrok | rešitev |
|---|---|---|
| Aparat se ne zažene. | Not plugged in; Lid not securely closed; Power outage. | Ensure power cord is securely plugged in; Check if the lid is locked; Verify power supply. |
| Dough is too sticky or too dry. | Incorrect flour-water ratio. | Adjust the flour-water ratio (recommended 100:45-100:50). Add small amounts of flour or water as needed. |
| Dough not rising during fermentation. | Yeast inactive; Incorrect temperature; Fermentation time too short. | Ensure yeast is active; Use warm water if room temperature is low; Increase fermentation time. |
| Močan hrup med delovanjem. | Unstable surface; Overloaded. | Place on a stable, flat surface; Do not exceed maximum capacity (2500g dough). |
8. Specifikacije
| Funkcija | Specifikacija |
|---|---|
| Znamka | Moongiantgo |
| Ime modela | 5L Dough Maker |
| barva | Bela |
| Dimenzije izdelka | 11.8"D x 9.8"Š x 12.2"V |
| Material | Plastic Base & 304 Stainless Steel Bowl |
| Posebne lastnosti | Constant Temperature Ferment, Microcomputer Timing |
| Zmogljivost | 5 litra (4.7 kvarte) |
| voltage | 110 voltov (AC) |
| Wattage | 200 vatov |
| Tip nadzora | Dotik |
| Flour Processing Volume | 200g-1250g |
| Dough Weight Range | 500g-2500g (1.1lb-5.5lb) |
| Material rezila | Nerjaveče jeklo |
| Deli, primerni za pomivanje v pomivalnem stroju | Bowl, Blade |
9. Garancija in podpora
Your Moongiantgo 5L Dough Maker is covered by a manufacturer's warranty. Please refer to the warranty card included with your product for specific terms and conditions. For technical support, troubleshooting assistance, or to inquire about replacement parts, please contact Moongiantgo customer service through the retailer where the product was purchased or visit the official Moongiantgo webmesto.


