
Uvod
This manual provides detailed instructions for the assembly, operation, and maintenance of your ODK Reversible L-Shaped Corner Desk, Model ZJZ-DCZWJ. Please read all instructions carefully before beginning assembly and retain this manual for future reference. Ensure all components are present and undamaged before proceeding.
Varnostne informacije:
- Vse majhne dele in embalažni material hranite izven dosega otrok.
- Mizo sestavite na mehki, čisti površini, da preprečite praske.
- Pred uporabo se prepričajte, da so vsi vijaki in pritrdilni elementi varno priviti. Občasno preverite in po potrebi ponovno privijte.
- Do not overload the desk or shelves beyond their intended weight capacity.
Vsebina paketa
Before assembly, unpack all components and verify that you have received all parts listed in the physical instruction booklet included with your product. If any parts are missing or damaged, please contact ODK customer support.
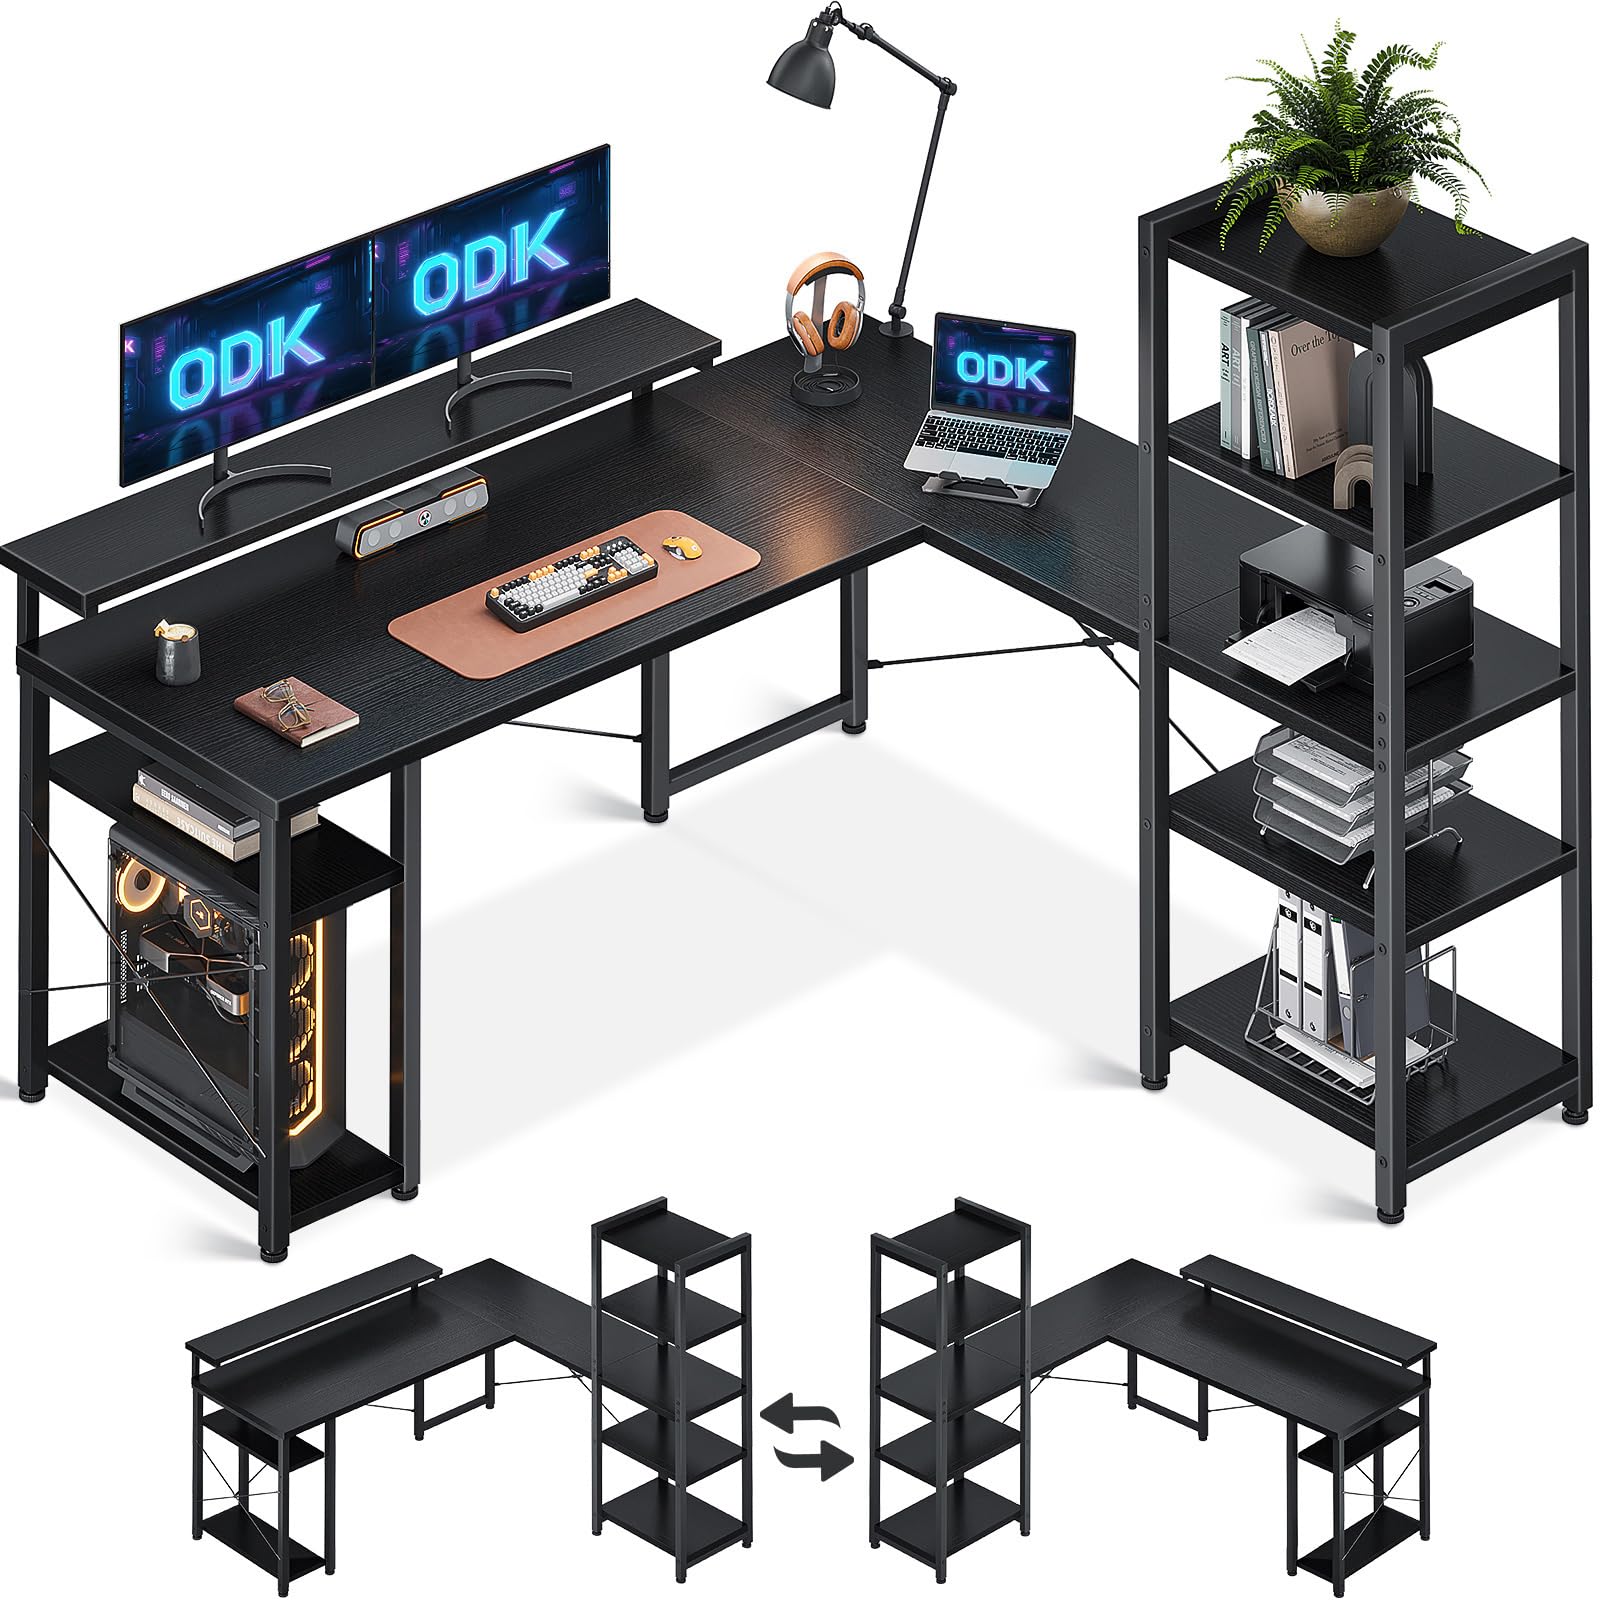
Slika: Konecview of the ODK L-Shaped Corner Desk setup, showing the desk, integrated shelving, and monitor stand.
Postavitev in montaža
Assembly typically requires two people. An Allen key is usually provided, but a battery-powered driver can expedite the process. Follow the step-by-step diagrams in your physical manual for precise assembly.
1. Determine Desk Orientation
The ODK L-Shaped Corner Desk is reversible, allowing you to configure the longer side of the L-shape to either the left or right, depending on your space requirements. Decide on your preferred orientation before starting assembly.

Image: Illustration showing the two possible configurations for the reversible L-shaped desk, with the shelving unit on either the left or right side.
2. Assemble Frame and Desk Panels
Begin by assembling the metal frame components according to the chosen orientation. Attach the main desk panels to the frame, ensuring all screws are finger-tightened initially. Once all panels are in place, fully tighten all fasteners.
3. Assemble Shelving Unit
Assemble the integrated shelving unit. This unit can be positioned on either side of the desk, depending on your reversible configuration choice. Secure the shelves to the frame using the provided hardware.
4. Attach Monitor Stand
The desk includes a long monitor stand. Attach the support brackets to the desk surface, then place the monitor stand panel on top. Ensure it is securely fastened.
Navodila za uporabo
Adjusting Monitor Stand Height
The monitor stand offers three adjustable height options to suit your ergonomic needs. To adjust the height, detach the monitor stand panel and re-position the support brackets to the desired height setting (10cm, 13cm, or 16cm) using the designated screw holes. Re-attach the monitor stand panel securely.
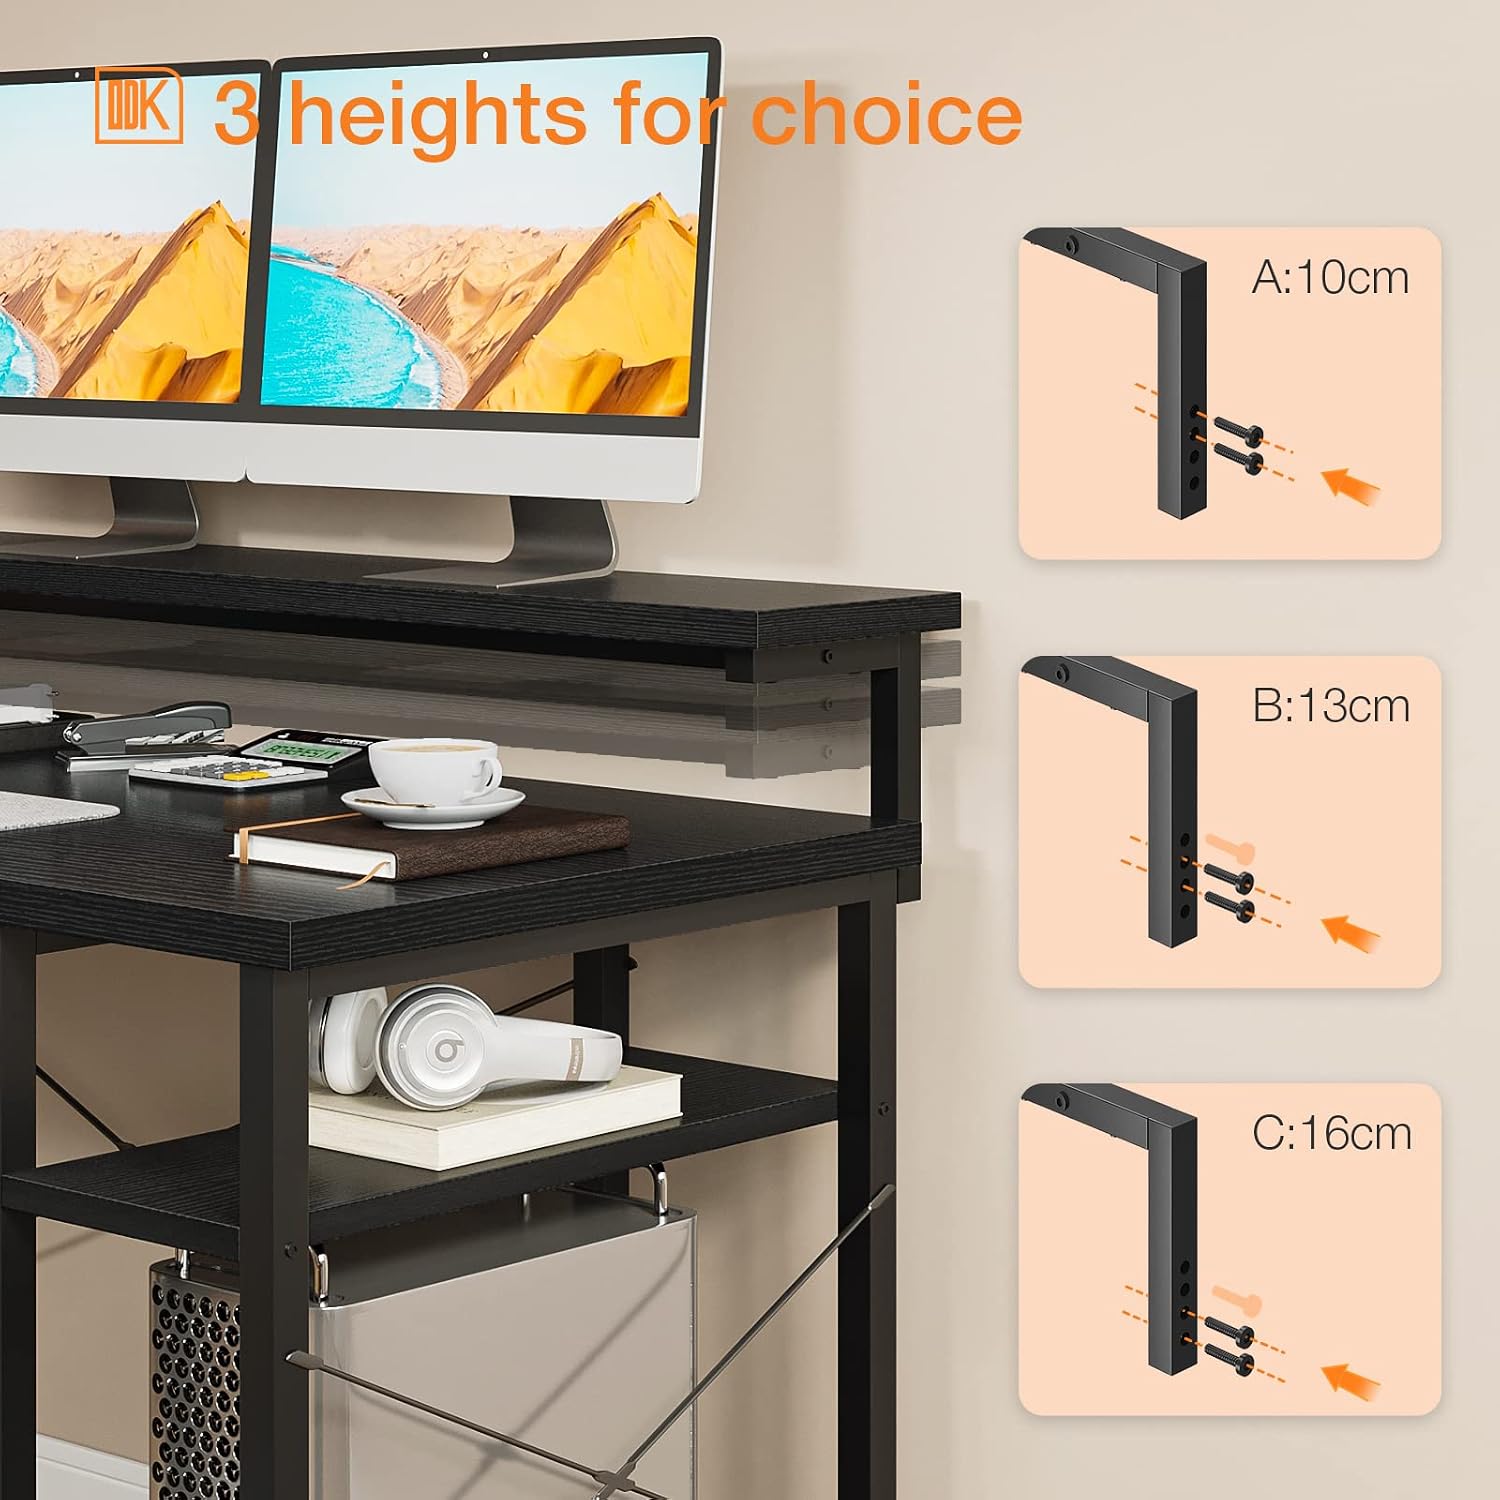
Image: Diagram illustrating the three adjustable height options (10cm, 13cm, 16cm) for the monitor stand, showing how the support brackets are attached.
Utilizing Shelving
The integrated shelving unit provides convenient storage for books, office supplies, or decorative items. Distribute weight evenly across the shelves to maintain stability.
Vzdrževanje
Da bi ohranili videz in dolgo življenjsko dobo vaše mize, sledite tem preprostim navodilom za nego:
- Čiščenje: Površine obrišite z mehko, damp krpo. Izogibajte se abrazivnim čistilom ali močnim kemikalijam, ki lahko poškodujejo zaključek.
- Razlitje: Clean up spills immediately to prevent staining or damage to the desk material.
- Preverjanje stabilnosti: Periodically check all screws and fasteners to ensure they remain tight. Re-tighten as needed to maintain desk stability.
- Izogibajte se neposredni sončni svetlobi: Dolgotrajna izpostavljenost neposredni sončni svetlobi lahko povzroči bledenje ali razbarvanje.
Odpravljanje težav
- Pisalna miza se maja: Ensure all screws and bolts are fully tightened. Check that the desk is placed on a level surface. Adjust leveling feet if present.
- Težave pri sestavljanju: Review the assembly diagrams in your physical manual carefully. Ensure all parts are oriented correctly. Do not force components together.
- Manjkajoči ali poškodovani deli: Do not proceed with assembly. Contact ODK customer support immediately for assistance.
Specifikacije
| Funkcija | Podrobnost |
|---|---|
| Številka modela | ZJZ-DCZWJ |
| Skupne mere (D x Š x V) | 155 x 140 x 76 cm |
| Teža izdelka | 32.5 kg |
| barva | Črna |
| Material | Inženirski les, kovinski okvir |
| Monitor Stand Height Options | 10 cm, 13 cm, 16 cm |
| Zahtevana montaža | ja |

Image: Detailed diagram showing the dimensions of the ODK L-Shaped Corner Desk, including overall length, width, height, and individual section measurements.
Garancija in podpora
For warranty information, product support, or to report missing/damaged parts, please refer to the contact details provided in your product packaging or visit the official ODK website. Please have your model number (ZJZ-DCZWJ) and purchase information ready when contacting support.