
1. Uvod
The Walfront MPPT Solar Charge Controller is designed to efficiently manage power flow from your solar panels to your battery bank, optimizing charging performance for off-grid solar systems. This manual provides essential information for the safe and effective installation, operation, and maintenance of your 50A MPPT solar charge controller.

Image 1.1: Walfront MPPT Solar Charge Controller 50A. This image shows the front view of the orange and black controller, featuring an LCD screen displaying PV, Battery, and Load information, along with 'ESC' and 'SET' buttons.
2. Ključne značilnosti
- High Efficiency MPPT Tracking: Features MPPT tracking efficiency greater than 99% and a maximum conversion efficiency of up to 98%, maximizing energy harvest from solar panels.
- Wide 180V PV Input and Auto Voltage Priznanje: Supports a maximum solar input voltage of 180V (at 25℃) and automatically recognizes 12V, 24V, 36V, and 48V battery systems. Compatible with battery voltagje od 9V do 64V.
- Clear LCD Display and Smart Protection: Built-in LCD provides real-time system data (voltage, current, operating status). Includes temperature compensation and multiple protection features for safe operation.
- Low No-Load Loss and Reliable Performance: No-load loss of ≤0.4W conserves energy. Designed for reliable operation in temperatures from -10℃ to 65℃ and altitudes up to 3000 meters.
- Enostaven za namestitev in uporabo: Auto-recognition feature simplifies setup. Compact design allows for straightforward mounting.

Image 2.1: Automatic Voltage Identification. This image highlights the controller's ability to automatically identify 12V, 24V, 36V, and 48V systems, shown with various solar panel application examples.
3. Varnostne informacije
Please read all instructions carefully before installation and operation. Failure to follow these safety guidelines may result in personal injury, damage to the controller, or other equipment.
- Ensure all wiring is correctly polarized and securely connected. Loose connections can cause overheating and damage.
- Vedno najprej priključite baterijo, nato sončno celico in na koncu breme. Odklopite v obratnem vrstnem redu.
- Do not connect the solar panel array to the controller without a battery connected.
- Zagotovite sistem voltage of the solar panel and battery are compatible with the controller's specifications.
- Krmilnik namestite v dobro prezračenem prostoru, stran od vnetljivih materialov in neposredne sončne svetlobe.
- Avoid touching live terminals. Use insulated tools during installation.
- This device is not waterproof. Protect it from moisture and water exposure.
4. Vsebina paketa
Preverite, ali so v vašem paketu priloženi vsi spodaj navedeni elementi:
- 1 x Walfront MPPT Solar Charge Controller (50A)
- 4 x Vijaki
- 4 x ekspanzijski vijaki
- 1 x Uporabniški priročnik (ta dokument)
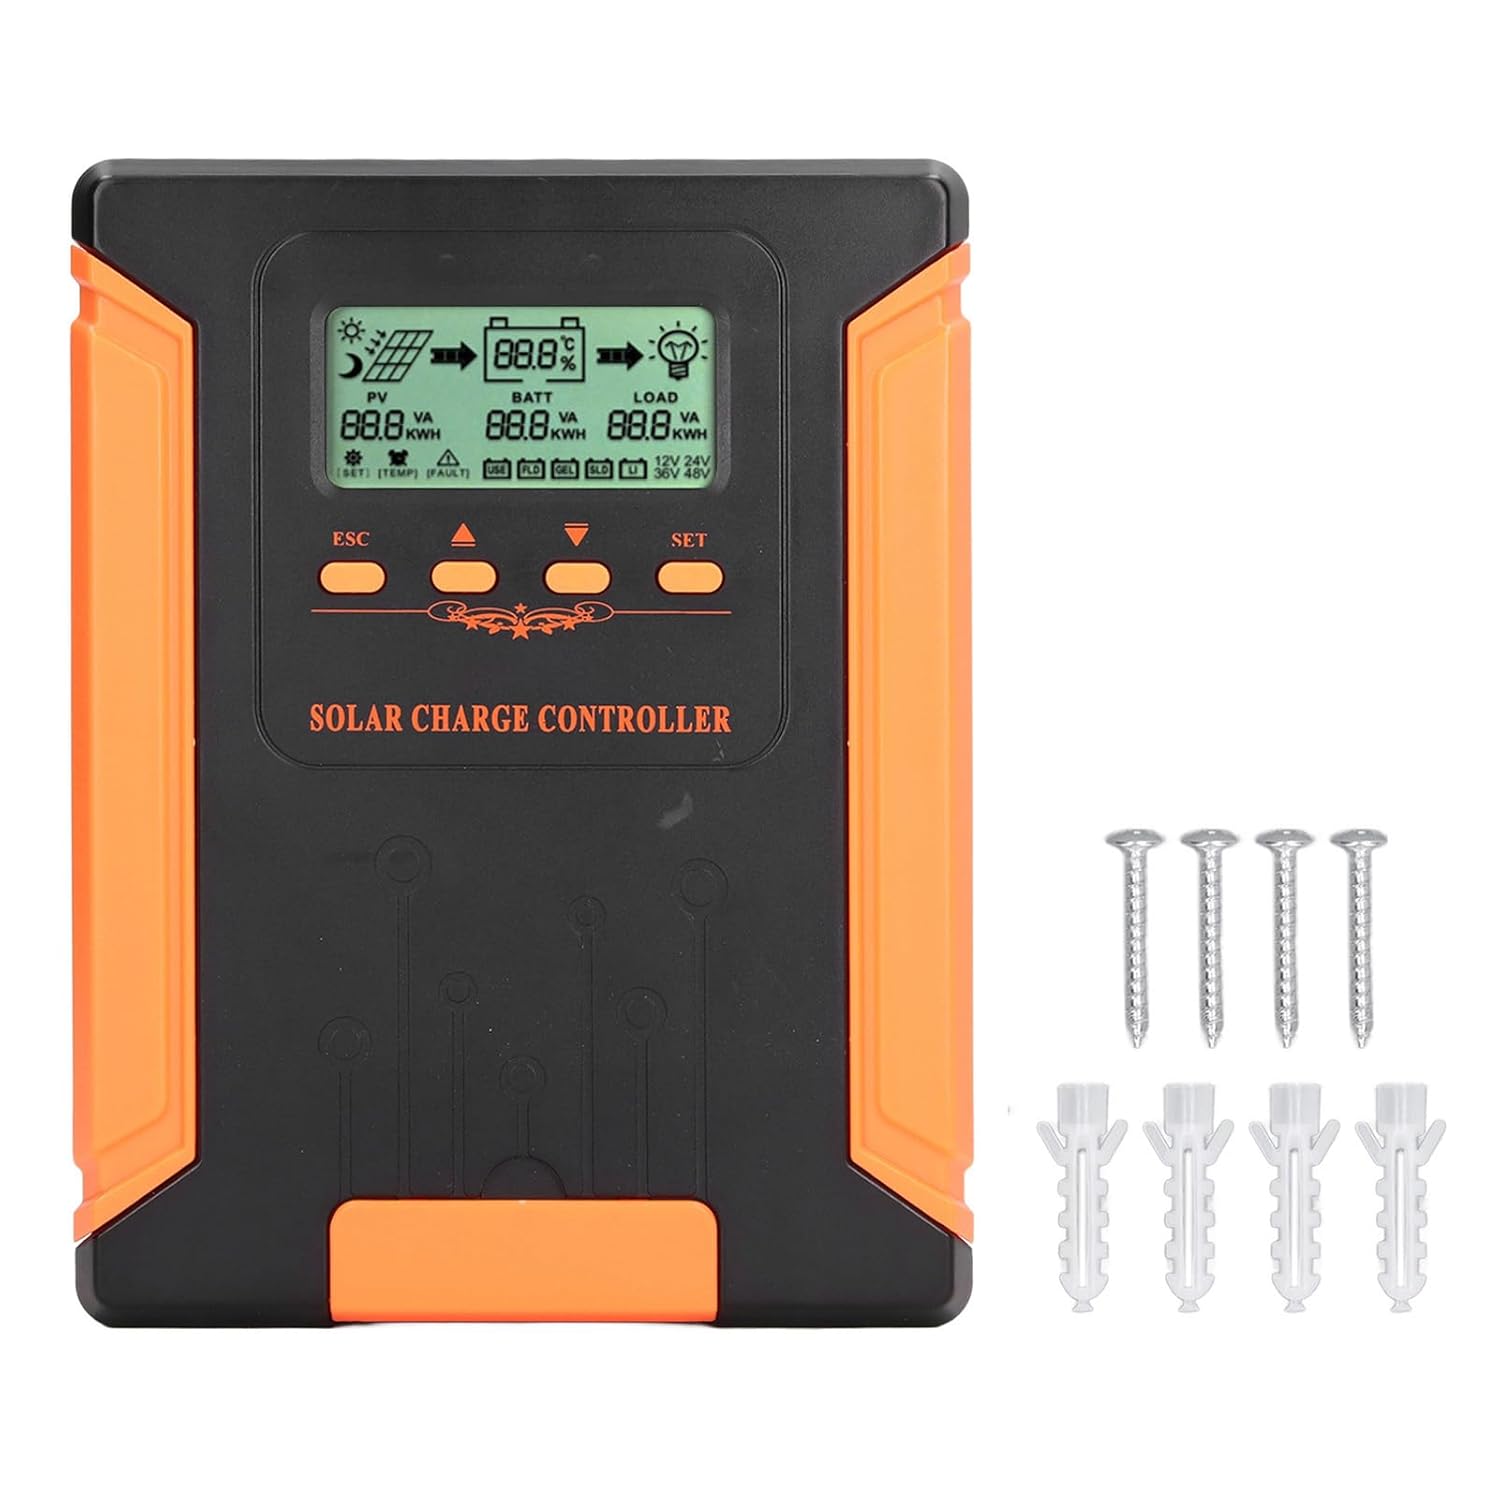
Image 4.1: Package Contents. This image displays the solar charge controller alongside the mounting screws and expansion screws provided in the package.
5. Nastavitev in namestitev
Follow these steps for proper installation of your solar charge controller.
5.1 Namestitev krmilnika
- Choose a dry, well-ventilated location, protected from direct sunlight, high temperatures, and moisture.
- Ensure there is sufficient space around the controller for heat dissipation, especially around the cooling fins.
- Mount the controller vertically on a solid surface using the provided screws.
5.2 Žične povezave
Refer to the wiring diagrams below for correct connection sequence. Always connect in the following order:
- Priključite baterijo: Connect the battery to the controller's battery terminals. Ensure correct polarity (+ to + and - to -). The controller will automatically detect the battery voltage.
- Povežite sončno ploščo: Connect the solar panel array to the controller's PV terminals. Ensure correct polarity.
- Priključitev enosmerne obremenitve (neobvezno): Connect the DC load to the controller's load terminals. Ensure correct polarity.
To disconnect the system, follow the reverse order: disconnect load, then solar panel, then battery.

Image 5.1: Basic System Connection Diagram. This diagram illustrates the connection order: 1. Battery Assembly, 2. Solar Panel Assembly, 3. DC Load. It also shows an AC Load and Inverter connected to the Battery Assembly.

Image 5.2: Detailed System Wiring Diagram. This diagram provides a more comprehensive view of a solar power system, including solar panels, battery, inverter (AC Output/Input), and various AC loads like laptops, lights, air conditioners, televisions, and fans.
6. Navodila za uporabo
The controller features an LCD display and control buttons for monitoring and configuration.
6.1 LCD zaslon
The LCD screen provides real-time information about your solar system, including:
- PV (Photovoltaic) Status: Vhodna voltage, current, and power from solar panels.
- BATT (Battery) Status: Baterija voltage, charging current, and state of charge.
- LOAD Status: Output current and power to the DC load.
- Sistem Voltage: Automatically detected battery system voltage (12 V/24 V/36 V/48 V).
- Indikatorji napak: Displays fault codes or warnings if issues occur.
6.2 gumbi za nadzor
The controller has three buttons: ESC, Up/Down arrows, and SET.
- Gumb ESC: Used to exit current menu or cancel an operation.
- Gumbi gor/dol: Uporablja se za navigacijo po možnostih menija ali prilagajanje vrednosti parametrov.
- Gumb SET: Used to enter a menu, confirm a selection, or save changes to parameters.

Image 6.1: Control Buttons. This close-up image shows the 'ESC', 'Up arrow', 'Down arrow', and 'SET' buttons on the controller's front panel.
7. Vzdrževanje
Redno vzdrževanje zagotavlja optimalno delovanje in dolgo življenjsko dobo vašega solarnega regulatorja polnjenja.
- Čiščenje: Periodically clean the controller's exterior with a dry cloth. Ensure the cooling fins are free from dust and debris to maintain proper heat dissipation.
- Povezave: Check all wiring connections regularly to ensure they are tight and free from corrosion.
- Pregled: Inspect the controller for any signs of physical damage, overheating, or unusual odors.
- Okolje: Ensure the installation environment remains dry and well-ventilated.

Image 7.1: Cooling Fins. This close-up shows the cooling fins on the top of the controller, which are crucial for heat dissipation and require regular cleaning.
8. Odpravljanje težav
Če imate težave s krmilnikom, si oglejte naslednje pogoste težave in rešitve:
| Težava | Možen vzrok | rešitev |
|---|---|---|
| Zaslon krmilnika je izklopljen | No battery connected or battery voltage prenizka. | Ensure battery is connected correctly and has sufficient charge (above 9V). |
| Ni polnilnega toka iz PV | Solar panels not connected, insufficient sunlight, or PV polarity reversed. | Preverite priključke in polariteto fotonapetostnih sistemov. Zagotovite zadostno sončno svetlobo. Preverite količino fotonapetostnih sistemov.tage je v dosegu. |
| Obremenitev ne deluje | Load disconnected, load current too high, or load polarity reversed. | Check load connections and polarity. Ensure load current does not exceed controller's rating. |
| Baterija ni popolnoma napolnjena | Insufficient solar input, undersized solar array, or battery issues. | Increase solar panel capacity or check for shading. Inspect battery health. |
9. Tehnične specifikacije
Below are the technical specifications for the Walfront MPPT Solar Charge Controller 50A.
| Parameter | Specifikacija |
|---|---|
| Sistem Voltage | 12V / 24V / 36V / 48V Auto |
| Nazivni polnilni tok | 50A |
| No Load Loss | ≤0.4 W |
| Solar Maximum Input Voltage | 180V (at 25℃), 150V (at -25℃) |
| Baterija Voltage Območje | 9-64V |
| Največja Power Point Voltage Območje | Baterija Voltage +2V do 150V |
| Učinkovitost pretvorbe | ≤98 % |
| Učinkovitost sledenja MPPT | > 99 % |
| Koeficient temperaturne kompenzacije | -2mv/℃/2V (default value) |
| Delovna temperatura | -10 ℃ do 65 ℃ |
| Stopnja zaščite | IP21 |
| Nadmorska višina | ≤3000 Meter / 9842.5ft |

Image 9.1: Model Comparison Table. This table provides a comparison of rated charging current and solar panel maximum input power for CM-50 (50A) and CM-60 (60A) models across different system voltages.
10. Garancija in podpora
Za informacije o garanciji in tehnično podporo glejte dokumentacijo, ki ste jo prejeli ob nakupu, ali se obrnite na prodajalca. Račun shranite kot dokazilo o nakupu.