
1. Uvod
Thank you for choosing the Netzu Digital Alarm Clock Model 5266B. This device combines a clear LED time display with an 8-color night light, dual alarm functionality, adjustable brightness, and convenient USB charging ports. This manual provides detailed instructions to help you set up and operate your alarm clock effectively.
2. Varnostne informacije
- Prepričajte se, da je napajalnik priključen na ustrezno električno vtičnico.
- Naprave ne izpostavljajte vodi ali prekomerni vlagi.
- Izogibajte se postavljanju ure v bližino virov toplote ali na neposredno sončno svetlobo.
- Napravo očistite z mehko, suho krpo. Ne uporabljajte abrazivnih čistil ali topil.
- Hranite izven dosega majhnih otrok, da preprečite nenamerno poškodbo ali zaužitje majhnih delov.
3. Vsebina paketa
Prosimo, preverite paket za naslednje artikle:
- Netzu Digital Alarm Clock (Model 5266B)
- Napajalni adapter
- CR2032 Button Cell Battery (pre-installed for backup)
- Uporabniški priročnik
4. Izdelek je končanview
Seznanite se z glavnimi komponentami budilke:

Slika: Spredaj view of the Netzu Digital Alarm Clock, showing the large LED time display and control buttons located on the top surface.
The clock features a large LED display for clear time visibility, and intuitive buttons on the top for easy access to settings and functions.
5. Nastavitev
5.1 Napajalni priključek
- Priloženi napajalnik priključite na vrata DC IN na zadnji strani budilke.
- Plug the adapter into a standard electrical outlet. The clock display will light up.
5.2 Rezervna baterija
The clock includes a pre-installed CR2032 button cell battery. This battery serves as a backup to maintain time and alarm settings during a power outage. The clock will not operate solely on battery power; it requires the AC adapter for normal function.
6. Navodila za uporabo
6.1 Nastavitev časa
- Pritisnite in držite ČAS NAST button (usually located on the back or top) until the hour digits begin to flash.
- Uporabite + or - buttons to adjust the hour. Pay attention to the AM/PM indicator if using 12-hour format.
- Pritisnite ČAS NAST again to confirm the hour and move to minute adjustment.
- Uporabite + or - gumbe za nastavitev minut.
- Pritisnite ČAS NAST še enkrat, da shranite nastavitev časa.
- Za preklop med 12-urnim in 24-urnim formatom časa pritisnite 12/24H button (if available) or cycle through the time setting options.
6.2 Nastavitev alarmov (dvojni alarm)
This clock supports two independent alarms (Alarm 1 and Alarm 2).
- Pritisnite in držite ALARM 1 NAST gumb, dokler ne utripajo številke ure budilke.
- Uporabite + or - gumbe za nastavitev želene ure budilke.
- Pritisnite ALARM 1 NAST again to confirm the hour and move to minute adjustment.
- Uporabite + or - gumbe za nastavitev želenih minut alarma.
- Pritisnite ALARM 1 NAST one more time to save the alarm setting.
- Postopek ponovite za ALARM 2 NAST if you wish to set a second alarm.
- Za vklop/izklop alarma pritisnite ustrezno tipko ALARM 1 VKLOP/IZKLOP or ALARM 2 VKLOP/IZKLOP button. An indicator icon will appear on the display when an alarm is active.
- To adjust the alarm volume, look for a dedicated GLASNOST button or a combination of buttons during alarm setting. The alarm sound frequency will gradually increase.
6.3 Funkcija dremeža

Slika: A hand pressing the large snooze button located on the top of the alarm clock, indicating its use for temporary silence.
Ko se oglasi alarm, pritisnite veliko DREMEŽ button on the top of the clock to temporarily silence the alarm for 9 minutes. The alarm will sound again after the snooze period. To turn off the alarm completely, press any other button (e.g., ALARM ON/OFF).
6.4 Funkcija nočne lučke
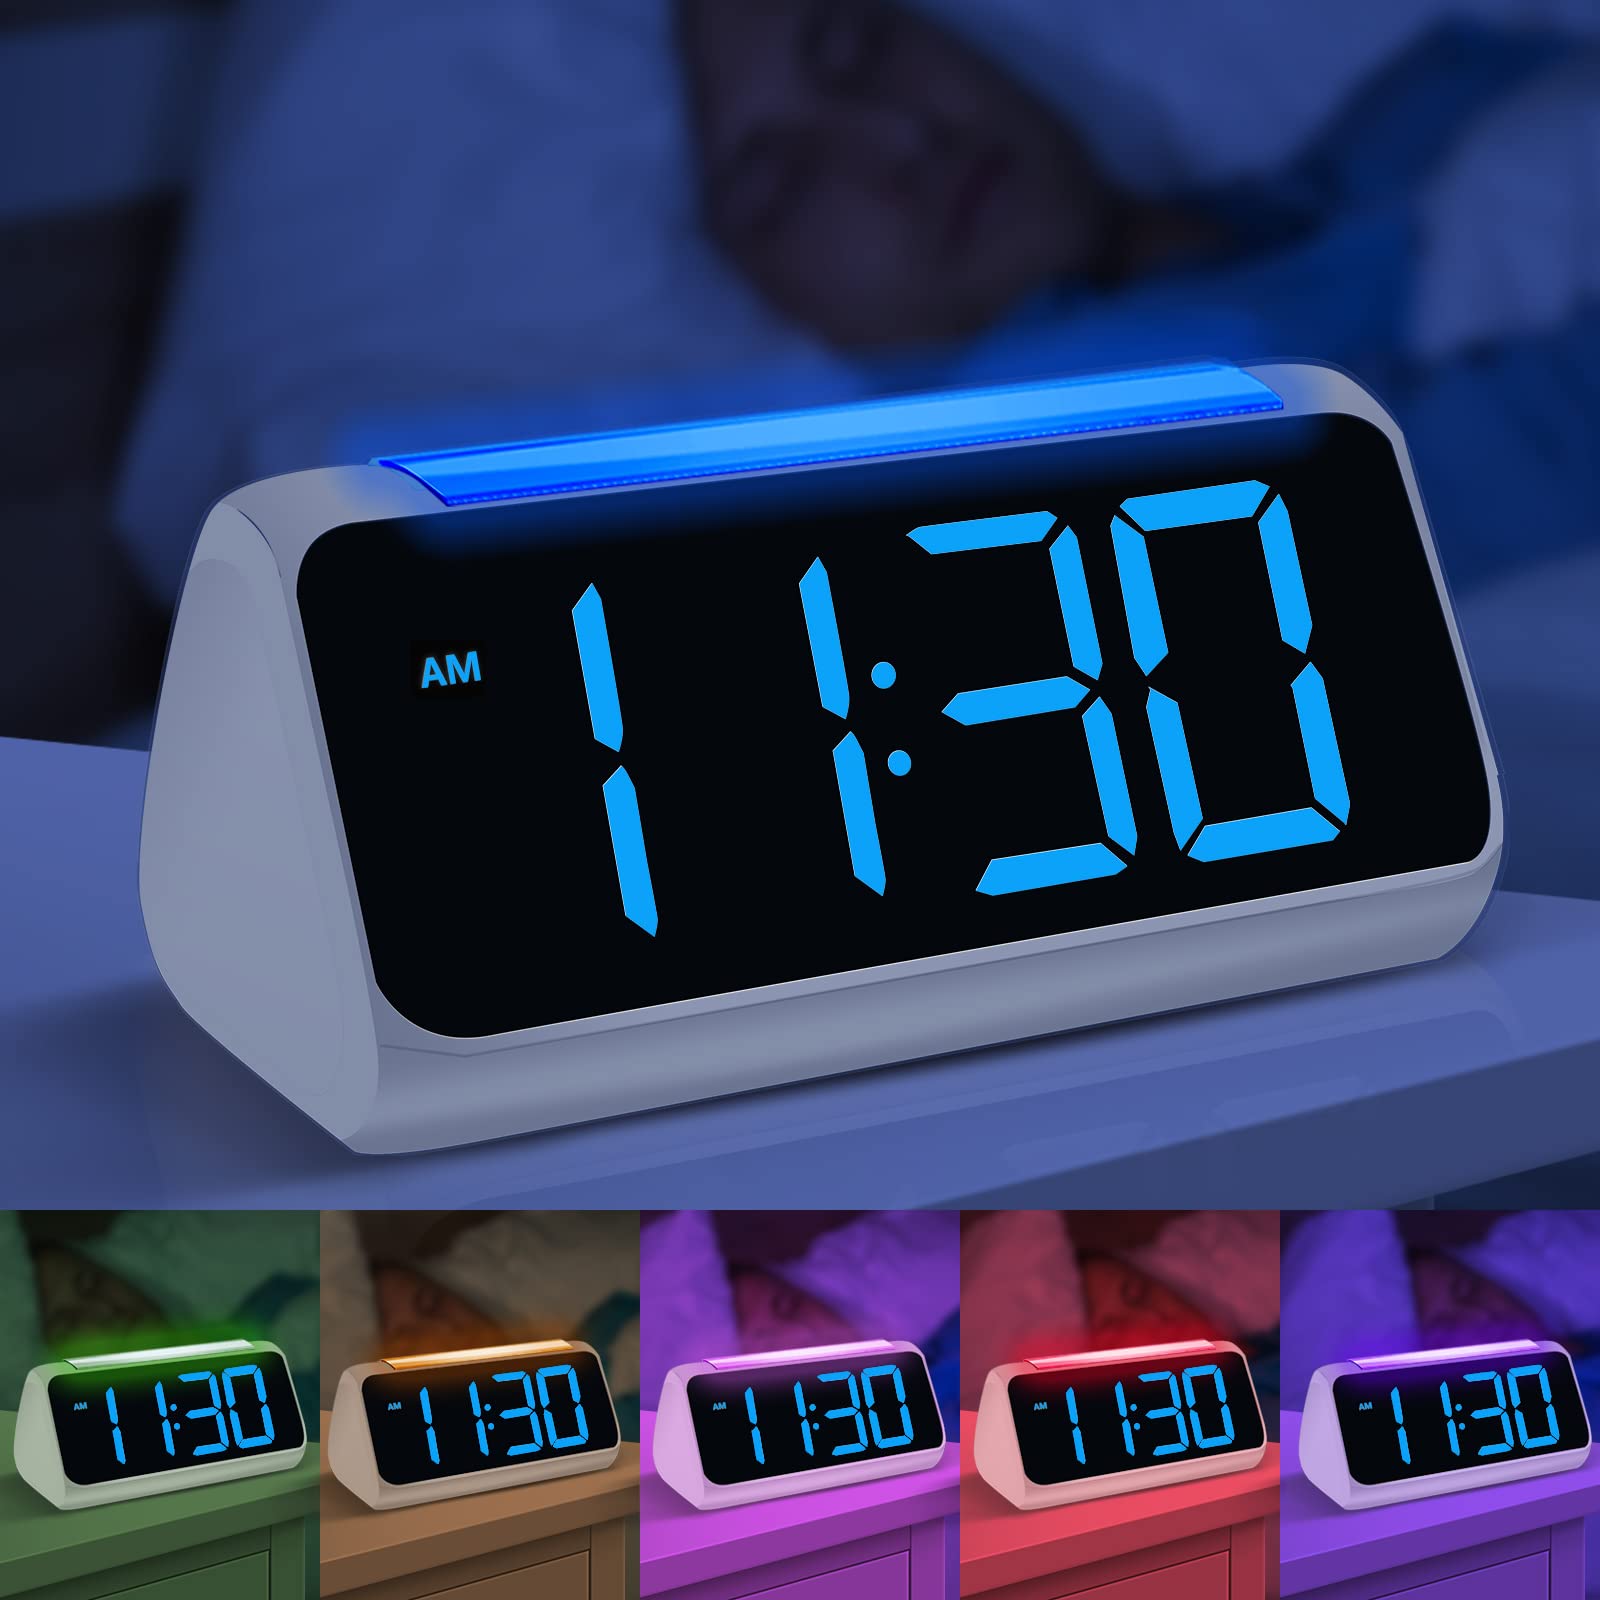
Slika: Večkratna views of the Netzu Digital Alarm Clock showcasing its 8 different night light color options, providing ambient illumination.
The clock features an 8-color night light with 3 adjustable brightness levels. To activate or change the night light:
- Pritisnite SVETLOBA button (or the top surface, as indicated by some models) to turn on the night light.
- Pritisnite SVETLOBA večkrat pritisnite gumb , da preklapljate med 8 razpoložljivimi barvami.
- To set a specific color, stop pressing the button when your desired color is displayed.
- To activate automatic color cycling, press and hold the SVETLOBA button until the colors begin to change automatically.
- Če želite prilagoditi svetlost nočne luči, pritisnite SVETLOBA button quickly after selecting a color or during automatic cycling. There are 3 brightness levels.
- Pritisnite in držite SVETLOBA znova pritisnite, da izklopite nočno lučko.
6.5 Prilagoditev svetlosti zaslona
The LED display brightness can be adjusted from 0% to 100% to suit your preference, ensuring readability during the day and minimal disturbance at night.
- Poiščite DIMMER or SVETLOst button (often a dedicated button or part of the +/- controls when not in time/alarm setting mode).
- Press the button to cycle through preset brightness levels or hold it to continuously adjust the brightness.
6.6 vrata za polnjenje USB
The alarm clock is equipped with dual 5V 1A USB charging ports on the back. These ports allow you to charge your smartphone or other small electronic devices conveniently.
- Connect your device's USB charging cable to one of the USB ports on the back of the alarm clock.
- Ensure the alarm clock is powered on via its AC adapter for the USB charging ports to function.
7. Vzdrževanje
- Čiščenje: Wipe the clock's surface with a soft, dry, lint-free cloth. Do not use liquid cleaners or sprays directly on the device.
- Shranjevanje: If storing the clock for an extended period, disconnect it from power and remove the backup battery. Store in a cool, dry place.
- Zamenjava baterije: If the backup battery needs replacement, carefully open the battery compartment on the bottom and replace the CR2032 battery with a new one, observing polarity.
8. Odpravljanje težav
| Težava | Možen vzrok | rešitev |
|---|---|---|
| Prikaz ure je izklopljen ali zatemnjen. | No power, power adapter loose, brightness set too low. | Check power connection. Adjust display brightness. |
| Alarm se ne oglasi. | Alarm not activated, alarm volume too low, incorrect alarm time set. | Ensure alarm is ON (indicator visible). Adjust alarm volume. Verify alarm time. |
| Čas je napačen po izpadu električne energijetage. | Backup battery depleted or missing. | Replace the CR2032 backup battery. Reset the time. |
| Polnjenje prek USB-ja ne deluje. | Clock not powered by AC adapter, faulty USB cable, device not compatible. | Ensure clock is plugged into AC power. Try a different USB cable. Check device compatibility. |
9. Specifikacije

Slika: Technical diagram illustrating the product dimensions: 175mm length, 91.5mm width, 84mm height, and 50.8mm digit height.
| Funkcija | Podrobnost |
|---|---|
| Znamka | Netzu |
| Številka modela | 5266B |
| barva | Bela in modra |
| Vrsta zaslona | Digitalna LED |
| Posebne lastnosti | Adjustable Night Light (8 colors, 3 brightness levels), Dual Alarm, Snooze Function, Full-range Dimmer (0-100%) |
| Vir napajanja | Electric (AC Adapter) with Battery Backup |
| Rezervna baterija | 1 x CR2032 (vključeno) |
| Vrata za polnjenje USB | Dual 5V 1A USB ports |
| Format časa | 12/24-urni preklop |
| Vrsta namestitve | Namizna |
| Dimenzije izdelka | 175 mm x 91.5 mm x 84 mm (približno 6.9 x 3.6 x 3.3 palca) |
| Višina številke | 50.8 mm (približno 2 palca) |
10. Garancija in podpora
Netzu products are designed for reliability and performance. For warranty information or technical support, please refer to the contact details provided with your purchase or visit the official Netzu webspletnega mesta. Račun shranite kot dokazilo o nakupu za uveljavljanje garancije.
