
1. Uvod
This manual provides instructions for the safe and effective operation of your ThreeH 1/4 Inch Digital Torque Adapter. This device converts a standard ratchet wrench into a digital torque wrench, offering precise torque measurement with audible and visual alerts.
2. Varnostne informacije
- Pri uporabi orodja vedno nosite ustrezno osebno zaščitno opremo, kot so zaščitna očala.
- Ensure the adapter is securely attached to the ratchet wrench and the fastener before applying torque.
- Do not exceed the maximum torque capacity of the adapter (30 Nm / 22.1 ft-lb).
- Keep the device clean and dry. Avoid exposure to extreme temperatures or corrosive environments.
- Do not attempt to disassemble or modify the adapter. Refer servicing to qualified personnel.
3. Izdelek je končanview
The ThreeH Digital Torque Adapter features a clear digital display, intuitive controls, and a compact design for use in various applications.

Slika 3.1: Digital Torque Adapter Components and Controls. This image highlights the LED flashing indicator, buzzer, and control buttons (P/T, Power, M, +, -) for unit selection and value adjustment.
Ključne komponente:
- Digitalni zaslon: Shows real-time torque values and settings.
- P/T Button: Toggles between Peak Hold (P) and Track (T) modes.
- Gumb za vklop: Vklopi/izklopi napravo.
- Gumb M: Used for mode selection and data memory functions.
- Gumba '+' in '-': Adjust preset torque values.
- LED Flashing Indicator: Provides visual alert during torque application.
- Zvočni signal: Provides audible alert during torque application.
- 1/4-palčni pogon: Input and output square drives for connecting to a ratchet wrench and sockets.
4. Nastavitev
4.1 Namestitev baterije
The torque adapter requires two (2) AAA 1.5V batteries (not included).
- Locate the battery compartment cover on the back of the adapter.
- Remove the screw(s) securing the battery cover and carefully lift it off.
- Vstavite dve bateriji AAA in pazite na pravilno polarnost (+/-), kot je označeno v notranjosti predala.
- Namestite pokrov baterije in ga pritrdite z vijakom(-i).
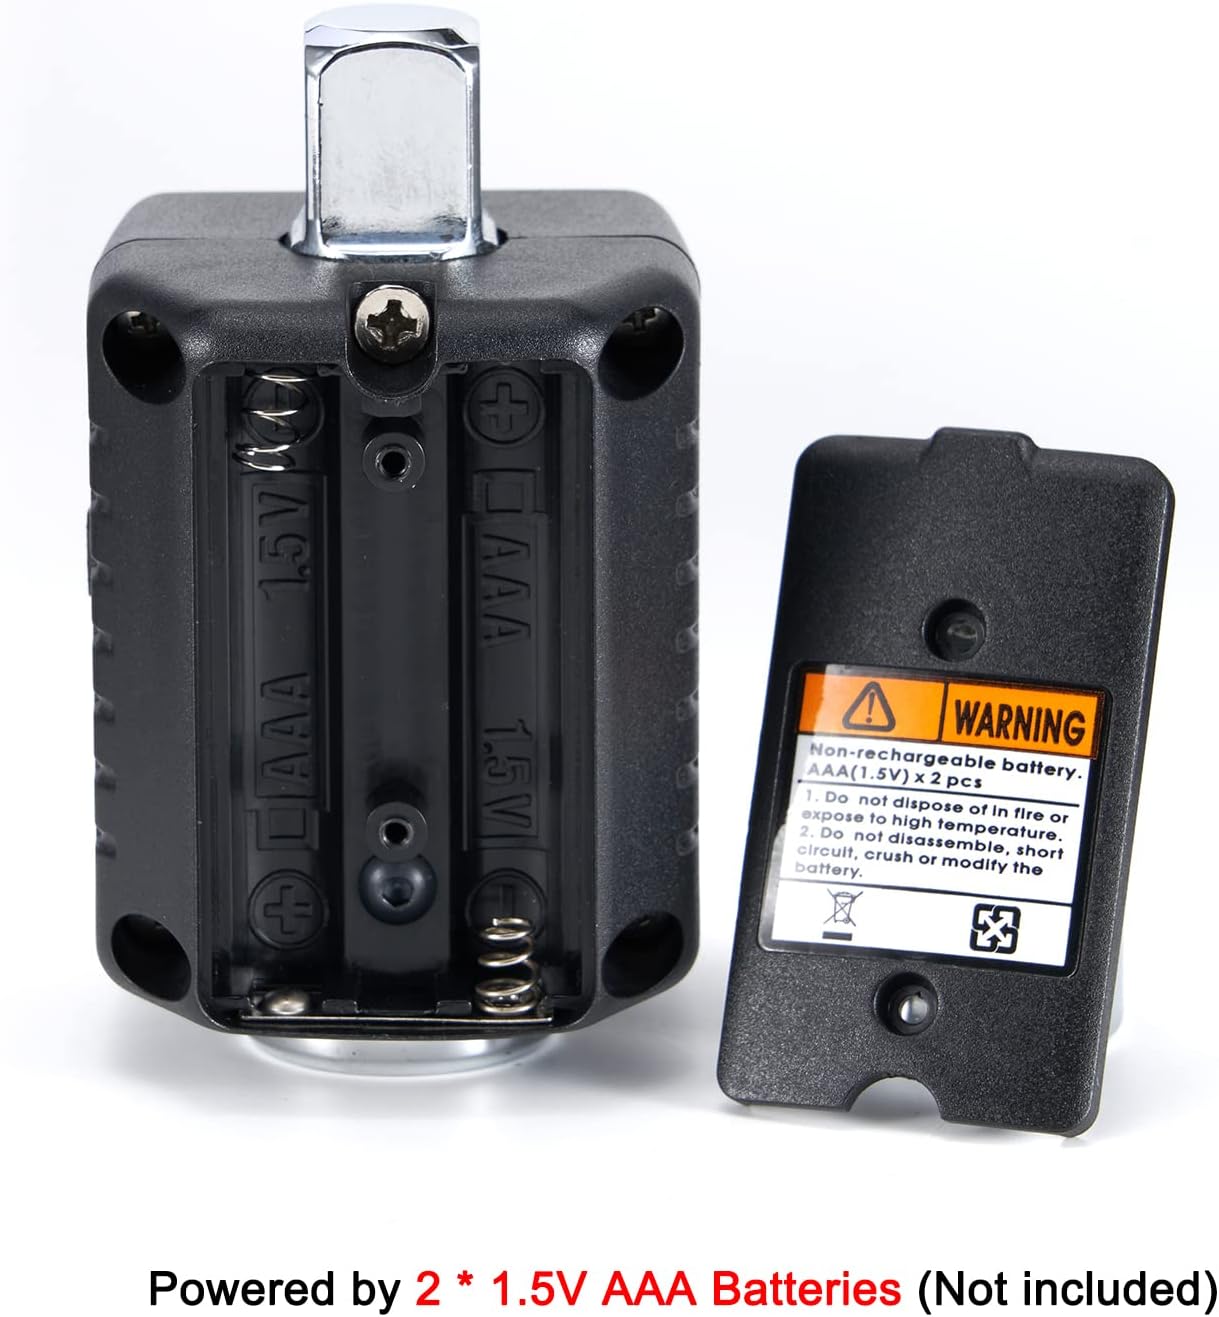
Slika 4.1: Battery Compartment. The image shows the open battery compartment, ready for two AAA batteries to be inserted with correct polarity.
5. Navodila za uporabo
5.1 Vklop/izklop
- Za vklop: Pritisnite Moč gumb.
- Za izklop: Pritisnite in držite Moč button for approximately 3 seconds. The device will also auto shut off after 70 seconds of inactivity.
5.2 Izbira enote
The adapter supports torque units in Newton-meters (Nm), foot-pounds (lb-ft), and kilogram-meters (kg-m).
- To change units: Simultaneously press the P / T in M buttons. The unit displayed on the screen will cycle through Nm, lb-ft, and kg-m. Release the buttons when the desired unit is shown.
5.3 Setting Target Torque Value
- Pritisnite M button to enter the preset torque setting mode.
- Uporabite '+' in '-' buttons to adjust the target torque value. Pressing and holding these buttons will increase or decrease the value more rapidly.
- Once the desired value is set, press the M button again to confirm and exit the setting mode.
5.4 Torque Application and Alerts
Attach the digital torque adapter to your 1/4 inch drive ratchet wrench, then attach the appropriate socket to the adapter's output drive. Apply torque to the fastener.

Slika 5.1: Adapter in Use. The image shows the digital torque adapter connected to a ratchet wrench, being used to tighten a fastener on an engine.
- As you apply torque, the digital display will show the real-time torque value.
- When the applied torque reaches 80% of the preset target value, the buzzer will begin to sound, and the LED will flash. The frequency of the beeps and flashes will increase as the torque approaches the target.
- When the preset target torque value is reached, the buzzer will emit a continuous tone, and the LED will flash rapidly. At this point, stop applying force immediately to avoid over-tightening.
5.5 Peak Hold (P) and Track (T) Modes
- Track Mode (T): Displays the real-time torque value as it is being applied. This is the default mode.
- Peak Hold Mode (P): Displays the maximum torque value achieved during the tightening process. To switch to Peak Hold mode, press the P / T button once. The display will show 'P' to indicate Peak Hold mode. To clear the peak value, press the P / T gumb znova.
6. Vzdrževanje
6.1 Čiščenje
- Wipe the adapter with a soft, dry cloth after each use.
- Ne uporabljajte abrazivnih čistil ali topil, saj lahko poškodujejo zaslon ali ohišje.
6.2 Shranjevanje
- Store the adapter in its protective case when not in use to prevent damage.
- Če naprave ne boste uporabljali dlje časa, odstranite baterije, da preprečite puščanje.
- Hraniti na hladnem in suhem mestu, stran od neposredne sončne svetlobe in ekstremnih temperatur.

Slika 6.1: Protective Carrying Case. The image displays the compact protective case designed for storing the digital torque adapter, with dimensions indicated.
7. Odpravljanje težav
- Naprava se ne vklopi: Preverite namestitev baterij in se prepričajte, da so nove. Po potrebi jih zamenjajte.
- Netočne meritve: Ensure the adapter is properly seated on the ratchet wrench and the socket is firmly attached. Avoid sudden jerking motions when applying torque. If persistent, the device may require professional calibration.
- Zaslon je zatemnjen ali utripa: Batteries may be low. Replace batteries.
- Buzzer or LED not working: Preverite napolnjenost baterije. Če težava ne izgine, se obrnite na podporo strankam.
8. Specifikacije
| Funkcija | Specifikacija |
|---|---|
| Številka modela | H-TG55A |
| Območje navora | 0.3 - 30 Nm (0.22 - 22.1 ft-lb) |
| Velikost pogona | 1/4 palca |
| Natančnost | ±2 % |
| Enote | Nm, lb-ft, kg-m |
| Podatkovni pomnilnik | 40 kompletov |
| Samodejni izklop | 70 seconds (no usage) |
| Vir napajanja | 2 x 1.5 V AAA baterije |
| Material | Legirano jeklo |
| Dolžina predmeta | 4.7 palcev |
| Teža predmeta | 120 gramov |

Slika 8.1: Drive Size and Torque Range. This image visually confirms the 1/4 inch drive size and the specified torque range of 0.3-30Nm (0.22-22.1ft-lb).
9. Informacije o garanciji
This product comes with a standard manufacturer's warranty. Please retain your proof of purchase for any warranty claims. For specific warranty terms and conditions, refer to the documentation included with your purchase or contact ThreeH customer support.
10. Podpora
For technical assistance, troubleshooting, or warranty inquiries, please contact ThreeH customer support through the retailer's platform or the official ThreeH website. Please have your product model number (H-TG55A) and purchase details ready when contacting support.