
1. Uvod
This manual provides detailed instructions for the installation, configuration, and operation of your MoesGo WiFi Smart Wall Light Switch. This device allows you to control your lighting remotely via a smartphone application, voice commands, or directly through its touch panel. It supports multi-control functionality and integrates with popular smart home platforms.
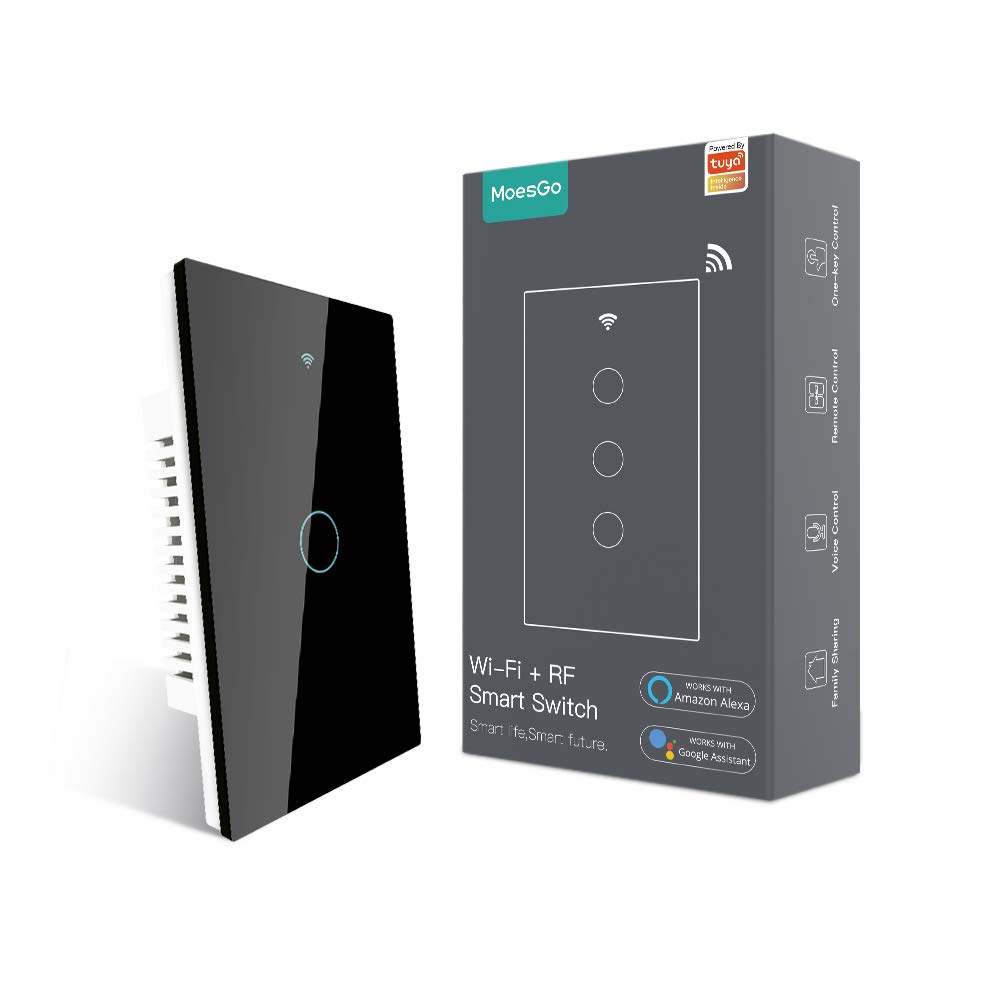
Image 1.1: MoesGo WiFi Smart Wall Light Switch and its retail packaging.
2. Safety Information and Important Considerations
Before proceeding with installation, please read and understand the following safety guidelines. Improper installation can lead to electrical shock or damage to the device and your electrical system.
- Potrebna nevtralna žica: This smart switch requires a neutral wire for operation. Verify that your electrical box has a neutral wire (typically white) before purchasing ali poskus namestitve.
- Samo 2.4 GHz Wi-Fi: The switch operates exclusively on a 2.4GHz Wi-Fi network. It is not compatible with 5GHz Wi-Fi networks. Ensure your router supports 2.4GHz and that your device is connected to this frequency during pairing.
- Odklop napajanja: Always turn off power at the circuit breaker before installing, removing, or servicing the switch. Failure to do so can result in serious injury or death.
- Profesionalna namestitev: If you are unfamiliar with electrical wiring, consult a qualified electrician.
- Ni zatemnilno stikalo: This device is an ON/OFF switch and does not support dimming functionality.
- Ni za tradicionalno 3-smerno ožičenje: This switch uses a multi-control association via the app for 3-way functionality, not traditional 3-way wiring.

Image 2.1: Visual summary of critical installation requirements and limitations.
3. Specifikacije
| Funkcija | Podrobnost |
|---|---|
| Znamka | MoesGo |
| Številka modela | AUB088K9T82Z |
| Dimenzije izdelka | 4.7 x 2.9 x 1.5 palcev |
| Teža | 7.83 unč |
| Način delovanja | VKLOP-IZKLOP-VKLOP |
| Trenutna ocena | 10 Amps |
| Delovna zvezatage | 240 volta |
| Vrsta stika | Običajno odprto |
| Vrsta priključka | Brezžično (2.4 GHz Wi-Fi) |
| Terminal | Vijak |
| Vrsta vezja | 3-way (via app multi-control) |
| Tip aktuatorja | Smart Touch |
4. Vodič za namestitev
4.1 Kontrolni seznam pred namestitvijo
- Confirm presence of a neutral wire in your electrical box.
- Prepričajte se, da je vaše omrežje Wi-Fi 2.4 GHz.
- Pred zagonom izklopite napajanje na odklopniku.
- Zberite potrebno orodje: izvijač, klešče za odstranjevanje izolacije, voltage tester.
4.2 Navodila za ožičenje
- Izklopite napajanje: Poiščite odklopnik, ki krmili stikalo za luč, ki ga želite zamenjati, in ga izklopite. Preverite, ali je napajanje izklopljeno z uporabo gumba za glasnost.tage tester.
- Odstranite staro stikalo: Carefully remove the existing wall plate and unscrew the old switch from the electrical box. Disconnect the wires.
- Prepoznajte žice: Identify the Live (Load), Neutral, and Ground wires. The Live wire typically carries power from the breaker, the Neutral wire completes the circuit, and the Ground wire provides safety.
- Povežite novo stikalo: Connect the wires from your electrical box to the MoesGo Smart Switch according to the diagram below. Ensure all connections are secure.
- Connect the Live wire (L) from the electrical box to the 'L IN' terminal on the switch.
- Connect the Neutral wire (N) from the electrical box to the 'N IN' terminal on the switch.
- Connect the Load wire(s) (to the light fixture) to the 'L1 OUT', 'L2 OUT', 'L3 OUT', 'L4 OUT' terminals as appropriate for your switch gang configuration.
- Connect the Ground wire (if present) to the ground screw in the electrical box.
- Namestitev stikala: Gently push the wired switch into the electrical box, ensuring wires are not pinched. Screw the switch into place.
- Namestite stensko ploščo: Attach the new glass wall plate.
- Obnovi moč: Turn the power back ON at the circuit breaker. The switch indicator light should illuminate.

Image 4.1: Detailed wiring diagram for the MoesGo Smart Wall Light Switch.
5. Združevanje in konfiguracija aplikacij
5.1 Download the Smart Life/Tuya App
Iskanje "Smart Life" or "Tuya Smart" in your smartphone's app store (iOS or Android) and download the application. Register for an account or log in if you already have one.
5.2 Pairing the Switch
- Vstopite v način seznanjanja: After restoring power, the Wi-Fi indicator on the switch should blink rapidly. If not, press and hold any button on the switch for 5-10 seconds until it blinks rapidly.
- Dodaj napravo v aplikacijo: Open the Smart Life/Tuya app. The app may automatically detect the new device. If not, tap the "+" icon in the top right corner, then select "Add Device" or "Auto Scan".
- Confirm Wi-Fi Network: Prepričajte se, da je vaš telefon povezan z omrežjem Wi-Fi s frekvenco 2.4 GHz. Ko boste pozvani, vnesite geslo za Wi-Fi.
- Popolno seznanjanje: Follow the on-screen instructions in the app to complete the pairing process. Once successfully paired, you can rename the switch and assign it to a room.

Image 5.1: Simplified pairing process using the Smart Life app.
6. Navodila za uporabo
6.1 Ročno upravljanje na dotik
Simply touch the corresponding button on the glass panel to turn the connected light ON or OFF.
6.2 Remote Control via Smart Life/Tuya App
Once paired, you can control your lights from anywhere using the Smart Life/Tuya app on your smartphone. Open the app, select your switch, and tap the ON/OFF button.
6.3 Glasovno upravljanje (Alexa in Google Home)
Integrate your MoesGo Smart Switch with Amazon Alexa or Google Home for hands-free voice control. Follow the instructions within the Alexa or Google Home app to link your Smart Life/Tuya account.
- Za Alexa: Say, "Alexa, turn on [Switch Name]" or "Alexa, turn off [Switch Name]".
- Za Google Home: Say, "Hey Google, turn on [Switch Name]" or "Hey Google, turn off [Switch Name]".

Slika 6.1: Konecview of various control methods for the smart switch.
6.4 Multi-Control (3-Way) Association
The MoesGo Smart Switch supports multi-control functionality, allowing multiple switches to control a single light without traditional 3-way wiring. This is achieved through an association feature within the Smart Life/Tuya app.
- Ensure both smart switches are installed and paired to the app.
- In the app, select one of the switches.
- Navigate to its settings or options, and look for "Multi-Control Association."
- Follow the app's prompts to link the two switches to control the same light.

Image 6.2: App interface for setting up multi-control association.
6.5 Razporejanje in časovniki
Use the Smart Life/Tuya app to set schedules or countdown timers for your lights. This allows you to automate when lights turn ON or OFF, enhancing convenience and energy efficiency.
6.6 Relay Status and Backlight Settings
The app provides options to customize the switch's behavior:
- Stanje releja: Configure the switch to remember its last ON/OFF state after a power outage, or to default to ON or OFF.
- Stikalo za osvetlitev ozadja: Turn the switch's backlight ON or OFF. This can be useful for bedrooms to avoid light disturbance during sleep.

Image 6.3: App settings for customizing relay status.

Image 6.4: App settings for controlling the switch backlight.
7. Odpravljanje težav
If you encounter issues with your MoesGo Smart Wall Light Switch, refer to the following common problems and solutions:
- Switch Not Responding / No Power:
- Check the circuit breaker to ensure power is ON.
- Verify all wiring connections are secure and correct, especially the neutral wire.
- Prepričajte se, da žarnica deluje.
- Seznanjanje z aplikacijo ni mogoče:
- Preverite, ali je vaše omrežje Wi-Fi 2.4 GHz. Stikalo ne podpira 5 GHz.
- Ensure your smartphone is connected to the 2.4GHz Wi-Fi network during pairing.
- Make sure the switch is in rapid blinking pairing mode. If not, press and hold any button for 5-10 seconds.
- Move the switch closer to your Wi-Fi router if signal strength is weak.
- Med seznanjanjem začasno onemogočite mobilne podatke v telefonu.
- Znova zaženite usmerjevalnik Wi-Fi in poskusite znova.
- Glasovno upravljanje ne deluje:
- Ensure your Smart Life/Tuya account is correctly linked to Alexa or Google Home.
- Verify the switch name in the Smart Life/Tuya app matches the name used in voice commands.
- Preverite internetno povezavo.
- Switch Turns ON/OFF Randomly:
- Check for any active schedules or automation rules in the Smart Life/Tuya app that might be causing this behavior.
- Ensure no other smart home devices or users are inadvertently controlling the switch.
- If the issue persists, consider resetting the switch and re-pairing it.
8. Vzdrževanje
To ensure optimal performance and longevity of your MoesGo Smart Wall Light Switch, follow these maintenance guidelines:
- Čiščenje: Use a soft, dry cloth to clean the glass panel. Avoid abrasive cleaners, solvents, or excessive moisture, which can damage the surface or internal components.
- Posodobitve vdelane programske opreme: Periodically check the Smart Life/Tuya app for available firmware updates for your switch. Updates can improve performance, add features, and enhance security.
- Okoljski pogoji: Ensure the switch is installed in an indoor environment within recommended temperature and humidity ranges. Avoid exposure to direct sunlight, extreme temperatures, or high humidity.


