
1. Uvod
Thank you for choosing the Xigmatek Lux M Micro-ATX Mini Tower PC Case. This manual provides detailed instructions for the installation, operation, and maintenance of your new PC chassis. Please read this manual carefully before beginning the assembly process to ensure proper installation and to maximize the performance and longevity of your system.
The Lux M case is designed to offer a robust and aesthetically pleasing housing for your computer components, featuring a tempered glass side panel, a metallic front panel with a unique cut-out pattern, and pre-installed fixed RGB fans for optimal cooling and visual appeal. It supports Micro-ATX and Mini-ITX motherboards and is compatible with various cooling solutions, including water cooling.
2. Varnostne informacije
Med namestitvijo in delovanjem upoštevajte naslednje varnostne ukrepe:
- Pred nameščanjem ali odstranjevanjem kakršnih koli komponent vedno izključite napajalnik iz stenske vtičnice, da preprečite električni udar.
- Handle all components with care. Avoid touching circuit boards directly; hold them by their edges.
- Wear an anti-static wrist strap when handling sensitive electronic components to prevent electrostatic discharge (ESD) damage.
- Keep the case and components away from liquids, excessive heat, and direct sunlight.
- Zagotovite ustrezno prezračevanje okoli ohišja računalnika, da preprečite pregrevanje.
- Keep small parts and screws out of reach of children.
3. Vsebina paketa
Preverite, ali so v paketu vsi predmeti. Če kateri koli predmet manjka ali je poškodovan, se obrnite na prodajalca.
- Xigmatek Lux M Micro-ATX Mini Tower PC Case
- Škatla s priborom (z vijaki, distančniki, kabelskimi vezicami itd.)
- Uporabniški priročnik (ta dokument)
4. Izdelek je končanview
Familiarize yourself with the various parts of your Xigmatek Lux M PC case.
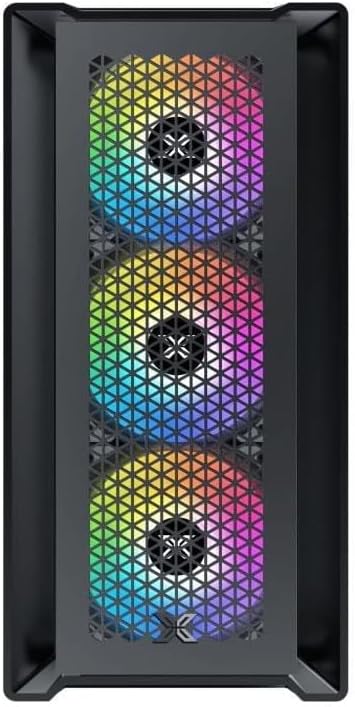
Slika 4.1: Spredaj View. This image displays the front of the Xigmatek Lux M case, highlighting the metallic mesh panel with a triangular design and the three pre-installed 120mm fixed RGB fans.

Figure 4.2: Angled Top-Front View. This perspective shows the tempered glass side panel, offering a clear view of the interior, and the top panel with its I/O ports (USB, audio) and power button.
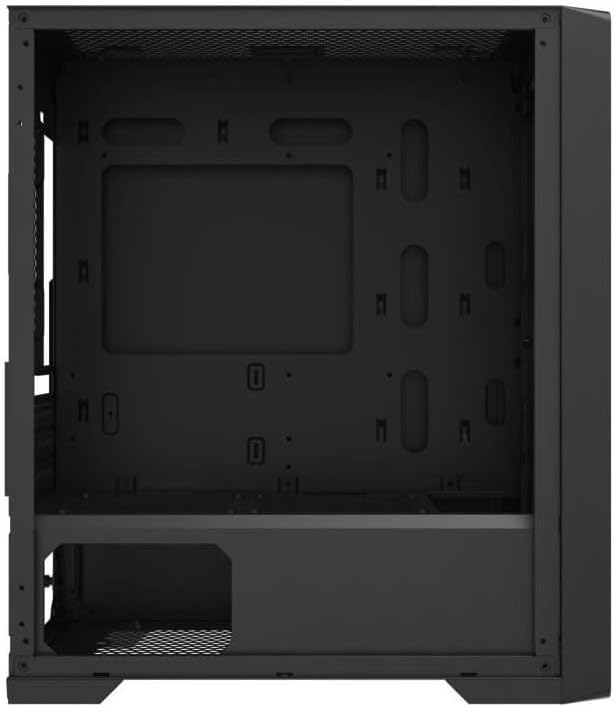
Slika 4.3: Notranja postavitev. The internal structure of the case, featuring the motherboard mounting tray, cutouts for cable management, and the power supply shroud at the bottom.
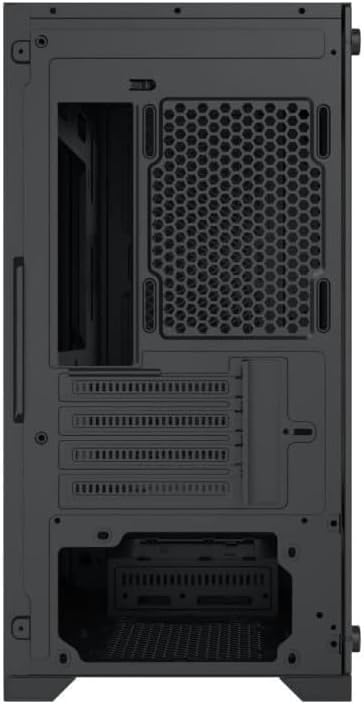
Slika 4.4: Zadaj View. This image illustrates the rear of the case, including the expansion slots for graphics cards and other add-in cards, the rear fan mounting area, and the power supply mounting bracket.
5. Nastavitev in namestitev
Follow these steps to install your computer components into the Xigmatek Lux M case.
5.1. Priprava primera
- Ohišje postavite na ravno, stabilno površino.
- Remove the tempered glass side panel by unscrewing the thumb screws and carefully lifting it off. Set it aside on a soft, non-abrasive surface.
- Remove the opposite steel side panel by unscrewing the thumb screws and sliding it backward.
5.2. Namestitev matične plošče
The Lux M supports Micro-ATX and Mini-ITX motherboards.
- Install the I/O shield (if not pre-installed on your motherboard) into the rear opening of the case.
- Align the motherboard with the pre-installed standoffs. Ensure all screw holes on the motherboard match the standoffs.
- Secure the motherboard using the provided motherboard screws. Do not overtighten.
5.3. Namestitev napajalne enote (PSU)
The PSU mounts at the rear bottom of the case.
- Slide the PSU into its designated compartment from the rear of the case.
- Align the PSU's screw holes with the holes on the case's rear panel.
- Napajalnik pritrdite s priloženimi vijaki.
5.4. Storage Drive Installation (2.5"/3.5" Drives)
The case supports 2x 2.5"/3.5" storage drives.
- Locate the drive cage beneath the PSU shroud or dedicated 2.5" mounting points behind the motherboard tray.
- For 3.5" HDDs, slide the drive into a drive tray (if applicable) and secure it with screws.
- For 2.5" SSDs, secure them directly to the mounting points using the provided screws.
5.5. Namestitev grafične kartice (VGA) in razširitvene kartice
Ohišje podpira grafične kartice dolžine do 320 mm.
- Z zadnje strani ohišja odstranite potrebne pokrove razširitvenih rež.
- Insert your graphics card or other expansion card into the appropriate PCIe slot on your motherboard.
- Secure the card to the case using the expansion slot screws.
5.6. Cooling System Installation (Optional)
The Lux M comes with 4x 120mm X24F fixed RGB fans. It supports additional cooling options.
- CPU hladilnik: Max height of 160mm. Install your CPU cooler according to its manufacturer's instructions.
- Podpora za radiator: The case supports radiators of 360mm, 240mm, or 120mm. Refer to your radiator's manual for installation. Common mounting locations include the front and top panels.
5.7. Upravljanje kablov
Za organizacijo kablov uporabite izreze za napeljavo kablov in pritrdilne točke za pladnjem matične plošče. To izboljša pretok zraka in estetiko.
5.8. Končna montaža
- Once all components are installed and cables are managed, reattach the steel side panel and secure it with thumb screws.
- Carefully reattach the tempered glass side panel and secure it with thumb screws.
6. Navodila za uporabo
After completing the installation, connect your peripherals (monitor, keyboard, mouse) and power cable to the PC. Press the power button located on the top panel of the case to start your system.
The pre-installed X24F RGB fans feature fixed RGB lighting, which will illuminate automatically upon system power-on. No additional software or controller is required for their basic operation.
Ensure that the case's ventilation is not obstructed to maintain optimal airflow and cooling performance.
7. Vzdrževanje
Redno vzdrževanje pomaga zagotoviti dolgo življenjsko dobo in optimalno delovanje komponent vašega računalnika.
- Čiščenje prahu: Periodically clean dust filters (if present) and the interior of the case using compressed air or a soft brush. Dust accumulation can hinder airflow and lead to overheating.
- Čiščenje zunanjosti: Obrišite zunanje površine z mehko damp cloth. Avoid harsh chemicals that may damage the finish or tempered glass.
- Kaljeno steklo: Clean the tempered glass panel with a glass cleaner and a microfiber cloth to avoid scratches and streaks.
8. Odpravljanje težav
If you encounter issues during or after installation, consider the following common troubleshooting steps:
- Brez napajanja:
- Prepričajte se, da je napajalni kabel varno priključen tako na napajalnik kot na stensko vtičnico.
- Preverite, ali je stikalo napajalnika v položaju »VKLOP«.
- Verify that the front panel power switch cable is correctly connected to the motherboard's front panel header.
- Fans Not Spinning / RGB Not Lighting:
- Ensure all fan power cables are securely connected to the motherboard or a fan controller.
- For RGB, confirm that any necessary RGB headers are connected to the motherboard (though the included fans are fixed RGB and should light up with power).
- Brez izhoda za prikaz:
- Verify that your monitor cable is connected to the graphics card (if installed) and not the motherboard's integrated graphics port.
- Ponovno namestite grafično kartico v režo PCIe.
- Pregrevanje:
- Za optimalen pretok zraka (dovod/izpuh) se prepričajte, da se vsi ventilatorji ohišja vrtijo in so pravilno usmerjeni.
- Očistite morebitne filtre za prah in notranje komponente.
- Verify that the CPU cooler is properly seated and making good contact with the CPU.
For more complex issues, consult your component manuals or seek assistance from Xigmatek support or a qualified technician.
9. Specifikacije
| Funkcija | Specifikacija |
|---|---|
| Znamka | Xigmatek |
| Ime modela | Lux M |
| Številka modela | EN48540 |
| Vrsta ohišja | Mini stolp |
| Združljivost matične plošče | Micro-ATX, Mini-ITX |
| Material | Tempered Glass (side panel), Metal (front panel) |
| barva | Črna |
| Vnaprej nameščeni ventilatorji | 4 x 120mm X24F Fixed RGB Fans |
| Podpora za radiatorje | 360 mm, 240 mm, 120 mm |
| Največja višina hladilnika procesorja | 160 mm |
| Največja dolžina VGA | 320 mm |
| Največja dolžina PSU | 165 mm |
| Skladiščni prostori | 2x 2.5"/3.5" |
| Posebne lastnosti | RGB Lighting, Triangular Mesh Front Design |
10. Garancija in podpora
Xigmatek products are manufactured to the highest quality standards. For warranty information and technical support, please refer to the warranty card included with your product or visit the official Xigmatek webspletnega mesta. Prosimo, shranite dokazilo o nakupu za uveljavljanje garancije.
For further assistance, you may contact Xigmatek customer support through their official channels.