
1. Uvod
Hvala za nakupasing the Acctim Delaware 71682 Radio Controlled LCD Digital Alarm Clock. This manual provides essential information for setting up, operating, and maintaining your new alarm clock. Please read these instructions carefully before use and retain them for future reference.
2. Izdelek je končanview
The Acctim Delaware 71682 is a radio-controlled digital alarm clock featuring a large LCD display with a green backlight, dual alarms, calendar, and indoor temperature display. Its radio-controlled function ensures accurate timekeeping in the UK and Ireland.
2.1. Komponente in zaslon
Familiarize yourself with the clock's buttons and display elements.
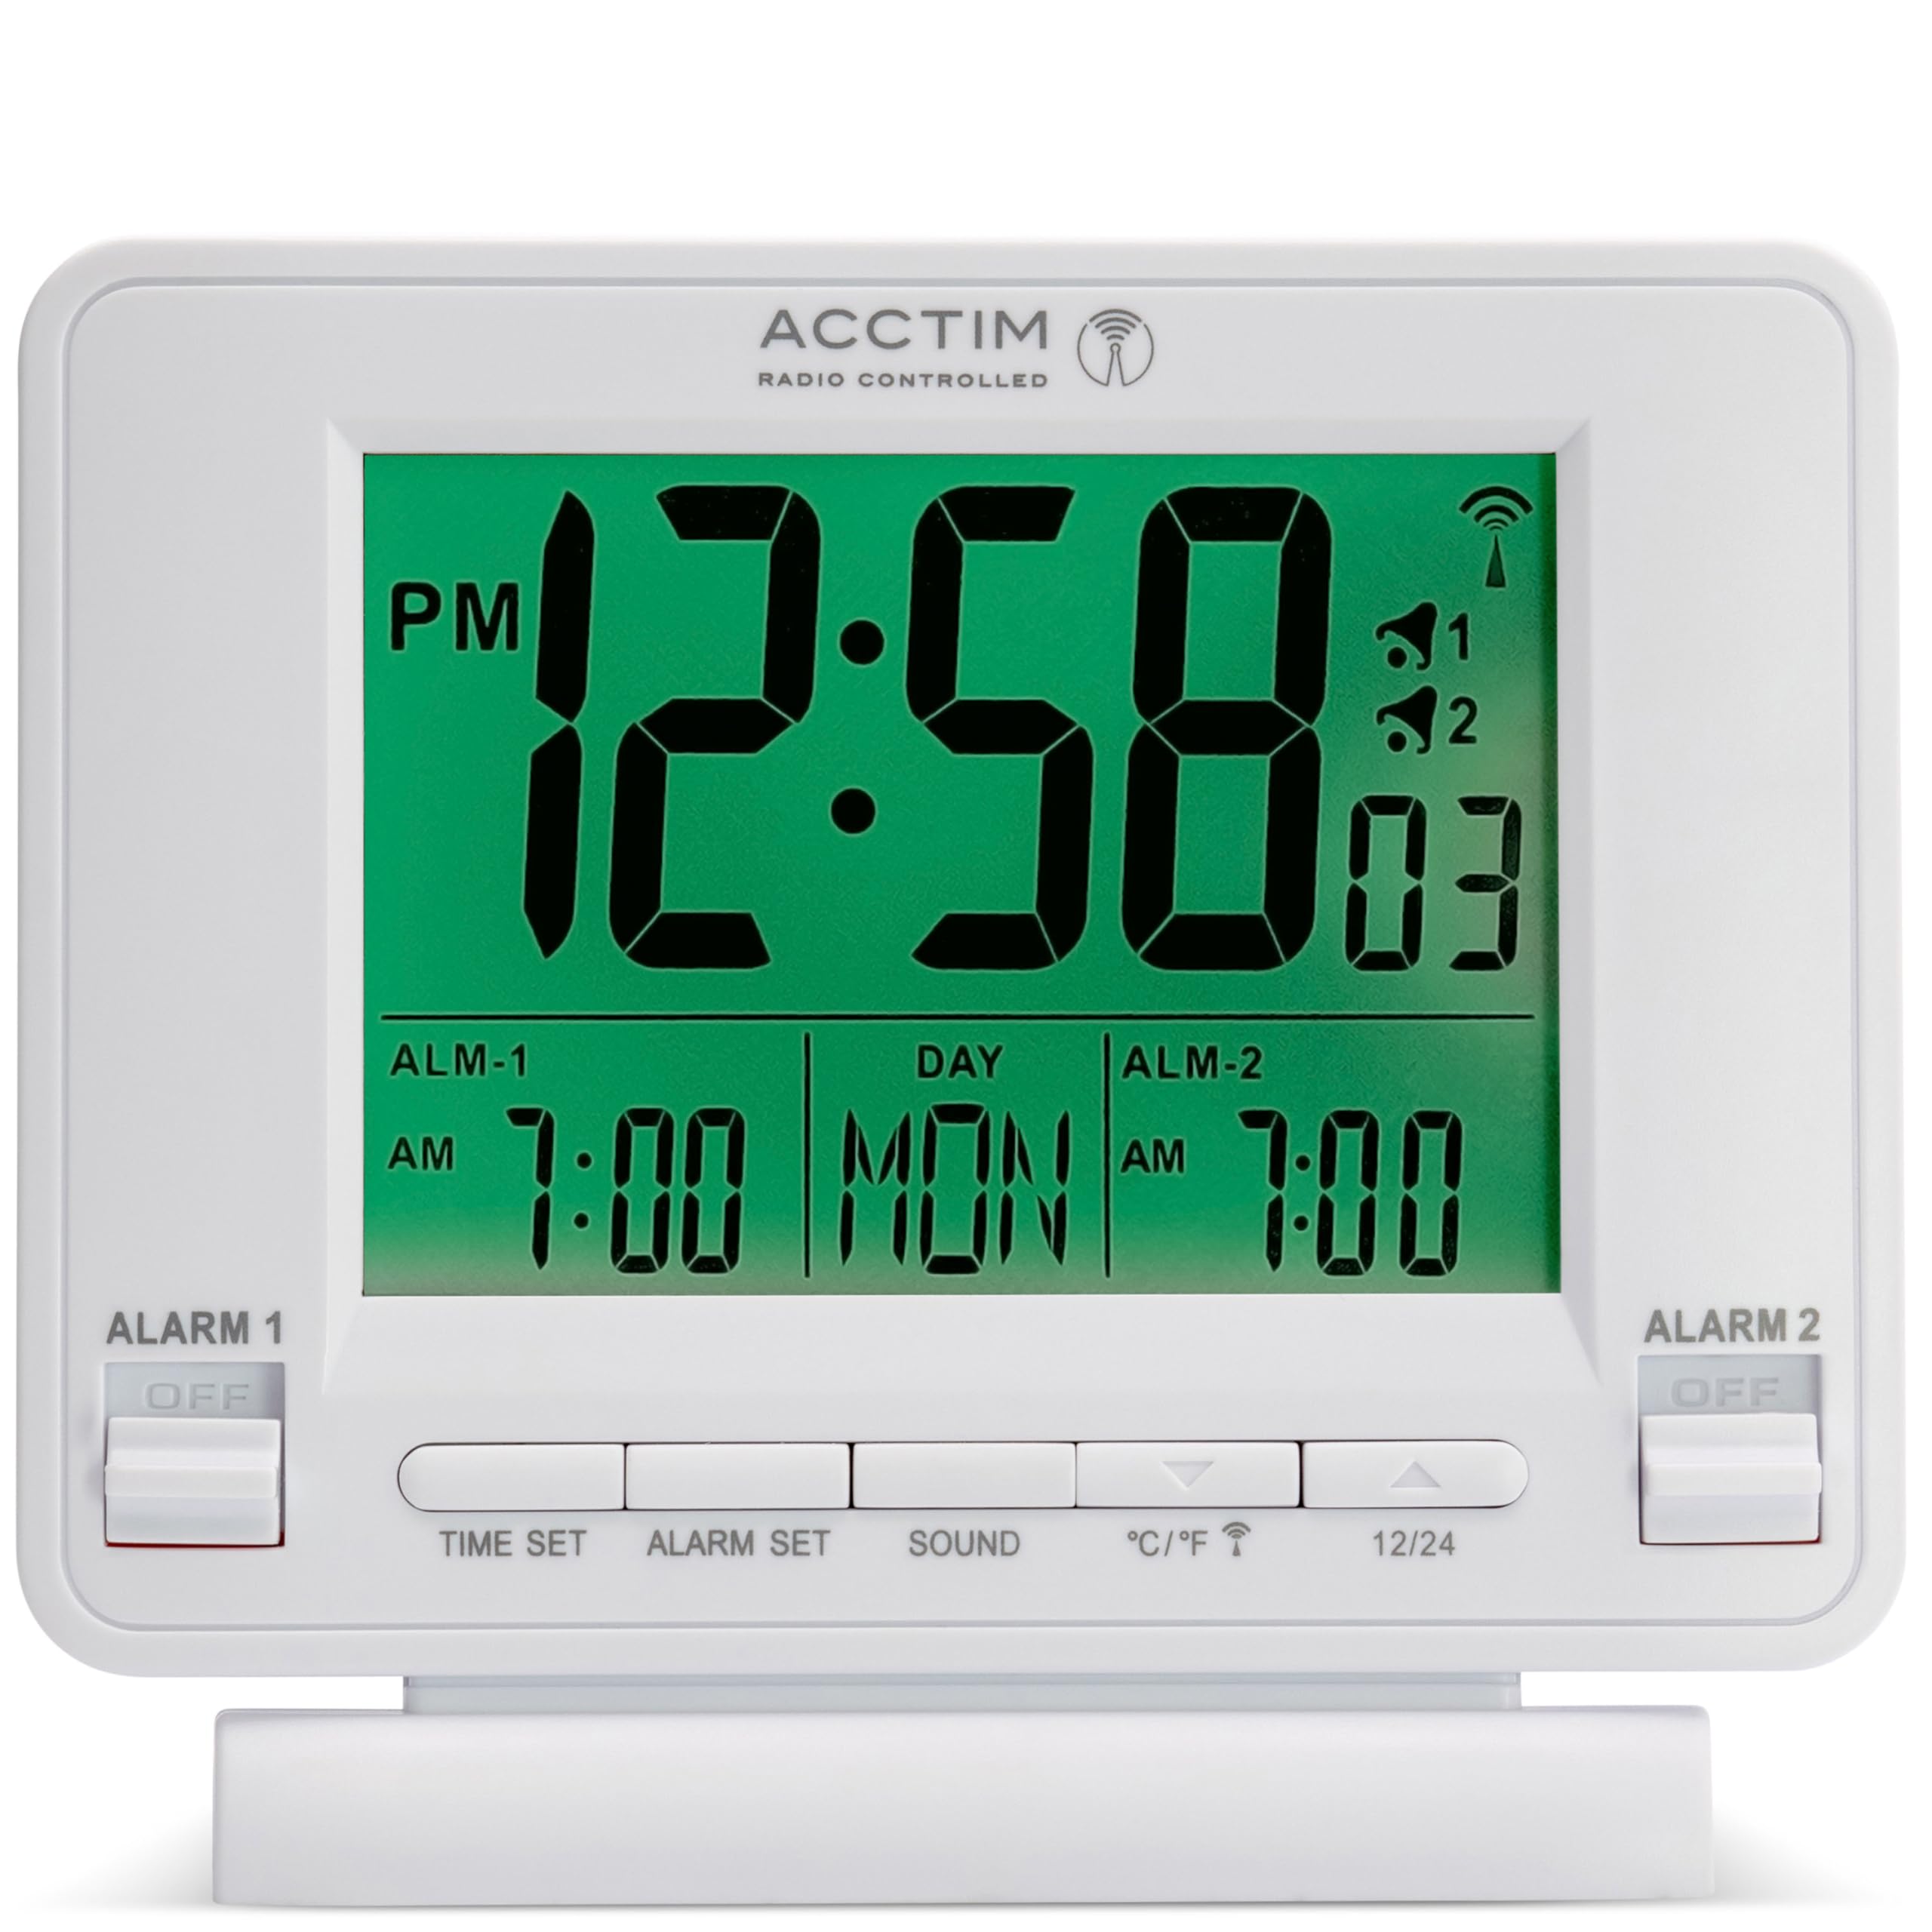
Slika 1: Spredaj view of the Acctim Delaware 71682 Radio Controlled LCD Digital Alarm Clock. The display shows time, day, date, and alarm settings. Control buttons are visible at the bottom, and alarm switches on the sides.
Nadzor sprednje plošče:
- ČAS NASTAVLJEN: Uporablja se za vstop v način nastavitve časa.
- NASTAVLJEN ALARM: Uporablja se za vstop v način nastavitve alarma.
- ZVOK: Used to select alarm sound, and typically functions as the Snooze/Backlight button.
- °C/°F: Toggles between Celsius and Fahrenheit for temperature display. Also functions as a 'down' adjustment button in setting modes.
- 12/24: Toggles between 12-hour and 24-hour time format. Also functions as an 'up' adjustment button in setting modes.
Kontrole na stranski plošči:
- ALARM 1 ON/OFF Switch: Activates or deactivates Alarm 1.
- ALARM 2 ON/OFF Switch: Activates or deactivates Alarm 2.

Slika 2: Zadaj view of the Acctim Delaware 71682 Alarm Clock. This image highlights the battery compartment cover and the recessed RESET button.
Kontrole na zadnji plošči:
- Predal za baterije: Holds the required AA batteries.
- Gumb RESET: A small, recessed button to reset the clock to factory defaults.
3. Nastavitev
3.1. Namestitev baterije
- Odprite pokrov predalčka za baterije na zadnji strani ure.
- Insert 2 new AA batteries, ensuring the correct polarity (+ and -).
- Trdno zaprite pokrov prostora za baterije.
Note: Batteries are not included. Always use fresh batteries for optimal performance.
3.2. Initial Setup and Radio Control Synchronization
Upon battery installation, the clock will automatically attempt to synchronize with the radio-controlled time signal (MSF signal for UK and Ireland). This process may take several minutes to a few hours, depending on your location and signal strength. During synchronization, a radio signal icon will flash on the display.
- Za boljši sprejem signala postavite uro blizu okna.
- Izogibajte se postavljanju v bližino elektronskih naprav, ki lahko povzročajo motnje.
- Once synchronized, the radio signal icon will appear solid on the display, and the time will be set automatically.
If the clock fails to synchronize, you may need to set the time manually.
4. Navodila za uporabo
4.1. Ročna nastavitev časa in datuma
If radio control is unavailable or you prefer manual setting:
- Pritisnite in držite ČAS NAST gumb, dokler ne začnejo utripati številke za uro.
- Uporabite 12/24 (gor) in ° C / ° F (down) buttons to adjust the hour.
- Pritisnite ČAS NAST again to confirm the hour and move to minutes. Adjust minutes using the up/down buttons.
- Nadaljujte s pritiskom ČAS NAST to cycle through and set year, month, and day.
- Pritisnite ČAS NAST one last time or wait for 10 seconds for the settings to be saved automatically.
4.2. Nastavitev alarmov (Alarm 1 in Alarm 2)
Ura ima dva neodvisna alarma.
- Pritisnite in držite ALARM NASTAVLJEN button until the Alarm 1 hour digits start flashing.
- Uporabite 12/24 (gor) in ° C / ° F (down) buttons to adjust the desired Alarm 1 hour.
- Pritisnite ALARM NASTAVLJEN again to confirm the hour and move to Alarm 1 minutes. Adjust minutes using the up/down buttons.
- Pritisnite ALARM NASTAVLJEN again to move to Alarm 2 hour setting. Repeat the adjustment process for Alarm 2.
- Pritisnite ALARM NASTAVLJEN one last time or wait for 10 seconds to save the alarm settings.
4.3. Activating/Deactivating Alarms
Use the physical switches on the sides of the clock:
- Potisnite ALARM 1 VKLOP/IZKLOP switch to 'ON' to activate Alarm 1. An alarm icon (1) will appear on the display.
- Potisnite ALARM 2 VKLOP/IZKLOP switch to 'ON' to activate Alarm 2. An alarm icon (2) will appear on the display.
- Slide the switches to 'OFF' to deactivate the respective alarms.

Slika 3: Spredaj view of the Acctim Delaware 71682 with Alarm 1 activated. The 'ALARM 1' switch is in the 'ON' position, and the corresponding alarm icon is visible on the LCD.
4.4. Using the Alarm and Snooze Function
- Ko se oglasi alarm, pritisnite ZVOK button (or any other front button, depending on model variation) to activate the snooze function. The alarm will pause and sound again after approximately 5 minutes.
- To stop the alarm completely, slide the corresponding VKLOP / IZKLOP ALARMA switch to 'OFF'.
4.5. Nastavitve zaslona
- 12/24-urni format: Pritisnite 12/24 button to switch between 12-hour (with AM/PM indicator) and 24-hour time display.
- Enota za temperaturo: Pritisnite ° C / ° F button to toggle the indoor temperature display between Celsius and Fahrenheit.
- Osvetlitev ozadja: Pritisnite ZVOK button (or the top button if present) to activate the green backlight for a few seconds.

Slika 4: Spredaj view of the Acctim Delaware 71682 with its green backlight activated, illuminating the time, date, and temperature display for enhanced visibility in low light conditions.
5. Vzdrževanje
5.1. Čiščenje
To clean the clock, use a soft, dry cloth. Do not use abrasive cleaners or chemical solvents, as these may damage the casing ali zaslon.
5.2. Zamenjava baterije
When the display becomes dim or the clock functions erratically, it's time to replace the batteries. Follow the battery installation steps in Section 3.1. Always replace both batteries at the same time with new ones.
6. Odpravljanje težav
- Brez zaslona ali zatemnjen zaslon:
Ensure batteries are inserted correctly with the correct polarity. Replace with fresh AA batteries. - Napačen čas:
Check if the radio control signal icon is solid. If it's flashing or absent, the clock may not be receiving the signal. Move the clock to a location with better reception (e.g., near a window). If the issue persists, set the time manually as described in Section 4.1. - Alarm se ne oglasi:
Verify that the respective ALARM ON/OFF switch (Alarm 1 or Alarm 2) is in the 'ON' position. Ensure the alarm time is set correctly. - Osvetlitev ozadja ne deluje:
Ensure batteries have sufficient power. The backlight is designed to illuminate for a short period only. - Clock unresponsive:
Remove the batteries, wait for a few minutes, then reinsert them. If the problem persists, use a pointed object (like a paperclip) to press the recessed PONASTAVI button on the back of the clock. Note that this will clear all settings.
7. Specifikacije
| Funkcija | Podrobnost |
|---|---|
| Številka modela | 71682 |
| Znamka | Acctim |
| Vrsta zaslona | Digitalni LCD |
| Posebne lastnosti | Radio Controlled (UK & Ireland), Dual Alarm, Snooze, Calendar, Indoor Temperature, Backlight |
| Vir napajanja | Battery (2 x AA required) |
| Dimenzije (V x Š x G) | 10.1 x 10.2 x 4 cm |
| Teža | 0.14 kg |
| barva | Bela |
8. Informacije o garanciji
This Acctim product comes with a 24-mesečna garancija from the date of purchase. Please retain your proof of purchase for any warranty claims. The warranty covers manufacturing defects but does not cover damage caused by misuse, accidents, unauthorized repairs, or normal wear and tear.
9. Podpora strankam
For further assistance, troubleshooting, or warranty inquiries, please contact Acctim customer support through their official webspletno mesto ali prodajalec, kjer je bil izdelek kupljen. Pripravite številko modela (71682) in dokazilo o nakupu.