
Uvod
The Keychron Q2 is a fully customizable wired mechanical keyboard featuring a compact 65% layout. Constructed with a solid full aluminum frame, the Q2 is designed for easy assembly and offers a premium typing experience. It supports full QMK and VIA programming for extensive customization and features hot-swappable switches for personalized tactile feedback.

Image: The Keychron Q2 Wired Custom Mechanical Keyboard, showcasing its compact 65% layout and blue color scheme.
Vodnik za namestitev
1. Vsebina paketa
Pred začetkom se prepričajte, da so prisotne vse komponente:
- Keychron Q2 Keyboard Kit (Aluminum Case, PCB, Steel Plate, Sound Absorbing Foam, Case Foam, Gaskets)
- Kabel USB tipa C na tip C
- Adapter USB Type-A to Type-C
- Stikalo Stikalo
- Izvleček za ključe
- Izvijač
- Šestnajsti ključ
- Stabilizers (4 sets)
Note: All tools are typically located at the bottom of the packaging.

Image: Diagram illustrating the contents of the Keychron Q2 package, including the keyboard, cables, and tools.
2. Priključitev tipkovnice
- Locate the USB Type-C port on the back of the Keychron Q2 keyboard.
- Connect one end of the provided USB Type-C to Type-C cable to the keyboard.
- Connect the other end of the cable to your computer's USB Type-C port. If your computer only has USB Type-A ports, use the included USB Type-A to Type-C adapter.
- Ensure the operating system switch (located on the back edge of the keyboard) is set to the correct position for your system (Mac or Windows).
- Vaš operacijski sistem bo tipkovnico samodejno prepoznal.

Slika: Bližnji posnetek view of the Keychron Q2 keyboard with a USB-C cable connected, showing the Mac/Win switch.
Navodila za uporabo
1. Prilagoditev QMK/VIA
The Keychron Q2 supports full QMK and VIA programming, allowing you to remap keys, create macros, and customize lighting effects. To use VIA software:
- Download the VIA software from the official Keychron webspletno mesto (keychron.com/pages/qmk-via).
- Connect your Q2 keyboard to your computer via the USB cable.
- Launch the VIA software. The software should automatically detect your Q2 keyboard. If not, you may need to import the Q2 keymap JSON file, also available on the Keychron webmesto.
- Use the graphical interface to drag and drop functions, assign macros, and configure lighting for each key. Changes are applied in real-time.

Image: Screenshot of the VIA software interface, demonstrating how to remap keys on the Keychron Q2 keyboard.
2 Stikala z možnostjo vroče menjave
The Q2's PCB supports both 3-pin and 5-pin MX style mechanical switches, allowing for easy switch replacement without soldering.
- S priloženim snemalnikom previdno odstranite pokrovček tipke s stikala, ki ga želite zamenjati.
- Use the provided switch puller to gently grip the top and bottom clips of the switch. Pull the switch straight up to remove it from the PCB.
- Poravnajte nožice novega stikala z luknjami na tiskanem vezju. Prepričajte se, da so nožice ravne, da se ne upognejo.
- Novo stikalo trdno pritisnite na svoje mesto, dokler ne klikne.
- Ponovno namestite pokrovček tipke.

Slika: Bližnji posnetek view of the Keychron Q2's PCB with several switches removed, demonstrating the hot-swappable feature.
3. Keycaps and RGB Lighting
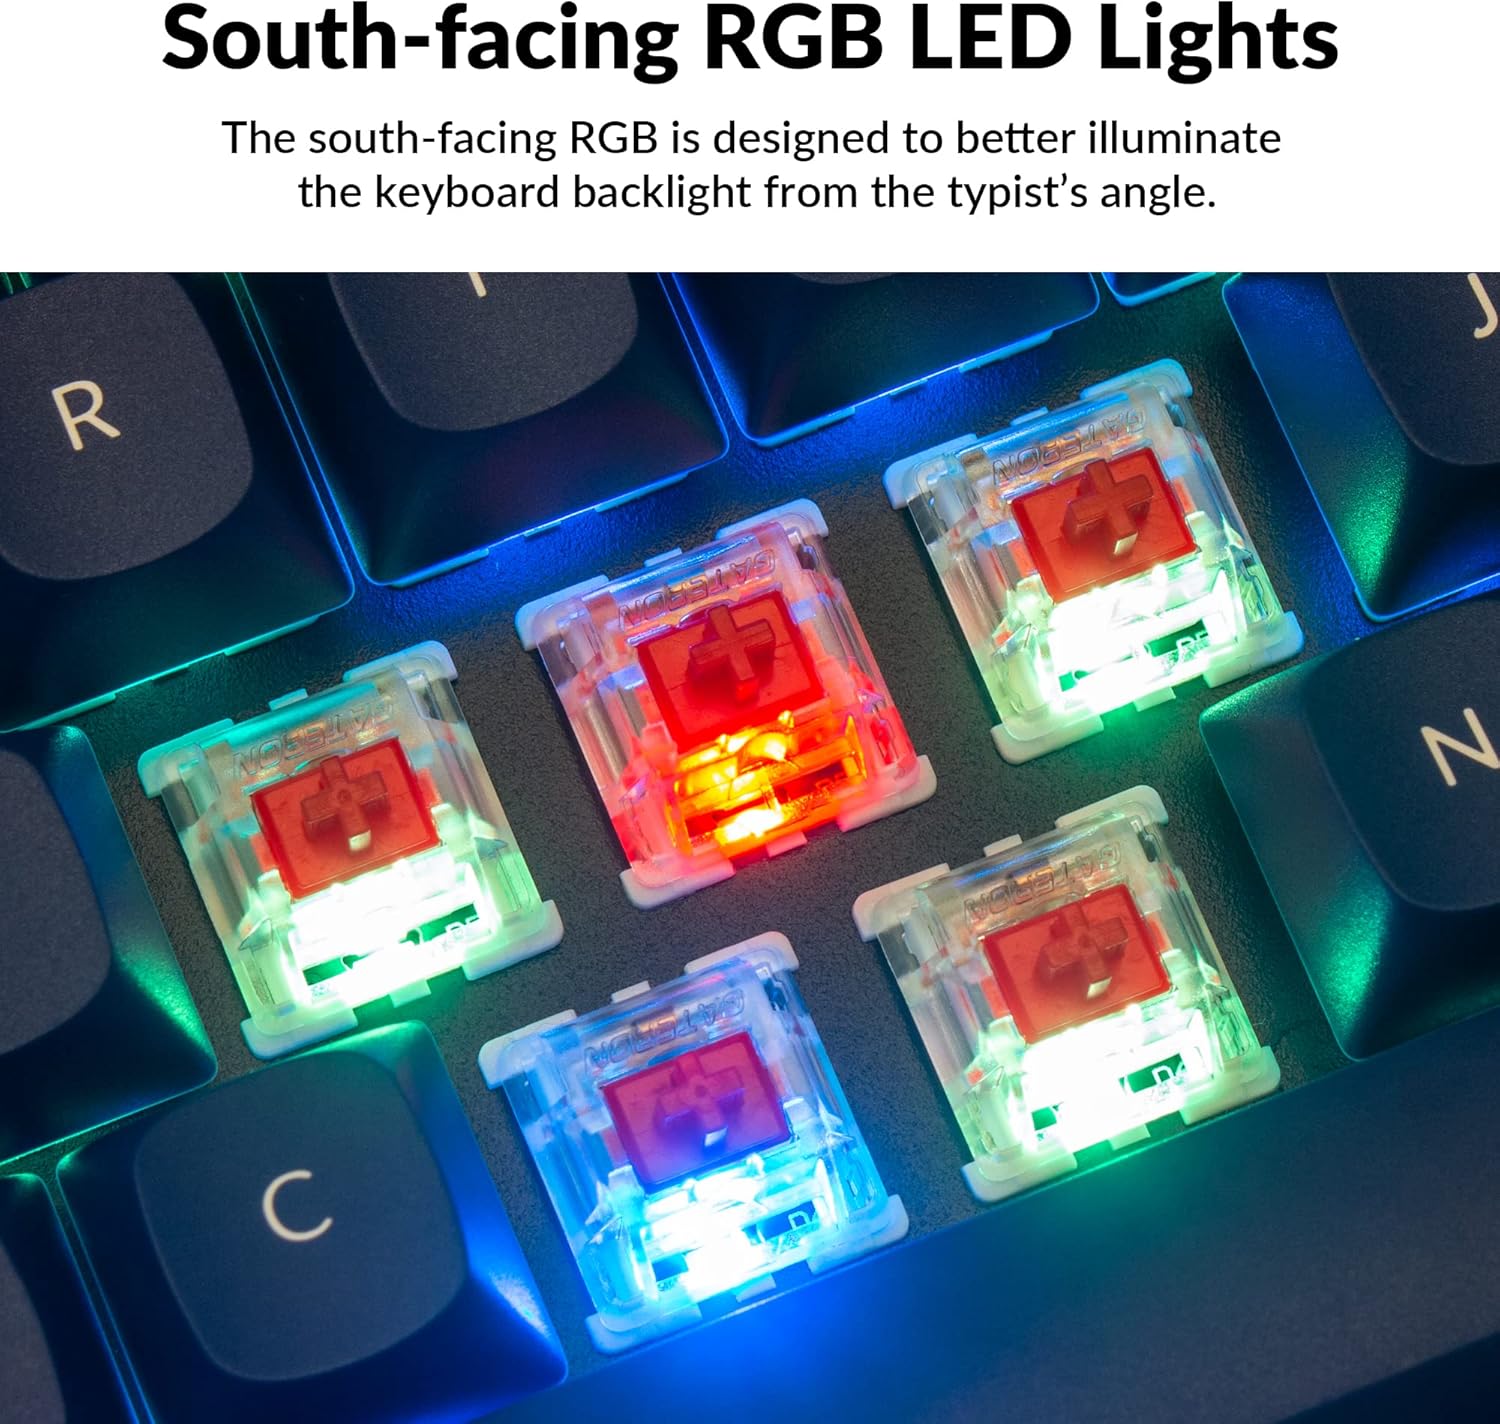
The Q2 comes with premium non-shine-through PBT keycaps, known for their durability and oil resistance. The keyboard features south-facing RGB LEDs, designed to provide better illumination of the backlight from the typist's perspective.
Slika: Podrobna view of the Keychron Q2's double-shot PBT keycaps, highlighting their texture and legends.

Image: A close-up of the Keychron Q2's south-facing RGB LEDs illuminating the switches from below.
Vzdrževanje
1. Čiščenje tipkovnice
Redno čiščenje pomaga ohranjati delovanje in videz tipkovnice.
- Odstranjevanje prahu: S pločevinko stisnjenega zraka odpihnite prah in umazanijo med tipkami.
- Čiščenje tipkovnice: For deeper cleaning, remove the keycaps using the provided keycap puller. Wash them with mild soap and water, then ensure they are completely dry before reattaching.
- Čiščenje ohišja: Aluminijasto ohišje obrišite z mehko krpoamp krpo. Izogibajte se ostrim kemikalijam, ki bi lahko poškodovale zaključek.
2. Switch and Stabilizer Maintenance
The hot-swappable design allows for easy maintenance of switches and stabilizers.
- Zamenjava stikala: If a switch becomes faulty, replace it using the hot-swapping procedure described in the Operating Instructions.
- Stabilizer Lubrication: For optimal performance and reduced wobbliness on larger keys (space bar, shift, enter), the PCB-mounted screw-in stabilizers can be lubricated. This typically involves disassembling the keyboard to access the stabilizers.

Image: An exploded diagram of the Keychron Q2, showing its various components like keycaps, switches, top case, gaskets, plate, PCB, sound absorbing foam, case foam, bottom case, and silicone gaskets, illustrating ease of disassembly.
Odpravljanje težav
Pogoste težave in rešitve:
- Tipkovnica se ne odziva:
- Prepričajte se, da je kabel USB varno priključen tako na tipkovnico kot na računalnik.
- Verify the Mac/Windows switch on the back of the keyboard is set to the correct operating system.
- Try connecting the keyboard to a different USB port or a different computer to rule out port issues.
- Znova zaženite računalnik.
- Določene tipke ne delujejo:
- Remove the keycap and switch for the non-functional key. Inspect the switch pins for bends or damage. Straighten bent pins carefully or replace the switch if damaged.
- Prepričajte se, da je stikalo popolnoma nameščeno v tiskano vezje.
- Check VIA software to ensure the key has not been accidentally remapped or disabled.
- Težave z RGB osvetlitvijo:
- Prepričajte se, da je tipkovnica pravilno priključena.
- Use the VIA software to check and adjust lighting settings.
- Perform a factory reset if lighting issues persist (refer to Keychron's official support for specific reset procedures).
- Naključno odklop tipkovnice:
- Poskusite z drugim kablom USB.
- Ensure the USB port on your computer is stable and providing sufficient power.
- Posodobite gonilnike USB v računalniku.
If you encounter issues not covered here, please refer to the official Keychron support resources.
Specifikacije
| Funkcija | Podrobnost |
|---|---|
| Znamka | Keychron |
| Ime modela | Q2 |
| Številka modela | Q2-J1 |
| Razporeditev tipkovnice | 65% (68 Keys), QWERTY |
| Tehnologija povezljivosti | Žično (USB-A, USB-C) |
| Združljive naprave | PC (Linux, MacOS, Windows) |
| Tip stikala | Gateron G Pro Red (Linear), Hot-swappable |
| Osvetlitev ozadja | RGB (obrnjeno proti jugu) |
| Material | Full Aluminum Frame, PBT Keycaps |
| Dimenzije izdelka | 12.89 cm D x 4.76 cm Š x 1.33 cm V |
| Posebne lastnosti | QMK/VIA Programmable, Double Gasket Design |
Informacije o garanciji
Keychron products typically come with a standard manufacturer's warranty. For detailed information regarding the warranty period, coverage, and terms and conditions for your Keychron Q2 keyboard, please refer to the official Keychron webspletno mesto ali garancijski list, ki je priložen izdelku. Dokazilo o nakupu shranite za uveljavljanje garancije.
Podpora in viri
For further assistance, software downloads (VIA), firmware updates, and frequently asked questions, please visit the official Keychron support page:
- Keychron Official Webspletno mesto: www.keychron.com
- QMK/VIA Software & Firmware: www.keychron.com/pages/qmk-via
- Keychron Store: Visit the Keychron Store on Amazon
You can also find community forums and additional user guides online for advanced customization and troubleshooting tips.