
Sharp Atomic Clock with Wireless Sensor
Navodila za uporabo atomske ure Sharp
Model: Atomic Clock with Wireless Sensor
Blagovna znamka: Sharp
1. Uvod
Thank you for choosing the Sharp Atomic Clock. This clock is designed to provide precise timekeeping and environmental monitoring with minimal user intervention. Featuring a large, easy-to-read display, it automatically synchronizes with the WWVB radio signal for unparalleled accuracy and displays both indoor and outdoor temperatures, along with the date and day of the week.
This manual provides detailed instructions for setting up, operating, maintaining, and troubleshooting your new atomic clock. Please read it thoroughly before use to ensure optimal performance and longevity of your device.
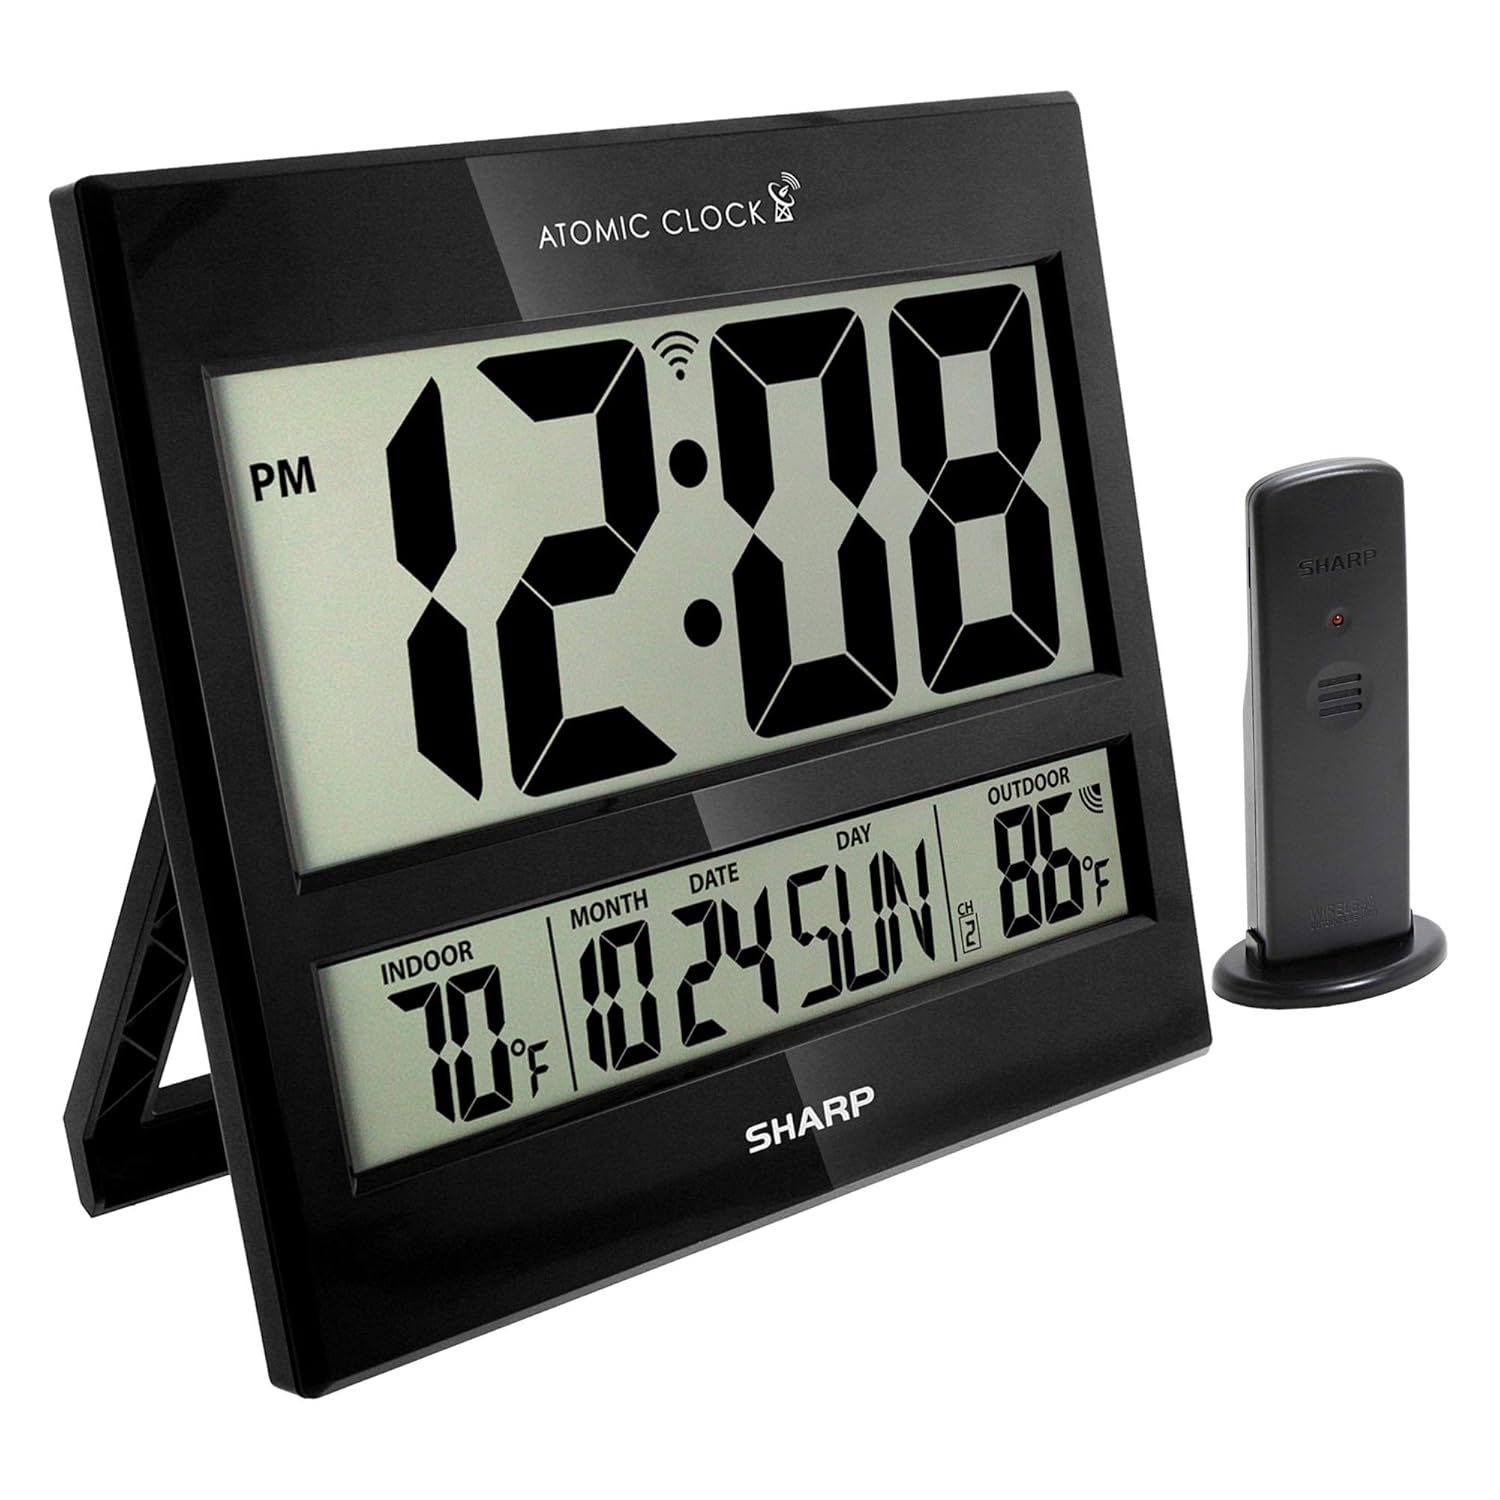
Image: The Sharp Atomic Clock main unit and its accompanying wireless outdoor sensor.
2. Ključne značilnosti
- Atomska natančnost: Automatically synchronizes with the WWVB radio broadcast from Fort Collins, Colorado, ensuring time accuracy to within one second.
- Brezžični zunanji senzor: Transmits outdoor temperature to the main unit from up to 100 feet away.
- Veliki LCD-zaslon: Large 3-inch tall time digits for easy readability.
- Indoor & Outdoor Temperature Display: Shows current temperatures for both environments.
- Calendar & Day of Week Display: Provides current month, date, and day.
- Vsestranska postavitev: Can be used as a wall clock or a desk clock with its integrated stand.
- Dvojne možnosti napajanja: Operates on batteries (3 x AA for main unit, 2 x AAA for sensor, not included) or electric power (110V/120V compatible for 'always on' display).

Image: Visual representation of the clock's main features.

Slika: Jasna view of the clock's display showing time, date, and temperature readings.
3. Navodila za namestitev
3.1 Razpakiranje in namestitev baterije
Carefully remove all components from the packaging. Ensure you have the main atomic clock unit and the wireless outdoor sensor. Batteries are not included and must be purchased separately.
- Glavna enota: Open the battery compartment on the back of the main clock unit. Insert 3 x AA batteries, ensuring correct polarity (+/-).
- Brezžični zunanji senzor: Open the battery compartment on the back of the sensor. Insert 2 x AAA batteries, ensuring correct polarity (+/-).
3.2 Namestitev brezžičnega senzorja
For accurate outdoor temperature readings, place the wireless sensor within 100 feet (30 meters) of the main unit. Choose a location that is:
- Protected from direct sunlight and precipitation.
- Away from large metal objects or electrical devices that could interfere with the signal.
- Ideally, on a north-facing wall or in a shaded area to prevent inaccurate temperature readings due to solar radiation.

Slika: nprample placement of the wireless outdoor sensor.
3.3 Initial Atomic Time Synchronization
After battery installation, the clock will automatically attempt to synchronize with the WWVB radio signal. This process may take several minutes to up to 48 hours, especially if the signal is weak or during daytime hours. For best reception, place the clock near a window and away from electronic interference.
The atomic clock will always be accurate to within one second as it receives daily WWVB updates. If the clock does not receive the WWVB signal immediately, just wait overnight, and it should be set in the morning.

Image: Explanation of atomic clock synchronization via WWVB radio broadcast.
4. Delovanje
4.1 Prikaz informacij
Velik LCD-zaslon prikazuje naslednje informacije:
- Čas: Current time in large, easy-to-read digits.
- Notranja temperatura: Temperatura, ki jo meri glavna enota.
- Zunanja temperatura: Temperature transmitted from the wireless sensor.
- Month, Date, Day: Trenutne informacije o koledarju.
- Indikator poletnega časa: Indicates if Daylight Saving Time is active.
- Indikator moči signala: Shows the strength of the WWVB signal.
4.2 Daylight Saving Time (DST) Assistance
The clock is designed to automatically adjust for Daylight Saving Time. However, if you live in an area that does not observe DST (e.g., Arizona, Hawaii, parts of Indiana), you may need to disable this feature or select another time zone to ensure correct time display. Refer to the buttons on the back of the unit for specific DST settings.

Image: Information regarding Daylight Savings Time adjustments.
4.3 Manual Adjustments (if needed)
While the clock is primarily automatic, manual adjustments for time zone or other settings can be made using the buttons located on the back of the unit. Consult the labels next to each button for their specific functions (e.g., CALENDAR, TIME, CHANNEL, UP, DOWN, TIME ZONE, WAVE, RESET).
5. Vzdrževanje
5.1 Zamenjava baterije
When the display becomes dim or the outdoor temperature reading is inconsistent, it is time to replace the batteries. Always replace all batteries in a unit at the same time with new ones of the same type.
- Main Unit: 3 x AA batteries.
- Wireless Outdoor Sensor: 2 x AAA batteries.
5.2 Čiščenje
Za čiščenje ure in senzorja uporabite mehko,amp krpo. Ne uporabljajte abrazivnih čistil ali topil, saj lahko poškodujejo zaslon aliasing.
6. Odpravljanje težav
6.1 No Outdoor Temperature Display
If your outdoor temperature is not showing on your clock, it may mean that the clock and the transmitter have lost their connection. To reconnect them:
- First, take the batteries out of both the main unit and the outdoor sensor for 15 minutes.
- Then, put the batteries back into the transmitter (sensor) first, followed by the main clock unit.
- Let them sit side by side inside your home. When both the indoor and outdoor temperatures show on your clock with the same reading, or within two degrees of each other, then you may put your transmitter back outside.
- Remember to keep the transmitter out of direct sun in a dry place and away from metal, which can affect the readings.

Image: Troubleshooting steps for outdoor temperature display.
6.2 Time/Date Incorrect
If the time or date is incorrect after initial setup or after a power interruption, ensure the clock is receiving a strong WWVB signal. You can manually initiate a signal search by pressing the 'WAVE' button on the back of the unit. Allow several minutes for the clock to attempt re-synchronization.
6.3 Zaslon je zatemnjen ali prazen
This usually indicates low batteries. Replace all batteries in both the main unit and the sensor. If using electric power, ensure the power adapter is securely connected to a working outlet.
7. Specifikacije
| Funkcija | Opis |
|---|---|
| Dimenzije izdelka | 8.75 x 1.5 x 7.9 palcev (Š x D x H) |
| Teža | 1.34 funta |
| Vrsta zaslona | LCD |
| Prikaz časa | Jumbo 3" Tall Digits |
| Temperaturno območje (v zaprtih prostorih) | Not specified, typically standard room temperature range. |
| Temperaturno območje (zunanje) | Not specified, typically -4°F to 140°F (-20°C to 60°C). |
| Doseg brezžičnega senzorja | Do 30 metrov (100 čevljev) na prostem |
| Vir napajanja (glavna enota) | 3 x AA batteries (not included) or 110V/120V AC adapter (for 'always on' display) |
| Vir napajanja (senzor) | 2 x AAA baterije (niso priložene) |
| Posebne lastnosti | Atomic Time, Temperature Display, Calendar Display, Wireless Outdoor Sensor |
| Proizvajalec | Ostra |
| Država izvora | Kitajska |
8. Garancija in podpora
Sharp products are manufactured to the highest quality standards. For detailed warranty information, including terms, conditions, and how to obtain service, please refer to the warranty card included with your product packaging or visit the official Sharp webspletnega mesta. Račun shranite kot dokazilo o nakupu za uveljavljanje garancije.
For technical support or further assistance, please contact Sharp customer service through the contact information provided in your product documentation or on the official Sharp support webmesto.
Ask a question about this manual
Ask about setup, troubleshooting, compatibility, parts, safety, or missing instructions. Manuals+ will review the question and use this page’s manual context to help answer it.