
1. Uvod
Thank you for choosing the Brightever 2-Pack Dusk to Dawn Outdoor Wall Lantern. This manual provides essential information for the safe installation, operation, and maintenance of your new outdoor lighting fixtures. Please read these instructions thoroughly before installation and retain them for future reference.
These outdoor wall lanterns feature a sophisticated photocell sensor for automatic dusk-to-dawn operation, durable construction, and a unique waterfall glass design, suitable for various outdoor applications.

Image: The Brightever 2-Pack Dusk to Dawn Outdoor Wall Lanterns, showcasing their design and integrated sensors.
2. Izdelek je končanview
Ključne značilnosti:
- Dusk to Dawn Photocell Sensor: Automatically turns the light on at dusk and off at dawn, optimizing energy efficiency.
- Vzdržljiva konstrukcija: Features sturdy, thick waterfall glass and an anti-corrosion pure aluminum framework with a black alloy finish.
- Odporen na vremenske vplive: Designed to withstand various weather conditions including rain, snow, and extreme temperatures.
- Zasnova z odprtim dnom: Facilitates easy bulb replacement and maintenance.
- Standardna osnova E26: Compatible with a variety of E26 Edison bulbs (LED, CFL, Incandescent). Bulbs are not included.

Image: Key features including unique waterfall glass, upgraded photocell sensor, E26 standard base, and corrosion-resistant aluminum construction.

Image: Illustration of the fixture's weather resistance, including sunproof, windproof, snowproof, and waterproof capabilities.
Kaj je v škatli:
- 2 x Brightever Outdoor Wall Lanterns
- 1 x Navodila za uporabo
- Mounting Hardware (including 3x 10AWG Wire Connectors, 2x M4-25 Phillips' Head Screws per fixture)

Image: Product dimensions and included mounting hardware. Each fixture includes wire connectors and screws.
3. Varnostne informacije
OPOZORILO: To avoid the risk of fire, electric shock, or personal injury, always follow these safety guidelines:
- Pred začetkom namestitve, vzdrževanja ali zamenjave žarnice vedno izklopite napajanje na glavnem odklopniku ali v omarici z varovalkami.
- Če niste prepričani o postopku namestitve, se posvetujte s kvalificiranim električarjem.
- Prepričajte se, da so vse električne povezave izvedene v skladu z lokalnimi predpisi in uredbami.
- Uporabljajte samo žarnice navedene vrste in moči.tage. Za podrobnosti glejte razdelek »Specifikacije«.
- Do not install on a dimmer switch if using the dusk-to-dawn feature, as it may interfere with the sensor's operation.
- S steklenimi komponentami ravnajte previdno, da preprečite lomljenje.
4. Navodila za namestitev
This fixture is designed for wall-mount installation. All necessary mounting hardware is included.
Potrebna orodja (niso priložena):
- Phillips izvijač za glavo
- Odstranjevalci žice
- Električni trak
- Zaščitna očala
Koraki namestitve:
- Izklopite napajanje: Before starting, ensure the power supply to the junction box is turned off at the circuit breaker.
- Priprava montažne plošče: Attach the mounting plate (pre-assembled with the fixture) to the junction box using the provided screws. Ensure it is securely fastened.
- Izvedite električne povezave:
- Povežite črna žico od svetilke do črna (hot) wire from the junction box using a wire connector.
- Povežite bela žico od svetilke do bela (neutral) wire from the junction box using a wire connector.
- Povežite tla žico od svetilke do tla wire from the junction box (or to the green ground screw on the mounting plate) using a wire connector.
- Ensure all connections are tight and secure. Wrap connections with electrical tape if desired for added insulation.
- Namestite napeljavo: Previdno poravnajte pritrditev z montažno ploščo in jo pritrdite s priloženimi vijaki.
- Namestite žarnico: Insert an E26 base bulb (not included) into the socket. Do not exceed the maximum wattage specified in the "Specifications" section.
- Obnovi moč: Ponovno vklopite napajanje na odklopniku.

Image: Product dimensions for reference during installation. Height: 12.6 inches, Width: 8.07 inches, Depth from wall: 8.07 inches.
5. Delovanje
The Brightever Outdoor Wall Lantern is equipped with a built-in dusk-to-dawn photocell sensor for automatic operation.
- Samodejni vklop/izklop: The sensor detects ambient light levels. The fixture will automatically turn on when it gets dark (dusk) and turn off when it becomes light (dawn).
- Namestitev senzorja: Ensure the photocell sensor (located on the top of the fixture) is not obstructed by eaves, trees, or other objects that could block natural light. Avoid installing the fixture near other light sources (e.g., streetlights, floodlights) that could interfere with the sensor's ability to detect darkness, causing it to turn off prematurely.
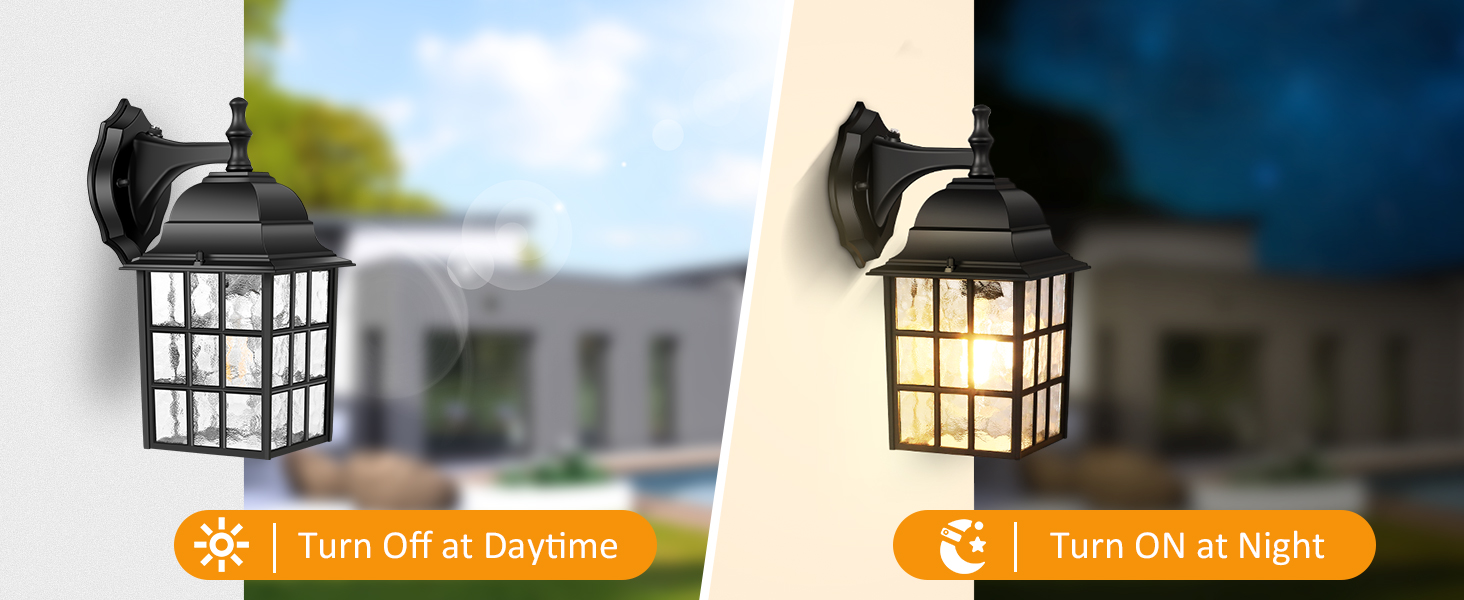
Image: Illustration of the light turning off automatically during the day and turning on automatically at night due to the photocell sensor.
6. Vzdrževanje
Zamenjava žarnice:
- Izklopite napajanje: Always turn off the power to the fixture at the circuit breaker before replacing the bulb.
- Dostopna žarnica: The fixture features an open bottom design. Simply reach into the bottom of the lantern to unscrew the old bulb.
- Namestite novo žarnico: Screw in a new E26 base bulb. Ensure the new bulb's wattage does not exceed the maximum specified (refer to "Specifications").
- Obnovi moč: Ponovno vklopite napajanje na odklopniku.
Čiščenje:
- Pred čiščenjem se prepričajte, da je napajanje izklopljeno in da se je naprava ohladila.
- Obrišite napravo z mehko krpoamp krpo. Ne uporabljajte abrazivnih čistil ali topil, saj lahko poškodujejo površino ali steklo.
- Regularly clean the photocell sensor to ensure optimal performance.
7. Odpravljanje težav
| Težava | Možen vzrok | rešitev |
|---|---|---|
| Luč se ponoči ne prižge. |
|
|
| Svetloba ostane prižgana čez dan. |
|
|
| Svetloba utripa. |
|
|
8. Specifikacije
| Funkcija | Podrobnost |
|---|---|
| Znamka | Brightever |
| Številka modela | 9033-BK |
| barva | Črna |
| Material | Metal (Aluminum), Waterfall Glass |
| Mere izdelka (D x Š x V) | 8.07 cm x 8.07 cm x 12.6 cm |
| Teža predmeta | 5.7 funta (na paket s 2 kosi) |
| Vir napajanja | Električni na kabel |
| voltage | 120 volta |
| Podnožje žarnice | E26 (žarnica ni vključena) |
| Max Wattage (LED) | 14 W |
| Max Wattage (žarnica z žarilno nitko) | 100 W |
| Posebne lastnosti | Dusk to Dawn Sensor, Waterproof, Anti-Rust, Energy Efficient |
| Notranja/zunanja uporaba | Na prostem |
| Zahtevana montaža | ja |

Image: Various E26 base bulb types compatible with the fixture. Bulbs are not included.
9. Garancija in podpora
Brightever stands behind the quality of its products. While specific warranty details are not provided in this manual, we encourage customers to contact us directly for any product-related inquiries or support needs.
For assistance, please refer to the contact information provided on the product packaging or visit the official Brightever store online. Your satisfaction is our top concern.
Optional protection plans may be available for purchase separately to extend coverage beyond the manufacturer's standard policy.