
Uvod
This manual provides detailed instructions for the setup, operation, and maintenance of your groov e Atlas Radio Alarm Clock with Wireless Charger. Please read this manual thoroughly before using the device to ensure proper function and to maximize your user experience. Keep this manual for future reference.
Vsebina paketa
Preverite, ali so v paketu prisotni vsi elementi:
- groov e Atlas Radio Alarm Clock
- Napajalni adapter
- Uporabniški priročnik
Lastnosti izdelka
- Wireless Charging (5W): Conveniently charge compatible smartphones by placing them on the top surface.
- FM radio: Prisluhnite svojim najljubšim FM postajam.
- LED zaslon: Jasen digitalni prikaz časa.
- Napajanje iz omrežja: Reliable power supply for continuous operation.
- Polnilna postaja USB: Additional USB port for charging other devices.
- Dvojni alarm: Set two independent alarms for different wake-up times.
- Zatemnitev zaslona: Prilagodite svetlost LED-zaslona.
Nastavitev
- Priključite napajanje: Insert the power adapter into the 'DC IN' port on the back of the alarm clock, then plug the adapter into a wall outlet. The display will light up.
- Nastavi čas:
- Press and hold the 'TIME SET' button located on the back of the unit.
- Use the 'TUN-' or 'TUN+' buttons on the top panel to adjust the hour.
- Press 'TIME SET' again to confirm the hour and move to minutes.
- Use 'TUN-' or 'TUN+' to adjust the minutes.
- Press 'TIME SET' once more to confirm and exit time setting.
- To switch between 12-hour and 24-hour format, press the '12/24H' button on the back.

Slika: Zadaj view of the groov e Atlas alarm clock, highlighting the DC IN power input and the USB charging port. The '12/24H TIME SET' and 'SLEEP' buttons are also visible.
Navodila za uporabo
Setting Alarms (ALM1 / ALM2)
- Press the 'ALM1' or 'ALM2' button to select the alarm you wish to set. The alarm icon will flash on the display.
- Use the 'TUN-' or 'TUN+' buttons to adjust the alarm hour.
- Press the 'ALM1' or 'ALM2' button again to confirm the hour and move to minutes.
- Use 'TUN-' or 'TUN+' to adjust the alarm minutes.
- Press the 'ALM1' or 'ALM2' button a third time to confirm the alarm time. The alarm icon will remain lit, indicating the alarm is active.
- To deactivate an alarm, press the corresponding 'ALM1' or 'ALM2' button until the alarm icon disappears from the display.
Delovanje radia FM
- Vklop/izklop: Press the 'ON/OFF' button to turn the radio on or off.
- Samodejno skeniranje: Pritisnite gumb »SCAN« za samodejno iskanje in shranjevanje razpoložljivih FM postaj.
- Ročna nastavitev: Use the 'TUN-' or 'TUN+' buttons to manually adjust the frequency. Press and hold for faster tuning.
- Prednastavljene postaje: Use 'MEM-' or 'MEM+' to cycle through saved preset stations.
- Prilagodi glasnost: Use the 'VOL-' or 'VOL+' buttons to control the radio volume.
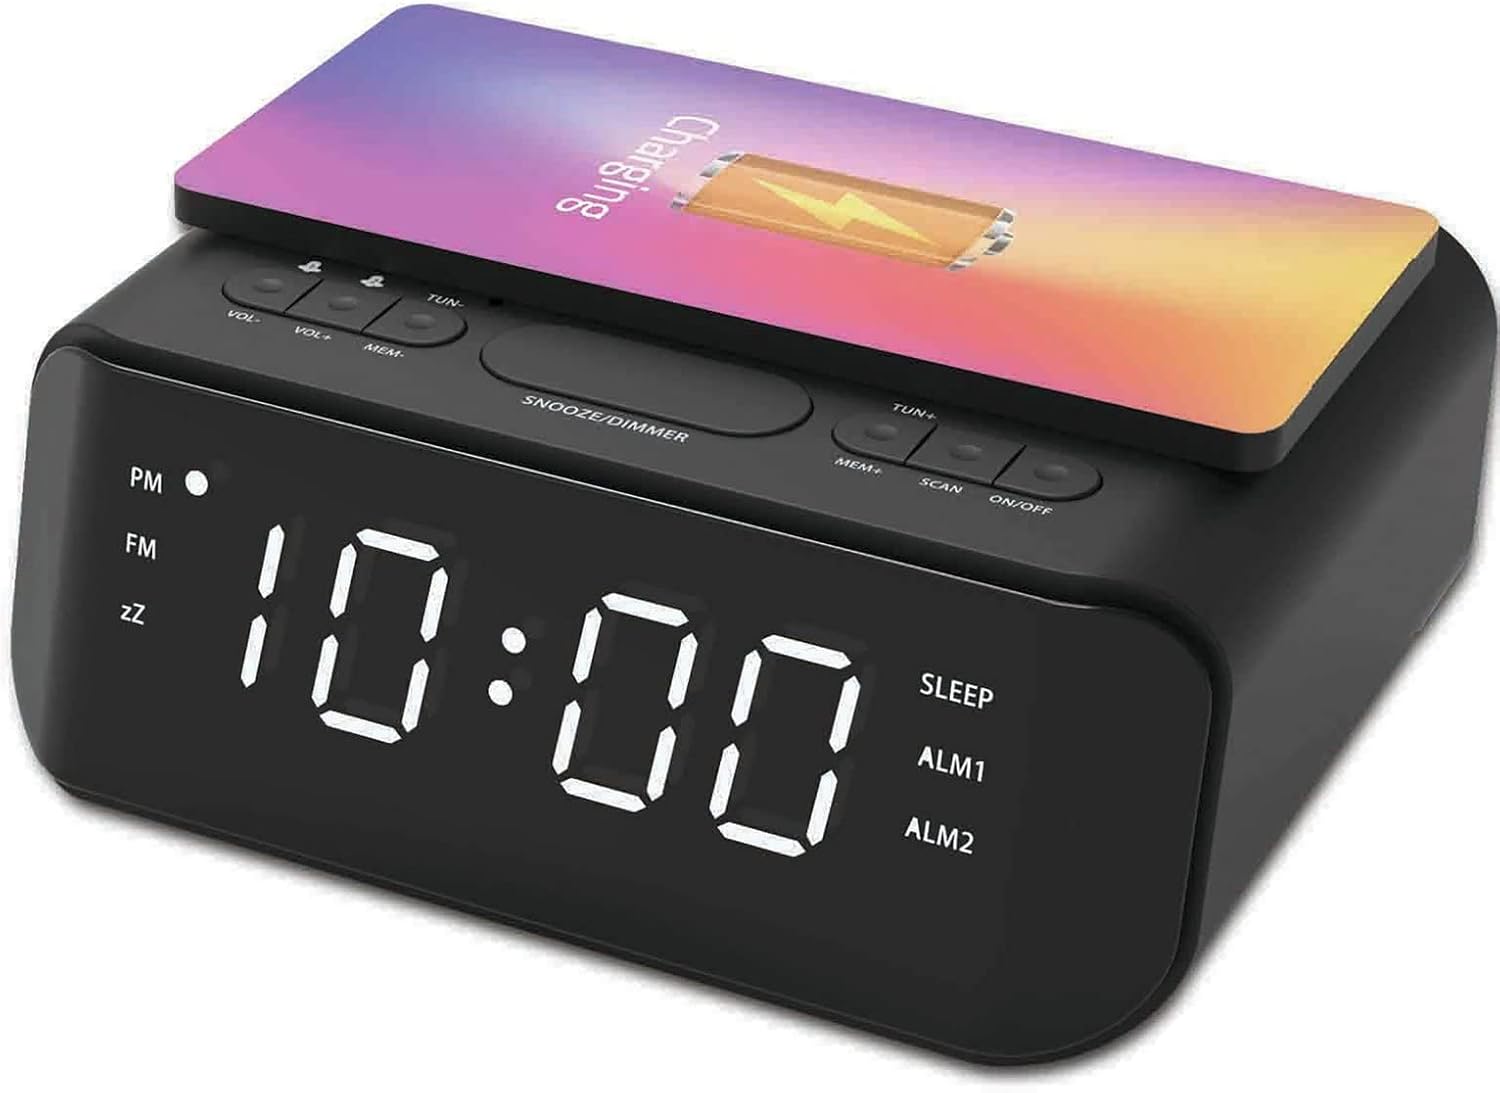
Slika: Zgoraj view of the groov e Atlas alarm clock, illustrating the layout of the control buttons for volume, tuning, memory, scan, and power.
Brezžično polnjenje
- Ensure your smartphone is compatible with 5W Qi wireless charging.
- Place your compatible smartphone centrally on the wireless charging pad located on the top surface of the alarm clock.
- The phone's display should indicate that charging has begun. If not, adjust the phone's position.

Image: A smartphone placed on the groov e Atlas alarm clock's top surface, showing the charging indicator on the phone's screen, confirming wireless charging is active.
USB polnjenje
- Connect a USB charging cable (not included) to the USB port on the back of the alarm clock.
- Drugi konec kabla priključite na napravo.
- Vaša naprava se bo začela polniti.
Zaslon zatemnitve
Press the 'SNOOZE/DIMMER' button to cycle through different brightness levels for the LED display. This allows you to adjust the display to your preferred visibility, especially in dark environments.
Vzdrževanje
- Čiščenje: Za čiščenje površine budilke uporabite mehko, suho krpo. Ne uporabljajte tekočih čistil ali abrazivnih materialov.
- Shranjevanje: Če naprave dlje časa ne uporabljate, jo izključite iz električnega omrežja in jo shranite na hladnem in suhem mestu.
- Varnost: Do not expose the device to water, high humidity, or extreme temperatures. Avoid dropping or subjecting the device to strong impacts.
Odpravljanje težav
| Težava | Možen vzrok | rešitev |
|---|---|---|
| Naprava se ne vklopi. | Napajalnik ni priključen ali pa je vtičnica pokvarjena. | Prepričajte se, da je napajalnik varno priključen v napravo in delujočo stensko vtičnico. Poskusite z drugo vtičnico. |
| Brezžično polnjenje ne deluje. | Phone not Qi-compatible or not positioned correctly. | Preverite, ali vaš telefon podpira brezžično polnjenje Qi. Telefon postavite na sredino polnilne podloge. Odstranite vse debele ovitke za telefon. |
| Alarm se ne oglasi. | Alarm ni aktiviran ali pa je glasnost prenizka. | Check if the alarm icon is lit on the display. Increase the alarm volume using the 'VOL+' button. |
| Radijski sprejem je slab. | Šibek signal ali položaj antene. | Extend and adjust the position of the FM antenna wire on the back of the unit for better reception. |
Specifikacije
- Številka modela: GVWC06BK
- Znamka: groov e
- barva: Črna
- Vrsta zaslona: Digitalna LED
- vir energije: Mains Powered (AC Adapter included)
- Izhod za brezžično polnjenje: 5W
- Izhod za polnjenje USB: 5V/1A
- Značilnosti alarma: Dual Alarm, Snooze
- Radio: FM
- Material: Akrilonitril butadien stiren (ABS)
- Oblika: Pravokotna
- Vrsta pritrditve: Namizni nosilec
- Vrsta gibanja: Kvarc
- Baterije: Not included (requires 1 battery for backup, type not specified in data)
Garancija in podpora
Your groov e Atlas Radio Alarm Clock GVWC06BK comes with a standard manufacturer's warranty. Please refer to the warranty card included in your package for specific terms and conditions, including the warranty period and coverage details.
For technical support, troubleshooting assistance, or warranty claims, please contact groov e customer service through their official webspletnega mesta ali kontaktnih podatkov, navedenih na vaši garancijski kartici.
Za morebitna vprašanja v zvezi z garancijo shranite dokazilo o nakupu.


