
Uvod
This manual provides essential information for the proper setup, operation, and maintenance of your Philips 346B1C Curved Monitor. This 34-inch WQHD (3440 x 1440) display features a 100 Hz refresh rate, 5ms response time, and a curved VA panel for an immersive viewing experience. Key features include USB-C docking, MultiView functionality, FreeSync technology, LowBlue Mode, and FlickerFree technology for enhanced user comfort and productivity.

Slika: spredaj view of the Philips 346B1C curved monitor, showcasing its ultrawide display and key features like WQHD, USB-C Docking, and MultiView.
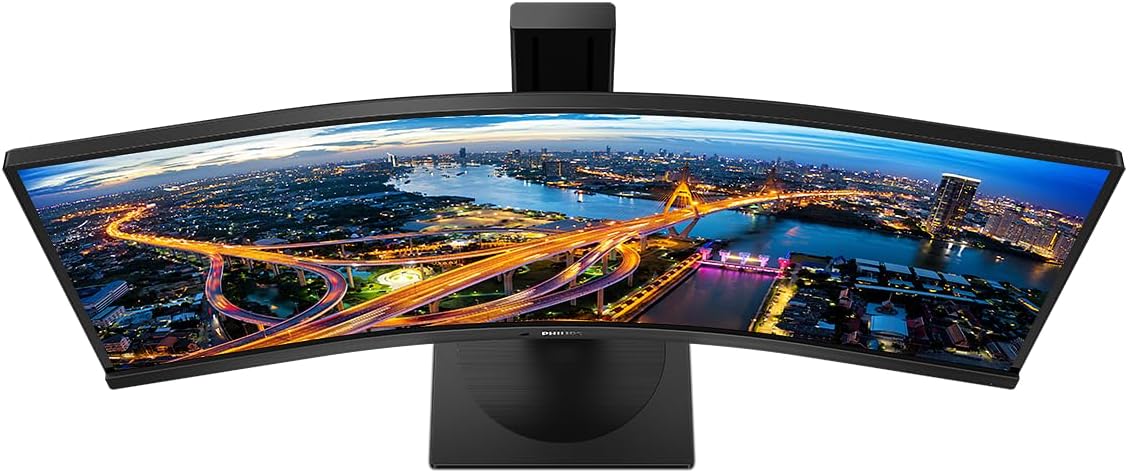
Slika: Od zgoraj navzdol view of the Philips 346B1C curved monitor, emphasizing the curvature of the screen.
Kaj je v škatli
Preden nadaljujete z namestitvijo, preverite, ali so vse komponente prisotne.
- Philips 346B1C Curved Monitor
- Stojalo za monitor (podstavek in vrat)
- Napajalni kabel
- HDMI kabel
- Kabel DisplayPort
- Kabel USB-C v USB-C
- USB-A to USB-B Cable (Upstream)
- Documentation (Quick Start Guide, User Manual CD)
Navodila za namestitev
1. Sestavljanje stojala
- Monitor postavite z zaslonom navzdol na mehko, čisto površino, da preprečite praske.
- Pritrdite vrat stojala na ploščo monitorja. Prepričajte se, da se varno zaskoči ali da je pritrjen z vijaki, če so priloženi.
- Pritrdite podstavek stojala na vrat stojala. Privijte palčni vijak ali vijake na spodnji strani podstavka.

Slika: Zadaj view of the Philips 346B1C monitor, showing the stand attachment point and VESA mounting holes.
2. Povezovanje z računalnikom
Monitor priključite na računalnik na enega od naslednjih načinov:
- HDMI povezava: En konec kabla HDMI priključite na vrata HDMI na monitorju, drugi konec pa na izhod HDMI na računalniku.
- Povezava DisplayPort: Connect one end of the DisplayPort cable to the monitor's DisplayPort and the other end to your computer's DisplayPort output.
- Povezava USB-C: Connect one end of the USB-C cable to the monitor's USB-C port and the other end to your computer's USB-C port. This connection supports video, data, and power delivery (up to 90W) to your laptop.
For USB hub functionality, connect the USB-A to USB-B upstream cable from your computer to the monitor's USB-B upstream port.
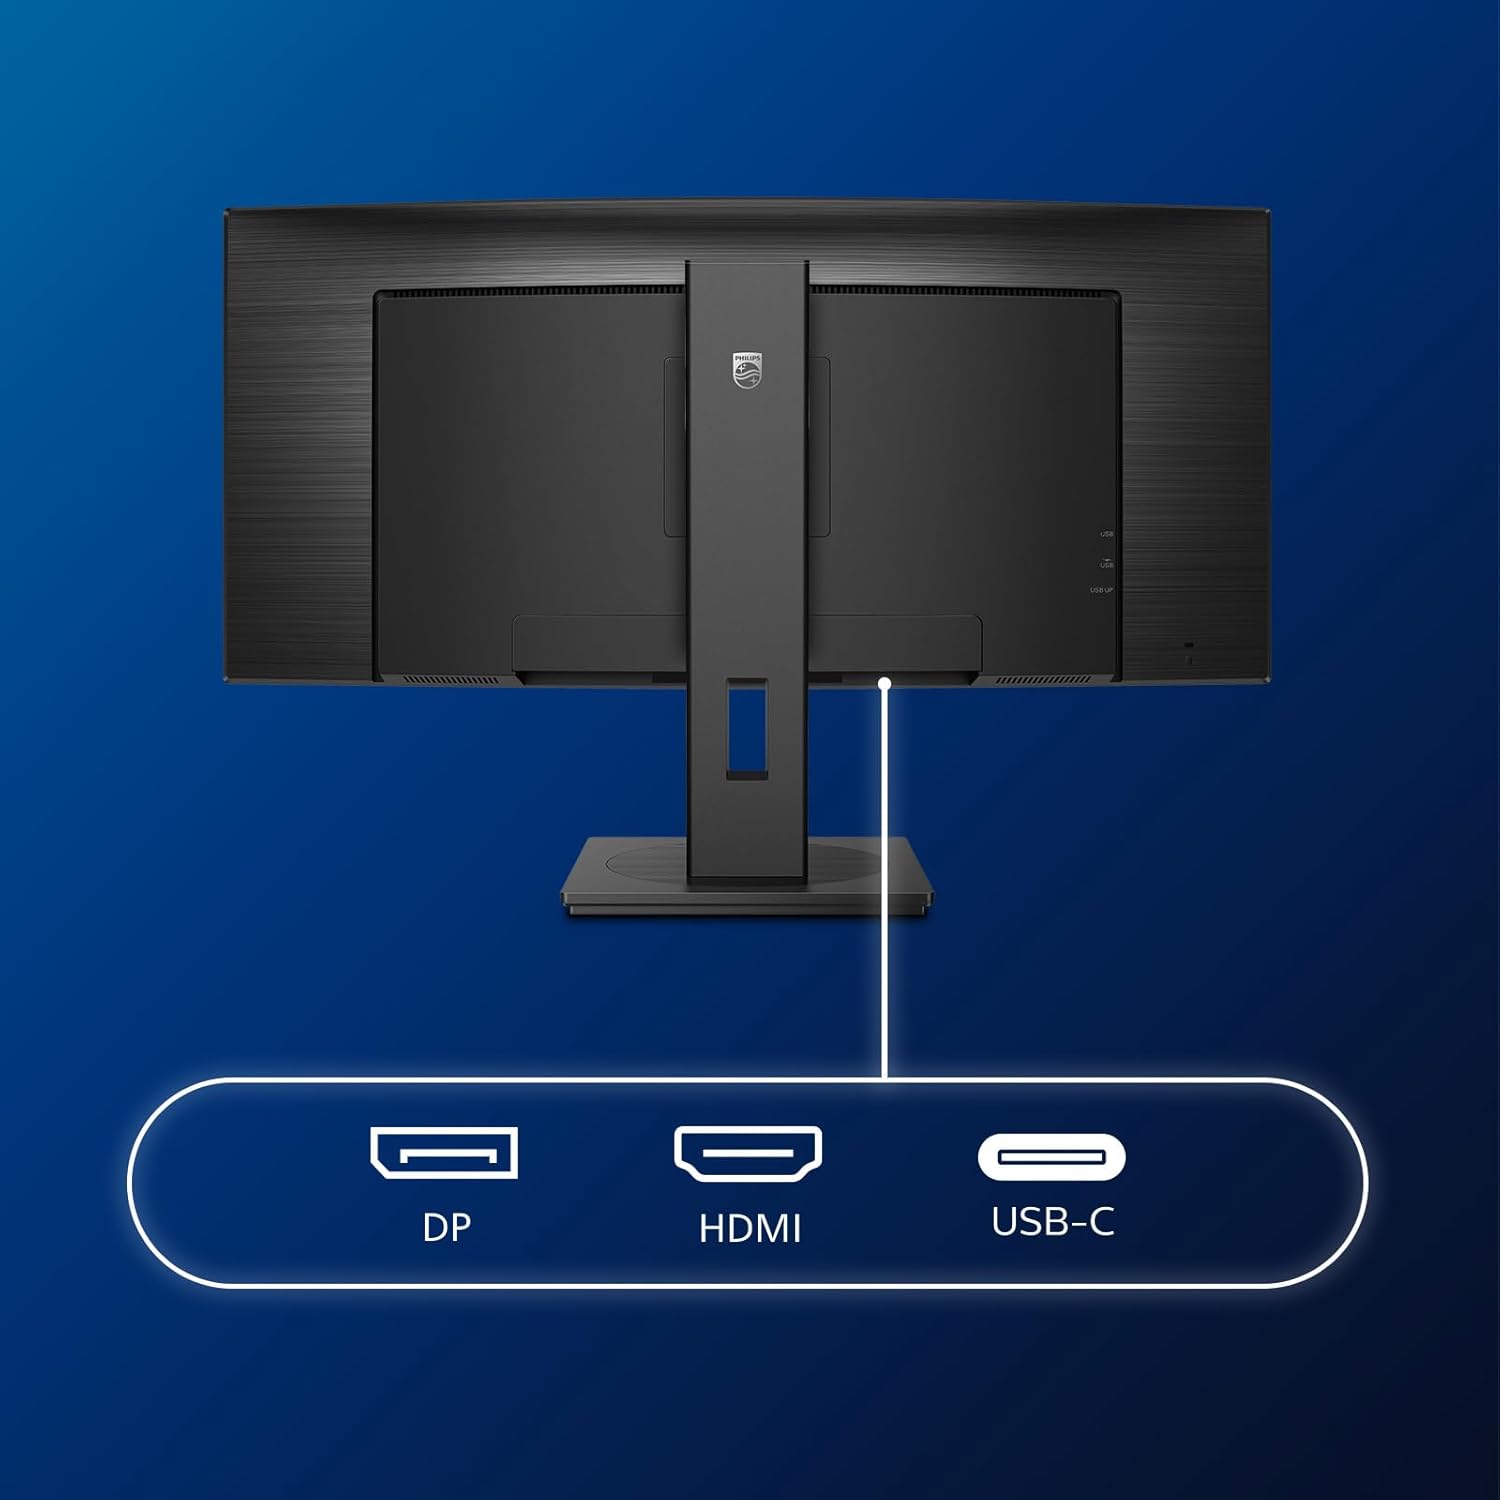
Slika: Podrobna view of the monitor's input ports, including DisplayPort (DP), HDMI, and USB-C, for connecting to various devices.
3. Napajalni priključek
Napajalni kabel priključite na vhod za napajanje monitorja in nato na ozemljeno električno vtičnico.
4. Začetni vklop
Press the power button located on the monitor to turn it on. The monitor should automatically detect the input signal. If not, use the On-Screen Display (OSD) menu to select the correct input source.
Navodila za uporabo
Zaslonski meni (OSD).
The OSD menu allows you to adjust various monitor settings. Use the joystick control located on the back or bottom of the monitor to navigate the menu.
- Svetlost/kontrast: Prilagodite splošno svetilnost in kontrast zaslona.
- Barvne nastavitve: Natančno nastavite barvno temperaturo, gamo in barvni prostor.
- Izbira vnosa: Manually switch between HDMI, DisplayPort, and USB-C inputs.
- Avdio: Adjust volume or mute the built-in speakers.
- Način slike: Select from preset picture modes (e.g., Standard, Gaming, Text).
MultiView Funkcionalnost
MultiView feature allows you to connect and view content from two different sources simultaneously on the screen. Access this feature through the OSD menu to select Picture-by-Picture (PbP) or Picture-in-Picture (PiP) modes and configure input sources.
Priklop USB-C
When connected via USB-C, the monitor acts as a docking station, providing video, data transfer through its integrated USB hub, and power delivery to charge your connected laptop (up to 90W).
SmartErgoBase and Adjustability
The monitor's SmartErgoBase allows for ergonomic adjustments including height, swivel, and tilt to optimize your viewudobje.

Image: Illustrations demonstrating the monitor's adjustable features, including height adjustment, tilt, and swivel capabilities for ergonomic positioning.
Funkcije za udobje oči
- Način LowBlue: Reduces harmful shortwave blue light emissions to prevent eye strain. Activate this mode via the OSD menu.
- Tehnologija brez utripanja: Regulates brightness and reduces flicker for more comfortable viewTa funkcija je vedno aktivna.
- PowerSensor & LightSensor: These sensors automatically adjust monitor brightness based on ambient light conditions and user presence, saving energy and reducing eye strain.
Vzdrževanje
Čiščenje monitorja
- Pred čiščenjem monitor vedno odklopite.
- Narahlo uporabite mehko krpo, ki ne pušča vlaken dampz vodo ali blagim, neabrazivnim čistilom za zaslone.
- Do not use alcohol, solvents, or ammonia-based cleaners, as these can damage the screen surface.
- Zaslon nežno obrišite, da odstranite prah in madeže.
- Clean the monitor casinz mehko, suho krpo.
Splošna nega
- Izogibajte se postavljanju težkih predmetov na monitor ali njegove kable.
- Monitorja ne izpostavljajte neposredni sončni svetlobi, prekomerni vročini ali ekstremnemu mrazu.
- Zagotovite ustrezno prezračevanje okoli monitorja.
Odpravljanje težav
Če imate težave z monitorjem, si oglejte naslednje pogoste korake za odpravljanje težav:
| Težava | Možen vzrok | rešitev |
|---|---|---|
| Na zaslonu ni slike | Napajalni kabel odklopljen; video kabel odklopljen; izbran napačen vhodni vir. | Ensure power cable is securely connected; Check video cable connections (HDMI, DP, USB-C); Select correct input source via OSD menu. |
| Slika je zamegljena ali popačena | Nepravilna ločljivost; Težava z grafičnim gonilnikom. | Nastavite ločljivost zaslona na 3440 x 1440; Posodobite gonilnike grafične kartice. |
| Iz zvočnikov ni zvoka | Volume muted or too low; Incorrect audio output selected on computer. | Adjust monitor volume via OSD; Check computer's audio output settings. |
| Vrata USB ne delujejo | Kabel USB za prenos v smeri navzgor ni priključen. | Ensure the USB-A to USB-B upstream cable is connected from the monitor to your computer. |
For further assistance, please refer to the support section or contact Philips customer service.
Specifikacije
| Funkcija | Podrobnost |
|---|---|
| Znamka | Philips |
| Številka modela | 346B1C |
| Velikost zaslona | 34 palca (86 cm) |
| Resolucija | 3440 x 1440 (WQHD) |
| Razmerje stranic | 21:9 |
| Površina zaslona | Curved VA Panel |
| Hitrost osveževanja | 100 Hz |
| Odzivni čas | 5 Milliseconds (GtG) |
| Kontrastno razmerje | 3000:1 (običajno) |
| Svetlost | 300 cd/m² |
| Viewkota | 178° (V) / 178° (V) |
| Povezljivost | 1x HDMI 2.0, 1x DisplayPort 1.2, 1x USB-C 3.2 Gen 1 (upstream, power up to 90W), 1x USB-B (upstream), 4x USB 3.2 (downstream), RJ45 (Ethernet) |
| Prilagodljiva sinhronizacija | FreeSync |
| Vgrajeni zvočniki | 2x 5W |
| Poraba energije | 5 Watts (Eco mode) |
| Teža | 7.8 kilogramov (s stojalom) |
Garancija in podpora
Informacije o garanciji
This Philips monitor comes with a 2-letna garancija proizvajalca. The specific terms and conditions of the warranty can be found in the detailed documentation provided with your product or on the official Philips support website. Your statutory rights as a consumer are not affected by this warranty.
Podpora uporabnikom
For technical assistance, product inquiries, or warranty claims, please visit the official Philips support website or contact their customer service department. You may need your monitor's model number (346B1C) and serial number (found on the back of the monitor) when contacting support.
Philipsova podpora Webspletno mesto: www.philips.com/support