1. Uvod
This manual provides essential instructions for the safe and effective use, installation, and maintenance of your Yamart String Trimmer Auto Head. This replacement head is designed for compatibility with various Toro string trimmer models, including 51975, 51955, 51954, 51974, 51976, 51977, 51978, and 51988. Please read this manual thoroughly before installation and operation to ensure proper function and safety.

Image 1.1: Yamart String Trimmer Auto Head and typical usage scenarios.
2. Varnostne informacije
Pri delu z električnim orodjem vedno dajte prednost varnosti. Neupoštevanje teh varnostnih smernic lahko povzroči resne poškodbe.
- Read Your Trimmer's Manual: Always refer to your specific Toro string trimmer's instruction manual for comprehensive safety warnings and operating procedures.
- Nosite zaščitno opremo: Always wear eye protection (safety glasses or goggles), hearing protection, long pants, sturdy footwear, and gloves when operating a string trimmer.
- Preglejte pred uporabo: Before each use, inspect the trimmer head for any damage, cracks, or loose parts. Ensure the cutting line is properly installed and not excessively worn.
- Čisto delovno območje: Ensure the work area is clear of debris, rocks, and other objects that could be thrown by the trimmer head. Keep bystanders and pets at a safe distance (at least 50 feet/15 meters).
- Odklop napajanja: Always disconnect the spark plug wire (for gas trimmers) or remove the battery/unplug the power cord (for electric trimmers) before performing any maintenance, installation, or clearing clogs.
- Pravilno ravnanje: Hold the trimmer firmly with both hands. Maintain proper footing and balance.
- Izogibajte se stiku: Never touch the trimmer head or cutting line while the engine/motor is running.
3. Vsebina paketa
Po odprtju embalaže preverite, ali so vse komponente prisotne in nepoškodovane.
- 1x Yamart String Trimmer Auto Head (Black body with Red cap)

Image 3.1: Yamart String Trimmer Auto Head (assembled).
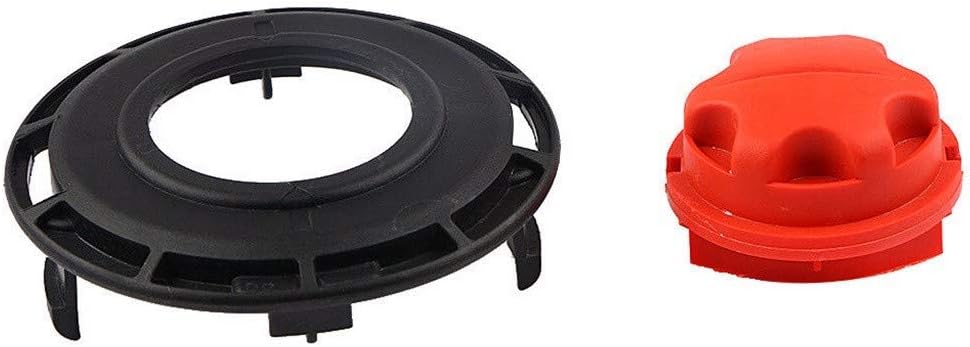
Image 3.2: Disassembled components of the trimmer head (base and cap).
4. Nastavitev in namestitev
This section details the steps for installing the Yamart String Trimmer Auto Head onto your compatible Toro string trimmer and reloading the cutting line.
4.1 Installing the Trimmer Head
- Zagotovite varnost: Before beginning, ensure your string trimmer is turned off and disconnected from its power source (spark plug wire removed for gas, battery removed or unplugged for electric).
- Odstranite staro glavo: Consult your Toro trimmer's manual for specific instructions on removing the existing trimmer head. Typically, this involves holding the shaft to prevent rotation and unscrewing the head counter-clockwise.
- Pritrdite novo glavo: Align the Yamart String Trimmer Auto Head with the trimmer shaft. Screw the new head onto the shaft in a clockwise direction until it is securely tightened. Ensure there is no wobble.
- Preveri ustreznost: Gently tug on the head to confirm it is firmly attached.
4.2 Reloading the Cutting Line
The Yamart Auto Head features an easy-to-reload spool design, eliminating the need to disassemble the entire head or turn the trimmer upside down.
- Priprava vrstice: Use appropriate diameter trimmer line as recommended by your Toro trimmer's manual. Cut a length of line (typically 15-20 feet, refer to your trimmer's manual for exact length).
- Align Spool: Locate the arrows or alignment marks on the trimmer head and the spool. Rotate the spool until these marks align.
- Vstavi vrstico: Feed one end of the trimmer line through one of the eyelets on the side of the trimmer head and push it straight through until it exits the opposite eyelet. Pull the line through until an equal length extends from both sides of the head.
- Vetrna linija: While holding the line ends, rotate the red cap of the trimmer head in the direction indicated by the winding arrow (usually clockwise). The line will automatically wind onto the internal spool. Continue winding until only about 6-8 inches of line extend from each eyelet.
- Preverite vrstico: Ensure the line is securely wound and feeds smoothly.

Image 4.1: Internal spool with trimmer line wound, indicating line path.
5. Navodila za uporabo
Once the trimmer head is installed and the line is loaded, you can begin operation. Always follow the operating instructions provided in your Toro string trimmer's main manual.
- Zaženi trimer: Start your string trimmer according to its manufacturer's instructions.
- Advance Line (Auto-Feed): This auto head is designed to advance line automatically when the head is tapped against the ground while the trimmer is running at operating speed. A light tap is usually sufficient. Avoid excessive force.
- Tehnika rezanja: Use a sweeping motion to cut grass. Avoid hitting hard surfaces or objects, which can damage the line and the trimmer head.
- Monitor Line Length: Periodically check the line length. If the line becomes too short, tap the head on the ground to advance more line.
6. Vzdrževanje
Regular maintenance ensures the longevity and optimal performance of your trimmer head.
- Očistite po uporabi: After each use, ensure the trimmer is off and disconnected from power. Clean any grass clippings, dirt, or debris from the trimmer head. A stiff brush can be used.
- Preverite glede poškodb: Regularly inspect the trimmer head for cracks, excessive wear, or other damage. Replace the head if it shows signs of significant wear or damage.
- Skladiščenje v vrstici: Vrtico za kosilnico shranjujte na hladnem in suhem mestu, da preprečite njeno krhkost.
- Replace Line: Replace the trimmer line as needed. Do not use line that is too thick or too thin for your trimmer, as this can affect performance and potentially damage the tool.
7. Odpravljanje težav
This section addresses common issues you might encounter with your Yamart String Trimmer Auto Head.
| Težava | Možen vzrok | rešitev |
|---|---|---|
| Vrstica se ne premakne naprej, ko se je dotaknete. |
|
|
| Glava kosilnice se ne prilega gredi. |
|
|
| Prekomerne vibracije med delovanjem. |
|
|
8. Specifikacije
- Vrsta izdelka: String Trimmer Auto Head
- Znamka: Yamart
- Material: ABS plastika
- barva: Črna + rdeča
- Compatible Toro Trimmer Models: 51975, 51955, 51954, 51974, 51976, 51977, 51978, 51988 (for straight and curved shaft brushcutters)
- Zamenja številke delov: 308923014, 120950010
9. Garancija in podpora
For any questions regarding installation, operation, or troubleshooting not covered in this manual, please contact Yamart customer support. Specific warranty details may vary by retailer or region. Please retain your proof of purchase for warranty claims.
For further assistance, refer to the official Yamart website or contact your product retailer.