
1. Uvod
This manual provides comprehensive instructions for the setup, operation, and maintenance of your Drawmer CMC2 Compact Monitor Controller. Please read this manual thoroughly before using the device to ensure proper functionality and to maximize its performance.
2. Varnostne informacije
- Napajanje: Use only the factory-supplied 15V DC power supply. Using an incorrect power supply may damage the unit and void the warranty.
- Prezračevanje: Zagotovite zadostno prezračevanje okoli enote. Ne blokirajte prezračevalnih odprtin.
- Vlaga: Naprave ne izpostavljajte dežju, vlagi ali prekomerni vlažnosti.
- Čiščenje: Pred čiščenjem izklopite napajanje. Uporabite suho, mehko krpo. Ne uporabljajte tekočih čistil ali aerosolov.
- Servisiranje: Vsa servisna dela prepustite usposobljenemu serviserju. Ne poskušajte sami odpirati ali popravljati enote.
3. Vsebina paketa
Preverite, ali vaš paket vsebuje naslednje elemente:
- Drawmer CMC2 Compact Monitor Controller
- 15V DC Power Supply Unit
- Uporabniški priročnik (ta dokument)
4. Izdelek je končanview
4.1 Kontrole sprednje plošče
The front panel provides all primary controls for audio monitoring and source selection.

Slika 4.1: Spredaj view of the Drawmer CMC2 Compact Monitor Controller, showing all knobs and buttons for input selection, speaker selection, master volume, headphone control, and mix check functions.
- AUX INPUT Knob: Adjusts the level of the auxiliary input.
- SOURCE SELECT Buttons (I/P1, I/P2, AUX): Izbere aktivni vhodni vir zvoka.
- SPEAKER SELECT Buttons (A, B, SUB): Activates the selected speaker outputs.
- MASTER VOLUME Knob: Controls the overall output level to the selected speakers.
- Gumb MUTE: Mutes all speaker outputs.
- HEADPHONE Knob: Prilagodi glasnost izhoda za slušalke.
- MIX CHECK Buttons (ØREV, MONO, DIM): Provides phase reverse, mono sum, and dim functions for mix analysis.
- AUX INPUT (3.5mm Jack): Front panel auxiliary input for portable devices.
- HEADPHONE Output (6.35mm Jack): Front panel headphone output.
4.2 Priključki na zadnji plošči
The rear panel houses all audio input and output connectors, along with the power input.

Slika 4.2: Zadaj view of the Drawmer CMC2 Compact Monitor Controller, displaying the DC power input, speaker outputs (Mono/Sub, R-B-L, R-A-L), and inputs (R-2-L, R-1-L).
- DC=15V Input: Connect the supplied 15V DC power adapter here.
- Stikalo za vklop: Vklopi/izklopi napajanje enote.
- SPEAKER OUTPUTS (MONO/SUB, R-B-L, R-A-L): Balanced XLR outputs for connecting up to two pairs of stereo monitors (A and B) and a mono subwoofer.
- INPUTS (R-2-L, R-1-L): Balanced XLR inputs for two stereo audio sources.
5. Nastavitev
Follow these steps to set up your CMC2 controller:
- Napajalni priključek: Connect the supplied 15V DC power adapter to the 'DC=15V' input on the rear panel. Plug the adapter into a suitable power outlet. Do not power on the unit yet.
- Vhodne povezave:
- Connect your primary audio source (e.g., audio interface, mixer) to the 'INPUTS R-1-L' using balanced XLR cables.
- Connect a secondary audio source to the 'INPUTS R-2-L' using balanced XLR cables.
- For portable devices, connect to the front panel 'AUX INPUT' (3.5mm jack) or the rear panel RCA auxiliary inputs (if available on your model, refer to specific product documentation).
- Priključki zvočnikov:
- Connect your main studio monitors to the 'SPEAKER OUTPUTS R-A-L' using balanced XLR cables.
- If using a second pair of monitors, connect them to 'SPEAKER OUTPUTS R-B-L'.
- If using a subwoofer, connect it to the 'SPEAKER OUTPUTS MONO/SUB'.
- Priključek za slušalke: If desired, connect your headphones to the front panel 'HEADPHONE' 6.35mm jack.
- Vklop: Once all connections are secure, press the power switch on the rear panel to turn on the CMC2.
6. Navodila za uporabo
This section details the functions of the CMC2's controls.
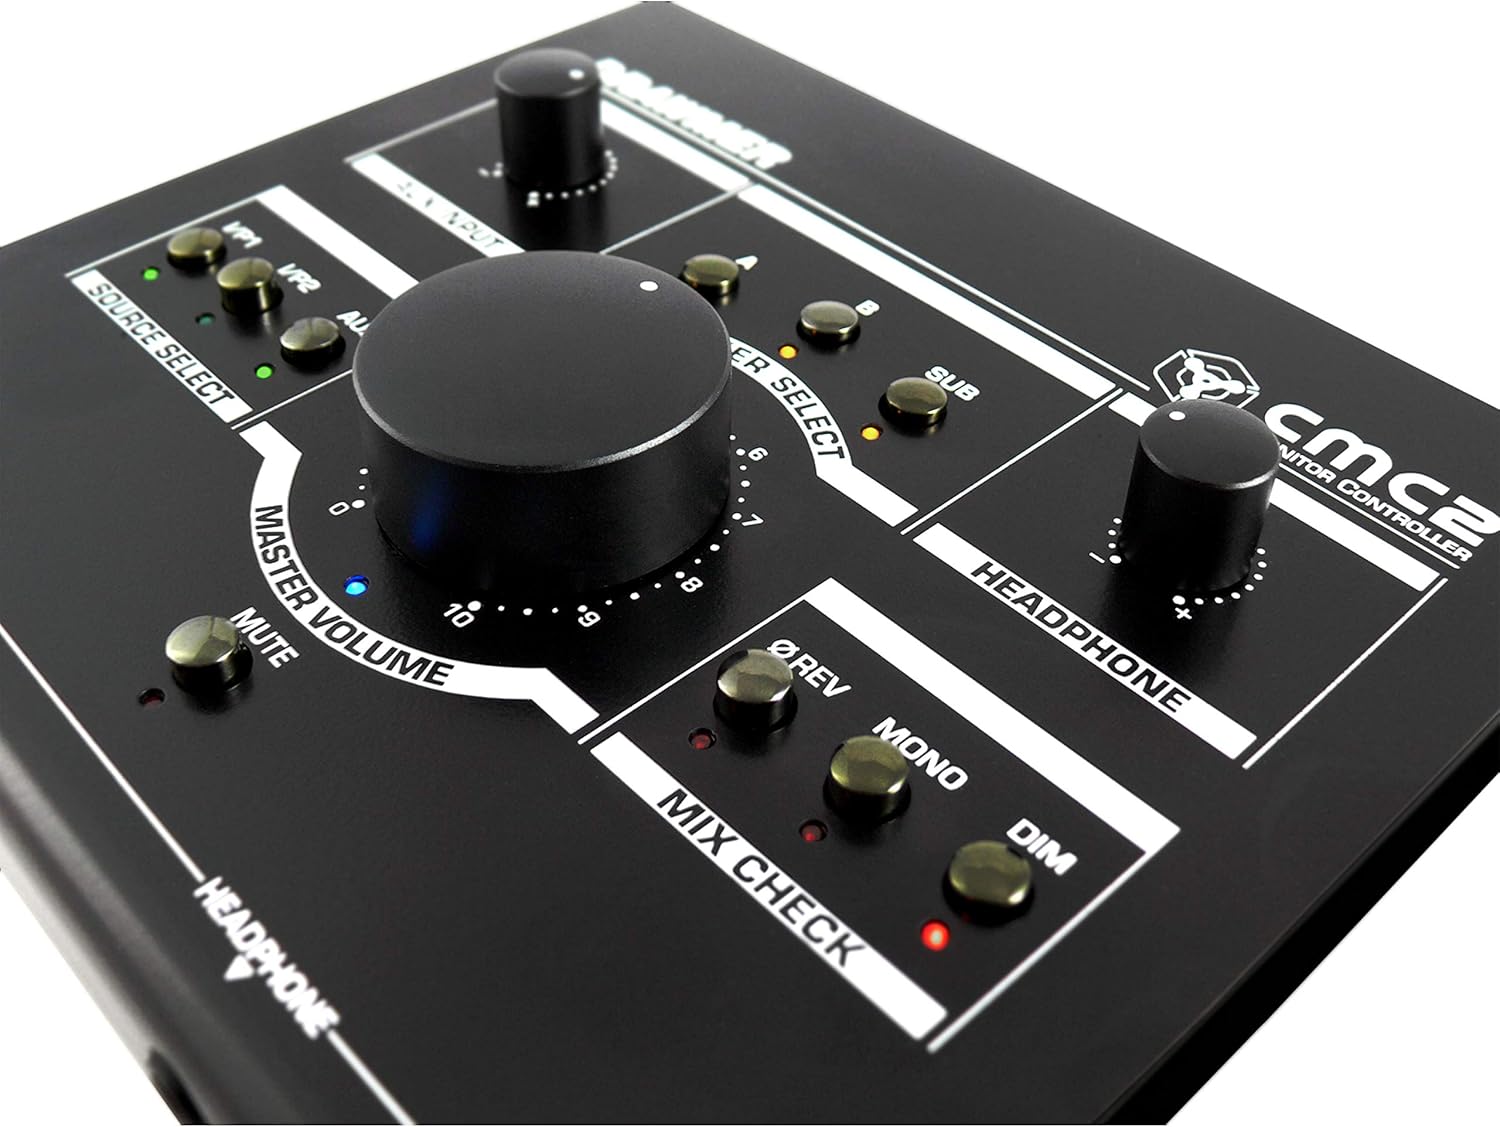
Slika 6.1: Bližnji posnetek view of the Drawmer CMC2 front panel, highlighting the master volume, source select, speaker select, headphone, and mix check controls.
6.1 Izbira vira
- Pritisnite I/P1 button to select the audio source connected to Input 1.
- Pritisnite I/P2 button to select the audio source connected to Input 2.
- Pritisnite POMOŽ button to select the auxiliary input (front panel 3.5mm jack).
- Only one source can be active at a time. The LED next to the selected button will illuminate.
6.2 Izbira zvočnikov
- Pritisnite A button to route the selected source to Speaker Output A.
- Pritisnite B button to route the selected source to Speaker Output B.
- Pritisnite SUB button to route the selected source to the Subwoofer Output.
- Multiple speaker outputs can be active simultaneously (e.g., A and SUB). The LEDs indicate active outputs.
6.3 Nadzor glasnosti
- Zavrtite veliko GLAVNA GLASNOST knob clockwise to increase the output level to the selected speakers, and counter-clockwise to decrease it.
- Zavrtite SLUŠALKE knob to adjust the listening level for connected headphones.
- Zavrtite AUX VHOD knob to adjust the input level of the auxiliary source.
6.4 Mix Check Functions
- Pritisnite ØREV button to reverse the phase of the right channel, useful for checking phase compatibility.
- Pritisnite MONO button to sum the stereo signal to mono, allowing you to check for mono compatibility issues in your mix.
- Pritisnite DIM button to temporarily reduce the output volume by a fixed amount, useful for quick listening level changes without losing your main volume setting.
6.5 Funkcija izklopa zvoka
- Pritisnite MUTE button to instantly silence all active speaker outputs. The LED will illuminate when mute is active. Press again to unmute.
7. Vzdrževanje
The Drawmer CMC2 is designed for reliable operation with minimal maintenance.
- Čiščenje: Keep the unit clean by wiping it with a dry, soft, lint-free cloth. Avoid abrasive cleaners or solvents.
- Okolje: Operate the unit in a clean, dry environment, away from direct sunlight, heat sources, and excessive dust.
- Prezračevanje: Prepričajte se, da prezračevalne reže niso ovirane, da preprečite pregrevanje.
8. Odpravljanje težav
If you encounter issues with your CMC2, refer to the following common problems and solutions:
- Brez napajanja:
- Ensure the 15V DC power adapter is securely connected to the unit and a working power outlet.
- Check that the rear panel power switch is in the 'ON' position.
- Brez zvočnega izhoda:
- Verify that the correct input source (I/P1, I/P2, or AUX) is selected and its LED is illuminated.
- Ensure that at least one speaker output (A, B, or SUB) is selected and its LED is illuminated.
- Check that the MASTER VOLUME knob is turned up and the MUTE button is not active (LED off).
- Confirm all audio cables are securely connected to both the CMC2 and your speakers/audio sources.
- Test with different cables or audio sources to isolate the problem.
- Popačen zvok:
- Reduce the input level from your audio source.
- Lower the MASTER VOLUME on the CMC2.
- Preverite, ali so avdio kabli poškodovani.
- Headphone Output Not Working:
- Ensure headphones are fully plugged into the front panel jack.
- Adjust the HEADPHONE volume knob.
- Test with a different pair of headphones.
If the problem persists, contact Drawmer customer support or your authorized dealer for assistance.
9. Specifikacije
| Ime modela | CMC2 |
| Znamka | risar |
| Priporočene uporabe | Zvočni nadzor |
| Tehnologija povezljivosti | XLR, RCA (Auxiliary) |
| Način avdio izhoda | Stereo |
| Vrsta zvočnika | Monitor |
| Dimenzije izdelka | 13 x 9 x 3 palcev (33 x 22.86 x 7.62 cm) |
| Teža predmeta | 3 funtov (1.36 kg) |
| Proizvajalec | risar |
10. Garancija in podpora
The Drawmer CMC2 Compact Monitor Controller is covered by a manufacturer's warranty. Please refer to the warranty card included with your product or visit the official Drawmer webza podrobne garancijske pogoje.
For technical support, service, or further inquiries, please contact your authorized Drawmer dealer or the Drawmer customer support team through their official channels.


