
Uvod
Thank you for choosing the ORSKEY Dash Cam S680. This manual provides detailed instructions for the installation, operation, and maintenance of your dash camera. Please read this manual thoroughly before use to ensure proper functionality and to maximize your experience with the product.
Vsebina paketa
Prosimo, preverite paket za naslednje artikle:
- ORSKEY Dash Cam S680 Unit
- Avto polnilec
- Sesalni nosilec
- Uporabniški priročnik (ta dokument)

The package contents of the ORSKEY Dash Cam S680, including the main camera unit, a suction cup mount for windshield attachment, and a car charger for power.
Konec izdelkaview
The ORSKEY Dash Cam S680 features a 3.0-inch LCD display, a 170-degree wide-angle lens, and records in 1080P Full HD. It is equipped with a Sony Exmor IMX 323 sensor and 6 glass lens elements for superior image quality, especially in low-light conditions with its WDR technology.
This image shows the advanced lens system of the ORSKEY Dash Cam, featuring a Sony Exmor IMX 323 sensor and 6 glass elements for clear 1080P video capture.
Nastavitev
1. Vstavljanje kartice Micro SD
Before using the dash cam, a Micro SD card (Class 10 or higher, up to 32GB) must be inserted. The Micro SD card is ni vključeno v paketu.
- Prepričajte se, da je kamera na armaturni plošči izklopljena.
- Poiščite režo za kartico Micro SD na strani kamere v armaturni plošči.
- Vstavite kartico Micro SD z zlatimi kontakti obrnjenimi proti zadnji strani kamere, dokler se ne zaskoči.
- Za odstranitev kartico nežno potisnite navznoter, dokler ne klikne, nato jo spustite in bo skočila ven.
Note: It is recommended to format the Micro SD card within the dash cam settings before first use and periodically thereafter to ensure optimal performance.
2. Namestitev kamere na armaturni plošči
- Očistite predel na vetrobranskem steklu, kamor nameravate namestiti kamero.
- Prisesalni nosilec pritrdite na kamero na armaturni plošči.
- Prisesek trdno pritisnite ob vetrobransko steklo in ga pritrdite s preklopno ročico. Kamero namestite tako, da zagotovite jasen pogled. view of the road without obstructing your driving visibility.

A visual guide demonstrating how to properly install the dash cam onto your car's windshield using the suction mount and connect the power cable.
3. Priključitev napajanja
- Avtomobilski polnilnik priključite na vhodno vtičnico za napajanje kamere v armaturni plošči.
- Drugi konec avtomobilskega polnilnika priključite v vtičnico za vžigalnik v vozilu.
- Route the power cable neatly along the edge of the windshield and dashboard to avoid obstructing your view or interfering with driving controls.
Navodila za uporabo
1. Vklop/izklop
- The dash cam will automatically power on and begin recording when your vehicle's engine starts (and the cigarette lighter provides power).
- It will automatically power off when the engine is turned off.
- Za ročni vklop/izklop pritisnite in držite gumb za vklop.
2. Načini snemanja
The dash cam offers several recording features to ensure comprehensive coverage:
- Snemanje v zanki: This feature allows continuous recording. When the Micro SD card reaches its storage limit, the camera automatically overwrites the oldest unlocked footage with new recordings. This ensures that recording never stops due to a full card.

An illustration detailing the loop recording feature, where the camera continuously records and overwrites the oldest footage when the memory card is full, ensuring uninterrupted recording.
- G-senzor (snemanje v sili): The built-in G-sensor detects sudden impacts or collisions. When triggered, it automatically locks the current video segment, preventing it from being overwritten by loop recording. This footage is saved in a separate folder to protect critical evidence.
- Zaznavanje gibanja: When enabled, the dash cam will automatically start recording if it detects movement in front of the vehicle while parked. This feature requires continuous power supply (e.g., hardwiring kit, not included) to function when the car is off.
- Spremljanje parkiranja: Similar to motion detection, this mode activates recording if an impact is detected while the vehicle is parked and the engine is off.

This image highlights the 24-hour monitoring capabilities, including motion detection and parking monitoring, which activate the camera when movement or impact is detected while parked.
3. Wide Dynamic Range (WDR) and Night Vision
The dash cam incorporates WDR technology and 6 unique infrared LED fill lights to enhance video quality in various lighting conditions, providing clear recordings both day and night.

A side-by-side comparison demonstrating the dash cam's clear video quality during the day and its enhanced night vision performance in low-light conditions.
4. Navigacija po meniju in nastavitve
Use the buttons on the side of the dash cam to navigate through the menu options displayed on the 3-inch LCD screen. Common settings include video resolution, loop recording duration, G-sensor sensitivity, motion detection on/off, date/time stamp, and Micro SD card formatting.

Podrobno view of the dash cam's 3-inch LCD screen displaying the menu options for configuration and settings.
5. Predvajanje
Za ponovnoview posnet footage:
- Stop recording by pressing the OK button (if currently recording).
- Enter playback mode via the menu.
- Browse through video files using the navigation buttons.
- Izberite a file in pritisnite OK za predvajanje.
- Alternatively, remove the Micro SD card and view footage on a computer using a card reader.
Vzdrževanje
1. Upravljanje kartic Micro SD
- Regularly format your Micro SD card (at least once a month) to prevent data corruption and ensure smooth operation.
- Use a high-quality Class 10 or higher Micro SD card from a reputable brand.
- Replace the Micro SD card if you experience frequent errors or recording issues.
2. Cleaning the Dash Cam
- Use a soft, dry cloth to clean the camera lens and screen. Avoid abrasive materials or chemical cleaners.
- Ensure the suction cup is clean for optimal adhesion to the windshield.
Odpravljanje težav
- Kamera se ne vklopi: Check if the car charger is properly connected to both the dash cam and the vehicle's cigarette lighter. Ensure the vehicle's ignition is on.
- Camera stops recording or does not record:
- Ensure a Micro SD card is inserted and properly formatted.
- The Micro SD card may be full; enable loop recording or format the card.
- The Micro SD card may be faulty or not Class 10 or higher. Try a different card.
- Check power connection; intermittent power can cause recording interruptions.
- Slaba kakovost videa:
- Clean the camera lens and your car's windshield.
- Prepričajte se, da je zaščitna folija odstranjena z objektiva.
- Preverite nastavitve ločljivosti videa v meniju.
- Motion Detection/Parking Monitoring not working effectively:
- These features require continuous power when the vehicle is off, typically via a hardwiring kit (not included).
- The 32GB Micro SD card capacity may limit the duration of parking mode recordings.
- Adjust sensitivity settings in the menu.
- Menu navigation is confusing: Refer to the detailed instructions in the 'Operating Instructions' section for specific button functions and menu layouts.
Specifikacije
| Številka modela | S680 |
| Ločljivost zajema videa | 1080p (1920 x 1080) pri 30 sličicah na sekundo |
| Velikost zaslona | 3 palcev |
| Realni kot View | 170 stopinj |
| Tehnologija optičnega senzorja | CMOS (Sonyjev senzor) |
| Vrsta bliskovnega pomnilnika | MicroSD (up to 32GB, Class 10 or higher) |
| Tehnologija povezljivosti | HDMI, USB |
| Vrsta namestitve | Sesalni nosilec |
| Tip baterije | Litijev polimer |
| Vključene komponente | Car Charger, Suction Mount, User Manual |

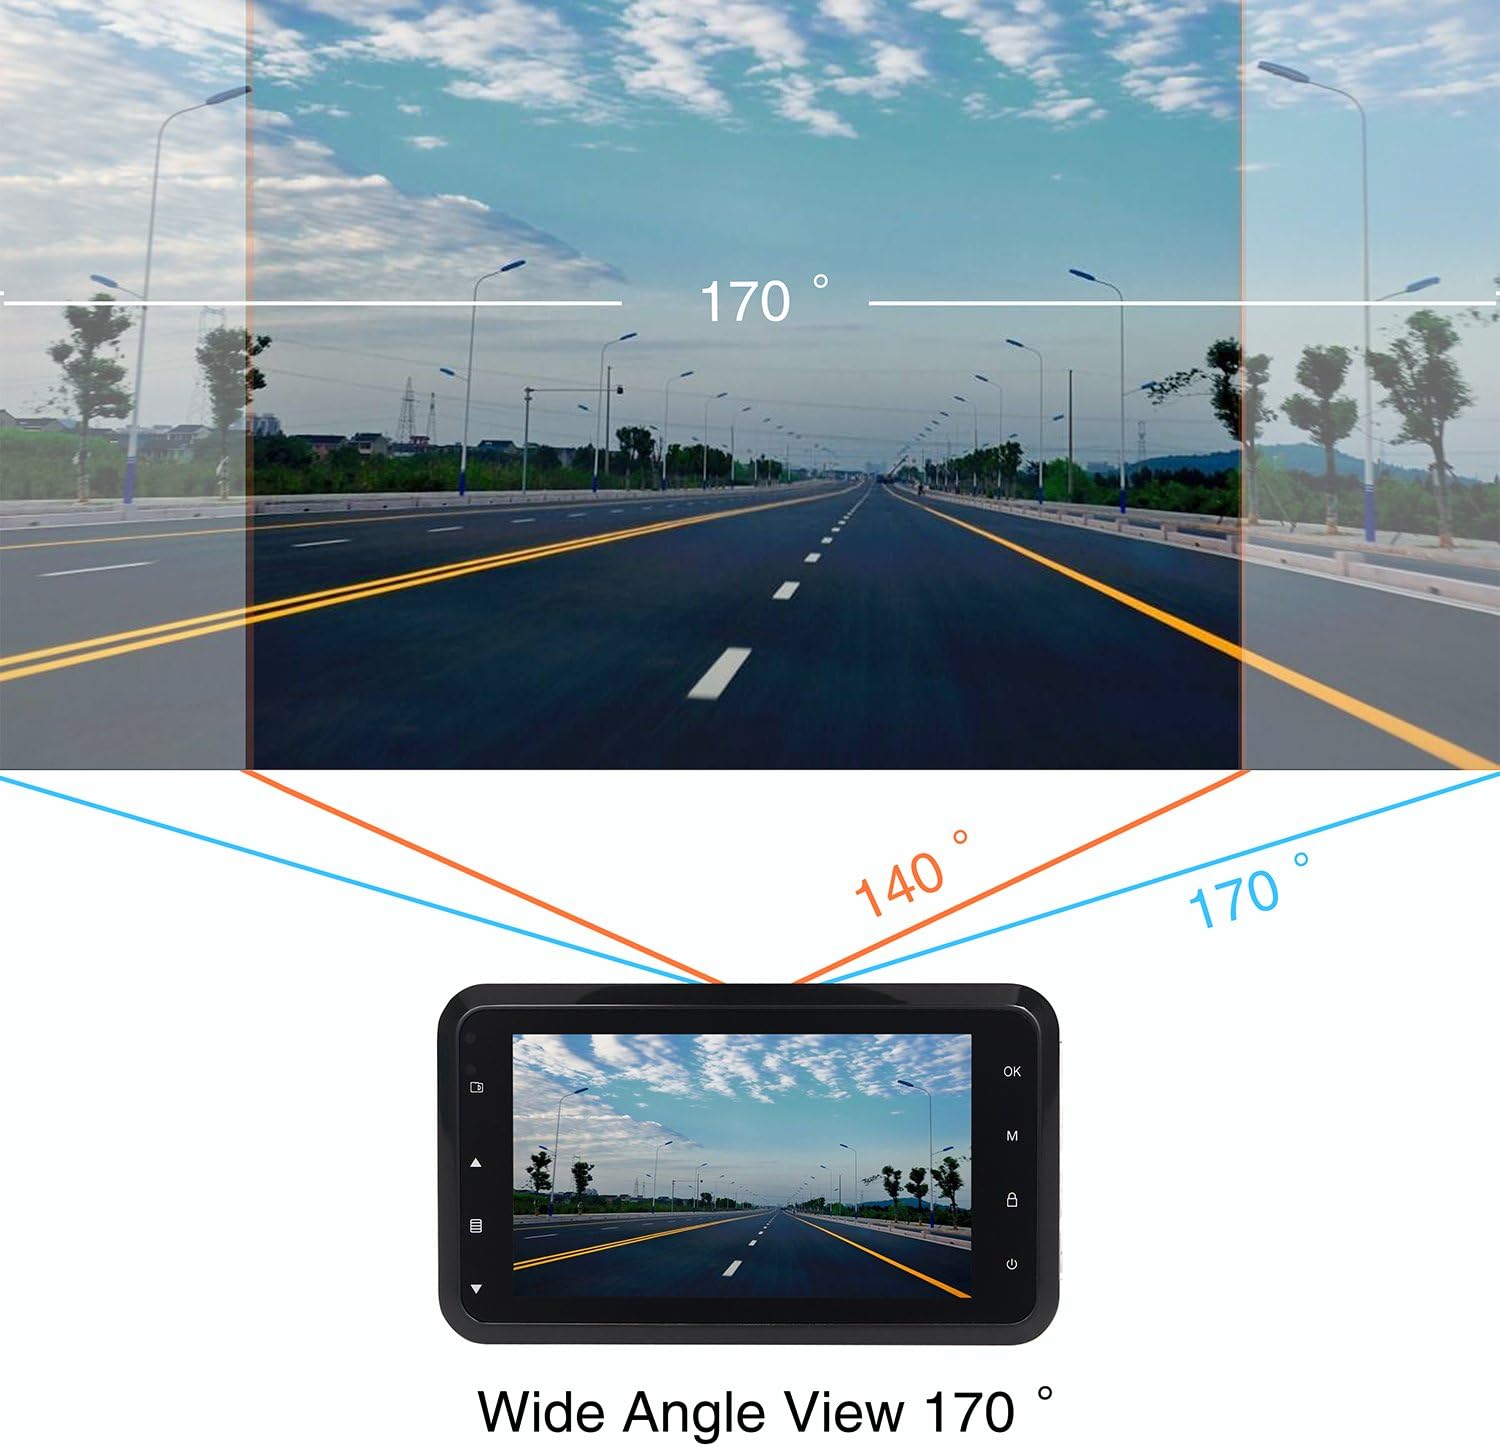
This diagram shows the expansive 170-degree wide-angle field of view captured by the dash cam, providing comprehensive road coverage.
Garancija in podpora
The ORSKEY Dash Cam S680 comes with a 12-mesečna garancija od datuma nakupa. Ta garancija krije proizvodne napake in zagotavlja, da izdelek deluje, kot je predvideno, pri normalni uporabi.
For technical support, warranty claims, or any questions regarding your dash cam, please contact ORSKEY customer service. Details for contacting support are typically found on the product packaging or the official ORSKEY webmesto.
ORSKEY provides a qualified after-sale service team, available 7 days a week, 24 hours a day, to assist you.


