
1. Uvod
This user manual provides detailed instructions for the installation, operation, and maintenance of your LeeKooLuu RV Backup Camera Wireless HD 1080P LK5 system. Please read this manual thoroughly before using the product to ensure proper function and safety. This system is designed to enhance your driving and parking experience by providing a clear, wide-angle view of your vehicle's rear surroundings.
2. Vsebina paketa
Prosimo, preverite, ali so v vašem paketu priloženi vsi spodaj navedeni artikli:
- 1 x 7-palčni monitor
- 1 x brezžična vzvratna kamera
- 2 x napajalni kabli
- 1 x adapter za vžigalnik
- 1 x senčnik
- 1 x nosilec za vetrobransko steklo
- 1 x U-nosilec
- 4 x antene
- 1 x uporabniški priročnik
- Other necessary installation parts
3. Varnostne informacije
Always prioritize safety when installing and operating the backup camera system. Adhere to all local traffic laws and regulations. This system is an aid and should not replace careful driving and direct observation.
- Prepričajte se, da so vse povezave varne in pravilno izolirane, da preprečite kratke stike.
- Ne ovirajte svojega view of the road with the monitor.
- Regularly check the camera and monitor for damage or loose connections.
- Clean the camera lens periodically to maintain clear visibility.
- Če niste prepričani o katerem koli koraku, je priporočljiva profesionalna namestitev.
4. Izdelek je končanview
The LeeKooLuu LK5 system features a 7-inch HD 1080P monitor and a durable wireless camera, designed for reliable performance in various vehicle types.

Slika 4.1: Konecview of the LeeKooLuu LK5 wireless backup camera system, showing the 7-inch monitor and the camera unit with dual antennas.
4.1. Ključne značilnosti
- Ločljivost HD 1080P: Zagotavlja jasne in podrobne slike.
- Digital Wireless Signal: Dual antenna design for stable, uninterrupted signal up to 600ft in open areas.
- 7-Inch Touch Key Screen: Large display with responsive touch controls for easy operation.
- DVR Recording Function: Supports simultaneous recording of up to 4 cameras with loop recording.
- Zmogljivost razdeljenega zaslona: Monitor can display dual or quad split views.
- IP69K Waterproof Camera: Full metal construction ensures durability in harsh weather conditions.
- Nočni vid: 18 infrared lights for enhanced visibility in low-light environments.
- DIY Guide Lines: Customizable parking guide lines for precise maneuvering.
- Furrion Pre-Wired Compatibility: Includes adapter for easy integration with Furrion pre-wired RVs.
5. Nastavitev in namestitev
The LeeKooLuu LK5 system is designed for straightforward installation. Follow these steps for optimal performance.
5.1. Namestitev kamere
The camera can be wired to your vehicle's running lights, tail lights, or reverse lights, depending on whether you want it active continuously or only when reversing.
- Izberite mesto namestitve: Select a central location at the rear of your RV or vehicle that provides an unobstructed view.
- Moč žice: Connect the camera's red wire to a 12V power source (e.g., running light, tail light, or reverse light positive wire) and the black wire to a ground point.
- Furrion Pre-Wired RVs: If your RV is Furrion pre-wired, use the provided adapter and pigtail wire for a plug-and-play installation.
- Varna kamera: Mount the camera securely using the provided bracket and hardware. Ensure the antennas are positioned for optimal signal transmission.

Figure 5.1: Diagram illustrating the easy installation process, including wiring options for the camera and monitor, and compatibility with Furrion pre-installed mounting kits.

Figure 5.2: Information regarding the included bracket adapter and pigtail wire for compatibility with Furrion pre-wired RVs.
5.2. Namestitev monitorja
The 7-inch monitor can be mounted on your dashboard or windshield.
- Pritrdite nosilec: Secure the U bracket or windshield mount to the monitor.
- Monitor položaja: Place the monitor in a location that does not obstruct your driving view but is easily accessible.
- Monitor moči: Connect the monitor's power cord to the cigarette lighter adapter or directly to an ACC/Fuse/Radio power source.
- Povežite antene: Attach the two antennas to the monitor for stable signal reception.

Figure 5.3: Visual representation of the monitor mounted on a dashboard using the U-bracket and on a windshield using the suction cup mount.
6. Delovanje
Once installed, the system will automatically pair. If pairing is needed, refer to the monitor's menu settings.
6.1. Osnovne funkcije
- Vklop/izklop: Pritisnite gumb za vklop na monitorju.
- Stabilnost signala: The dual antenna design ensures a stable signal, reducing lag and interruptions.
- Upravljanje s tipkami na dotik: Use the touch keys on the monitor for navigation and settings adjustments.
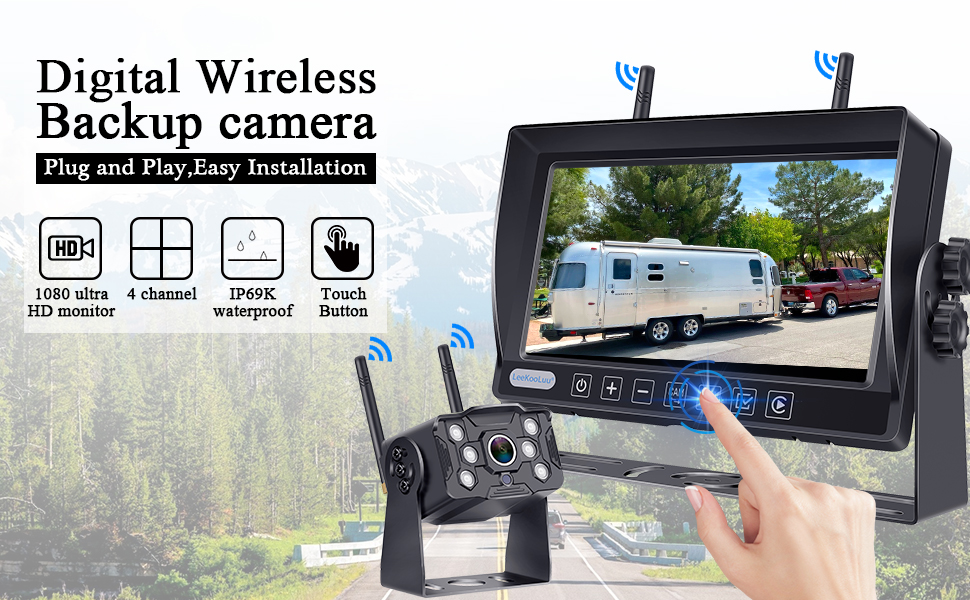
Figure 6.1: Illustration of the digital wireless backup camera system in operation, highlighting the touch button interface on the monitor.
6.2. Split Screen Monitoring
The monitor supports displaying multiple camera feeds simultaneously.
- Stikalo Views: Use the "Split" or "Quad" button on the monitor to cycle through single, dual, or quad-screen views.
- Adding Cameras: The system supports up to 4 wireless cameras. Additional cameras can be purchased separately and paired.

Figure 6.2: The 7-inch monitor displaying various split-screen configurations, demonstrating its ability to support up to four wireless camera inputs simultaneously.
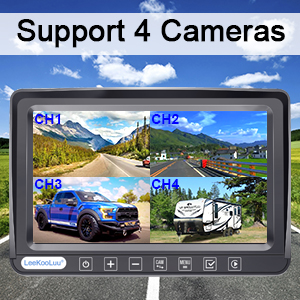
Figure 6.3: Visual confirmation that the system supports up to four cameras, showing a quad-view prikaz na monitorju.
6.3. DIY Guide Lines
Customize the parking guide lines to match your vehicle and preferences.
- Prilagoditev: Access the guide line settings through the monitor's menu to adjust width, vertical position, and horizontal position.
- Omogoči/onemogoči: Guide lines can be turned on or off as needed.

Slika 6.4: Npramples of customizable guide lines on the monitor, demonstrating adjustments for width, vertical movement, and horizontal movement.
7. Nastavitve menija
The monitor's menu allows for various adjustments and feature controls.

Figure 7.1: Icons representing various functions accessible through the monitor's menu, including Night Vision, Easy Install, Wireless, HD 1080P, 4 Channel, 7" Screen, Plug and Play, Touch Button, 170° Wide Angle, and Guide Lines DIY.
- Preusmeritev slike: Adjust the image orientation (Normal, Mirror, Vertical Normal, Vertical Mirror) to suit your mounting preference.
- Brightness/Saturation/Contrast: Fine-tune display quality.
- Seznanjanje: Re-pair cameras to the monitor if needed.
- Sistemske nastavitve: General system configurations.
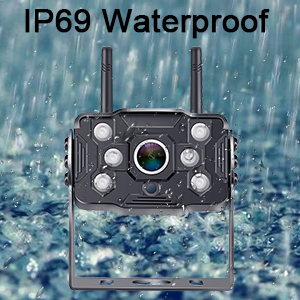
Figure 7.2: Display showing the four image flip modes: Normal, Mirror, Vertical Normal, and Vertical Mirror, allowing users to adjust the view based on camera orientation.
8. Recording Function (DVR)
The LK5 system includes a DVR function, allowing you to record video footage from the connected cameras.
- Snemanje v zanki: Videos are automatically saved and overwrite the oldest files ko je shramba polna.
- Predvajanje: Review posnet footage directly on the monitor.
- Shranjevanje: An SD card (not included) is required for recording.

Figure 8.1: Illustration of the loop recording feature, showing video playback on the monitor and the ability to search recorded video by time and mode.
9. Vzdrževanje
Proper maintenance ensures the longevity and optimal performance of your LeeKooLuu backup camera system.
- Čiščenje objektiva fotoaparata: Lečo fotoaparata redno obrišite z mehko krpoamp cloth to remove dirt, dust, or water spots that may obscure the viewIzogibajte se abrazivnim čistilom.
- Čiščenje zaslona monitorja: Use a microfiber cloth to gently clean the monitor screen. Do not spray cleaning solutions directly onto the screen.
- Preverjanje povezav: Periodically inspect all power cables and antenna connections for any signs of wear, corrosion, or looseness. Ensure they are securely fastened.
- Zaščita pred vremenskimi vplivi: While the camera is IP69K waterproof, extreme weather conditions (e.g., heavy snow, ice) may temporarily affect performance. Clear any obstructions from the camera lens.
- Shranjevanje: Če vozilo dlje časa shranjujete, razmislite o odklopu sistema iz napajanja, da preprečite praznjenje akumulatorja.
10. Odpravljanje težav
If you encounter issues with your LeeKooLuu RV Backup Camera system, refer to the following common problems and solutions:
| Težava | Možen vzrok | rešitev |
|---|---|---|
| Na monitorju ni slike |
|
|
| Utripanje ali nestabilnost slike |
|
|
| Slaba kakovost slike (zamegljena, temna) |
|
|
| Snemanje ne deluje |
|
|
11. Specifikacije
| Funkcija | Podrobnost |
|---|---|
| Številka modela | M1 |
| Velikost monitorja | 7 palcev |
| Ločljivost zajema videa | 1080p |
| Brezžično Domet | Up to 600ft (open area), 270ft (in vehicles) |
| Ocena vodotesnosti | IP69K (Camera) |
| voltage | 12 volta |
| Tehnologija zaslona | LED |
| Posebne lastnosti | 7 Inch Screen, Powerful Digital Wireless Signal, Real 1080P Resolution, Recording Ability, Split Screen (Support 2 wireless Cameras) |
| Tehnologije povezljivosti | Brezžično |
| Tehnologija optičnega senzorja | CMOS |
| Vrsta objektiva | Širok kot |
| Dimenzije izdelka | 8 x 2 x 8 palcev |
| Teža predmeta | 3.21 funtov |
12. Garancija in podpora
LeeKooLuu is committed to providing high-quality products and excellent customer service. While specific warranty terms are not detailed in this manual, the manufacturer offers dedicated support for their products.
- Storitev za stranke: For any questions, technical assistance, or support needs, please contact LeeKooLuu customer service.
- Spletni viri: Check the official LeeKooLuu website or product page for FAQs, updated manuals, or video tutorials.

Figure 12.1: Image representing the availability of 24-hour customer service for support and inquiries.