
Uvod
Thank you for choosing the USX MOUNT UL Listed Tilting TV Wall Mount. This manual provides detailed instructions for safe and proper installation, operation, and maintenance of your TV mount. Please read all instructions carefully before beginning installation to ensure a secure and optimal viewizkušnje.
Varnostne informacije
OPOZORILO: Failure to read and follow all instructions may result in personal injury, property damage, or voiding of warranty. If you have any questions, please contact customer service.
- Ensure the mounting surface (wall) can safely support the combined weight of the mount and your television.
- Do not install this product into drywall alone. It must be mounted to wood studs, concrete, or brick walls.
- Use appropriate tools and follow all drilling and fastening instructions precisely.
- Two-person installation is highly recommended for safety, especially when lifting and positioning the television.
- Med namestitvijo hranite otroke in hišne ljubljenčke proč.
Vsebina paketa
Please verify that all components are present and undamaged before installation. If any parts are missing or defective, contact USX MOUNT customer service.
- Stenski nosilec za TV
- Standard Mounting Hardware Kit (pre-labeled bags)
- Nivo mehurčkov
- Kabelske vezice (3 kosi)
- Navodila za uporabo
Specifikacije
| Funkcija | Podrobnost |
|---|---|
| Številka modela | XTM009 |
| Vrsta namestitve | Stenski nosilec |
| Vrsta gibanja | Nagib |
| Material | Kovina |
| barva | Črna |
| Združljive velikosti televizorjev | 26-60 palcev |
| Zmogljivost teže | Do 99 lbs (45 kg) |
| Združljivost VESA | 75x75mm, 100x100mm, 200x100mm, 200x200mm, 300x200mm, 300x300mm, 400x300mm, 400x400mm |
| Največji kot nagiba | 0° do -8° |
| Profile iz zidu | 1.5 palcev (3.8 cm) |
| Teža predmeta | 1.42 kg |
Preverjanje združljivosti
Before installation, ensure your TV and wall are compatible with this mount:
- Velikost televizorja: Suitable for most 26-60 inch flat screen, LED, LCD, and curved TVs.
- Teža televizorja: Your TV must weigh no more than 99 lbs (45 kg).
- Vzorec VESA: Check the four mounting holes on the back of your TV. The distance (width x height) must match one of the following VESA patterns: 75x75mm, 100x100mm, 200x100mm, 200x200mm, 300x200mm, 300x300mm, 400x300mm, 400x400mm.
- Vrsta stene: This mount is designed for installation on wood studs (12 or 16 inch spacing), solid concrete, or brick walls. NE nameščajte samo v suhomontažne plošče.
- Blocked Inputs: Ensure the mount will not block any necessary input ports on the back of your TV.

Navodila za namestitev
Follow these steps for a secure and easy installation. A detailed installation video is also provided below.
Step 1: Attach Brackets to TV Back
- Televizor previdno položite z zaslonom navzdol na mehko, čisto površino, da preprečite praske.
- Identify the correct screws and spacers from the hardware kit that fit your TV's VESA mounting holes.
- Attach the two vertical TV brackets to the back of your TV using the selected screws and spacers. Ensure they are securely tightened.

2. korak: Namestite stensko ploščo
- Locate the desired mounting position on your wall. Use a stud finder to identify wood studs if applicable.
- Mark the drilling points for the wall plate. Use the included bubble level to ensure the marks are perfectly horizontal.
- Drill pilot holes at the marked locations. For wood studs, use a 4/32 inch (3mm) drill bit to a depth of 2.36 inches (60mm). For concrete/brick, use a 3/8 inch (10mm) drill bit and insert concrete anchors.
- Attach the wall plate to the wall using the lag bolts and washers. Tighten securely.
Step 3: Hang TV onto Wall Plate
- With assistance, carefully lift the TV with the attached brackets and hook them onto the top edge of the wall plate.
- Gently lower the TV until the brackets engage with the wall plate.
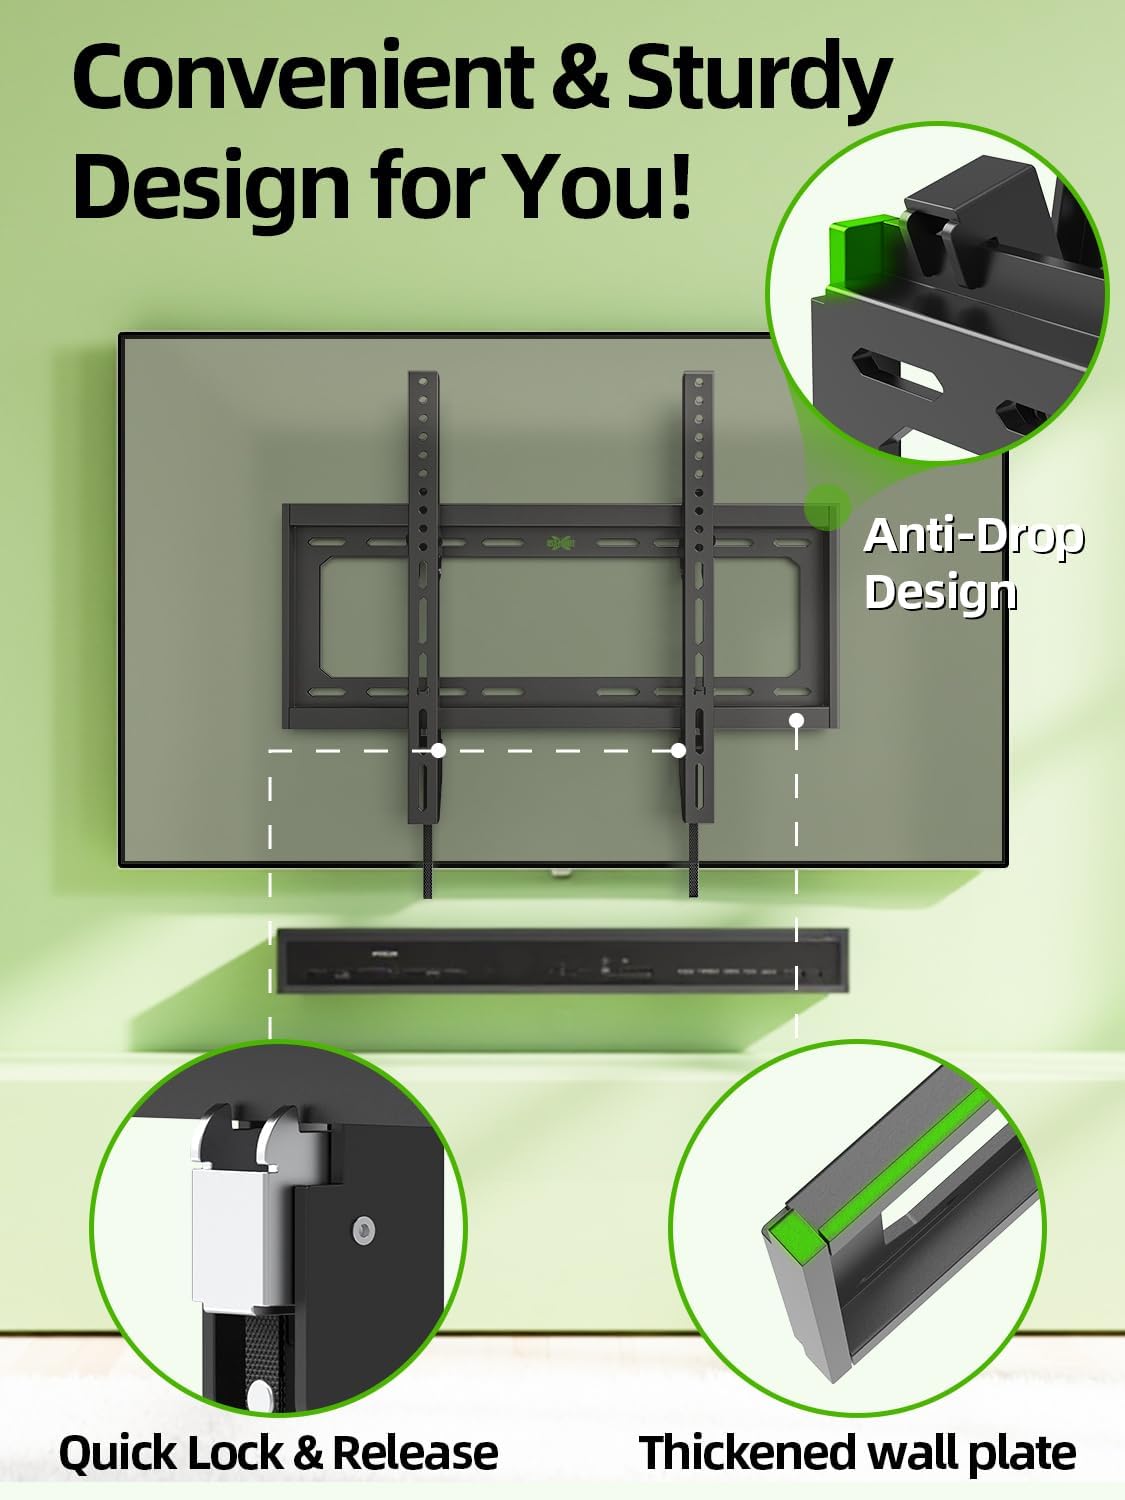
- Pull the quick-release straps downwards to ensure the TV is securely locked onto the wall plate.
Videoposnetek namestitve
This video demonstrates the installation process for the USX MOUNT Tilting TV Wall Mount, showing steps from preparing the wall to mounting the TV.
Delovanje
This tilting TV wall mount allows for easy adjustment to optimize your viewkot osvetlitve in zmanjša bleščanje.
Nastavitev kota nagiba
- The mount offers a tilt adjustment range of 0° to -8°.
- To adjust the tilt, gently push or pull the bottom of your TV to achieve the desired angle. No tools are required for this adjustment.

Quick Lock and Release
- The mount features a quick lock and release mechanism for easy removal or re-attachment of the TV.
- To release the TV, pull down on the integrated straps located at the bottom of the TV brackets. This disengages the locking mechanism, allowing you to lift the TV off the wall plate.
- To lock, ensure the straps are released and the TV is fully seated on the wall plate. The anti-drop design helps secure the TV.
Scenario Video
This video illustrates various scenarios where the USX MOUNT Tilting TV Wall Mount can be applied, showcasing its functionality in different settings.
Vzdrževanje
Redno vzdrževanje zagotavlja dolgo življenjsko dobo in varno delovanje vašega nosilca za televizor.
- Občasno preverite vse vijake in matico, da se prepričate, da so trdno priviti. Po potrebi jih ponovno privijte.
- Nosilec očistite z mehko, suho krpo. Izogibajte se abrazivnim čistilom ali topilom.
- Ensure no cables are pinched or stressed by the mount or TV.
Odpravljanje težav
Če naletite na kakršne koli težave, si oglejte naslednje pogoste težave in rešitve:
- Televizor ni poravnan: Ensure the wall plate was installed level. Small adjustments can sometimes be made by slightly loosening and re-tightening the TV brackets on the wall plate, or by using the leveling feature if available.
- Nosilec se zdi ohlapen: Immediately remove the TV. Re-check all wall fasteners and TV bracket screws for proper tightness. Ensure the wall type is appropriate for installation.
- Težave z nagibanjem televizorja: Ensure no cables are obstructing the movement. Check that the tilt mechanism is not overtightened (though this model is tool-free tilt).
- TV cannot be locked onto wall plate: Ensure the TV brackets are correctly aligned with the wall plate and the quick-release straps are fully engaged.
Garancija in podpora
USX MOUNT provides a 10-year warranty for this product. For technical assistance, missing parts, or any other inquiries, please contact our US-based friendly customer service. We are committed to providing quality products and excellent customer experience.
Kontaktni podatki: Please refer to the product packaging or the official USX MOUNT webspletno mesto za najnovejše kontaktne podatke za službo za stranke.