1. Uvod
Hvala za nakupasing the Project Source 2-Pack 13-inch Bronze Flush Mount Light fixtures. These fixtures are designed to provide ambient lighting with a traditional aesthetic, featuring a durable bronze finish and an elegant alabaster glass shade. They are suitable for various indoor spaces, including bathrooms, bedrooms, kitchens, dining rooms, and living rooms, enhancing the decor while providing reliable illumination.
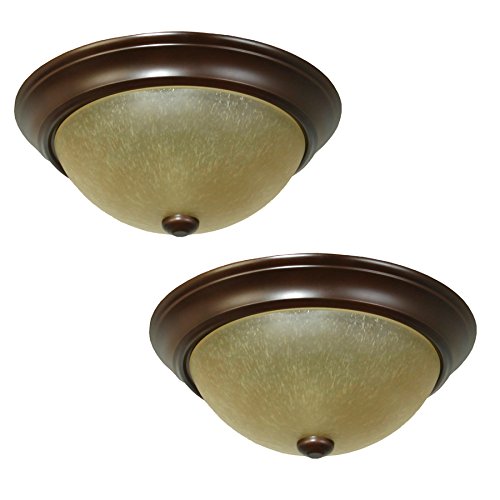
Slika 1: Two Project Source 13-inch Bronze Flush Mount Light fixtures. Each fixture features a round bronze base and a dome-shaped alabaster glass shade, secured by a small finial at the bottom center of the shade.
2. Pomembne varnostne informacije
OPOZORILO: Nevarnost električnega udara. Pred namestitvijo ali servisiranjem izklopite napajanje na varovalčni omarici ali odklopniku.
- Pred začetkom namestitve natančno preberite vsa navodila.
- Vse električne povezave morajo biti v skladu z lokalnimi predpisi, odloki ali Nacionalnim električnim kodeksom (NEC). Če niste seznanjeni s pravilnimi električnimi priključki, se posvetujte z usposobljenim električarjem.
- Use only UL-listed wire connectors for the electrical connections.
- Ne prekoračite največje wattage specified for this fixture (14 Watts per bulb).
- Wear safety glasses and appropriate protective gear during installation.
- Prepričajte se, da je napeljava pravilno ozemljena.
3. Vsebina paketa
Pred začetkom namestitve preverite, ali so prisotne vse komponente:
- 2 x 13-inch Bronze Flush Mount Light Fixtures (with alabaster glass shades)
- Pritrdilni material (vijaki, matice, nosilec)
- Opomba: Žarnice NISO priložene.
4. Specifikacije
| Funkcija | Podrobnost |
|---|---|
| Znamka | Vir projekta |
| Številka modela | 40804 |
| Dimenzije (širina x višina) | 13 palca x 5.36 palca |
| Končaj | bron |
| Material senčila | Alabastrovo steklo |
| Število luči | 2 per fixture |
| Vrsta podnožja žarnice | Medium base (E-26) |
| Priporočena oblika žarnice | A15 |
| Največja moč žarnicetage | 14 W (na žarnico) |
| Seznam varnosti | Na seznamu UL |
| Združljivost sob | Bathroom, Bedroom, Kitchen, Dining Room, Living Room |
| Vrsta namestitve | Flush Mount |
| Teža artikla (paket) | 7.04 funtov |
5. Nastavitev in namestitev
Potrebna orodja: Phillips head screwdriver, flathead screwdriver, wire strippers, electrical tape, safety glasses.
Koraki pred namestitvijo:
- Izklopite napajanje: Locate the circuit breaker or fuse box that supplies power to the light fixture location. Turn off the power completely before proceeding.
- Pripravite območje: Clear the work area and ensure you have stable footing if using a ladder.
- Razpakiraj: Carefully remove the fixture and all components from the packaging.
Koraki namestitve:
- Pritrdite montažni nosilec: Pritrdite montažni nosilec (priložen) na električno razdelilno omarico v stropu s priloženimi vijaki. Prepričajte se, da je trdno pritrjen.
- Povežite električne žice:
- Povežite črna (hot) wire from the ceiling to the črna wire of the fixture using a wire nut.
- Povežite bela (neutral) wire from the ceiling to the bela wire of the fixture using a wire nut.
- Povežite tla wire (bare copper or green) from the ceiling to the tla wire of the fixture (or the ground screw on the mounting bracket) using a wire nut or by wrapping it securely around the screw.
- Secure Fixture to Mounting Bracket: Carefully push the wired fixture up towards the ceiling, aligning the holes in the fixture base with the screws on the mounting bracket. Secure the fixture in place with the decorative nuts or screws provided.
- Namestite žarnice: Insert the recommended A15 shape, E-26 medium base light bulbs (not included) into the sockets. Do not exceed 14 Watts per bulb.
- Pritrdite stekleno senčilo: Carefully place the alabaster glass shade onto the fixture. Secure it in place using the finial or retaining ring provided, tightening it gently until snug. Do not overtighten.
- Obnovi moč: Ko je namestitev končana in so vse povezave varne, ponovno vzpostavite napajanje na odklopniku.
6. Navodila za uporabo
Once the Project Source Flush Mount Light fixtures are correctly installed and power is restored, they can be operated using the standard wall switch connected to the circuit. Simply toggle the wall switch to turn the lights on or off.
7. Nega in vzdrževanje
Regular cleaning will help maintain the appearance and performance of your light fixtures.
- Čiščenje naprave: Dust the bronze finish regularly with a soft, dry cloth. For more thorough cleaning, wipe the bronze finish with a damp cloth and a mild, non-abrasive soap solution, then dry immediately with a clean, soft cloth to prevent water spots.
- Cleaning the Glass Shade: The alabaster glass shade can be removed for cleaning. Wash it with mild soap and water, then rinse thoroughly and dry completely before reattaching to the fixture.
- Zamenjava žarnice: Always ensure the power is turned off at the circuit breaker and the bulbs have cooled down before attempting to replace them. Use only bulbs that meet the specified wattage in osnovni tip.
- Do not use abrasive cleaners, solvents, or polishes on any part of the fixture, as they may damage the finish or glass.
8. Odpravljanje težav
Če imate težave s svetilko, si oglejte naslednje pogoste težave in rešitve:
- Lučka se ne prižge:
- Check that the power supply is on at the circuit breaker.
- Ensure the light bulbs are correctly installed and are not burnt out. Try replacing with a known working bulb.
- Verify that all wire connections (black to black, white to white, ground) are secure and properly connected.
- Utripanje luči:
- Ensure the light bulbs are fully tightened in their sockets.
- Check for any loose wire connections within the fixture or junction box.
- Confirm that the bulbs used are compatible with the fixture and are not exceeding the maximum wattage.
- Glass shade is loose or wobbles:
- Gently tighten the finial or retaining ring that secures the glass shade. Do not overtighten.
If the problem persists after attempting these solutions, please consult a qualified electrician or contact customer support.
9. Garancija in podpora strankam
For detailed warranty information regarding your Project Source 2-Pack 13-in W Bronze Flush Mount Light, please refer to the documentation included with your original purchase. Warranty terms typically cover defects in materials and workmanship for a specified period.
If you require technical assistance, have questions about installation, or need to report a defect, please contact Project Source customer service directly through their official website or the contact information provided in your product packaging. Please have your model number (40804) and purchase details ready when contacting support.


