
1. Uvod
This instruction manual provides detailed guidance for assembling and using the Gikfun Prototype Shield DIY Kit. This kit is designed to facilitate the creation of custom circuits for Arduino UNO R3 and Mega 328P boards, offering a flexible prototyping area for various electronic projects.

Slika 1: Zgoraj view of the Gikfun Prototype Shield, showing the prototyping area and pin headers.
2. Komponente kompleta
The Gikfun Prototype Shield DIY Kit (EK1038) includes the following components for three sets:
- 3 x Prototype Shield PCBs
- Various pin headers (male, female, long male/female)
- Gumb za ponastavitev
- LED indikator
- Upori

Image 2: All components included in the Gikfun Prototype Shield DIY Kit (3 sets).

Image 3: The Gikfun Prototype Shield DIY Kit components packaged in a clear plastic box.
3. Nastavitev in montaža
The Prototype Shield is a DIY kit and requires soldering to assemble the pin headers and other small components onto the PCB.
3.1. Soldering Headers
- Carefully identify all pin headers and components.
- Insert the long male/female headers into the corresponding holes on the Prototype Shield PCB. Ensure correct orientation.
- Solder each pin securely. A high-quality gold finish on the PCB ensures easy soldering.
- Solder the reset button, LED, and any other small components to their designated spots on the shield.
3.2. Mounting on Arduino
Once assembled, the Prototype Shield can be mounted directly onto your Arduino UNO R3 or Mega 328P board.
- Align the long male/female headers of the Prototype Shield with the female headers on your Arduino board.
- Gently press the shield down until it is fully seated. Ensure all pins are correctly aligned to prevent damage.
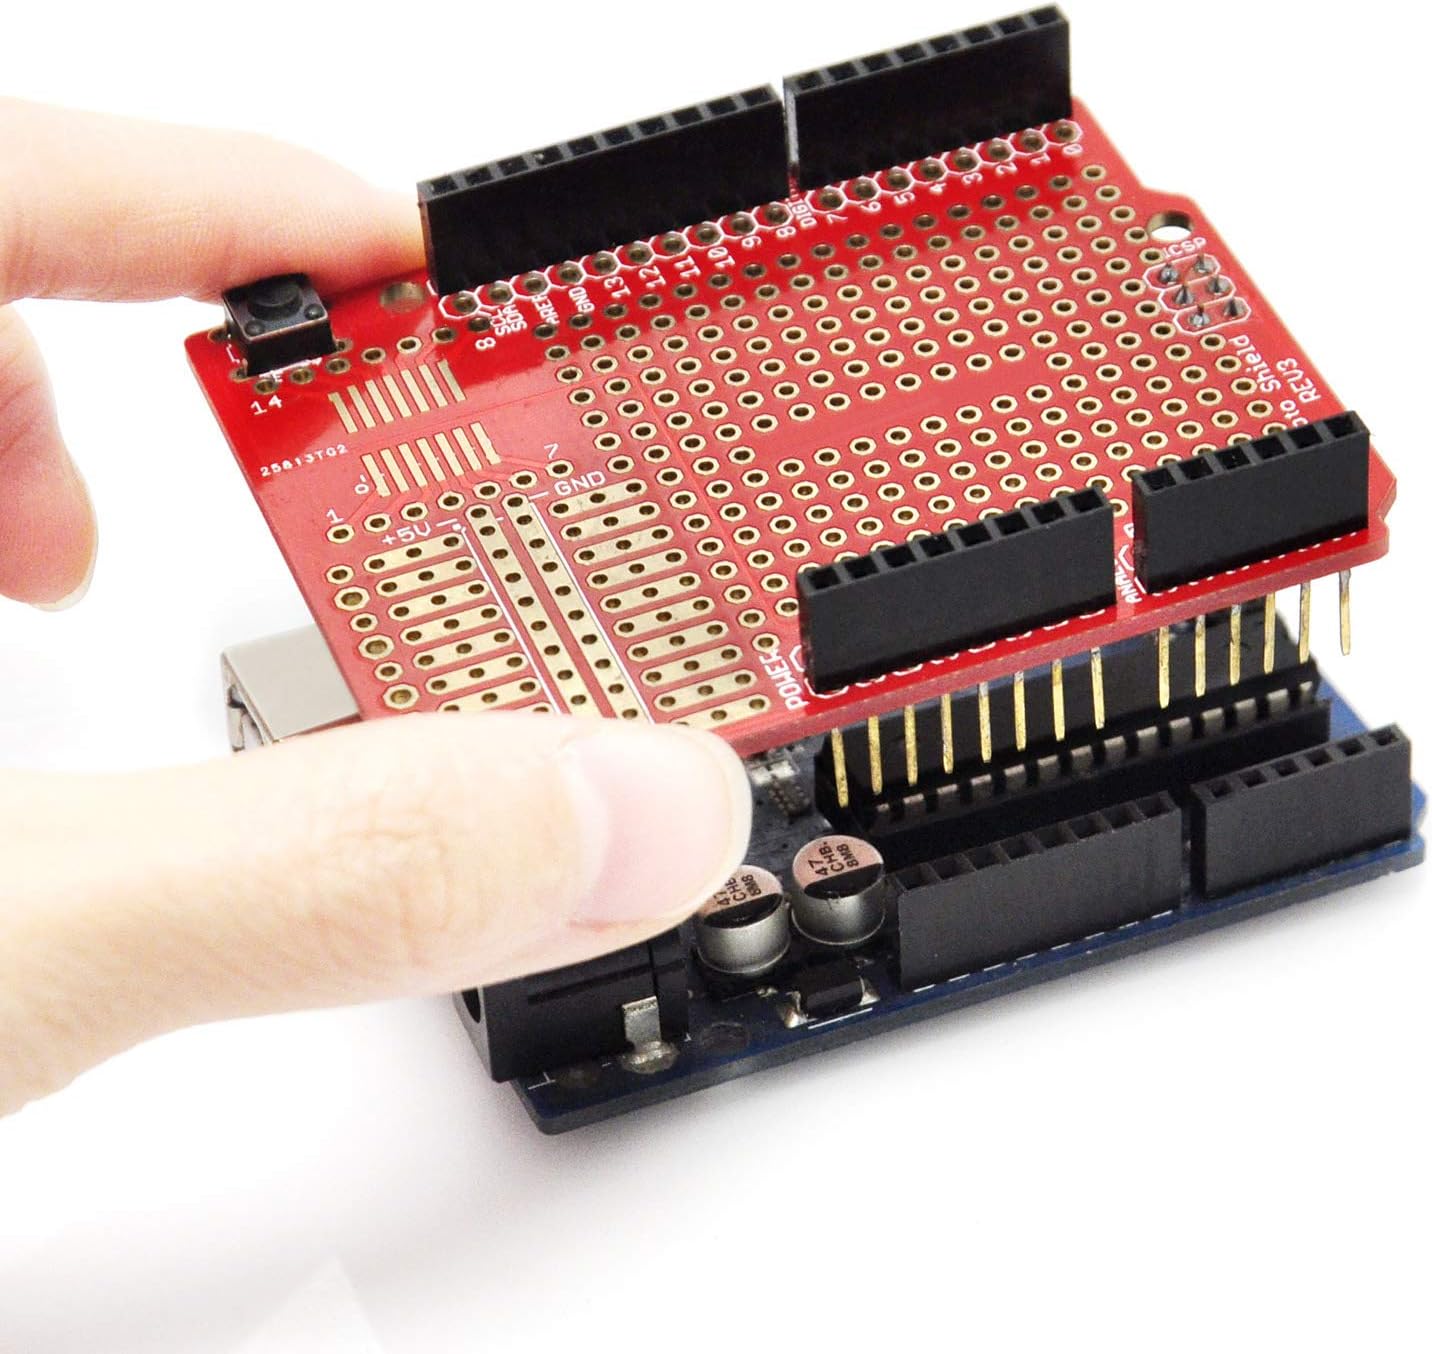
Image 4: Demonstrating the process of mounting the Prototype Shield onto an Arduino board.

Slika 5: Stran view of the Prototype Shield correctly mounted on an Arduino board.

Slika 6: Pod kotom view of the Prototype Shield mounted on an Arduino, ready for circuit building.
4. Navodila za uporabo
The Prototyping Shield provides a versatile area for designing and testing custom circuits.
4.1. Prototyping Area
- Spajkalne komponente: You can directly solder through-hole and surface mount components onto the prototyping area to create permanent circuits.
- Breadboard Integration: For temporary circuit testing, a small solderless breadboard (not included) can be attached to the prototyping area. This allows for quick experimentation without permanent soldering.
- I/O Pin Access: The shield provides extra connections for all Arduino I/O pins, making it easy to integrate custom circuits with your Arduino's functionality.
4.2. Prijava Examples
The following videos demonstrate various applications and uses of a prototype shield.
Video: Gikfun Prototype Shield DIY KIT for Arduino UNO R3
Ta videoposnetek ponuja konecview of the Gikfun Prototype Shield DIY Kit for Arduino UNO R3, showcasing its features and potential uses in electronic projects.
Video: Application of Prototype Shield DIY KIT
This video demonstrates practical applications of the Prototype Shield DIY Kit, illustrating how it can be used to build and test custom circuits.
Video: Prototype Shield makes it easy to design custom circuits
This video highlights the ease of designing custom circuits using the Prototype Shield, showing its integration with an Arduino board and external components.
5. Vzdrževanje
To ensure the longevity and optimal performance of your Gikfun Prototype Shield, follow these maintenance guidelines:
- Shranjevanje: Store the shield and components in a dry, dust-free environment. The provided plastic box is suitable for storage.
- Čiščenje: If necessary, gently clean the PCB with a soft, dry brush or a lint-free cloth. Avoid using harsh chemicals or abrasive materials.
- Ravnanje: Handle the shield by its edges to avoid touching the gold-plated contacts or soldered joints.
- Oxidation Prevention: The gold-plated finish on the PCB helps prevent oxidation, ensuring good conductivity and solderability over time.
6. Odpravljanje težav
If you encounter issues with your Prototype Shield, consider the following troubleshooting steps:
- Težave s povezavo: Ensure all headers are firmly seated into the Arduino board. Verify that all soldered connections are solid and free from cold joints or bridges.
- Component Clearance: Some holes on the shield, particularly near the Arduino's power jack, might have clearance issues with certain components. Plan your component placement carefully.
- Soldering Traces: Be mindful when soldering, especially in densely populated areas. Ensure solder does not bridge traces, particularly the reset button trace which runs between closely spaced pins.
- Napajanje: Confirm that your Arduino board is receiving adequate power.
- Usmerjenost komponent: Double-check the orientation of polarized components like LEDs and integrated circuits.
7. Specifikacije
| Funkcija | Podrobnost |
|---|---|
| Znamka | Gikfun |
| Ime modela | UNO R3 Mega 328P (Compatible) |
| Združljive naprave | Arduino UNO R3, Arduino Mega 328P |
| Vključene komponente | 3 Sets of Prototyping Prototype Shield ProtoShield Gold Print DIY Kit |
| Tehnologija povezljivosti | I2C |
| Mere predmeta (D x Š x V) | 4.6 cm D x 0.5 cm Š x 2.8 cm V |
| Teža predmeta | 2.4 unč |
| Številka modela | LYSB00Q9YB7PI-ELECTRNCS |
| UPC | 707948005615 |
8. Informacije o garanciji
Specific warranty details for the Gikfun Prototype Shield DIY Kit are not provided in the product information. Please refer to the retailer's return policy or contact Gikfun directly for warranty inquiries.
9. Podpora
For technical support, questions, or suggestions regarding your Gikfun Prototype Shield, please contact Gikfun directly:
- E-pošta: service@gikfun.com
- Webspletno mesto: www.gikfun.com