
1. Uvod
Thank you for choosing the Mebus 40291 Digital Weather Station Clock. This device provides accurate time, indoor temperature, and a weather forecast, helping you stay informed about your environment. This manual will guide you through the setup, operation, and maintenance of your new weather station clock.
2. Varnostne informacije
- Uporabljajte samo predpisano vrsto baterij in pazite na pravilno polarnost.
- Ne mešajte starih in novih baterij ali različnih vrst baterij.
- Izpraznjene baterije takoj odstranite, da preprečite puščanje in poškodbe.
- Napravo hranite stran od ekstremnih temperatur, neposredne sončne svetlobe in visoke vlažnosti.
- Naprave ne razstavljajte ali poskušajte popraviti sami. Za servis se obrnite na usposobljeno osebje.
- Hraniti izven dosega otrok.
3. Izdelek je končanview
The Mebus 40291 features a clear digital display that shows essential information at a glance. Familiarize yourself with the display elements and controls.
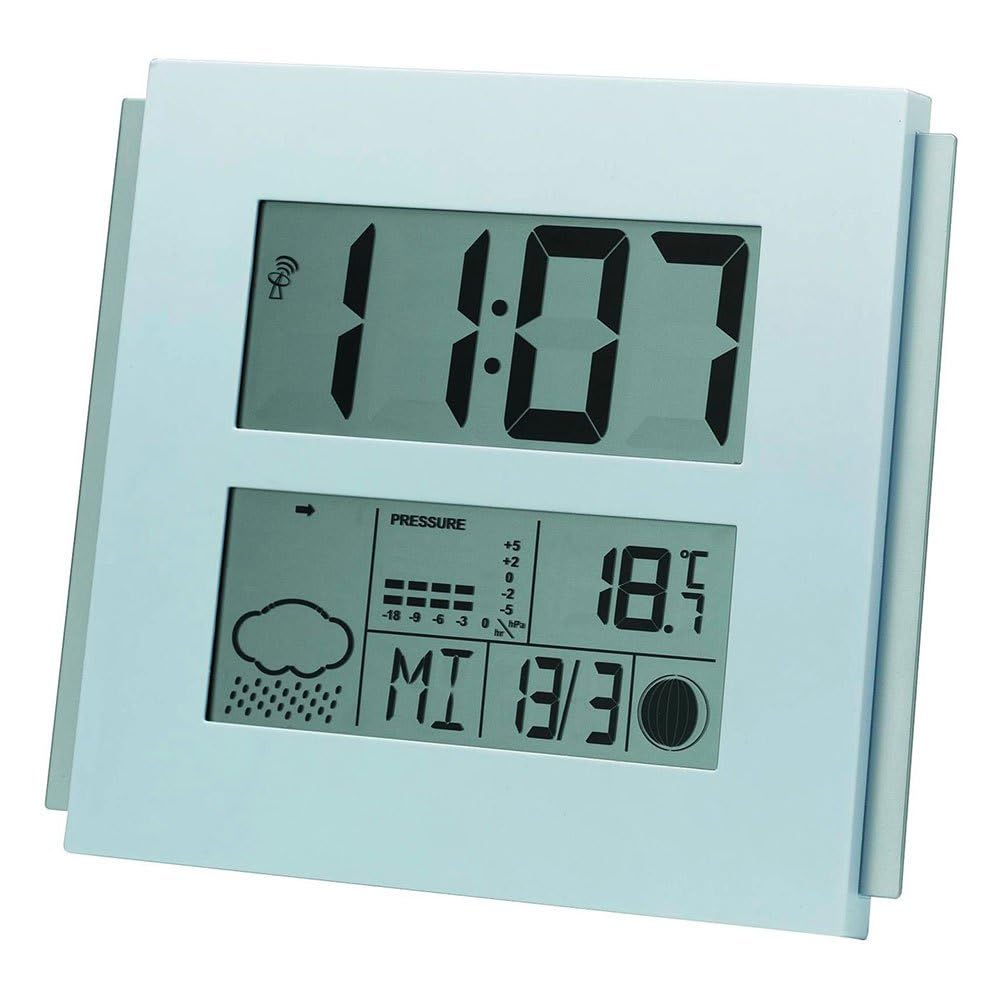
This image displays the Mebus 40291 digital weather station clock. The upper section shows the time as 11:07. The lower section features a weather forecast icon (cloud with rain), a barometric pressure trend indicator, current temperature (18.5°C), and the date (Wednesday, March 30th, indicated as MI 3/30). A radio signal icon is visible next to the time, indicating radio-controlled time synchronization.
Elementi prikaza:
- Prikaz časa: Large digits for current time.
- Radio Control Icon: Indicates successful reception of the radio time signal.
- Ikone vremenske napovedi: Displays predicted weather conditions (e.g., sunny, cloudy, rainy).
- Barometric Pressure Trend: Shows if pressure is rising, falling, or stable.
- Prikaz temperature: Current indoor temperature in Celsius or Fahrenheit.
- Prikaz datuma: Day of the week and date.
Kontrole:
Specific buttons for setting time, date, and other functions are typically located on the back or side of the device. Refer to the markings on your unit for exact button identification (e.g., SET, MODE, UP, DOWN).
4. Nastavitev
4.1 Namestitev baterije
- Poiščite pokrov predalčka za baterije na zadnji strani enote.
- Odstranite pokrov.
- Insert the required batteries (not included) according to the polarity markings (+ and -) inside the compartment.
- Varno namestite pokrov prostora za baterije.
4.2 Initial Power-On and Time Synchronization
Upon battery installation, the clock will power on and typically begin searching for the radio time signal (DCF77 in Europe). This process may take several minutes. During this time, the radio control icon may flash. Once the signal is received, the time will automatically set, and the icon will become steady.
Place the weather station in an area free from electronic interference and away from large metal objects for optimal signal reception.
5. Delovanje
5.1 Ročna nastavitev časa in datuma
If the radio signal is not available or you prefer to set the time manually:
- Press and hold the 'SET' or 'MODE' button (refer to your unit's specific buttons) until the time display starts flashing.
- Use the 'UP' or 'DOWN' buttons to adjust the hours, then press 'SET'/'MODE' to confirm.
- Ta postopek ponovite za minute, leto, mesec in dan.
- Press 'SET'/'MODE' one last time to exit the setting mode.
5.2 Understanding Weather Forecast
The weather station predicts weather conditions based on changes in barometric pressure. The icons displayed represent a forecast for the next 12-24 hours within a 30-50 km radius. Common icons include:
- sonce: Clear weather.
- Oblak: Cloudy weather.
- Cloud with Rain: Rain or showers.
- Cloud with Sun: Partly cloudy.
The barometric pressure trend indicator shows if the pressure is rising (arrow up), falling (arrow down), or stable (horizontal arrow).
5.3 Prikaz temperature
The device displays the current indoor temperature. Some models allow switching between Celsius (°C) and Fahrenheit (°F) using a dedicated button (often labeled 'C/F' or similar).
6. Vzdrževanje
6.1 Čiščenje
Napravo obrišite z mehko damp krpo. Ne uporabljajte abrazivnih čistil ali topil, saj lahko poškodujejo zaslon aliasing.
6.2 Zamenjava baterije
When the display becomes dim or functions become erratic, it is time to replace the batteries. Follow the battery installation steps outlined in Section 4.1.
7. Odpravljanje težav
- Zaslon je prazen: Preverite namestitev baterij in se prepričajte, da so nove.
- Napačen čas: Ensure the device is within range of the radio time signal. If not, set the time manually. Check for interference sources.
- Inaccurate weather forecast: Weather forecasts are predictions and may not always be 100% accurate. Ensure the device is not placed near heat sources or vents that could affect temperature readings.
- Ni sprejema radijskega signala: Try relocating the device to a different position, preferably near a window and away from electronic devices that may cause interference.
- Naprava se ne odziva: Remove batteries, wait a few minutes, and reinsert them to perform a soft reset.
8. Specifikacije
| Znamka | Mebus |
| Številka modela | ES107832002 (40291) |
| Vrsta zaslona | Digitalno |
| Vir napajanja | Na baterije (baterije niso priložene) |
| Vrsta gibanja | Kvarc |
| barva | Srebrna |
| Teža predmeta | 2.2 funtov |
| ASIN | B00JPBT2LI |
9. Garancija in podpora
Warranty information for the Mebus 40291 Digital Weather Station Clock is typically provided at the point of purchase or included with the product packaging. Please retain your proof of purchase for warranty claims.
For technical support, troubleshooting assistance beyond this manual, or inquiries regarding spare parts, please contact the manufacturer or your retailer. Contact details can usually be found on the product packaging or the manufacturer's official webmesto.