
NVX XPLOC4
Uporabniški priročnik za 4-kanalni nastavljiv linijski izhodni pretvornik NVX XPLOC4
Model: XPLOC4
1. Uvod
The NVX XPLOC4 is a 4-channel adjustable line output converter designed to integrate an aftermarket amplifier with a factory or aftermarket stereo system that lacks dedicated RCA outputs. It converts high-level speaker signals into low-level RCA signals, enabling the addition of external amplifiers for enhanced audio performance. This unit features a 6:1 step-down ratio, adjustable gain output, and a DC amplifier turn-on trigger.
2. Ključne značilnosti
- 4-kanalno delovanje: Supports front and rear speaker channels for comprehensive ampintegracija lifierja.
- Adjustable Gain Output: Allows precise matching of the output signal to the amplifier's input sensitivity.
- High Power Input Capability: Handles up to 600 watts total (150 watts per channel) from the source unit.
- DC Amplifier Turn-On Trigger: Provides a remote turn-on signal for the amplifier, eliminating the need for a separate remote wire from the head unit.
- Low Distortion Design: Engineered for high-quality audio signal conversion with minimal distortion.
3. Vsebina paketa
Preverite, ali so v paketu prisotni vsi elementi:
- NVX XPLOC4 4-Channel Line Output Converter
- snopu
- Uporabniški priročnik (ta dokument)
4. Varnostne informacije
Please read all instructions carefully before installation. Improper installation can result in damage to the device, vehicle, or personal injury. Always disconnect the vehicle's battery before beginning any electrical work. Consult a professional car audio installer if you are unsure about any part of the installation process.
5. Nastavitev in namestitev
5.1 Shema ožičenja
The following diagram illustrates the connections for the NVX XPLOC4. Ensure all connections are secure and properly insulated.
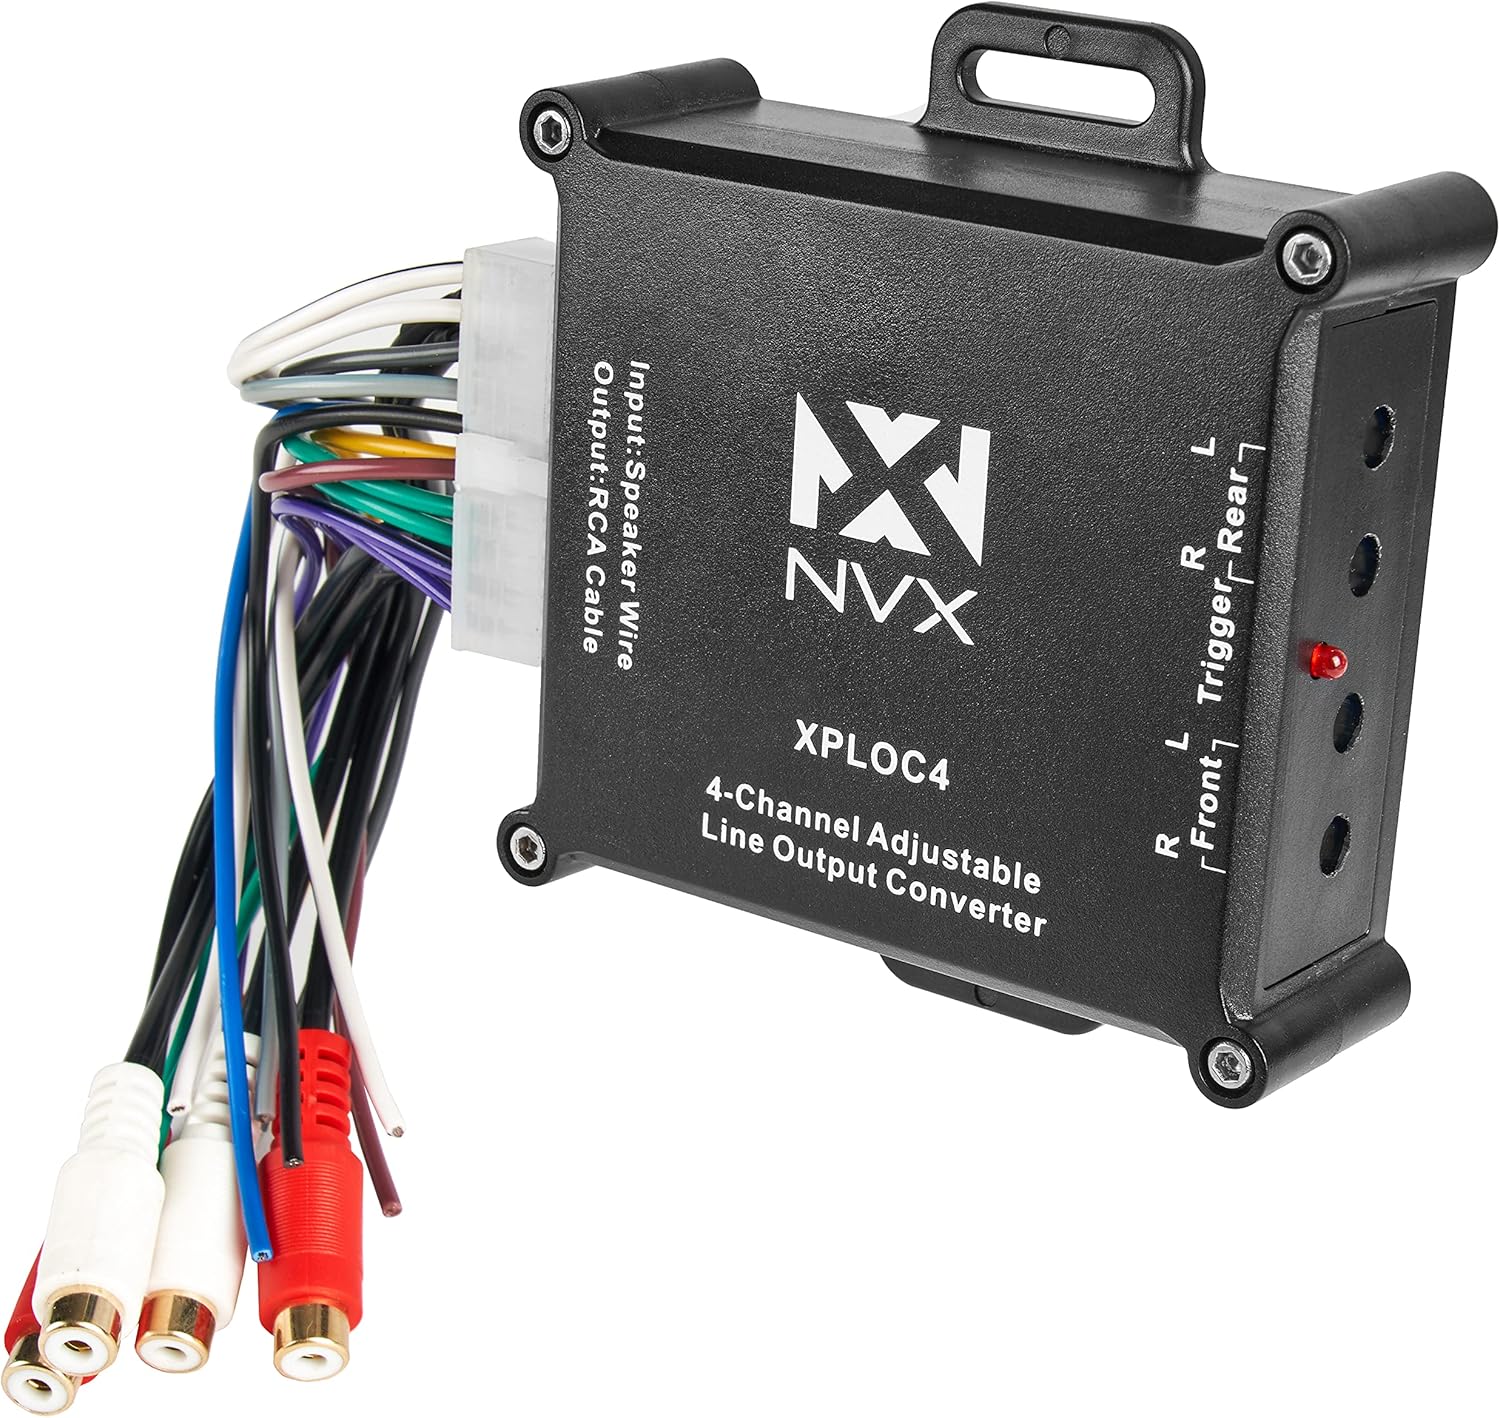
Image 1: NVX XPLOC4 unit showing the main body, wiring harness, and RCA outputs. This image provides an overview of the product's physical components and connections.
5.2 Koraki povezave
- Odklopite baterijo: Pred zagonom odklopite negativni pol akumulatorja vozila, da preprečite kratke stike.
- Prepoznajte žice zvočnikov: Locate the speaker output wires from your factory or aftermarket head unit. These will be connected to the input side of the XPLOC4's wiring harness.
- Connect Speaker Inputs: Connect the corresponding speaker wires from your head unit to the input wires of the XPLOC4 harness. Match positive to positive and negative to negative for each channel (Front Left, Front Right, Rear Left, Rear Right).
- Priključki za napajanje in ozemljitev:
- Povežite +12V (Yellow) wire from the XPLOC4 to a constant +12V power source.
- Povežite GND (črna) wire from the XPLOC4 to a solid chassis ground point.
- Remote Turn-On Output: The XPLOC4 provides a Remote (Blue) output wire. Connect this wire to the remote turn-on input of your aftermarket amplifier. This signal will turn on the amplifier when the head unit is active.
- RCA Output Connections: Connect the RCA output cables from the XPLOC4 to the RCA input jacks on your aftermarket amplifier. Ensure Front Left/Right and Rear Left/Right channels are correctly matched.
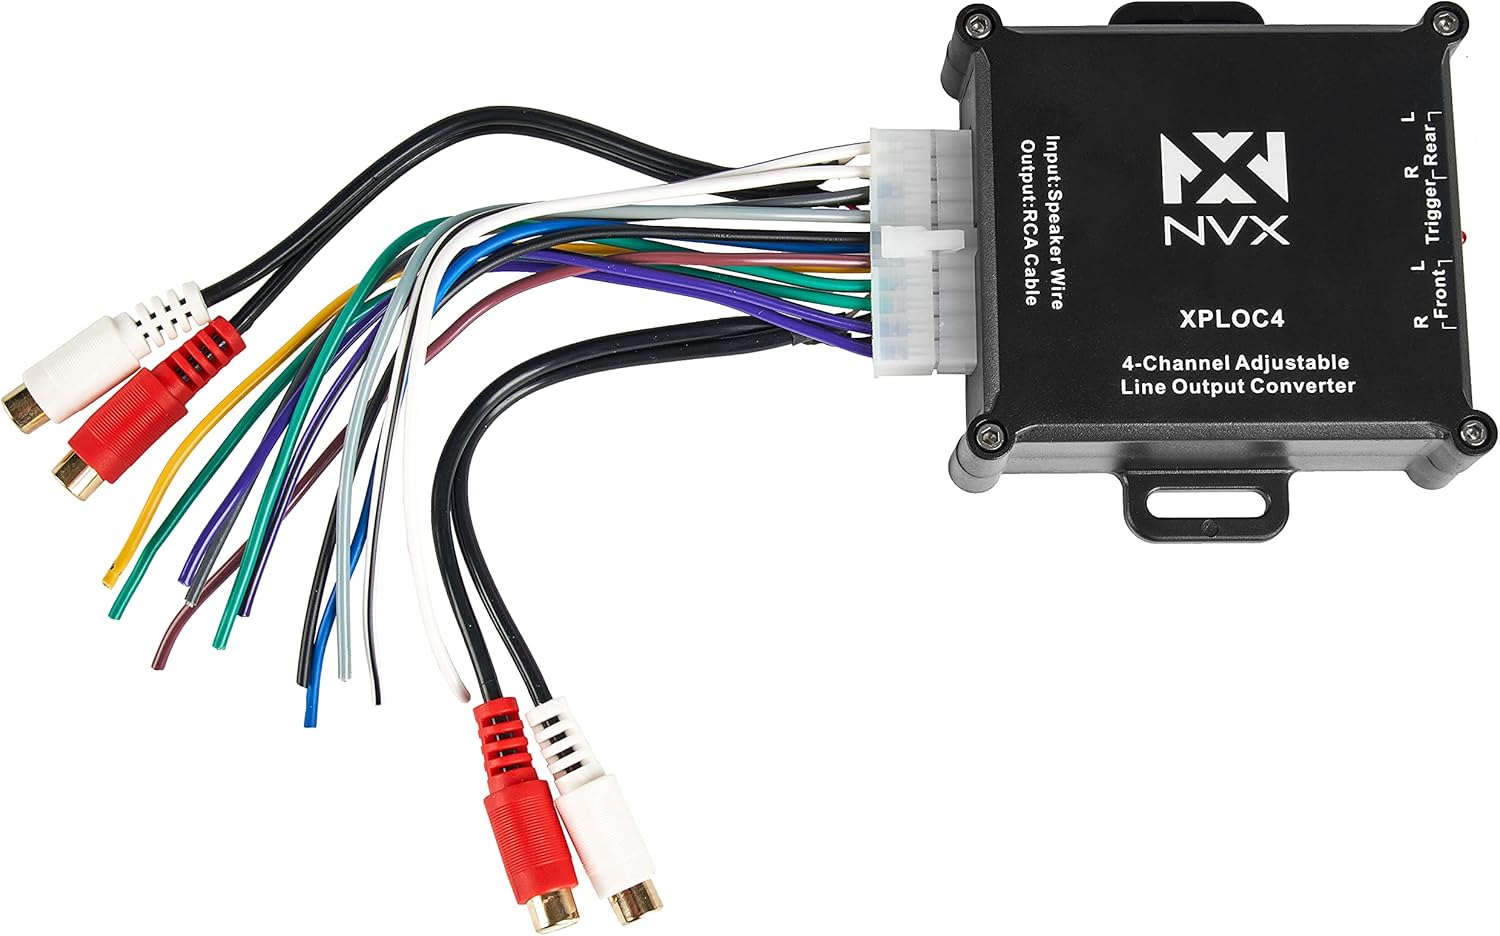
Slika 2: Podrobno view of the NVX XPLOC4's input speaker wire harness and the RCA output connections, illustrating the various wiring points.
6. Navodila za uporabo
6.1 Adjusting Gain Levels
The NVX XPLOC4 features adjustable gain controls for each channel pair (Front and Rear). These controls allow you to match the output level of the XPLOC4 to the input sensitivity of your amplifier, preventing distortion and optimizing sound quality.

Slika 3: Stran view of the NVX XPLOC4, highlighting the four blue gain adjustment screws and the red LED indicator light.
- Začetna nastavitev: Turn the gain adjustment screws on the XPLOC4 all the way down (counter-clockwise).
- Ampdobiček lifierja: Set the gain controls on your aftermarket amplifier to their minimum setting.
- Head Unit Volume: Glasnost glavne enote povečajte na približno 75-80 % največje ravni.
- Adjust XPLOC4 Gain: Slowly turn the gain adjustment screws on the XPLOC4 clockwise until the red LED indicator light just begins to flicker or illuminate steadily. This indicates that the signal is approaching clipping. Back off slightly until the LED is off or only flickers minimally.
- Prilagodi Ampdobiček lifierja: Once the XPLOC4 gains are set, slowly increase the gain on your amplifier until the desired volume and sound quality are achieved without audible distortion.
The red LED indicator on the XPLOC4 serves as a clipping indicator. If it illuminates brightly or constantly, the input signal is too high, and distortion may occur. Reduce the head unit volume or the XPLOC4 gain until the LED is off or only flickers occasionally on peak notes.
7. Vzdrževanje
The NVX XPLOC4 is designed for reliable operation and requires minimal maintenance. Ensure the unit is installed in a dry location, away from excessive heat and direct sunlight. Periodically check all wiring connections to ensure they remain secure and free from corrosion.
- Čiščenje: Use a soft, dry cloth to clean the exterior of the unit. Do not use harsh chemicals or abrasive cleaners.
- Prezračevanje: Ensure the unit has adequate ventilation to prevent overheating, although passive cooling is generally sufficient for this device.
8. Odpravljanje težav
| Težava | Možen vzrok | rešitev |
|---|---|---|
| Ni zvoka iz amplifier. |
|
|
| Popačen zvok. |
|
|
| Brenčanje ali brenčanje. |
|
|
9. Specifikacije
| Funkcija | Specifikacija |
|---|---|
| Model | XPLOC4 |
| Kanali | 4-kanalni |
| Največja vhodna moč | 600W Total (150W per channel) |
| Step-Down Ratio | 6:1 |
| Vrsta izhoda | RCA (Low-Level) |
| Vrsta vnosa | Speaker Level (High-Level) |
| Daljinski vklop | DC sprožilni izhod |
| Dimenzije (D x Š x V) | 7.64 x 5.04 x 1.57 palcev |
| Teža | 5.6 unč |
10. Garancija in podpora
For warranty information and technical support, please refer to the official NVX website or contact your authorized NVX dealer. Keep your purchase receipt as proof of purchase for warranty claims.
Spletna podpora: www.nvx.com/support
Ask a question about this manual
Ask about setup, troubleshooting, compatibility, parts, safety, or missing instructions. Manuals+ will review the question and use this page’s manual context to help answer it.