
Uvod
Hvala za nakupasing the SENTRY CL933 Big Screen Weather Alarm Clock. This device combines a digital alarm clock with a large LCD display, providing essential information such as time, date, indoor temperature, humidity, and a weather forecast. This manual will guide you through the setup, operation, and maintenance of your new alarm clock.
Varnostne informacije
- Naprave ne izpostavljajte ekstremnim temperaturam, neposredni sončni svetlobi ali visoki vlažnosti.
- Izogibajte se padcem ali izpostavljanju enote močnim udarcem.
- Ne mešajte starih in novih baterij ali različnih vrst baterij.
- Odstranite baterije, če enote ne boste uporabljali dlje časa.
- Napravo očistite z mehko, suho krpo. Ne uporabljajte abrazivnih čistil ali topil.
- Ta izdelek je samo za uporabo v zaprtih prostorih.
Vsebina paketa
Prosimo, preverite, ali so vsi elementi prisotni:
- SENTRY CL933 Big Screen Weather Alarm Clock
- Uporabniški priročnik (ta dokument)
Konec izdelkaview
The SENTRY CL933 features a large, easy-to-read LCD display and intuitive controls. Familiarize yourself with the main components:
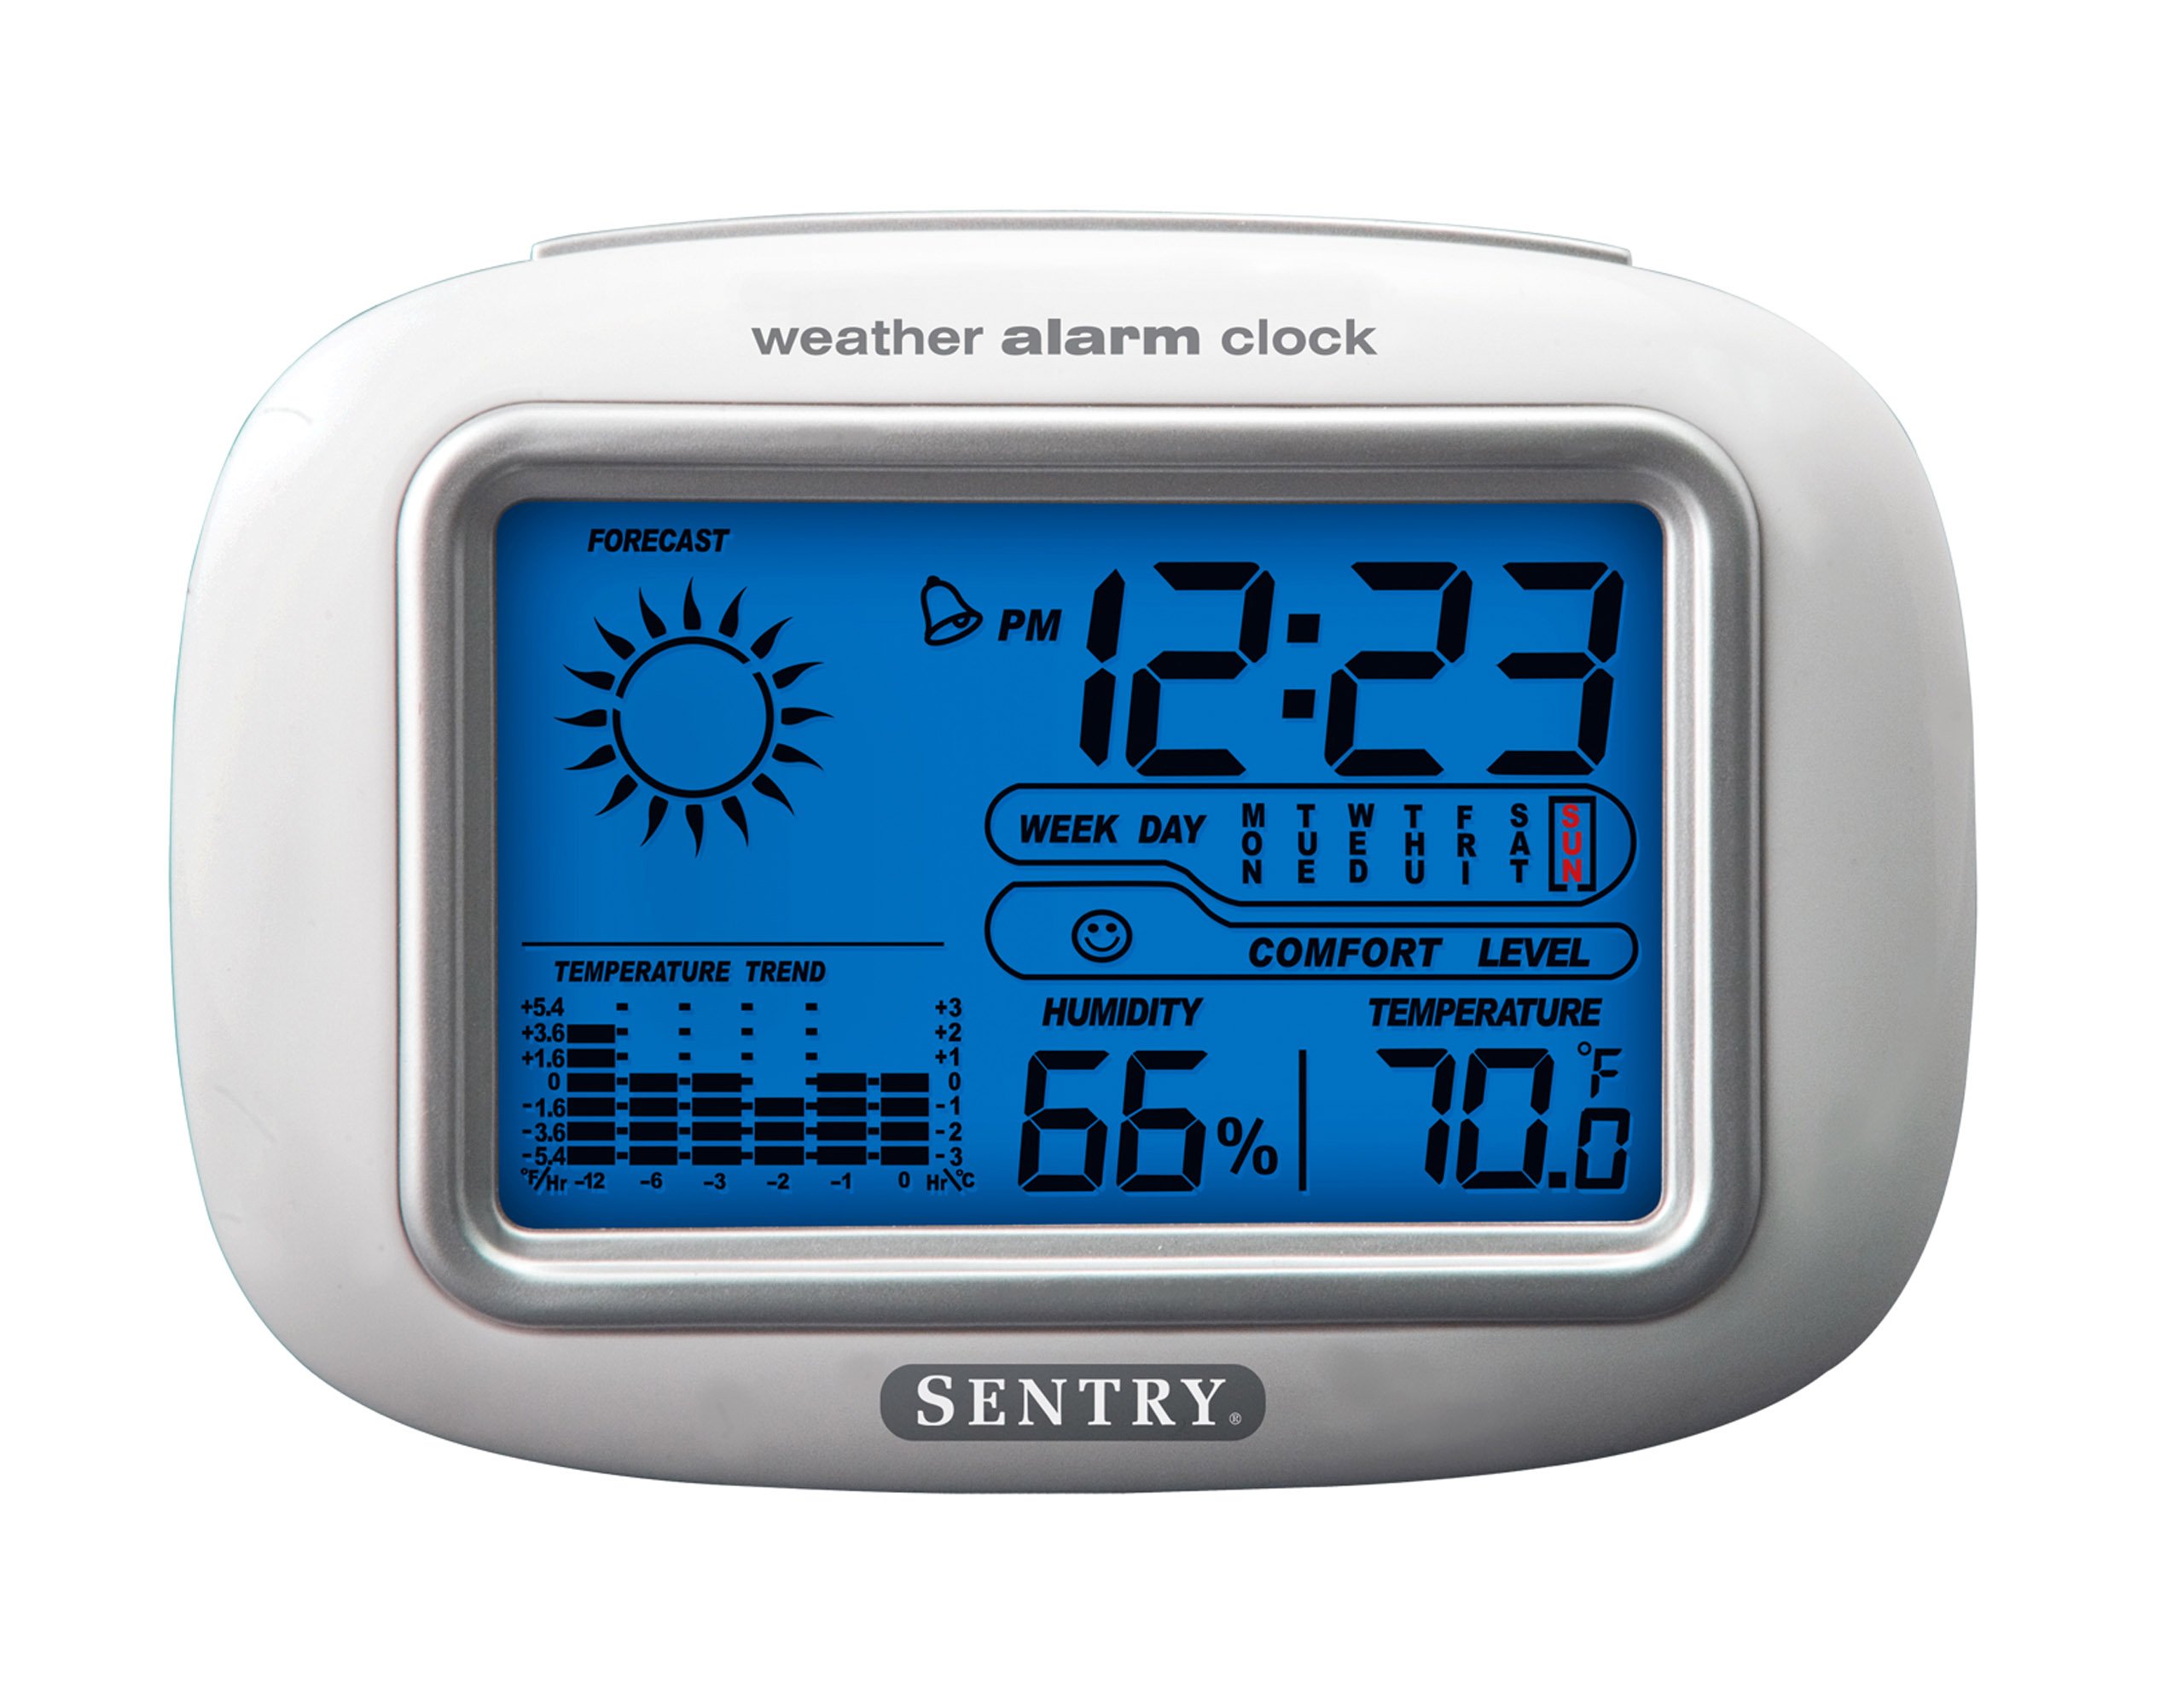
The SENTRY CL933 Big Screen Weather Alarm Clock displayed in its retail packaging, showing the clock face with time, weather forecast, humidity, and temperature readings.
Elementi prikaza:
- Prikaz časa: Shows current time (12/24 hour format).
- Date & Day of Week: Displays the current date and day.
- Ikona vremenske napovedi: Indicates predicted weather conditions (e.g., sunny, cloudy, rainy).
- Moon Phase Icon: Shows the current moon phase.
- Prikaz temperature: Shows indoor temperature in Celsius or Fahrenheit.
- Prikaz vlažnosti: Shows indoor humidity percentage.
- Comfort Level Icon: Indicates the comfort level based on temperature and humidity.
- Kazalnik temperaturnega trenda: Shows if the temperature is rising, falling, or stable over the last 12 hours.
- Ikona alarma: Indicates when the alarm is set.
Control Buttons (typically on the back or sides):
- Gumb NAČIN/NASTAVITEV: Used to switch between display modes and enter setting mode.
- Gumba GOR/DOL: Used to adjust values during setting and sometimes to toggle display options.
- Gumb ALARM: Used to set or activate/deactivate the alarm.
- Gumb DREMEST/LUČKA: Activates the backlight and functions as the snooze button when the alarm sounds.
- Gumb °C/°F: Preklaplja med prikazom temperature v stopinjah Celzija in Fahrenheita.
Nastavitev
1. Namestitev baterije
- Poiščite pokrov predalčka za baterije na zadnji strani enote.
- Pokrov odstranite tako, da ga potisnete ali dvignete.
- Insert two (2) new AAA batteries (not included) according to the polarity indicators (+ and -) inside the compartment.
- Varno namestite pokrov prostora za baterije.
- The clock will power on and the display will activate.
2. Začetna namestitev
Place the alarm clock on a stable, flat surface away from direct heat sources, strong vibrations, or areas with extreme temperature fluctuations for accurate readings.
Navodila za uporabo
1. Nastavitev časa in datuma
- Pritisnite in držite NAČIN/NASTAVITEV button for approximately 3 seconds to enter time setting mode. The hour digit will start flashing.
- Uporabite UP or DOL gumbi za nastavitev ure.
- Pritisnite NAČIN/NASTAVITEV ponovno za potrditev ure in premik na nastavitev minut.
- Repeat steps 2 and 3 for minutes, year, month, and day.
- Po nastavitvi dneva pritisnite NAČIN/NASTAVITEV še zadnjič za izhod iz načina nastavitev.
- Za preklop med 12-urnim in 24-urnim formatom časa pritisnite UP medtem ko utripa ura med nastavljanjem časa.
2. Nastavitev alarma
- Pritisnite ALARM enkrat pritisnite gumb, da prikažete trenutni čas alarma.
- Pritisnite in držite ALARM button for approximately 3 seconds. The alarm hour digit will start flashing.
- Uporabite UP or DOL gumbe za nastavitev ure budilke.
- Pritisnite ALARM again to confirm the hour and move to the alarm minute setting.
- Uporabite UP or DOL gumbe za nastavitev minute alarma.
- Pritisnite ALARM še zadnjič za potrditev in izhod iz načina nastavitve alarma.
- Za vklop ali izklop alarma pritisnite ALARM button briefly when the current time is displayed. An alarm icon will appear on the display when the alarm is active.
3. Funkcija dremeža in osvetlitev ozadja
- Ko se oglasi alarm, pritisnite tipko SNOOZE / LUČ button to activate the snooze function. The alarm will temporarily stop and sound again after a few minutes (typically 5-10 minutes).
- To turn off the alarm completely, press any other button (e.g., ALARM, NAČIN/NASTAVITEV) when the alarm is sounding.
- Pritisnite SNOOZE / LUČ button at any time to activate the backlight for a few seconds, illuminating the display for easy viewing in low light conditions. The backlight is not designed to stay on continuously to conserve battery life.
4. Izbira enote za temperaturo (°C/°F)
Pritisnite ° C / ° F button (usually located on the back or side) to toggle the temperature display between Celsius and Fahrenheit.
5. Understanding Weather and Environmental Displays
- Vremenska napoved: The icon (e.g., sun, clouds, rain) represents a prediction of the weather for the next 12-24 hours based on atmospheric pressure changes detected by the internal sensor. This is an estimate and may not always match official weather reports.
- Vlažnost: Displays the current indoor relative humidity percentage.
- Raven udobja: An icon (e.g., smiley face, neutral face, frowny face) indicates the indoor comfort level based on the combination of temperature and humidity.
- Temperature Trend: The arrow indicator shows if the indoor temperature has been rising, falling, or remaining stable over the past 12 hours.
- Lunina faza: The moon icon changes to reflect the current phase of the moon.
Vzdrževanje
- Čiščenje: Enoto obrišite z mehko damp krpo. Ne uporabljajte močnih kemikalij ali abrazivnih materialov.
- Zamenjava baterije: When the display becomes dim or functions become erratic, replace the two AAA batteries. Ensure correct polarity.
- Shranjevanje: Če uro shranjujete dlje časa, odstranite baterije, da preprečite puščanje.
Odpravljanje težav
| Težava | Možen vzrok/rešitev |
|---|---|
| Zaslon je prazen ali temen. | Batteries are low or incorrectly installed. Replace with new AAA batteries, ensuring correct polarity. |
| Time/Date cannot be set. | Prepričajte se, da pritisnete in držite NAČIN/NASTAVITEV gumb za 3 sekunde, da vstopite v način nastavitve. |
| Alarm se ne oglasi. | The alarm may not be activated. Press the ALARM button briefly to ensure the alarm icon is displayed. Check alarm time setting. |
| Netočna temperatura/vlažnost. | The unit may be placed near a heat source, vent, or in direct sunlight. Move the clock to a more stable environment. Readings are for indoor conditions only. |
| Vremenska napoved se zdi napačna. | The weather forecast is an estimate based on internal barometric pressure changes and may not always align with local weather reports. It is a general trend indicator. |
Specifikacije
- Model: CL933
- Znamka: STRAŽA
- Vrsta zaslona: Digitalni LCD z osvetlitvijo ozadja
- vir energije: Napajanje na baterije
- Potrebne baterije: 2 x AAA (niso vključeni)
- Dimenzije: 6.5 x 2.25 x 4.25 palcev (16.5 x 5.7 x 10.8 cm)
- Teža: 6.2 unče (176 gramov)
- Lastnosti: Time, Date, Day of Week, Alarm, Snooze, Indoor Temperature (°C/°F), Indoor Humidity, Weather Forecast Icons, Moon Phase, Comfort Level Indicator, 12-hour Temperature Trend.
- Vrsta pritrditve: Namizna
Garancija in podpora
SENTRY products are designed for reliability and performance. For any questions, technical support, or warranty inquiries, please refer to the contact information provided with your purchase or visit the official SENTRY webspletnega mesta. Prosimo, shranite dokazilo o nakupu za uveljavljanje garancije.